Filters Panel
Learn about Gigapixel AI's Filters for Enhancements
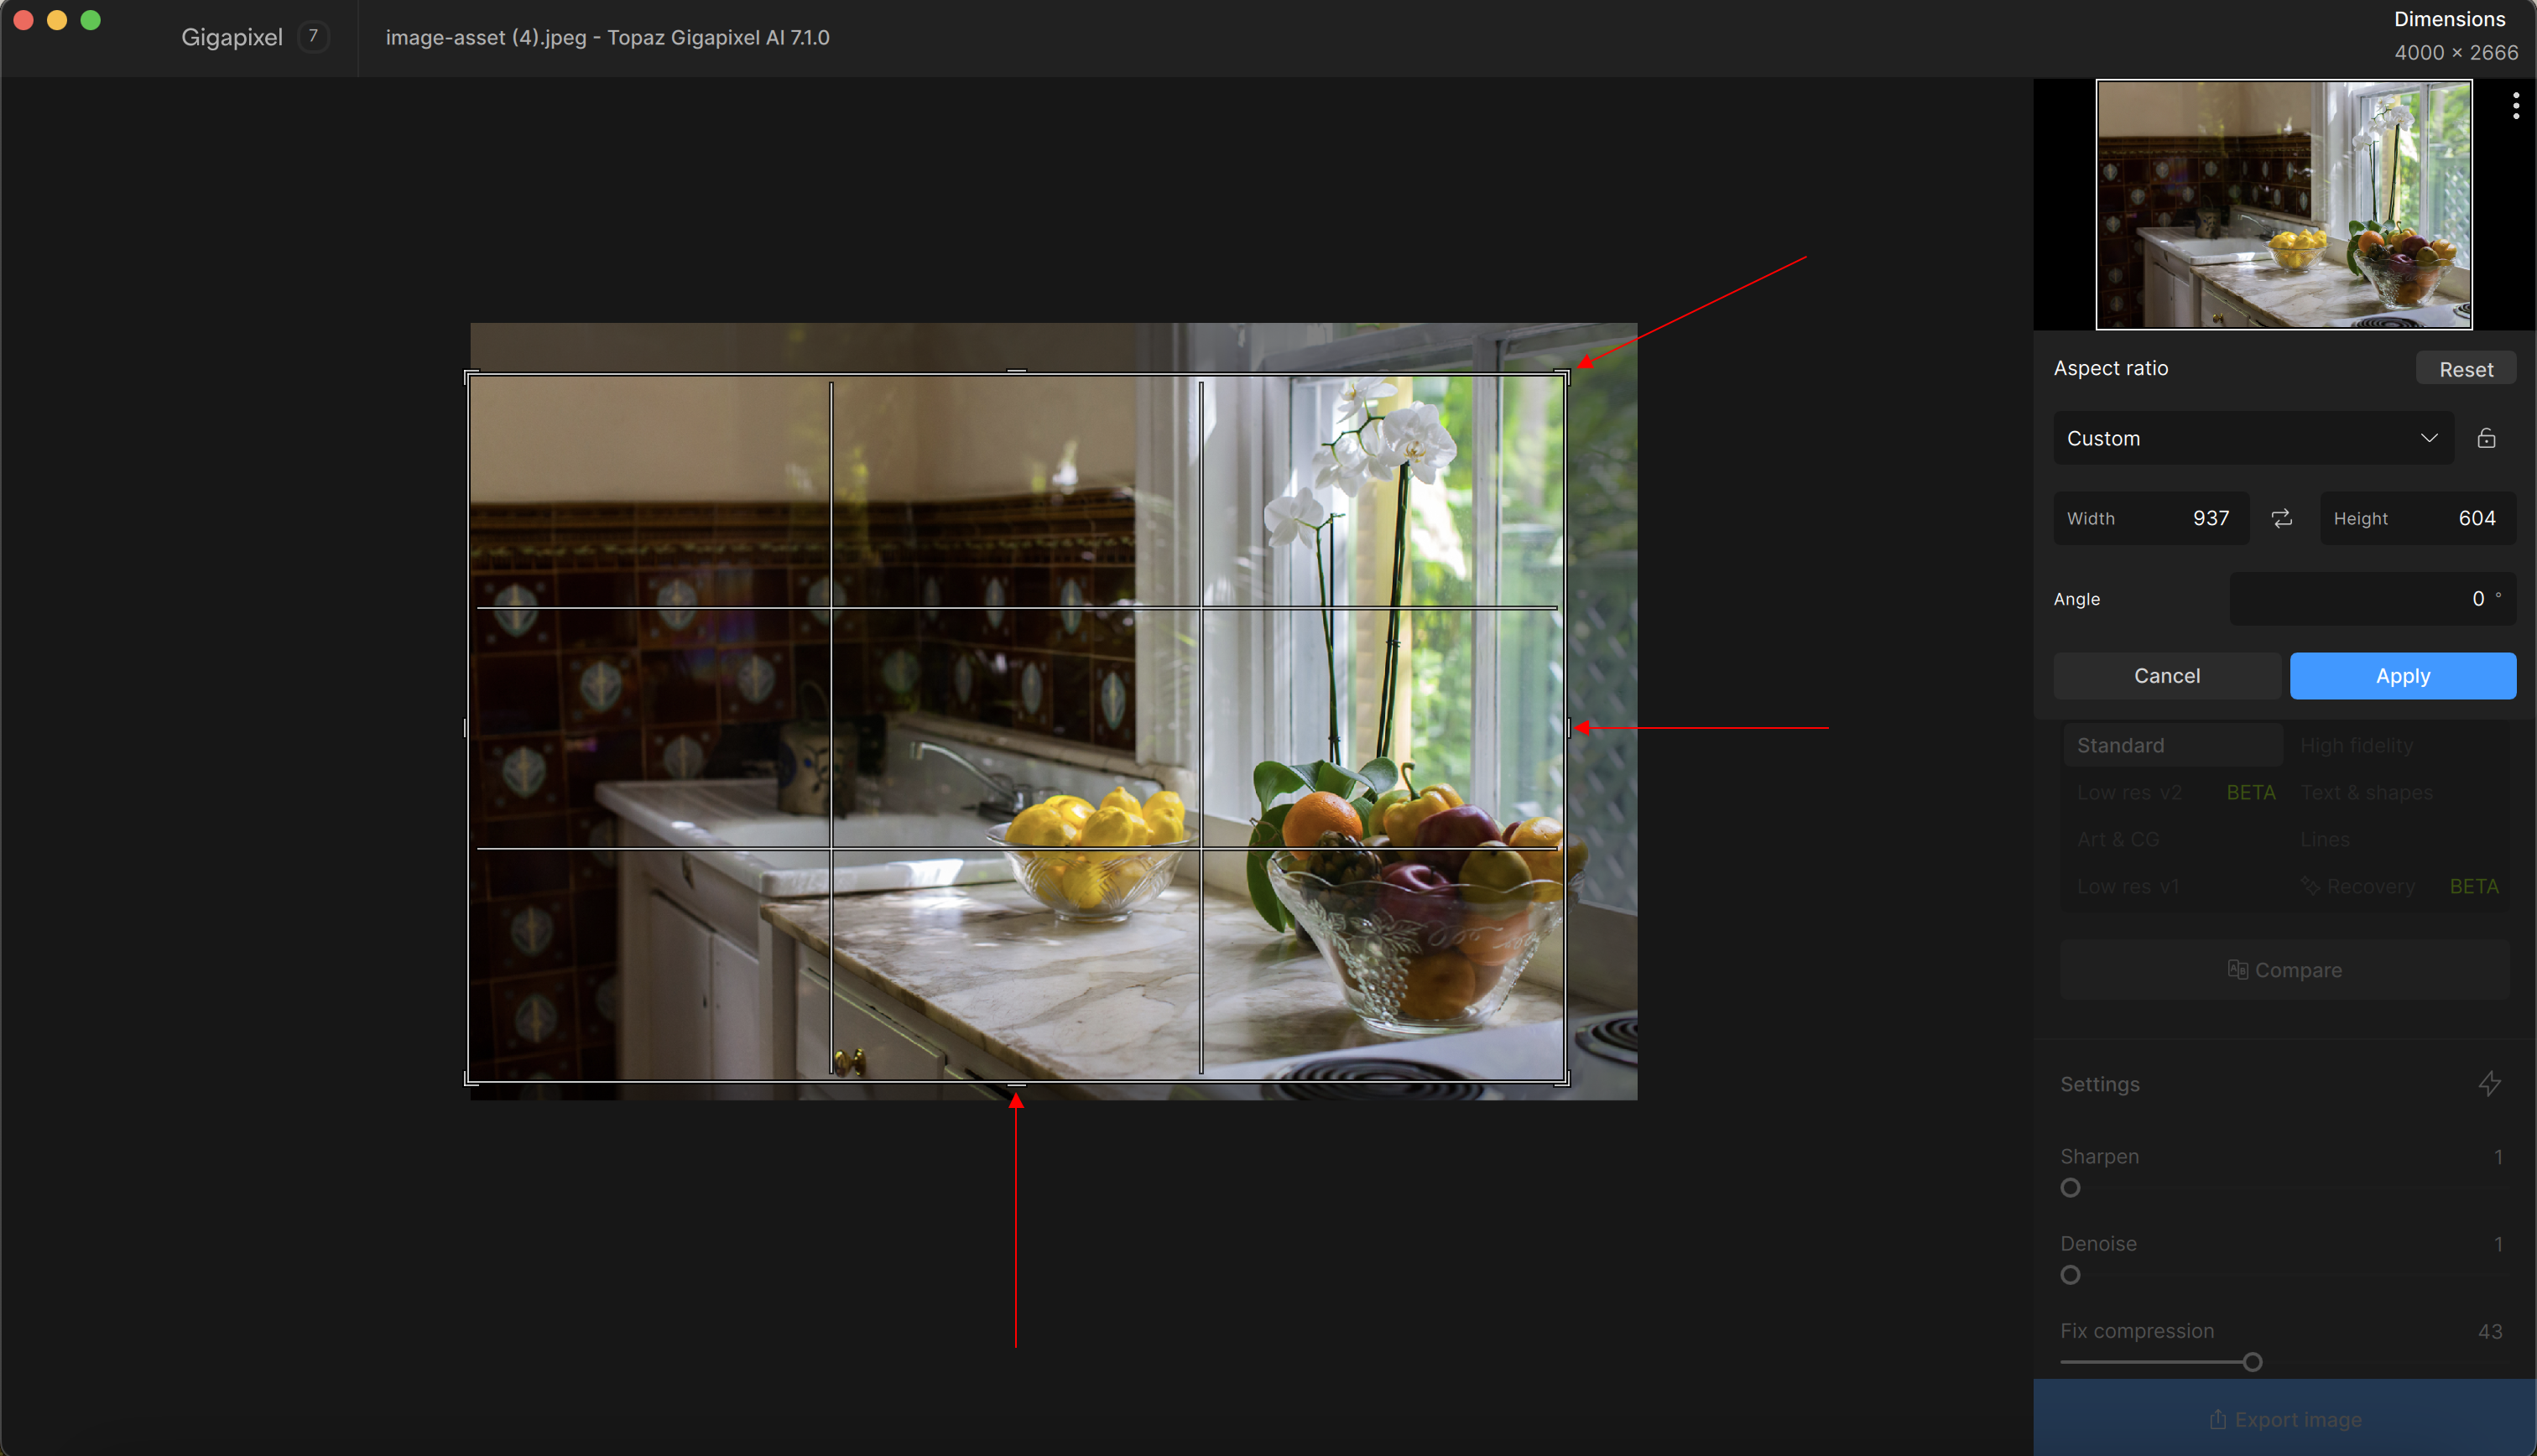
Crop Tool
Change the Aspect Ratio of your image.
Locate the Crop button at the top right of the Filters Panel below the Navigation.
The Crop panel opens and shows the different options to change the file dimensions of your image.
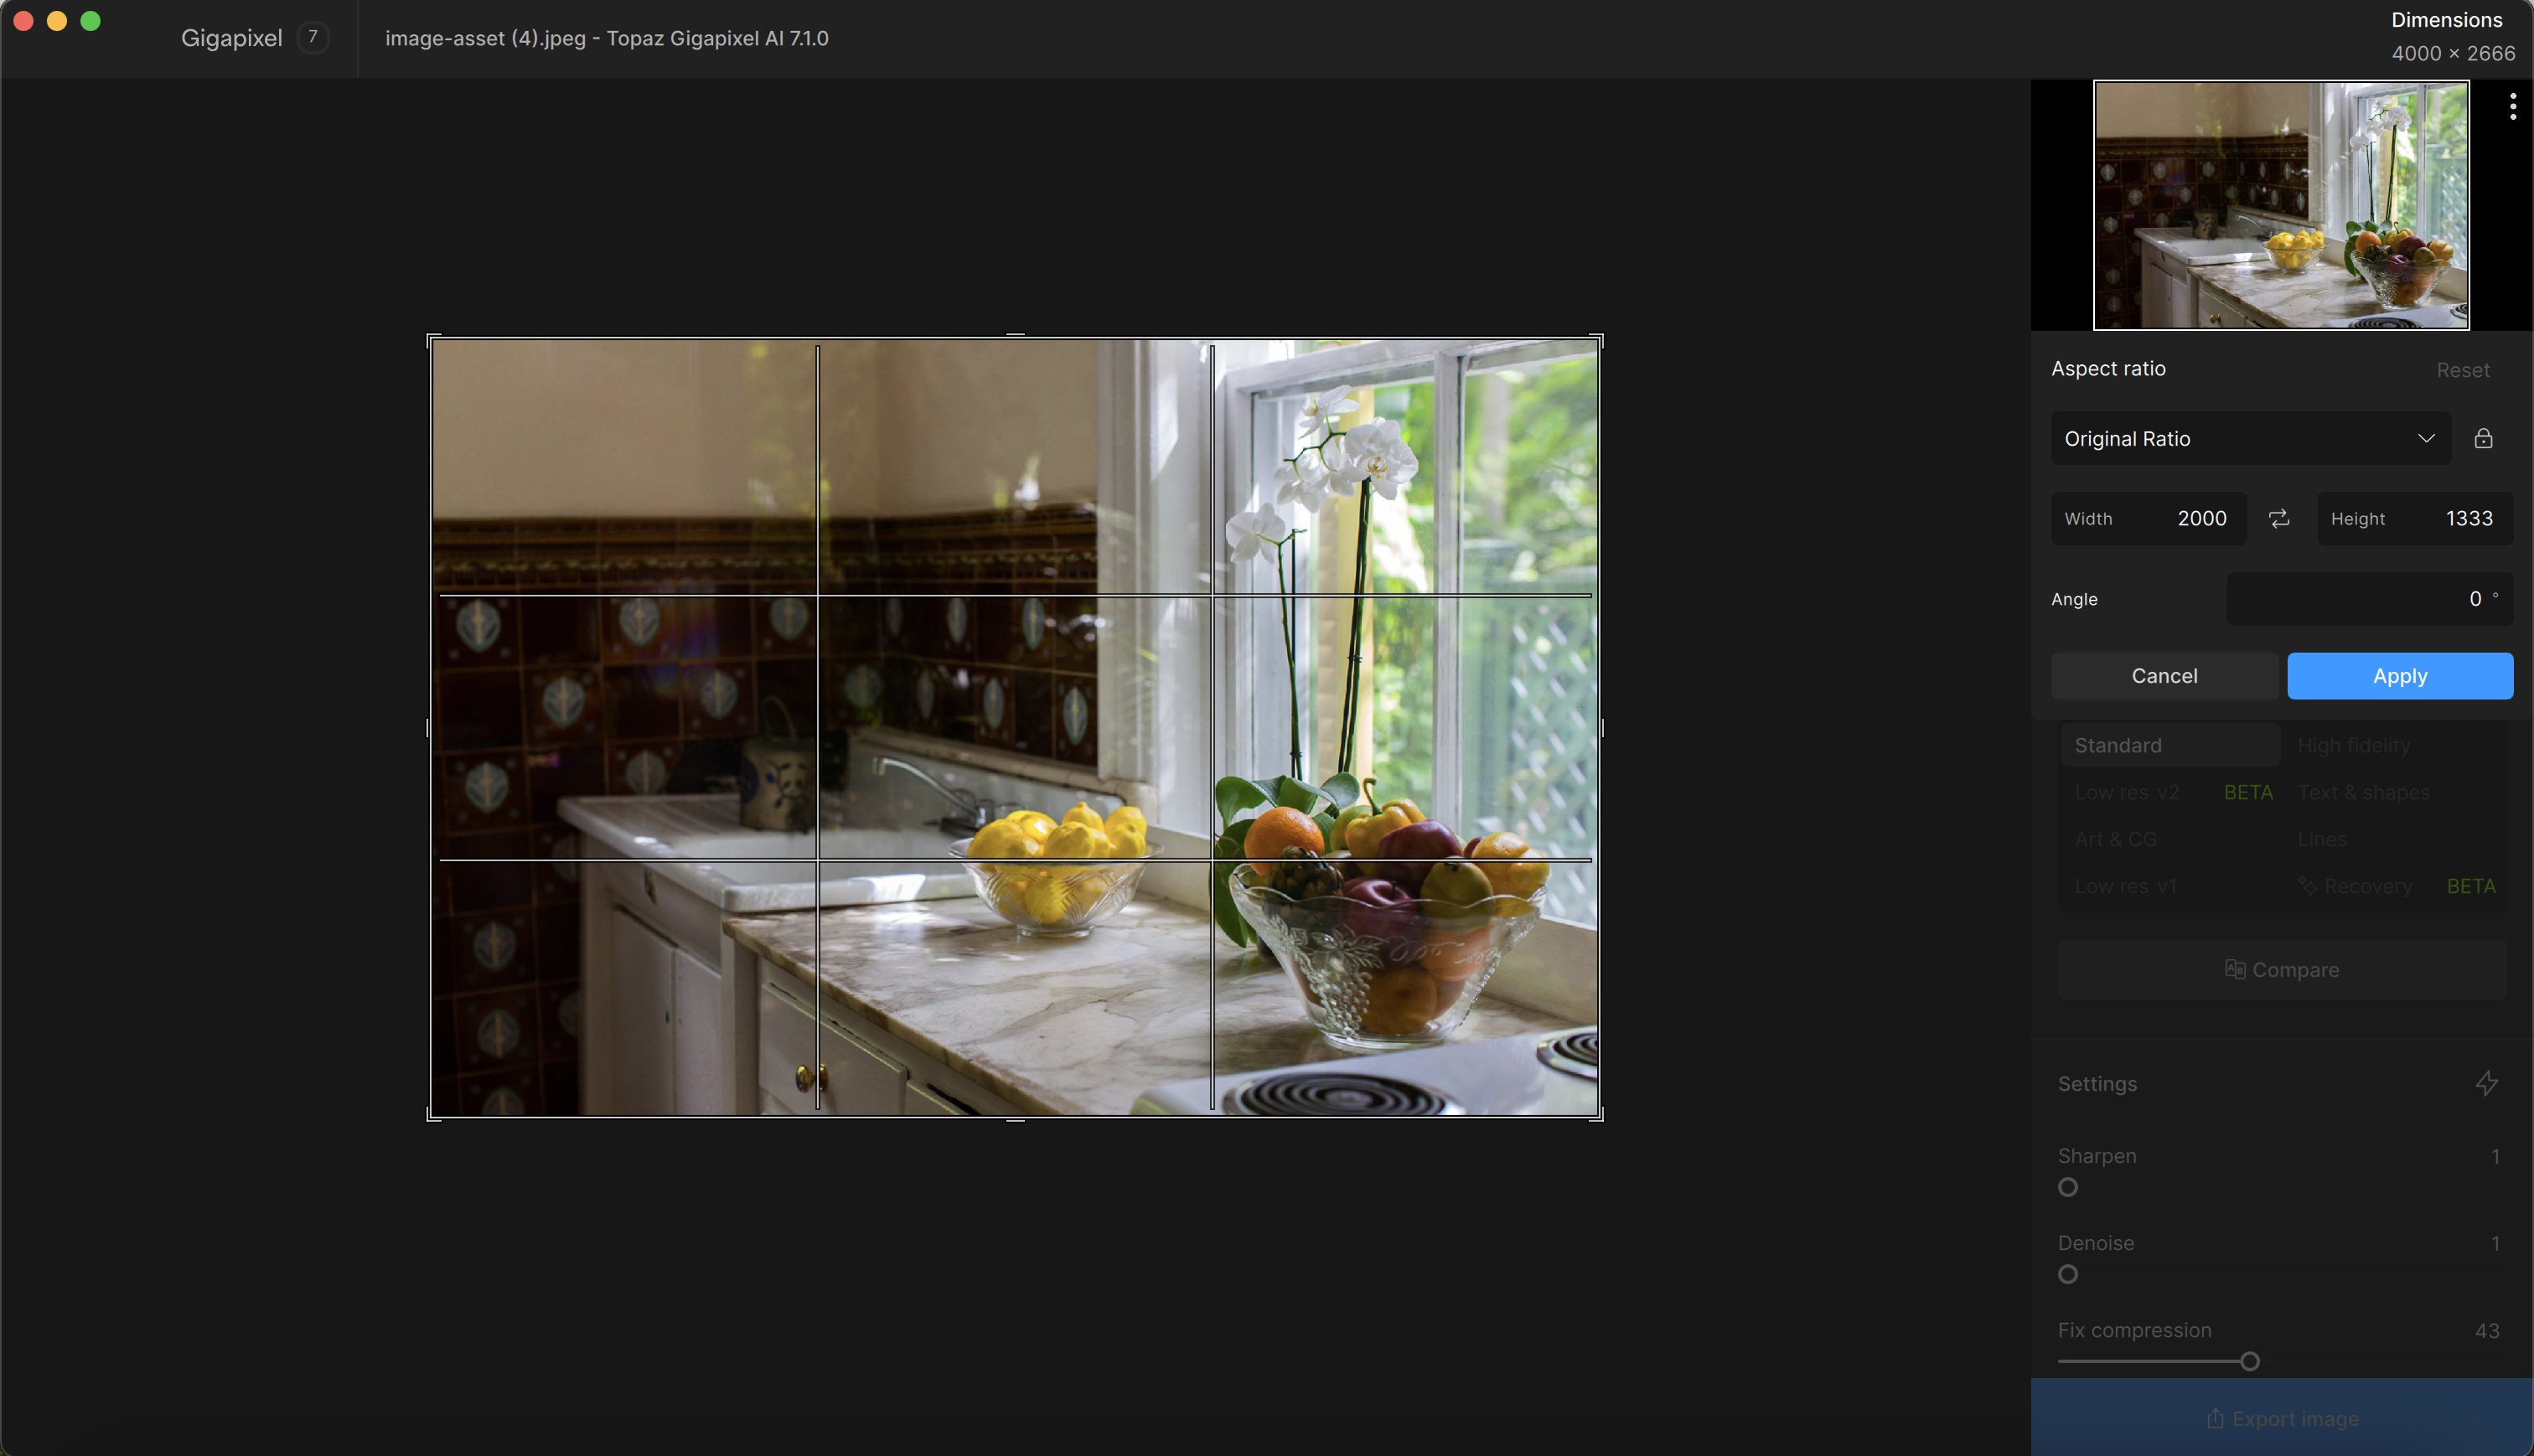
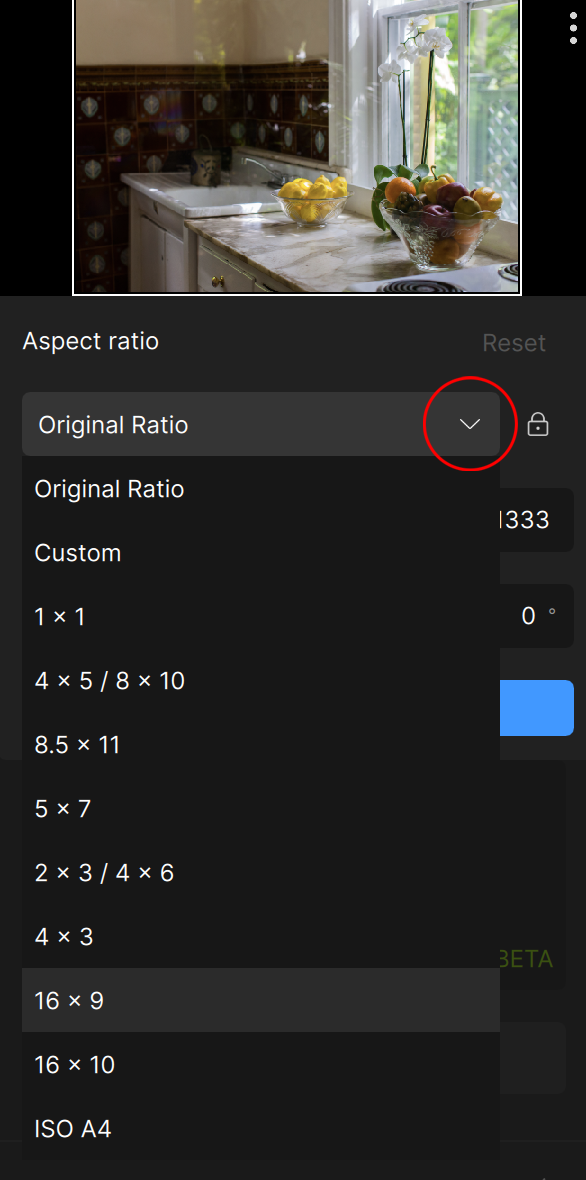
Select from different aspect ratios provided in the dropdown menu or set your own custom crop.
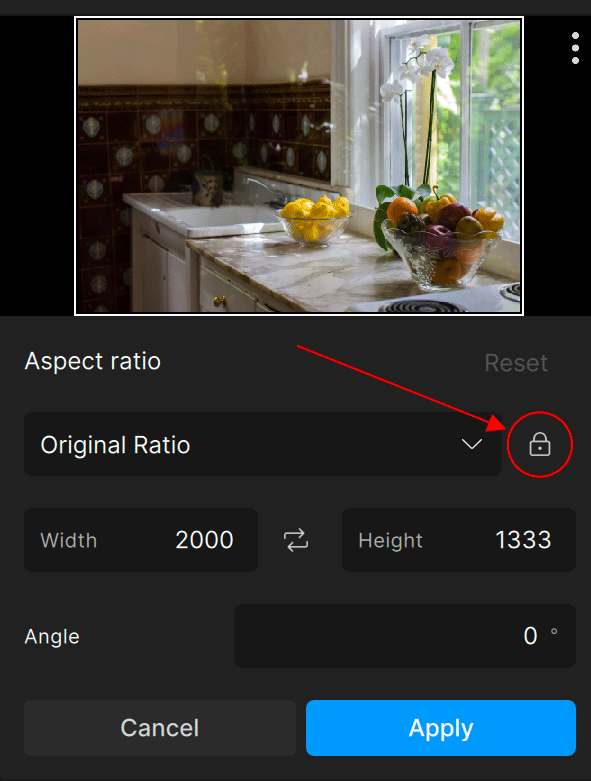
To choose a Custom Size:
Click on the Lock symbol to unlock the ratio size. You can type your specific width or height or resize the image manually.
Use the crop corners and lines to create a freehand crop.
Change the rotation of your image by clicking anywhere around your image in the preview and drag it around. You can review the degree of the angle rotation located in the Crop panel.
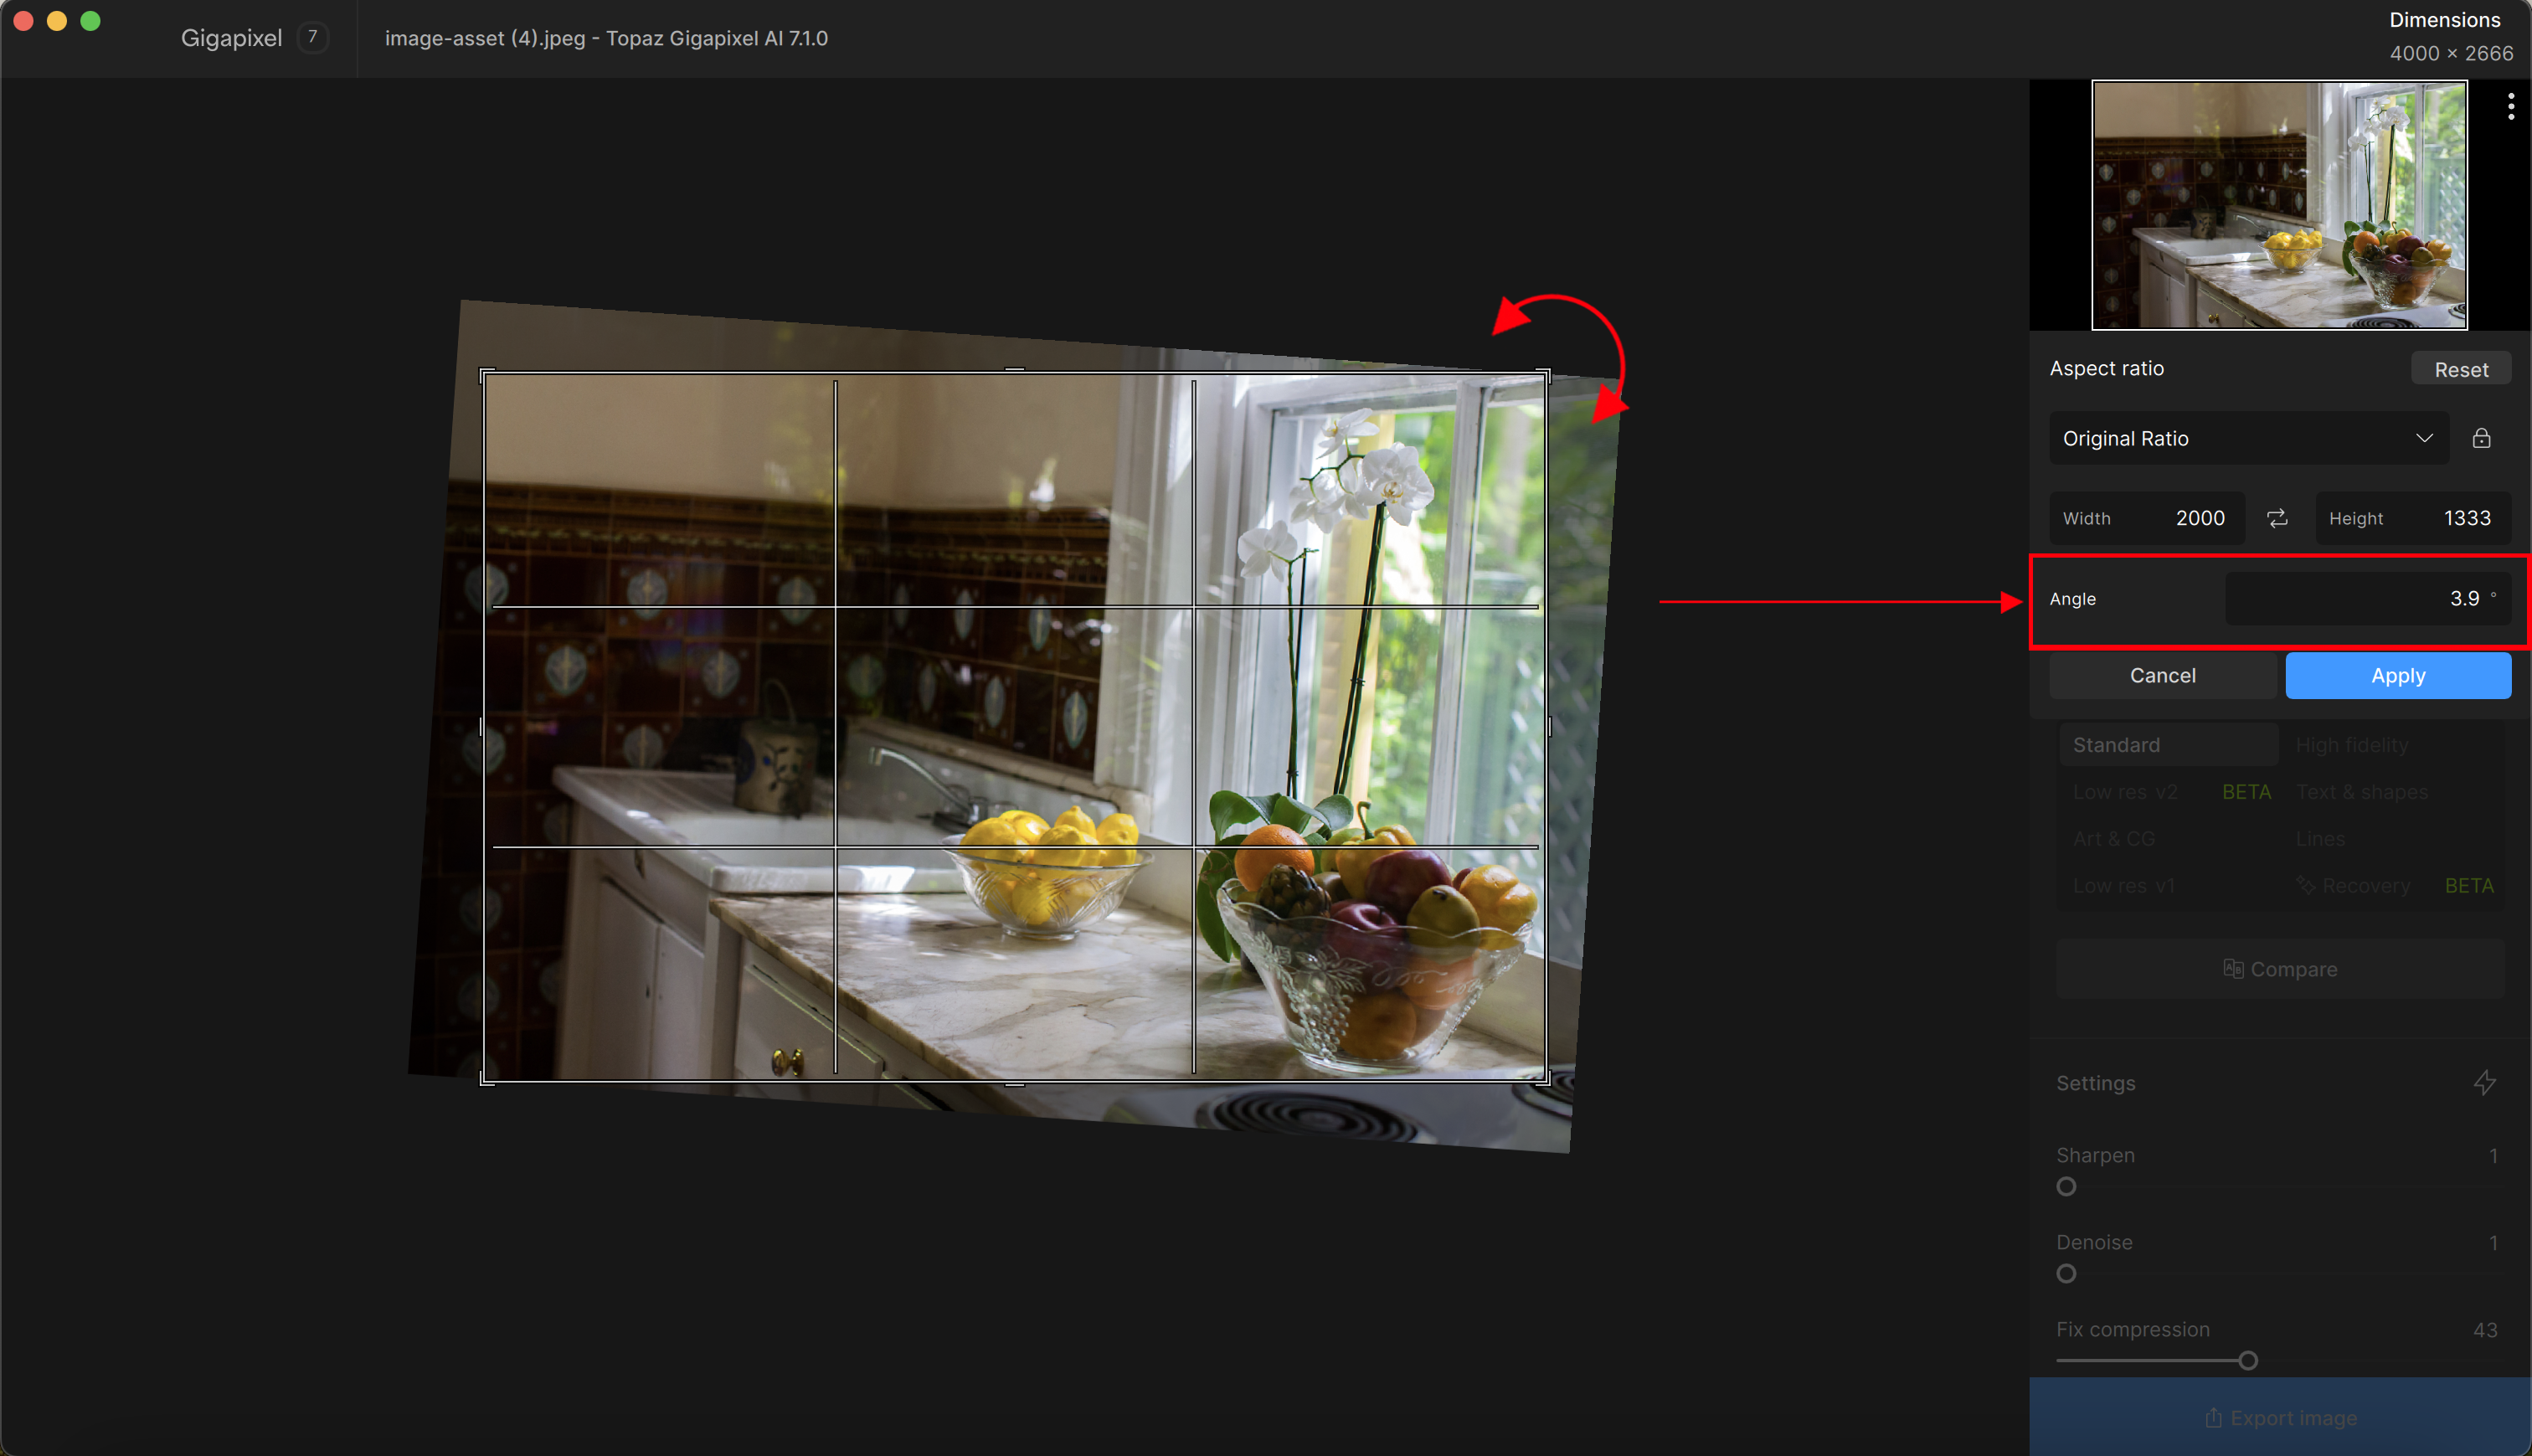
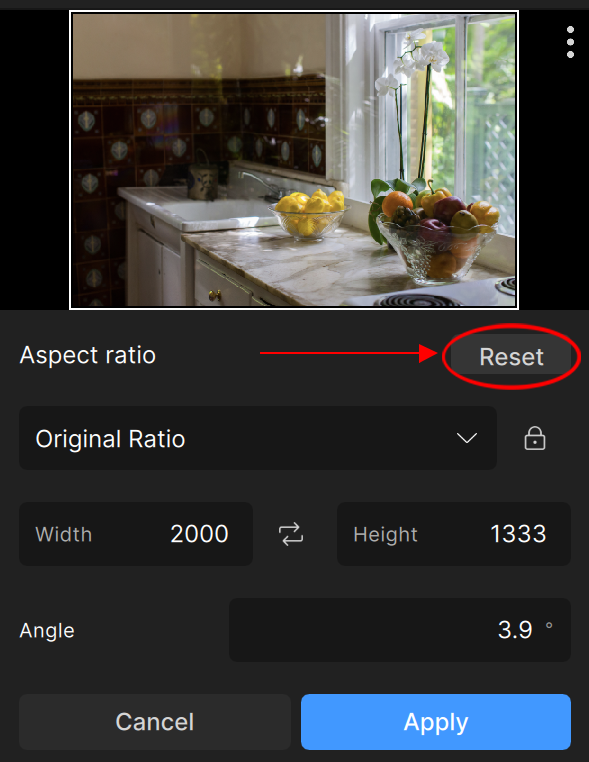
To undo your custom crop, click on the "Reset" button to return the crop to its original ratio.
Change the orientation of your crop by selecting the opposing arrow symbol between the Width and Height.

Once you have decided on your crop, click "Apply".

Photo by Esther Huynh
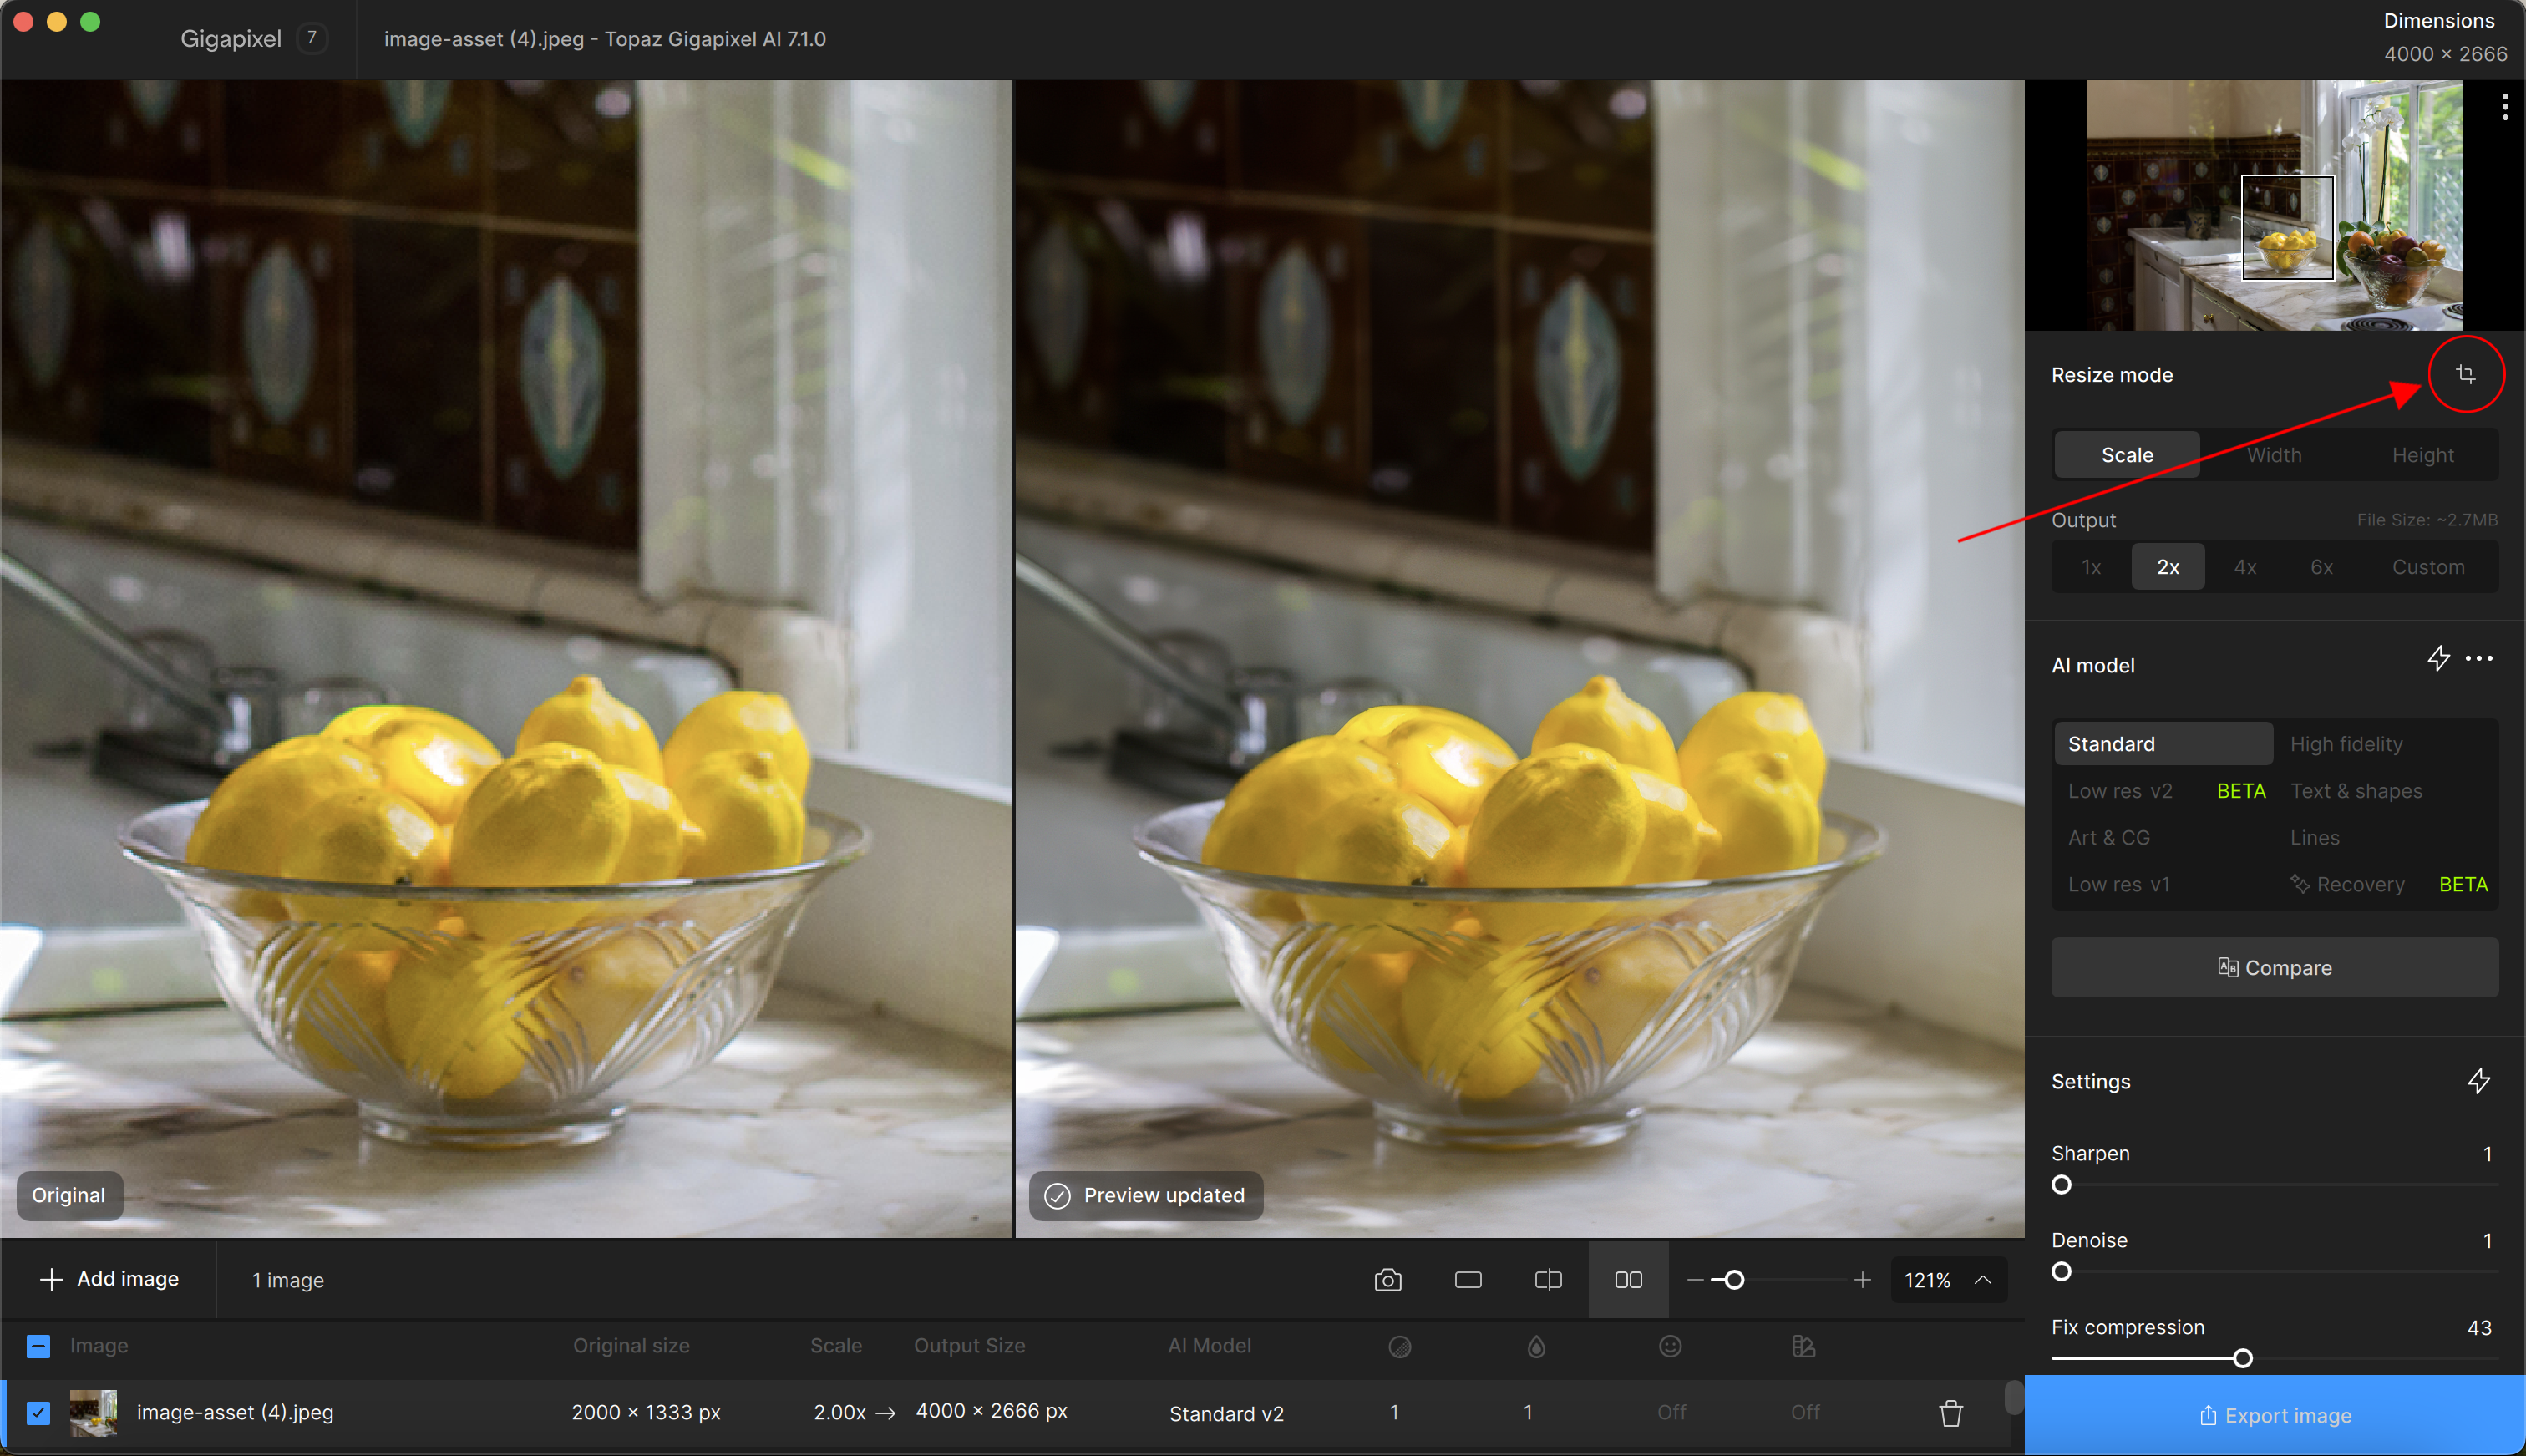
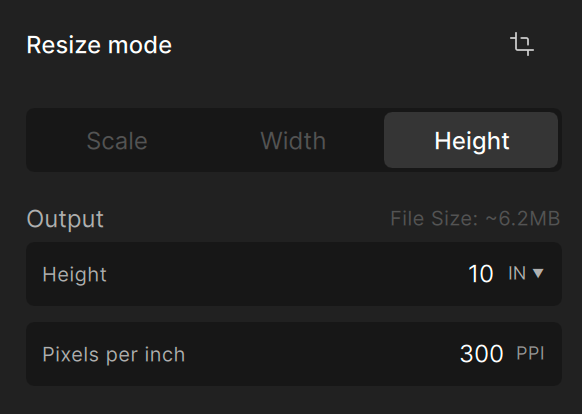
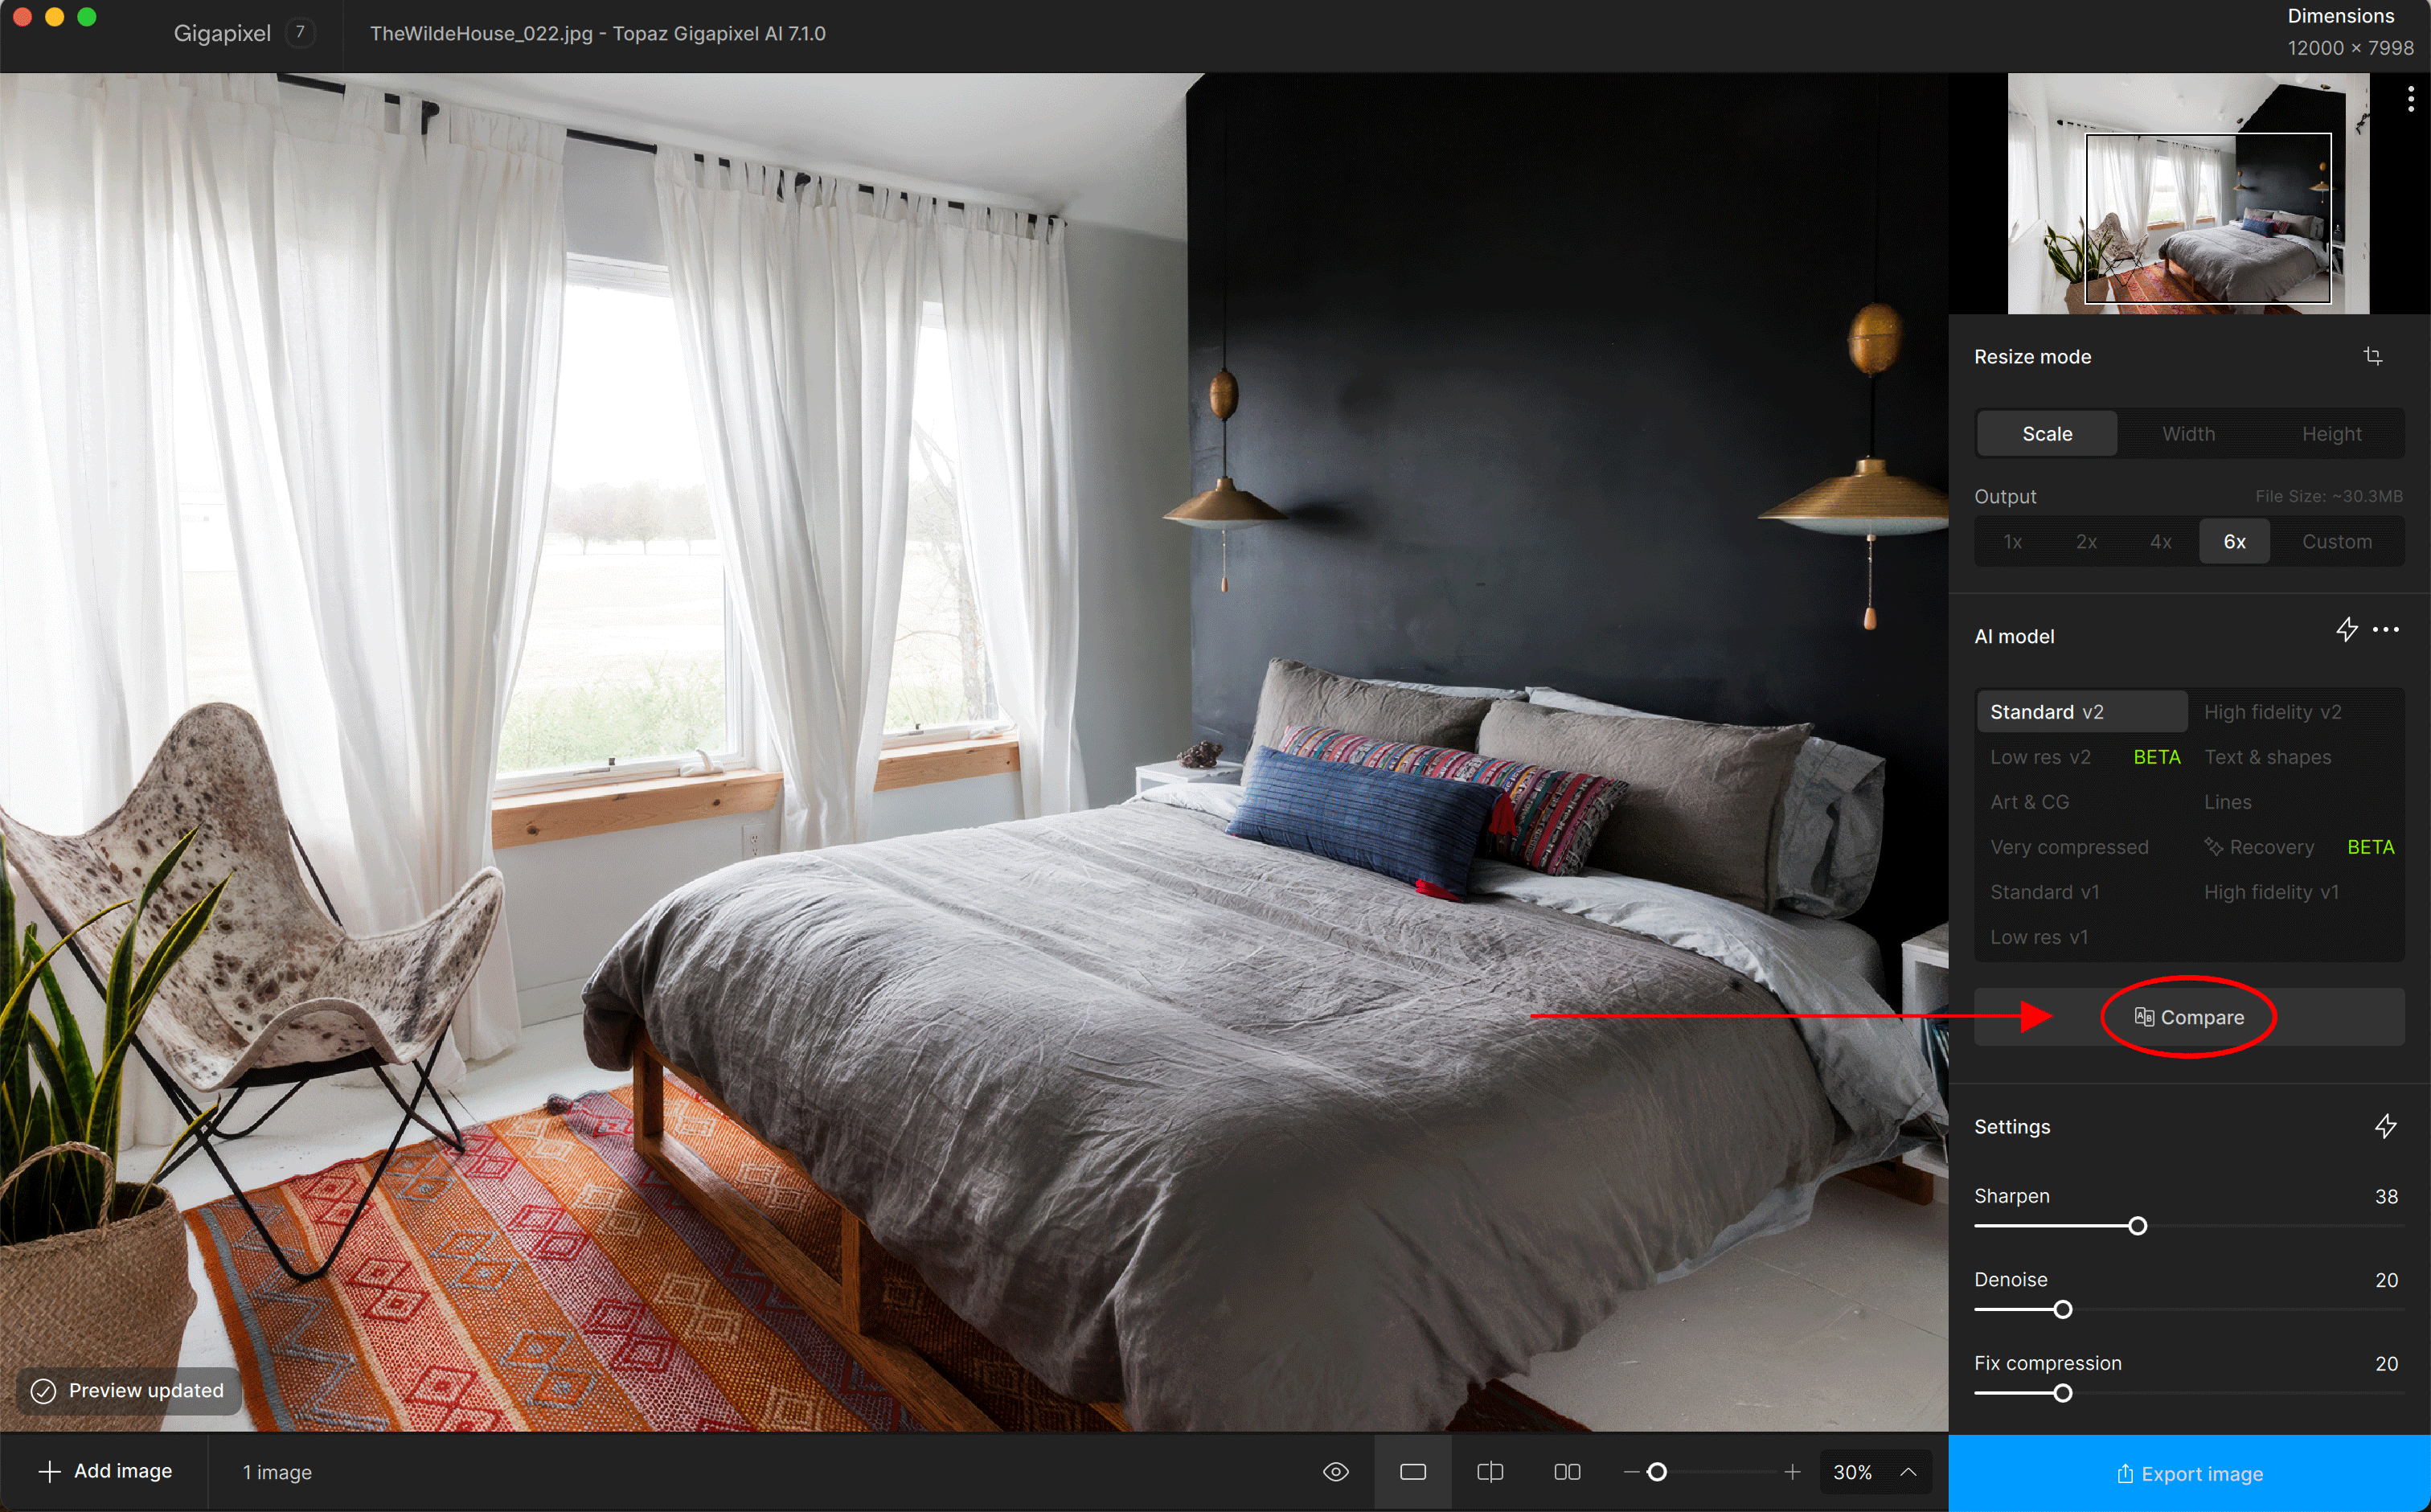
Resize Mode
Use the Resize Mode to upscale your image.
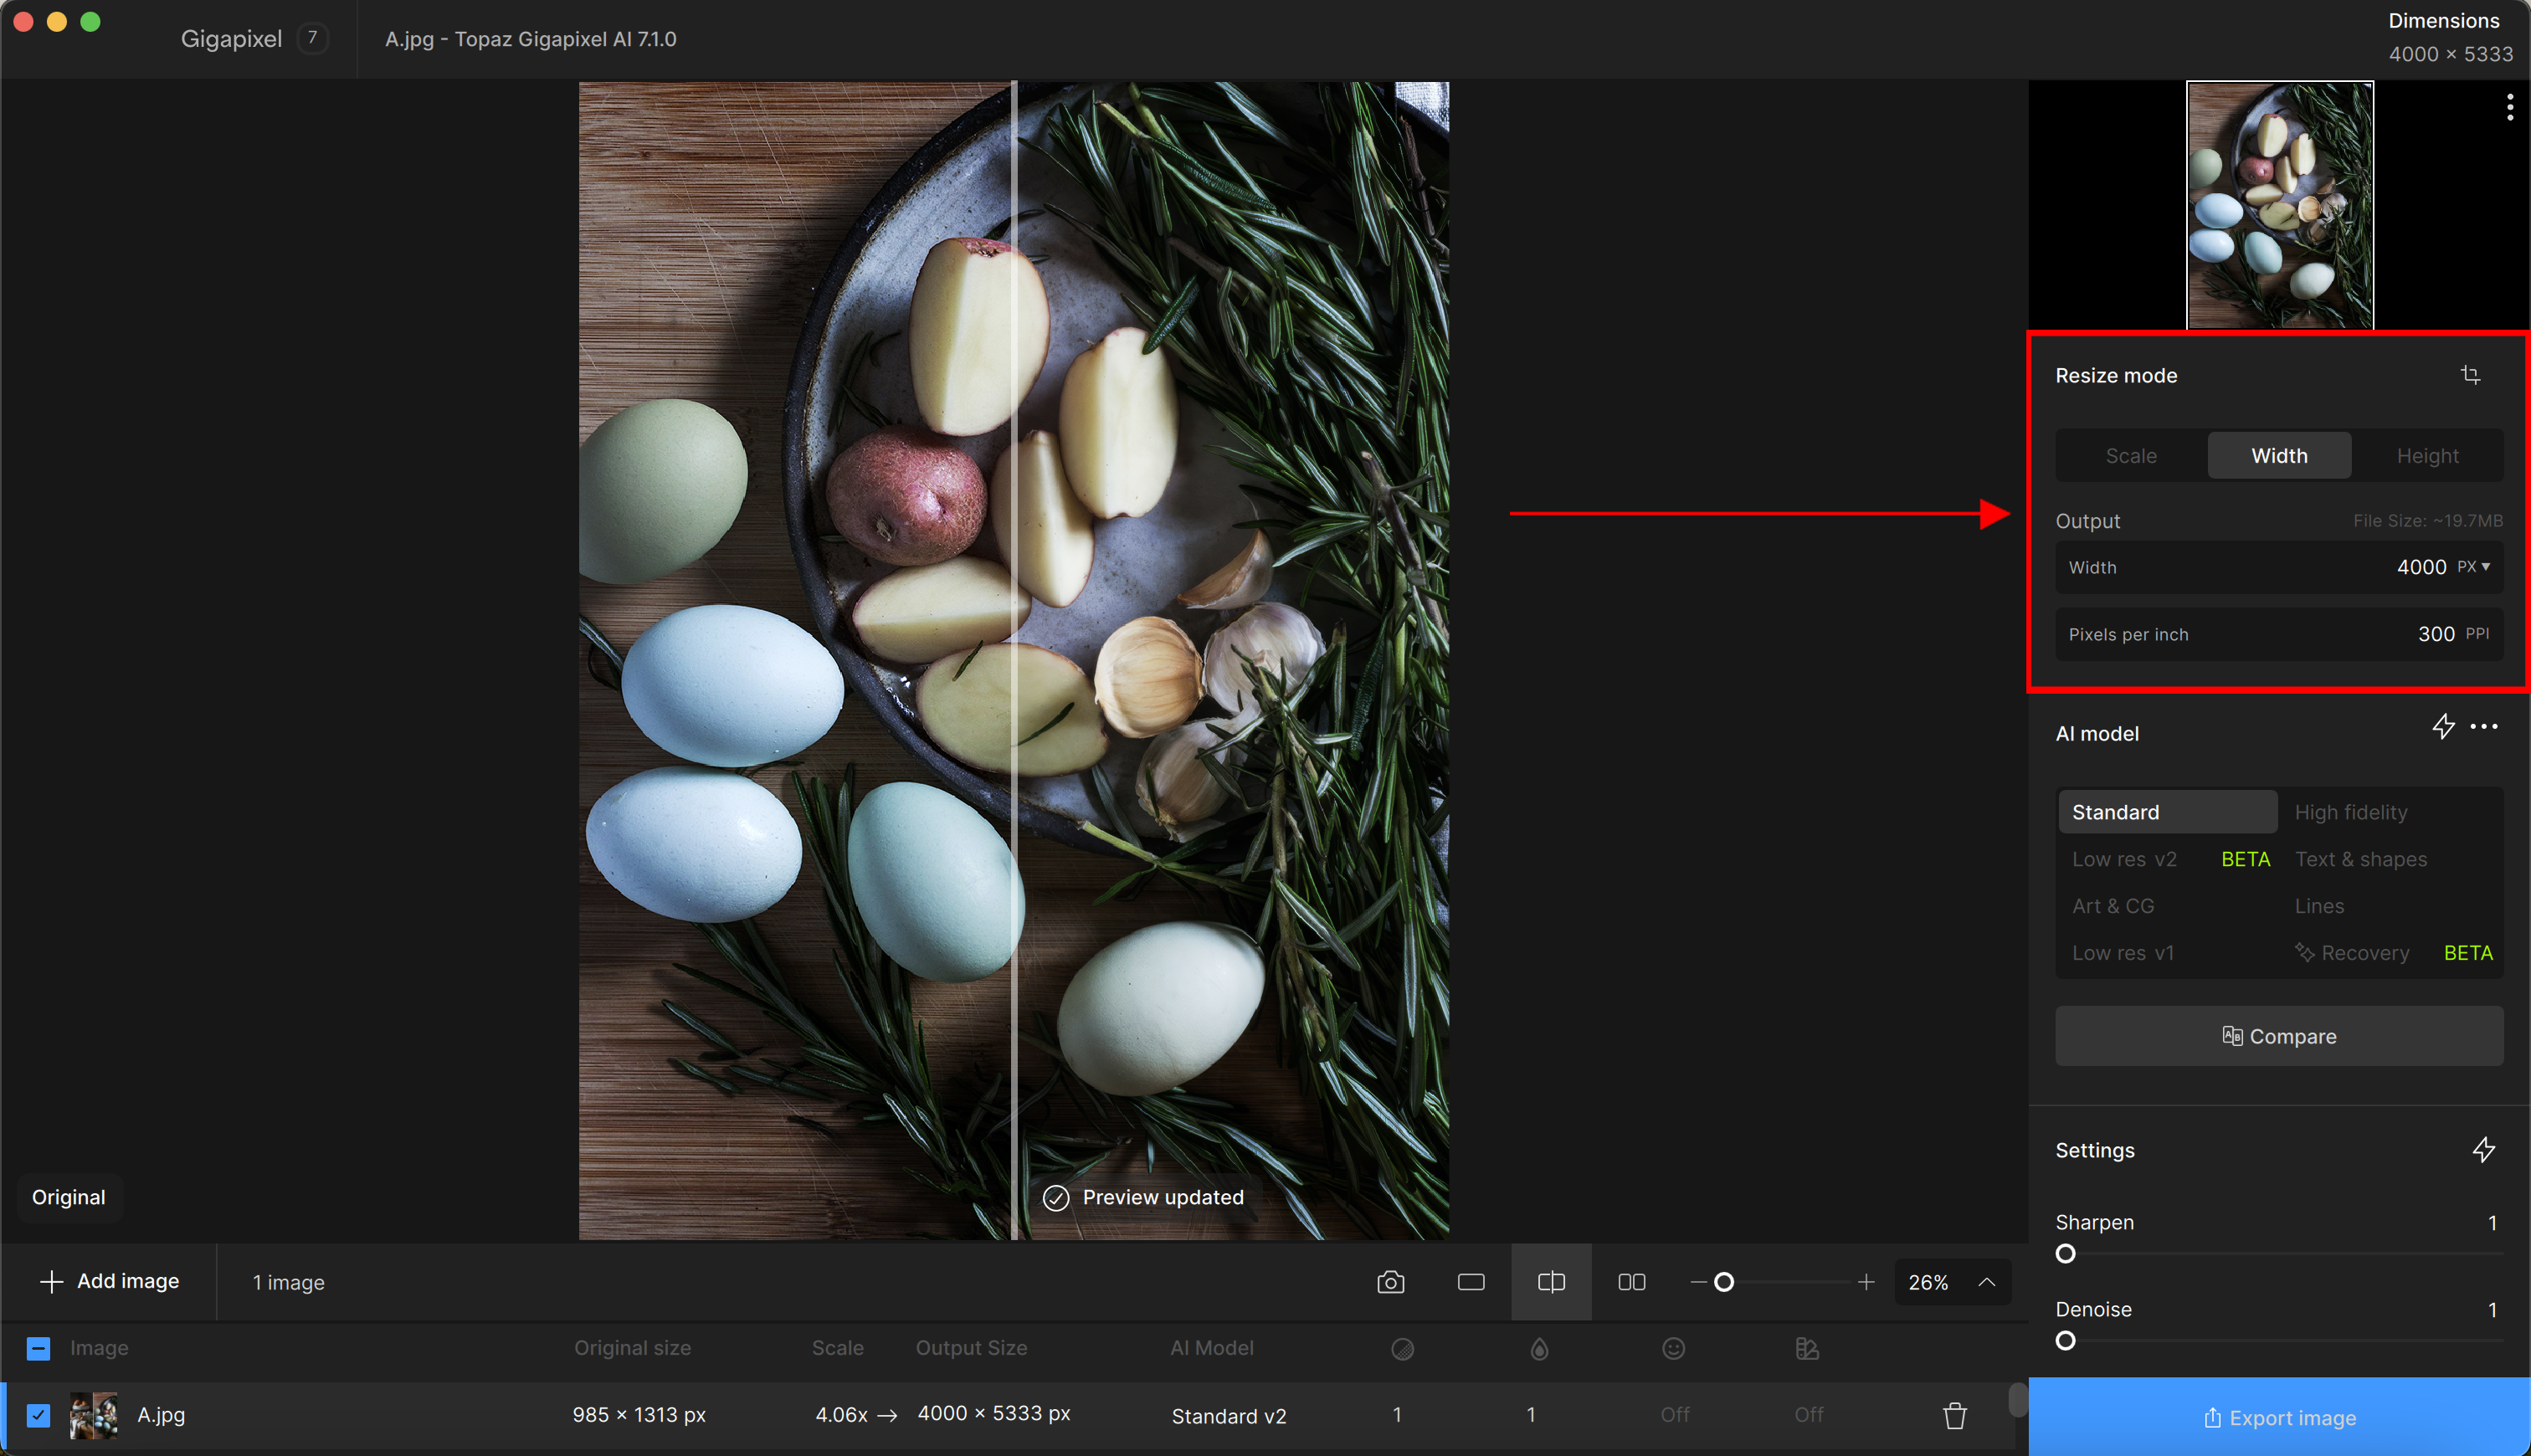
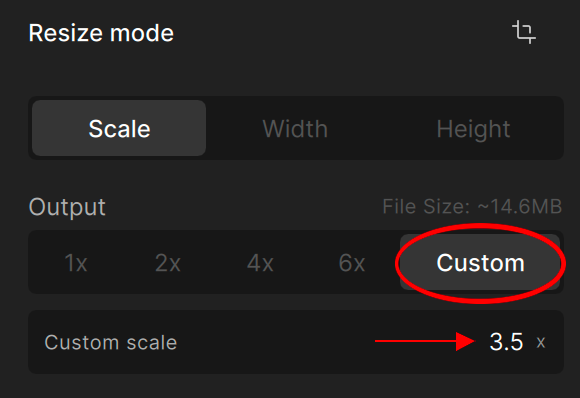
There are three modes to select from:
- SCALE - upscale your image by a multiplier of up to 6x
- WIDTH - upscale your image by inputting a custom width size
- HEIGHT -upscale your image by inputting a custom height size
Both the WIDTH & HEIGHT options allow you to input a measurement size (pixels, inches, or centimeters) and pixels per inch (PPI). Once you have set your size, your changes are viewable in the File List.
To change Pixels per Unit to your image:
- Go to Resize Mode > Select Width or Height
- Click on drop down arrow to change the unit of measurement from “PX” (pixels) to “IN” (inches) or “CM” (centimeters)
- The Pixels per Unit will appear.
- Type in your Pixels per Unit first.
- Then go back and type your desired Output Width/Height.
To Input a Custom Scale Multiplier:
1. Resize Mode > Select Scale
2. Click "Custom"
3. Type your multiplier in the "Custom scale" box and press Enter
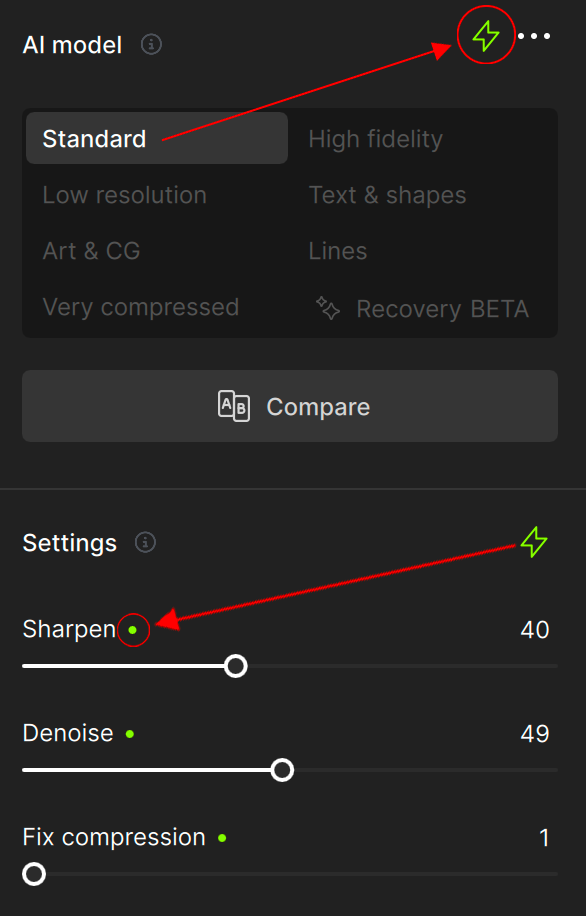
AI Model
AI Models are the program filters Topaz Labs has created to determine how to adjust or enhance your images, graphics, digital scans, or artwork.
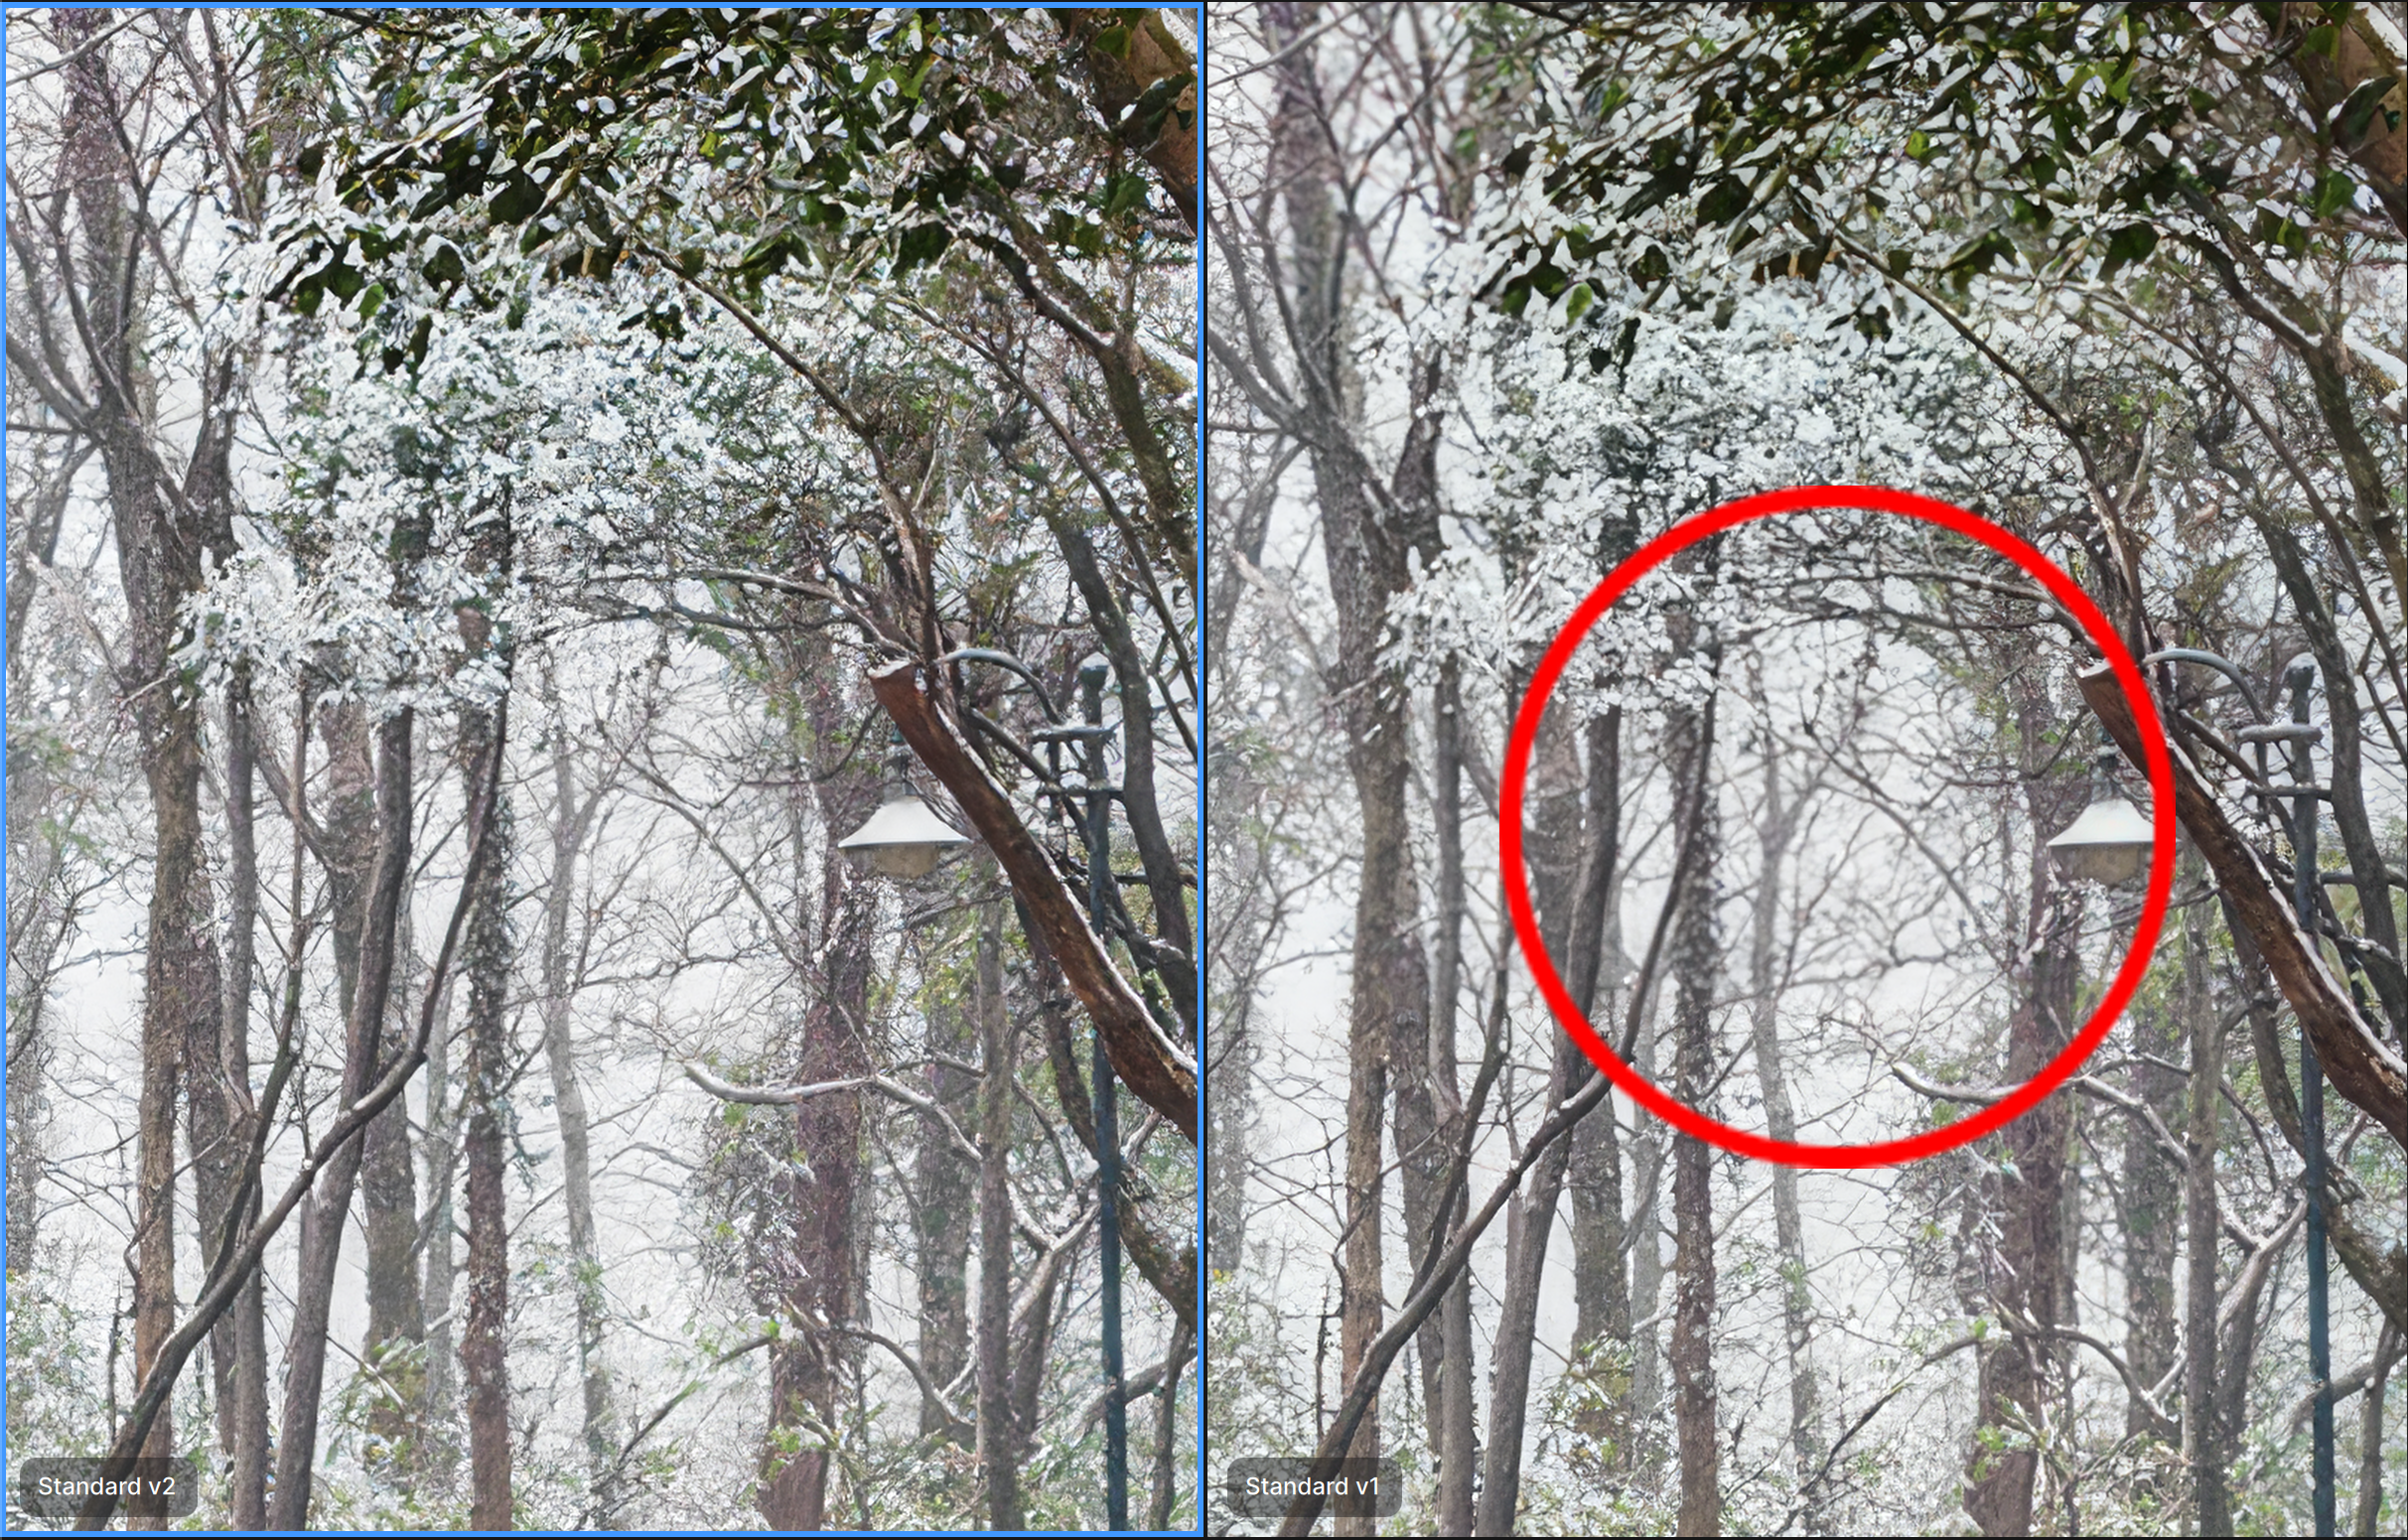
The Standard AI Model is the overall recommended model to use across a variety of images. This model has been trained to see a variety of files but works best for photos, graphics, and generated images.
Standard v2, first introduced in version 7.0.0, is the default version in 7.1.0
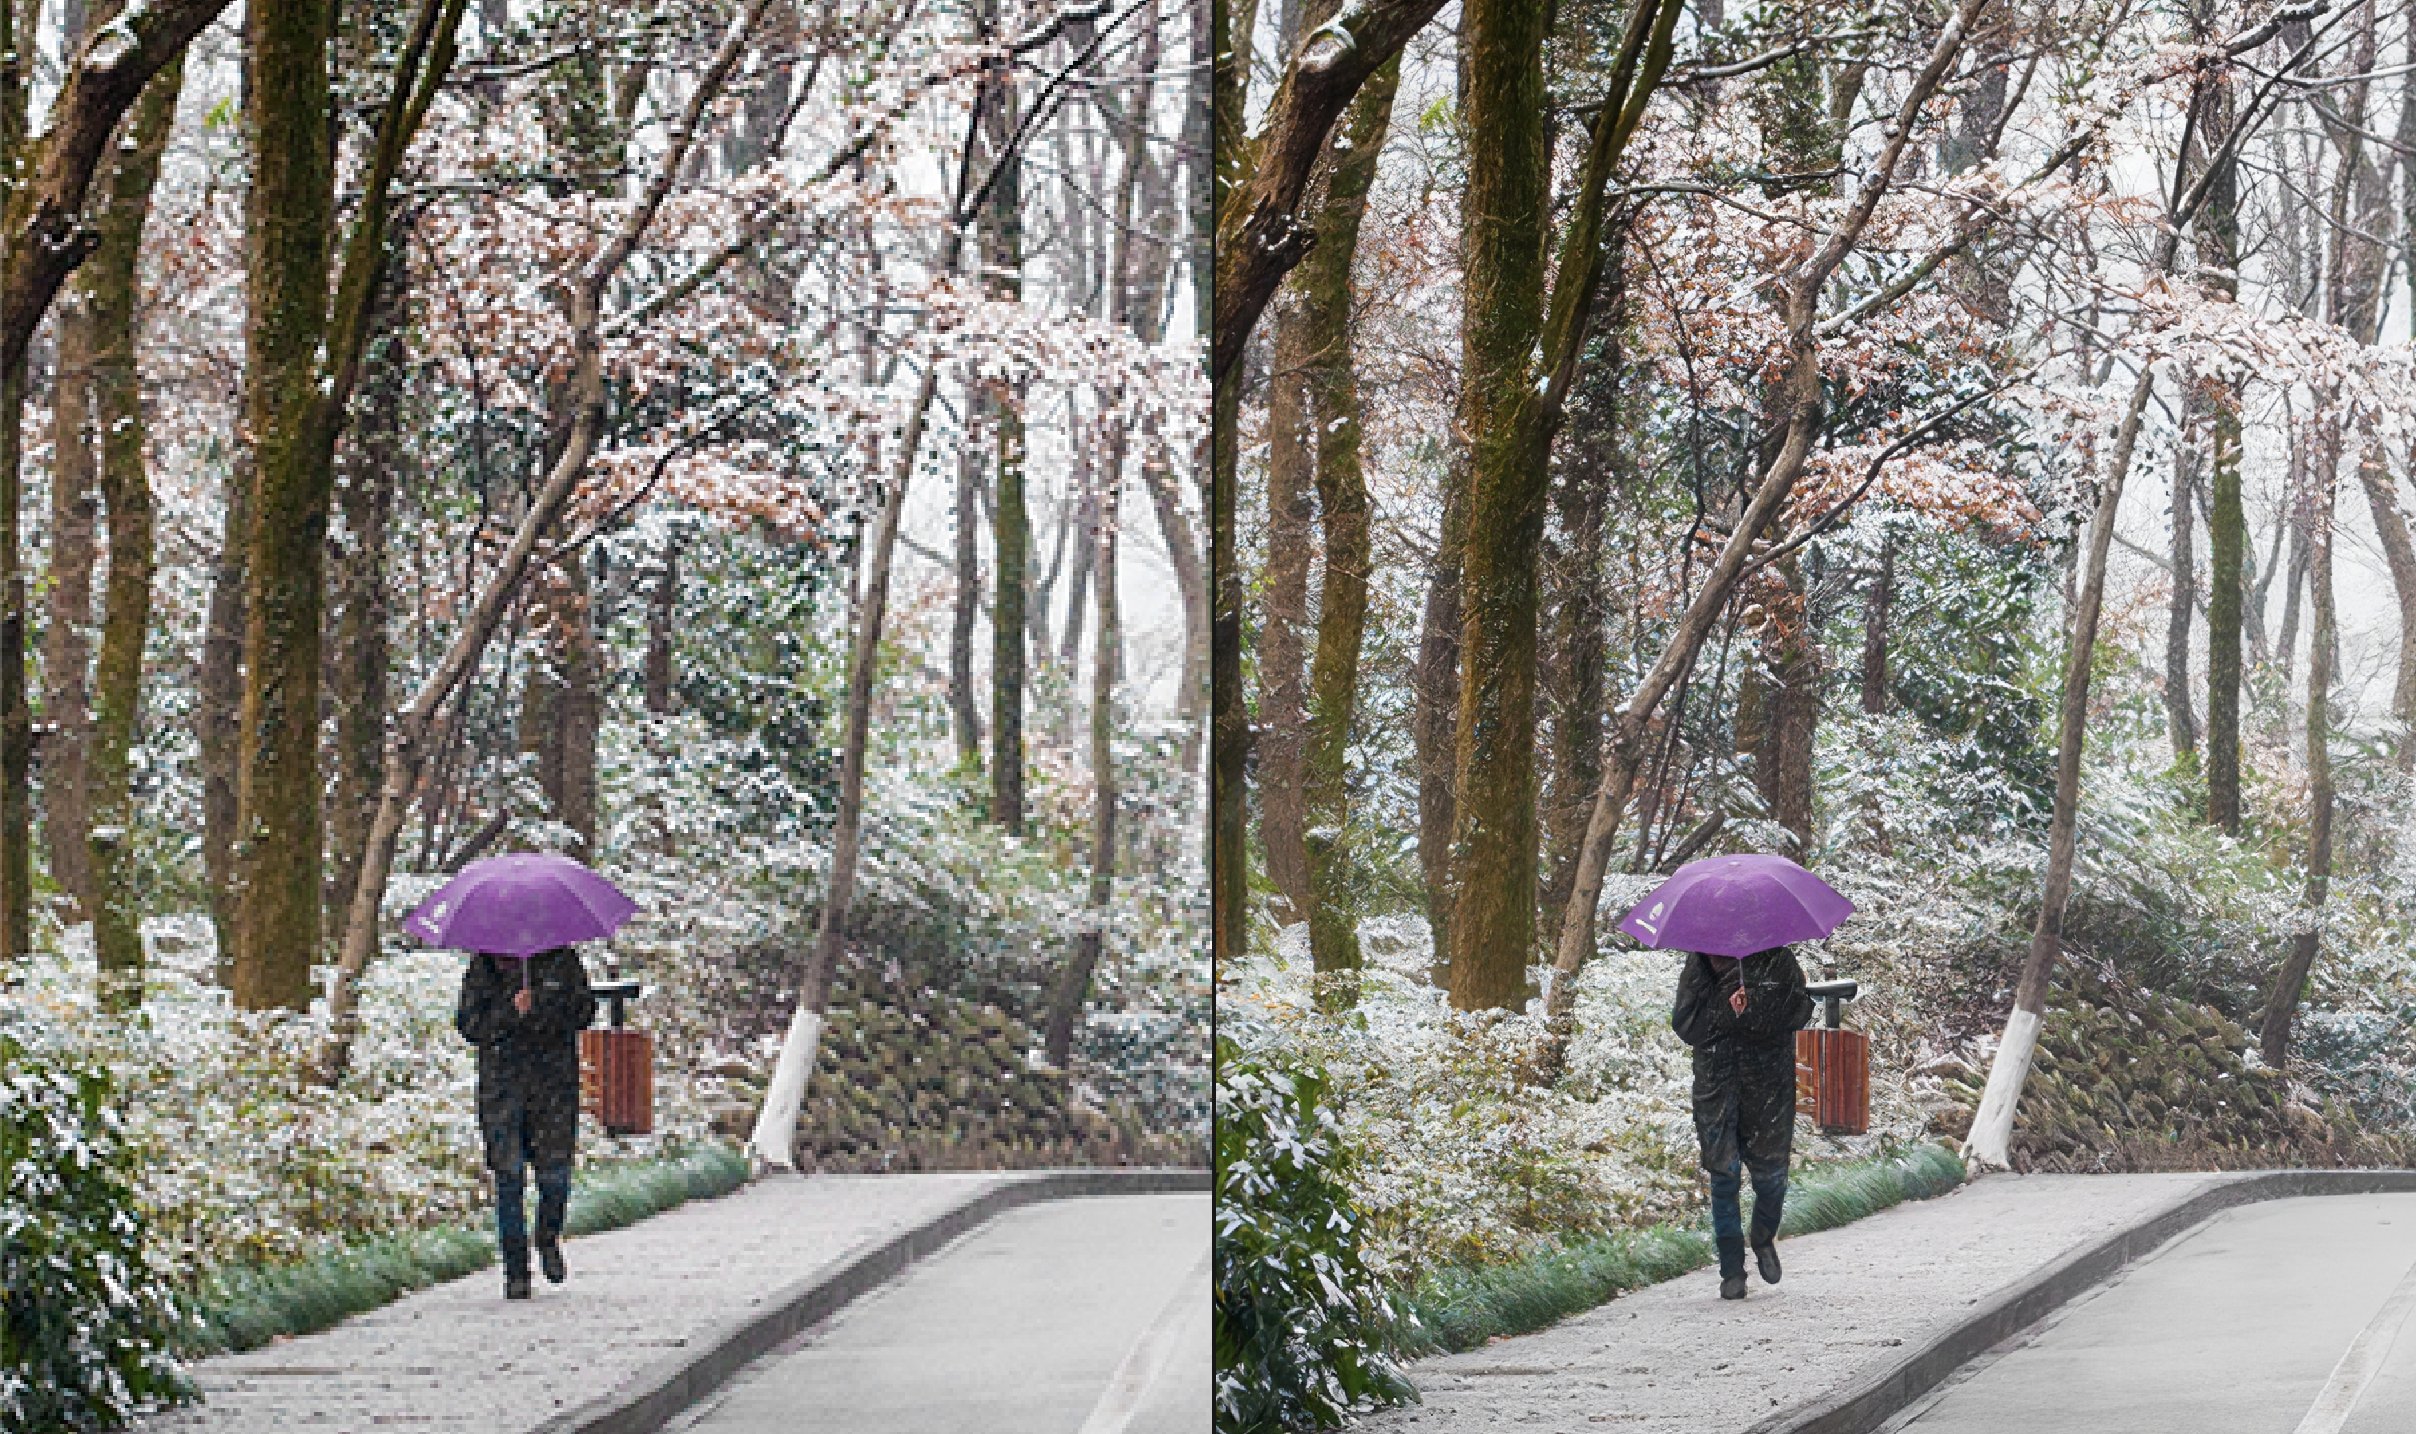
Standard v2 reduces blurry patches that occurred in Standard v1.
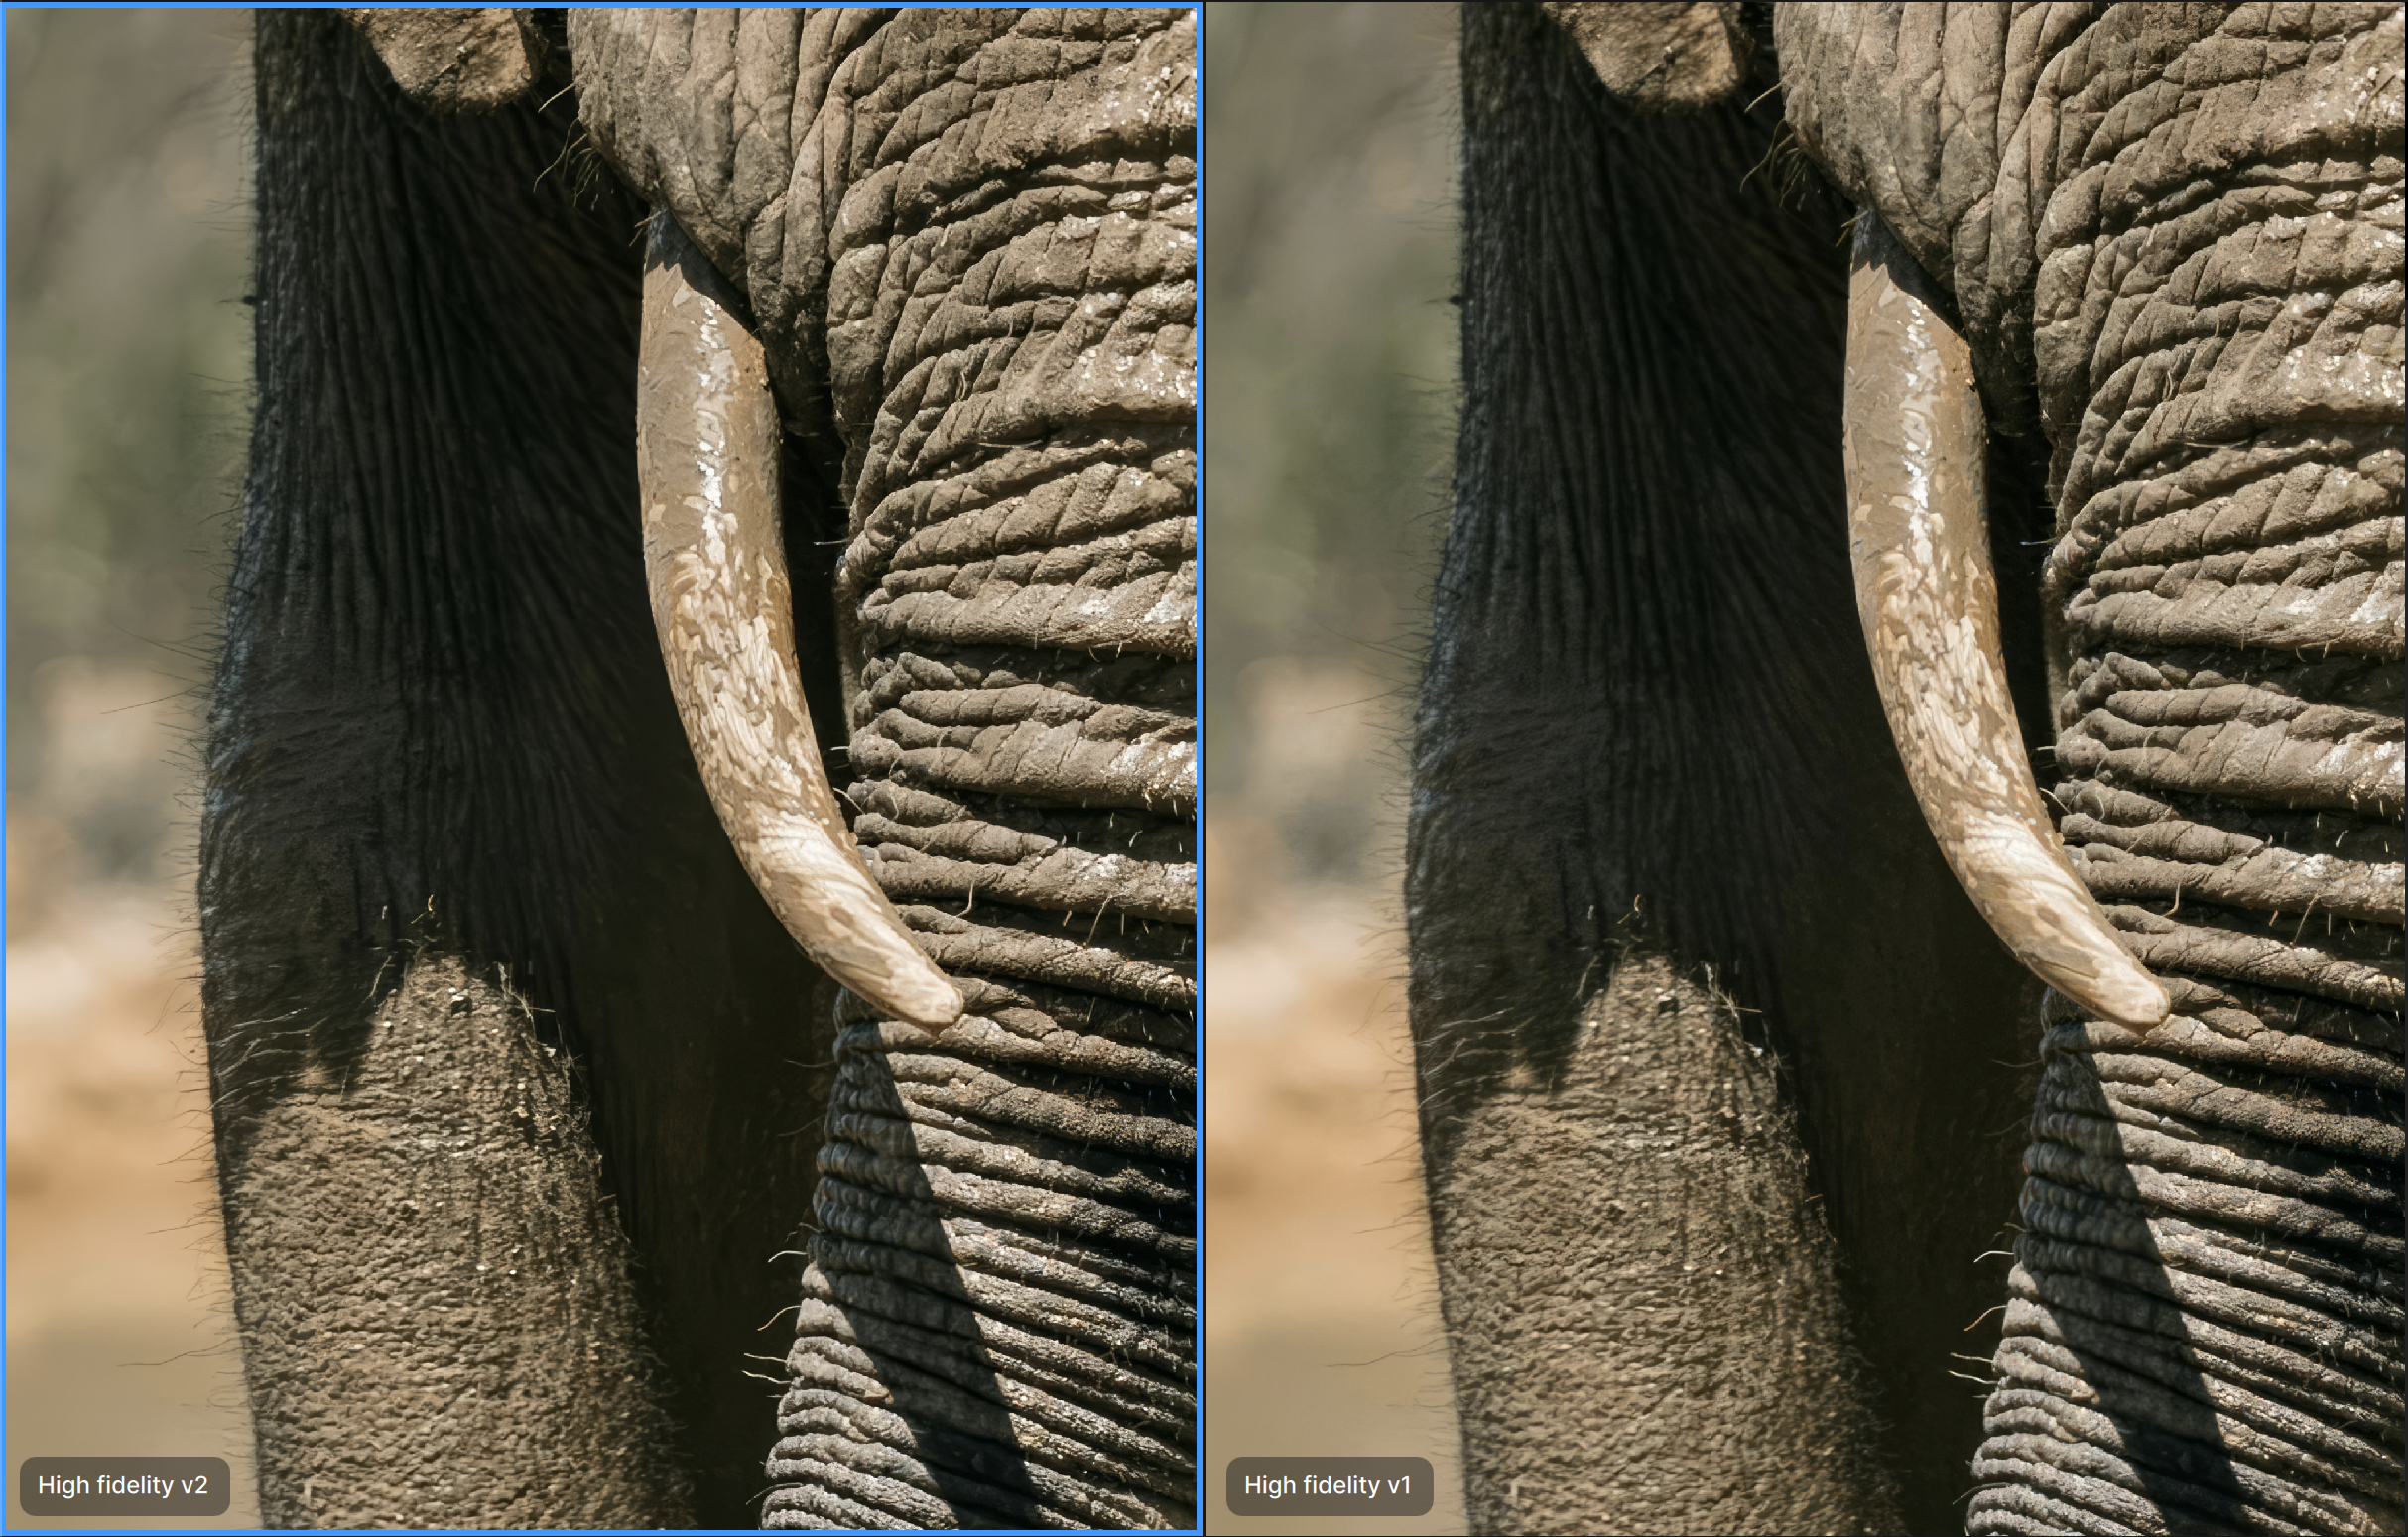
The High Fidelity AI Model is trained to study high quality images with high resolution. Images from high end cameras are best. This filter can maintain the original look of images, without creating distortions.
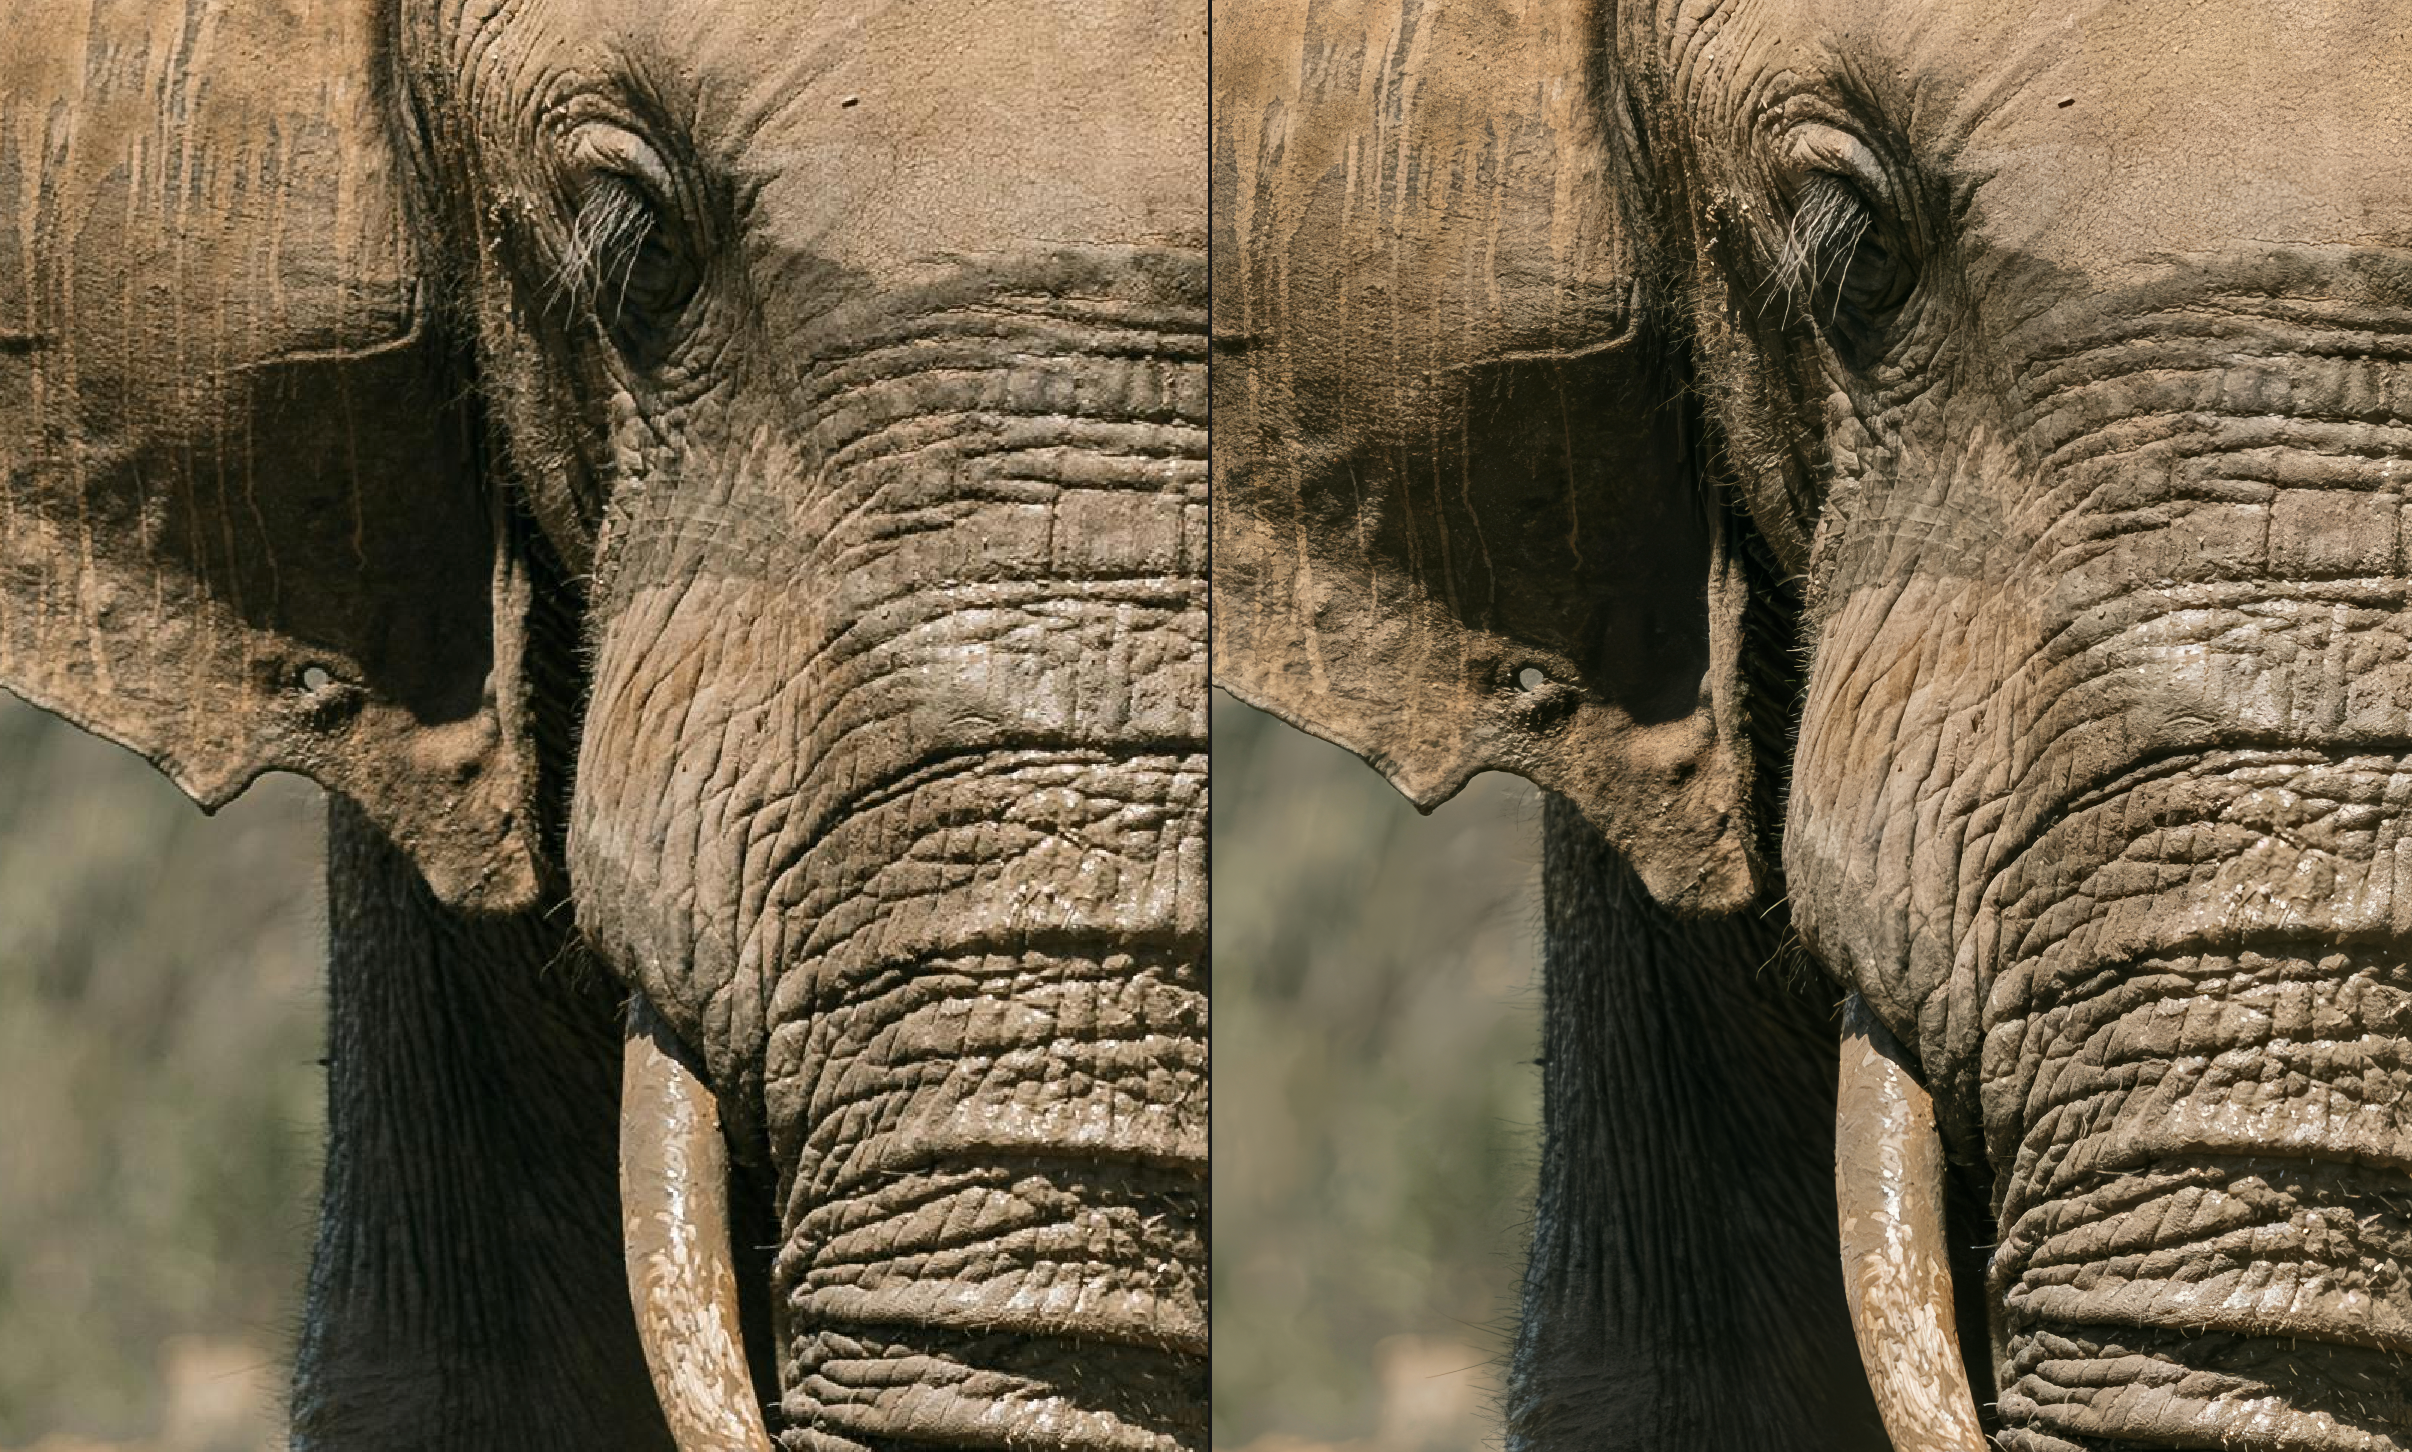
Standard v2 addresses more natural textures preserving them while maintaining sharpness.
To keep the look of grain or noise in the image, tune down the Denoise and Fix Compression sliders for more natural results.
Low resolution files are commonly identified as having fewer pixels. This model works best with screenshots, images pulled from the web or images with 72 pixels per inch (ppi).
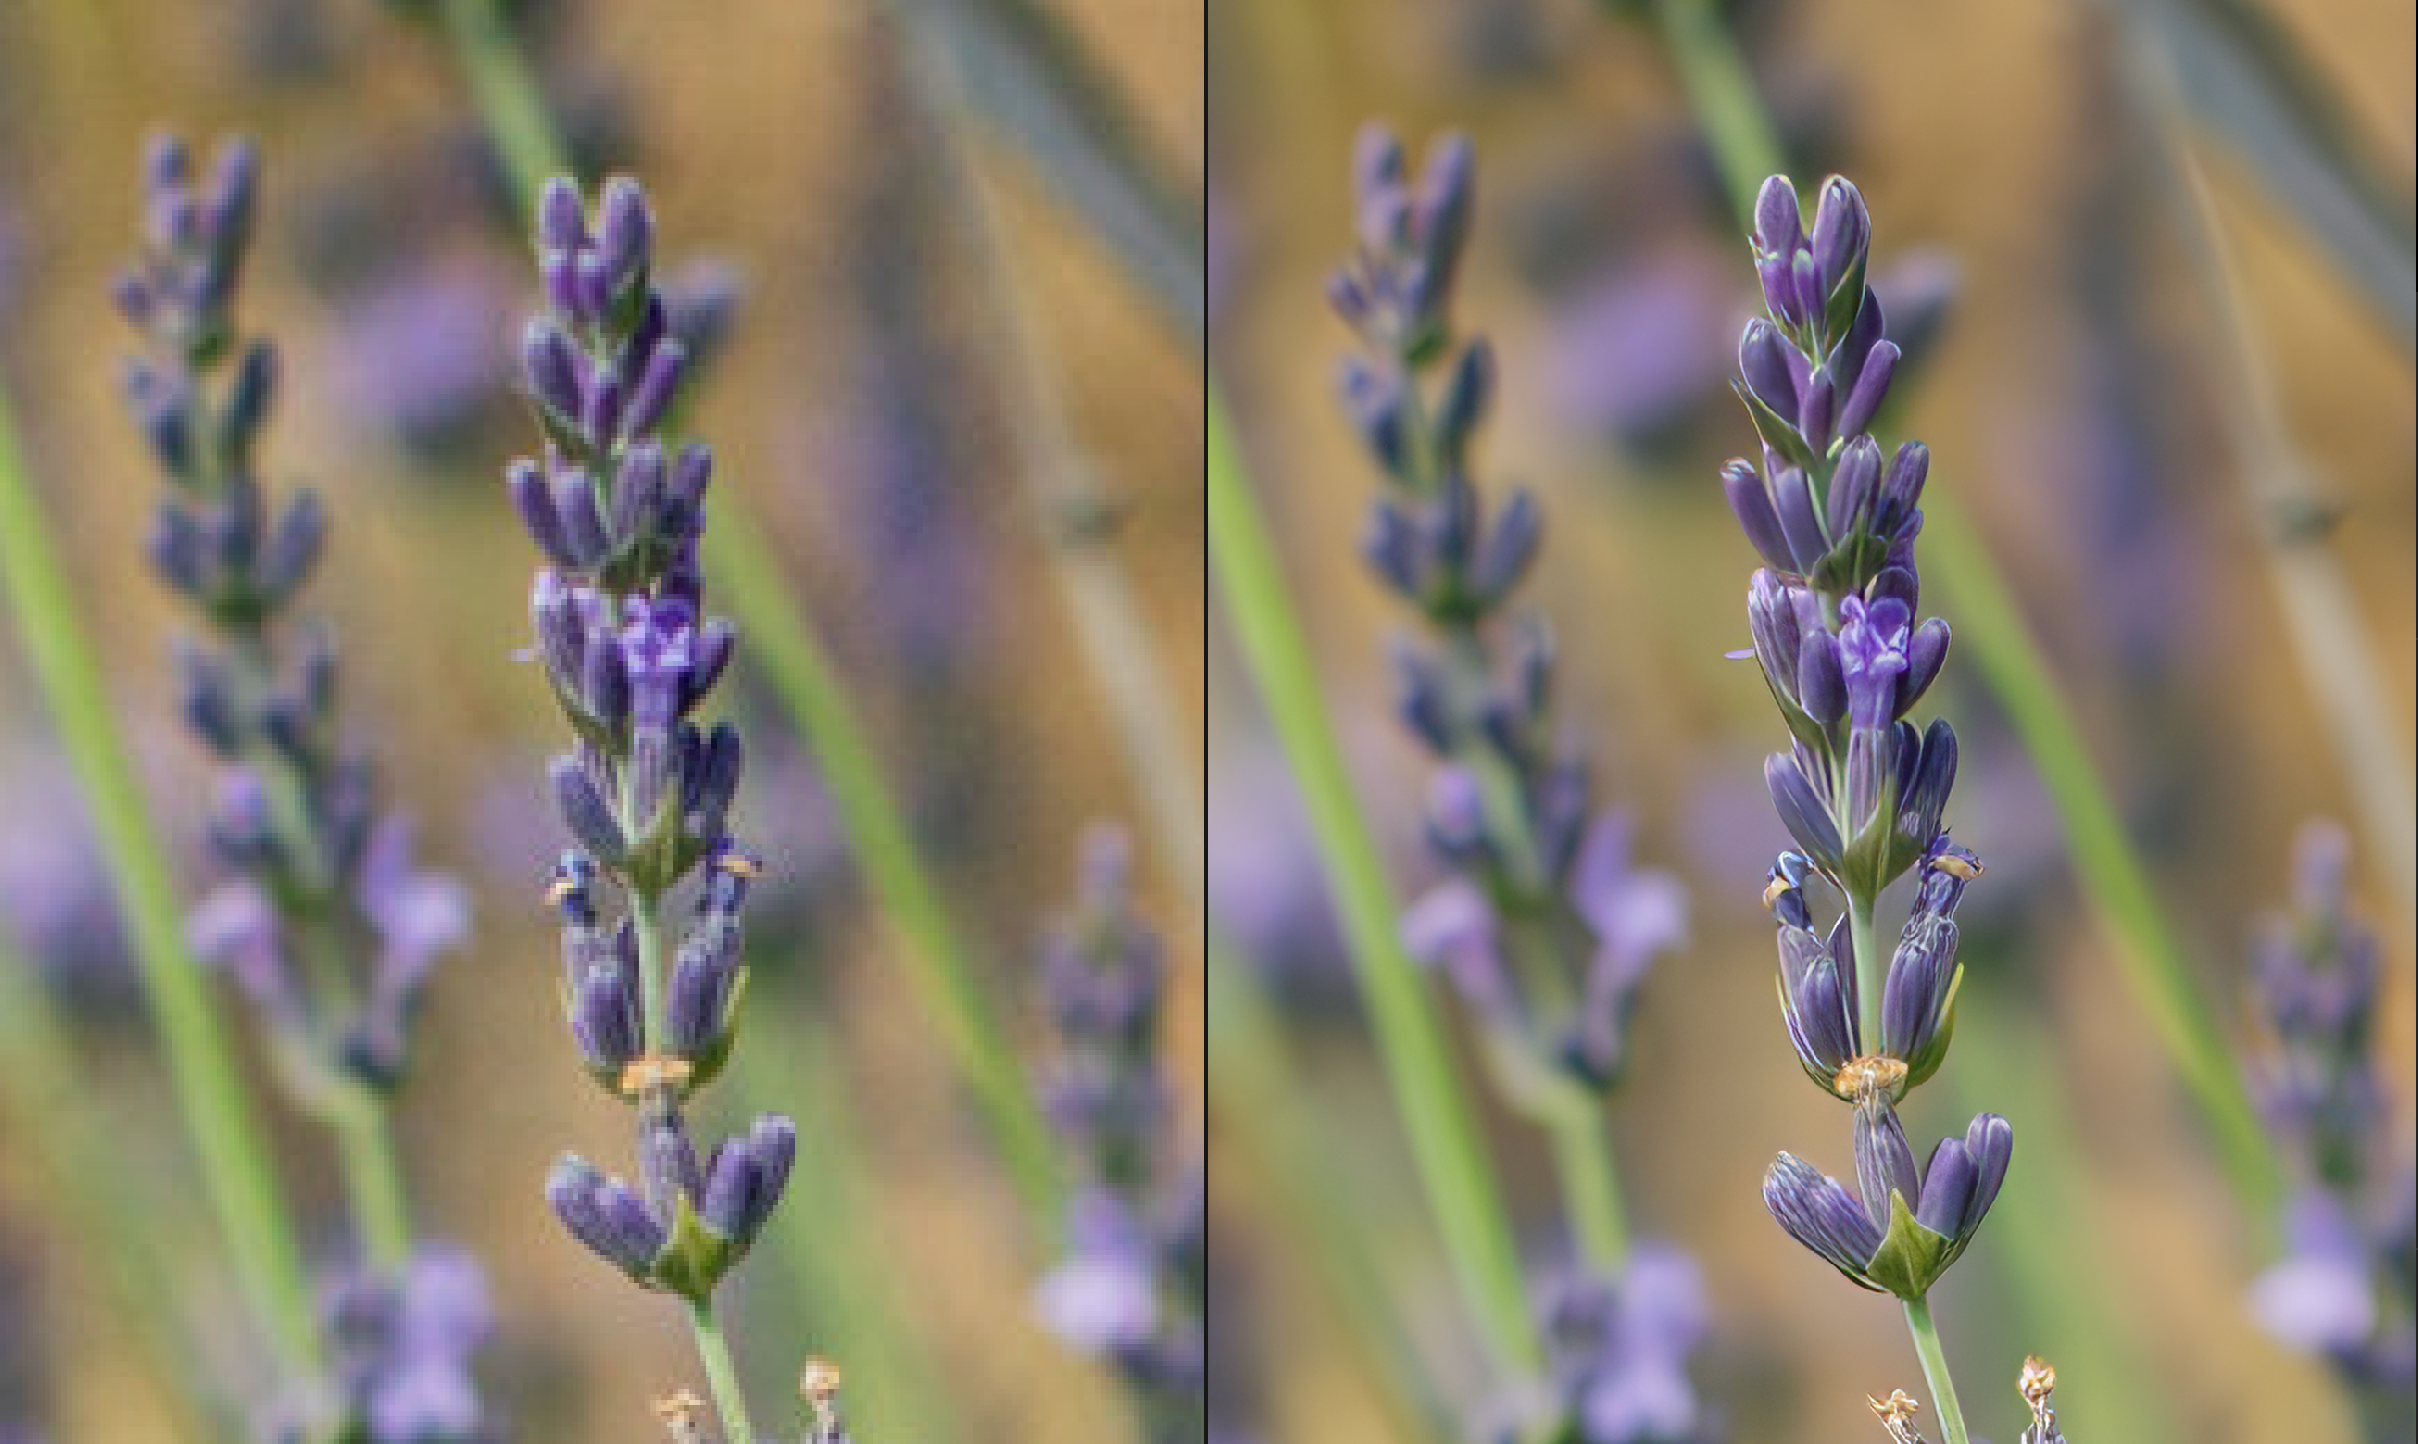
Low resolution v1 (Legacy Model as of v.7.1.0) v1 is trained to remove more blur by default.

Photo by Esther Huynh
Text & shapes enables more distinct patterns and shapes during upscaling with man-made objects, textures, and even written text and fonts.
This AI model is suitable for graphic design, typography, images with street signs, or text on architecture, automobiles, etc.
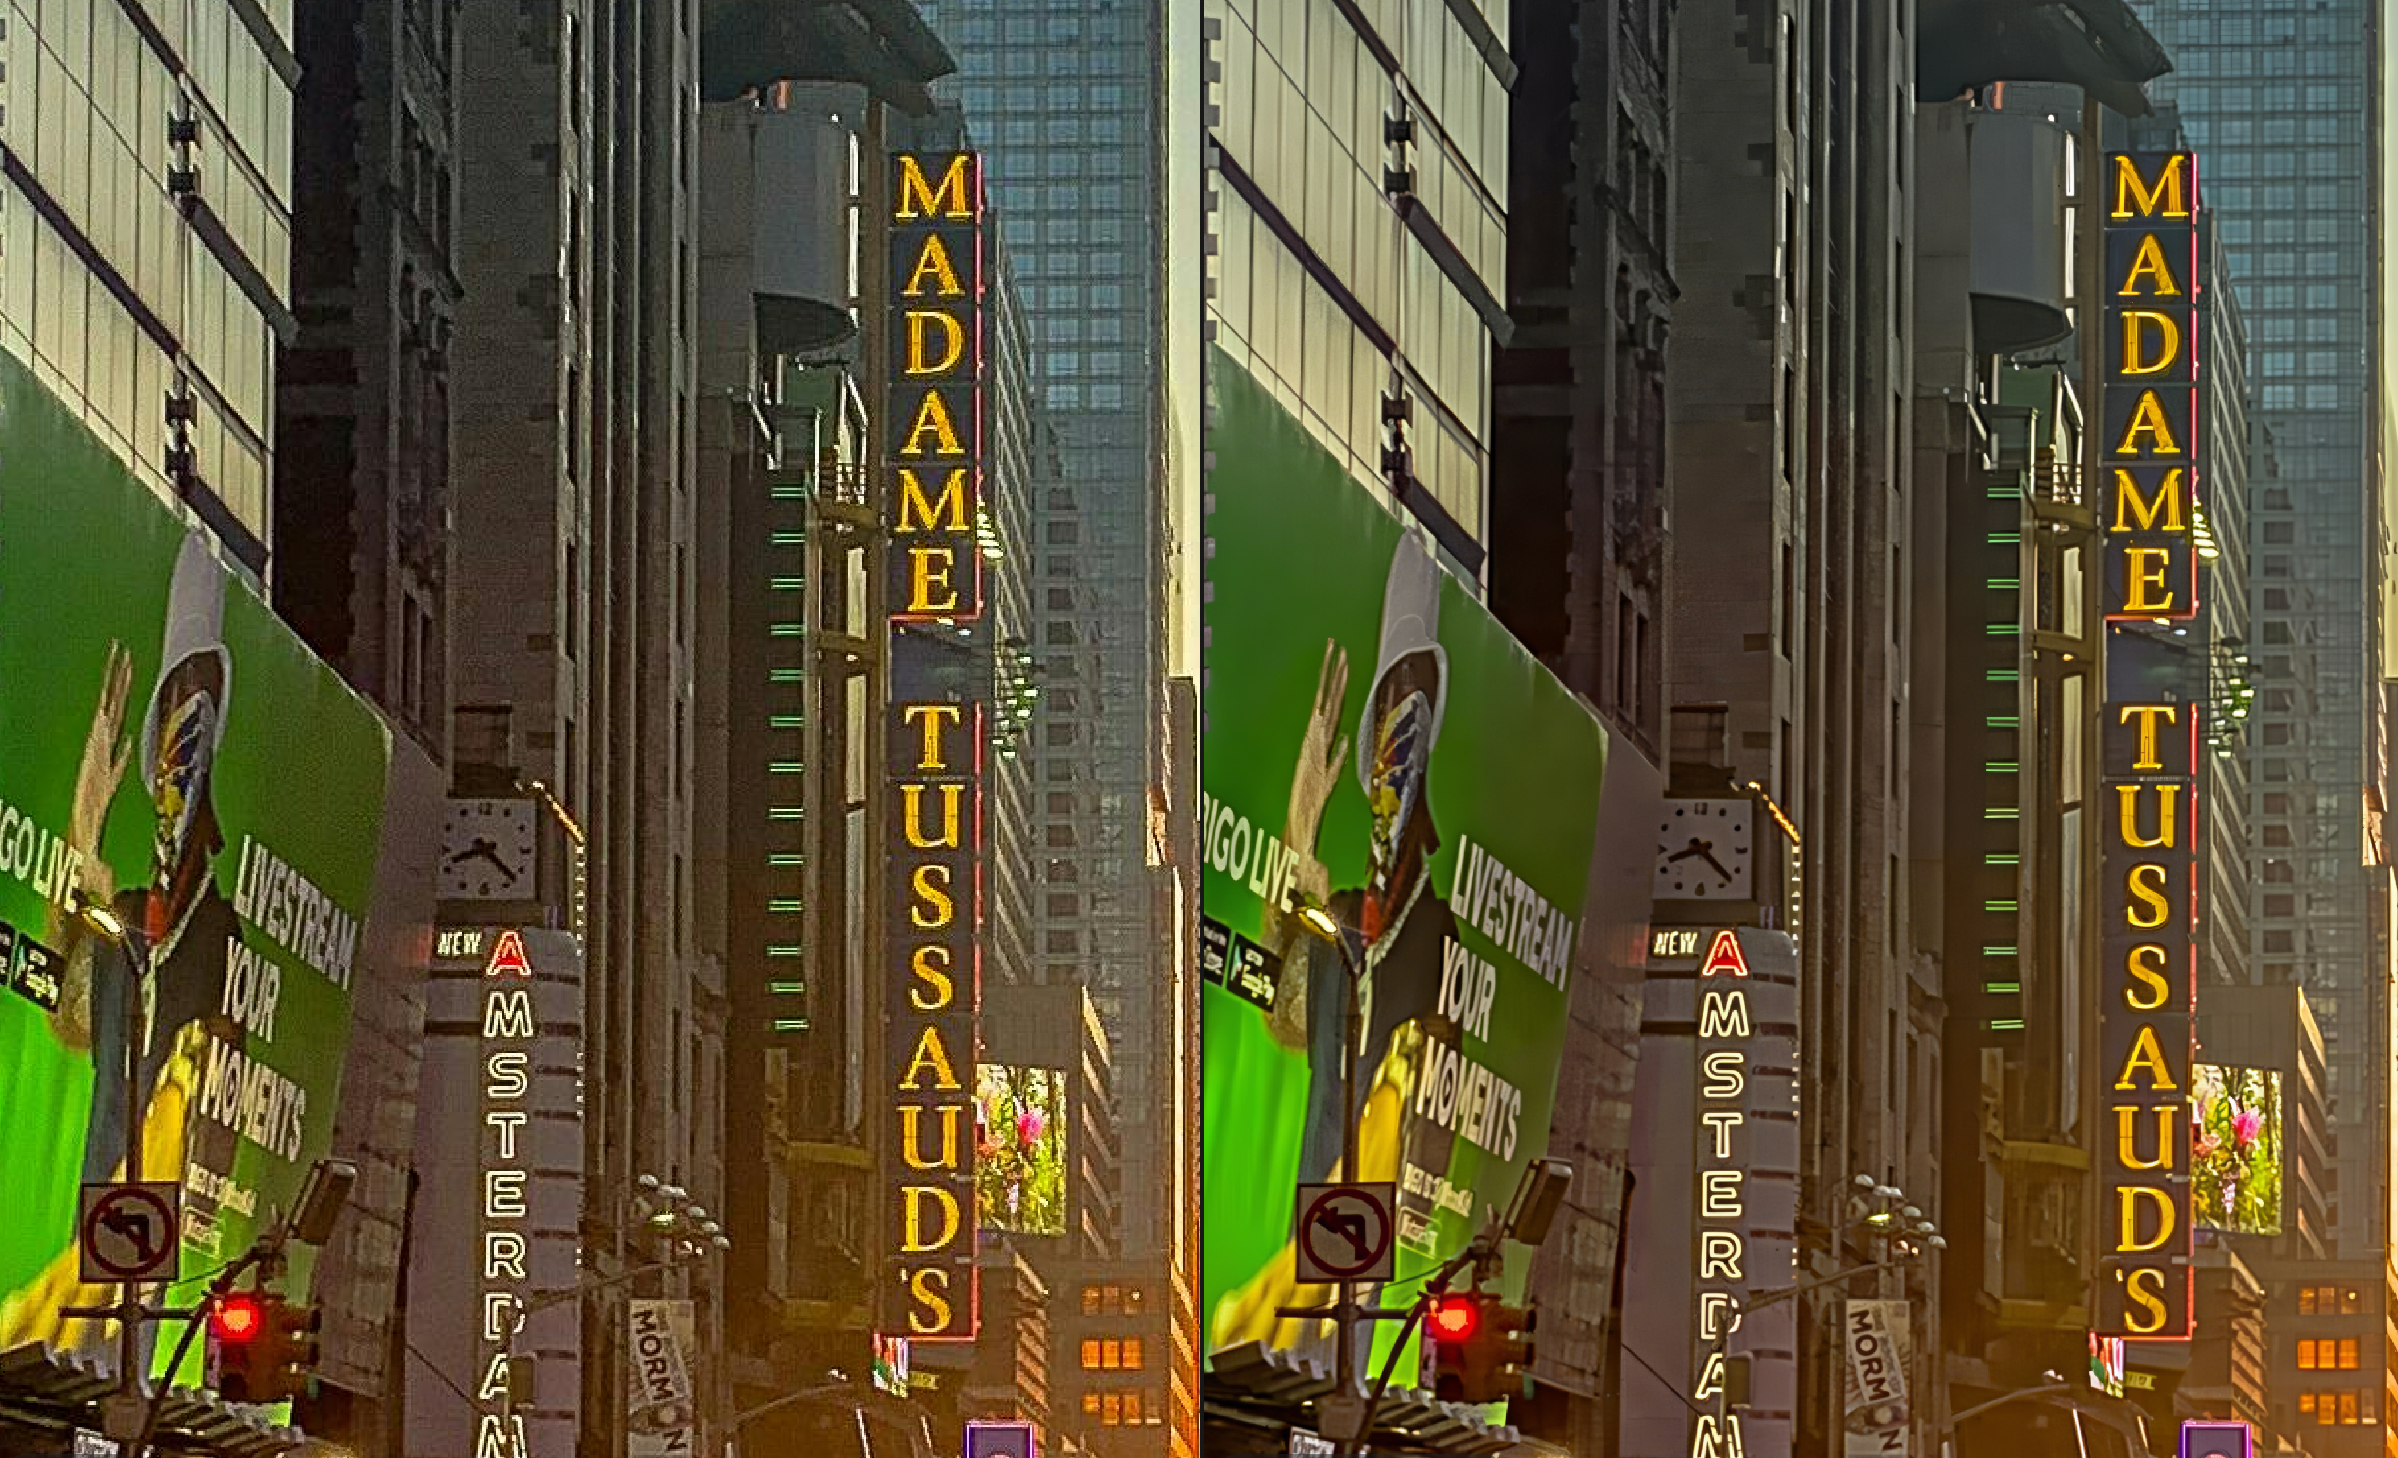
Photo courtesy of Fondo Antiguo de la Biblioteca de la Universidad de Sevilla
The Art/CG AI Model is best for artwork, drawings, illustrations, and computer generated graphics like Midjourney
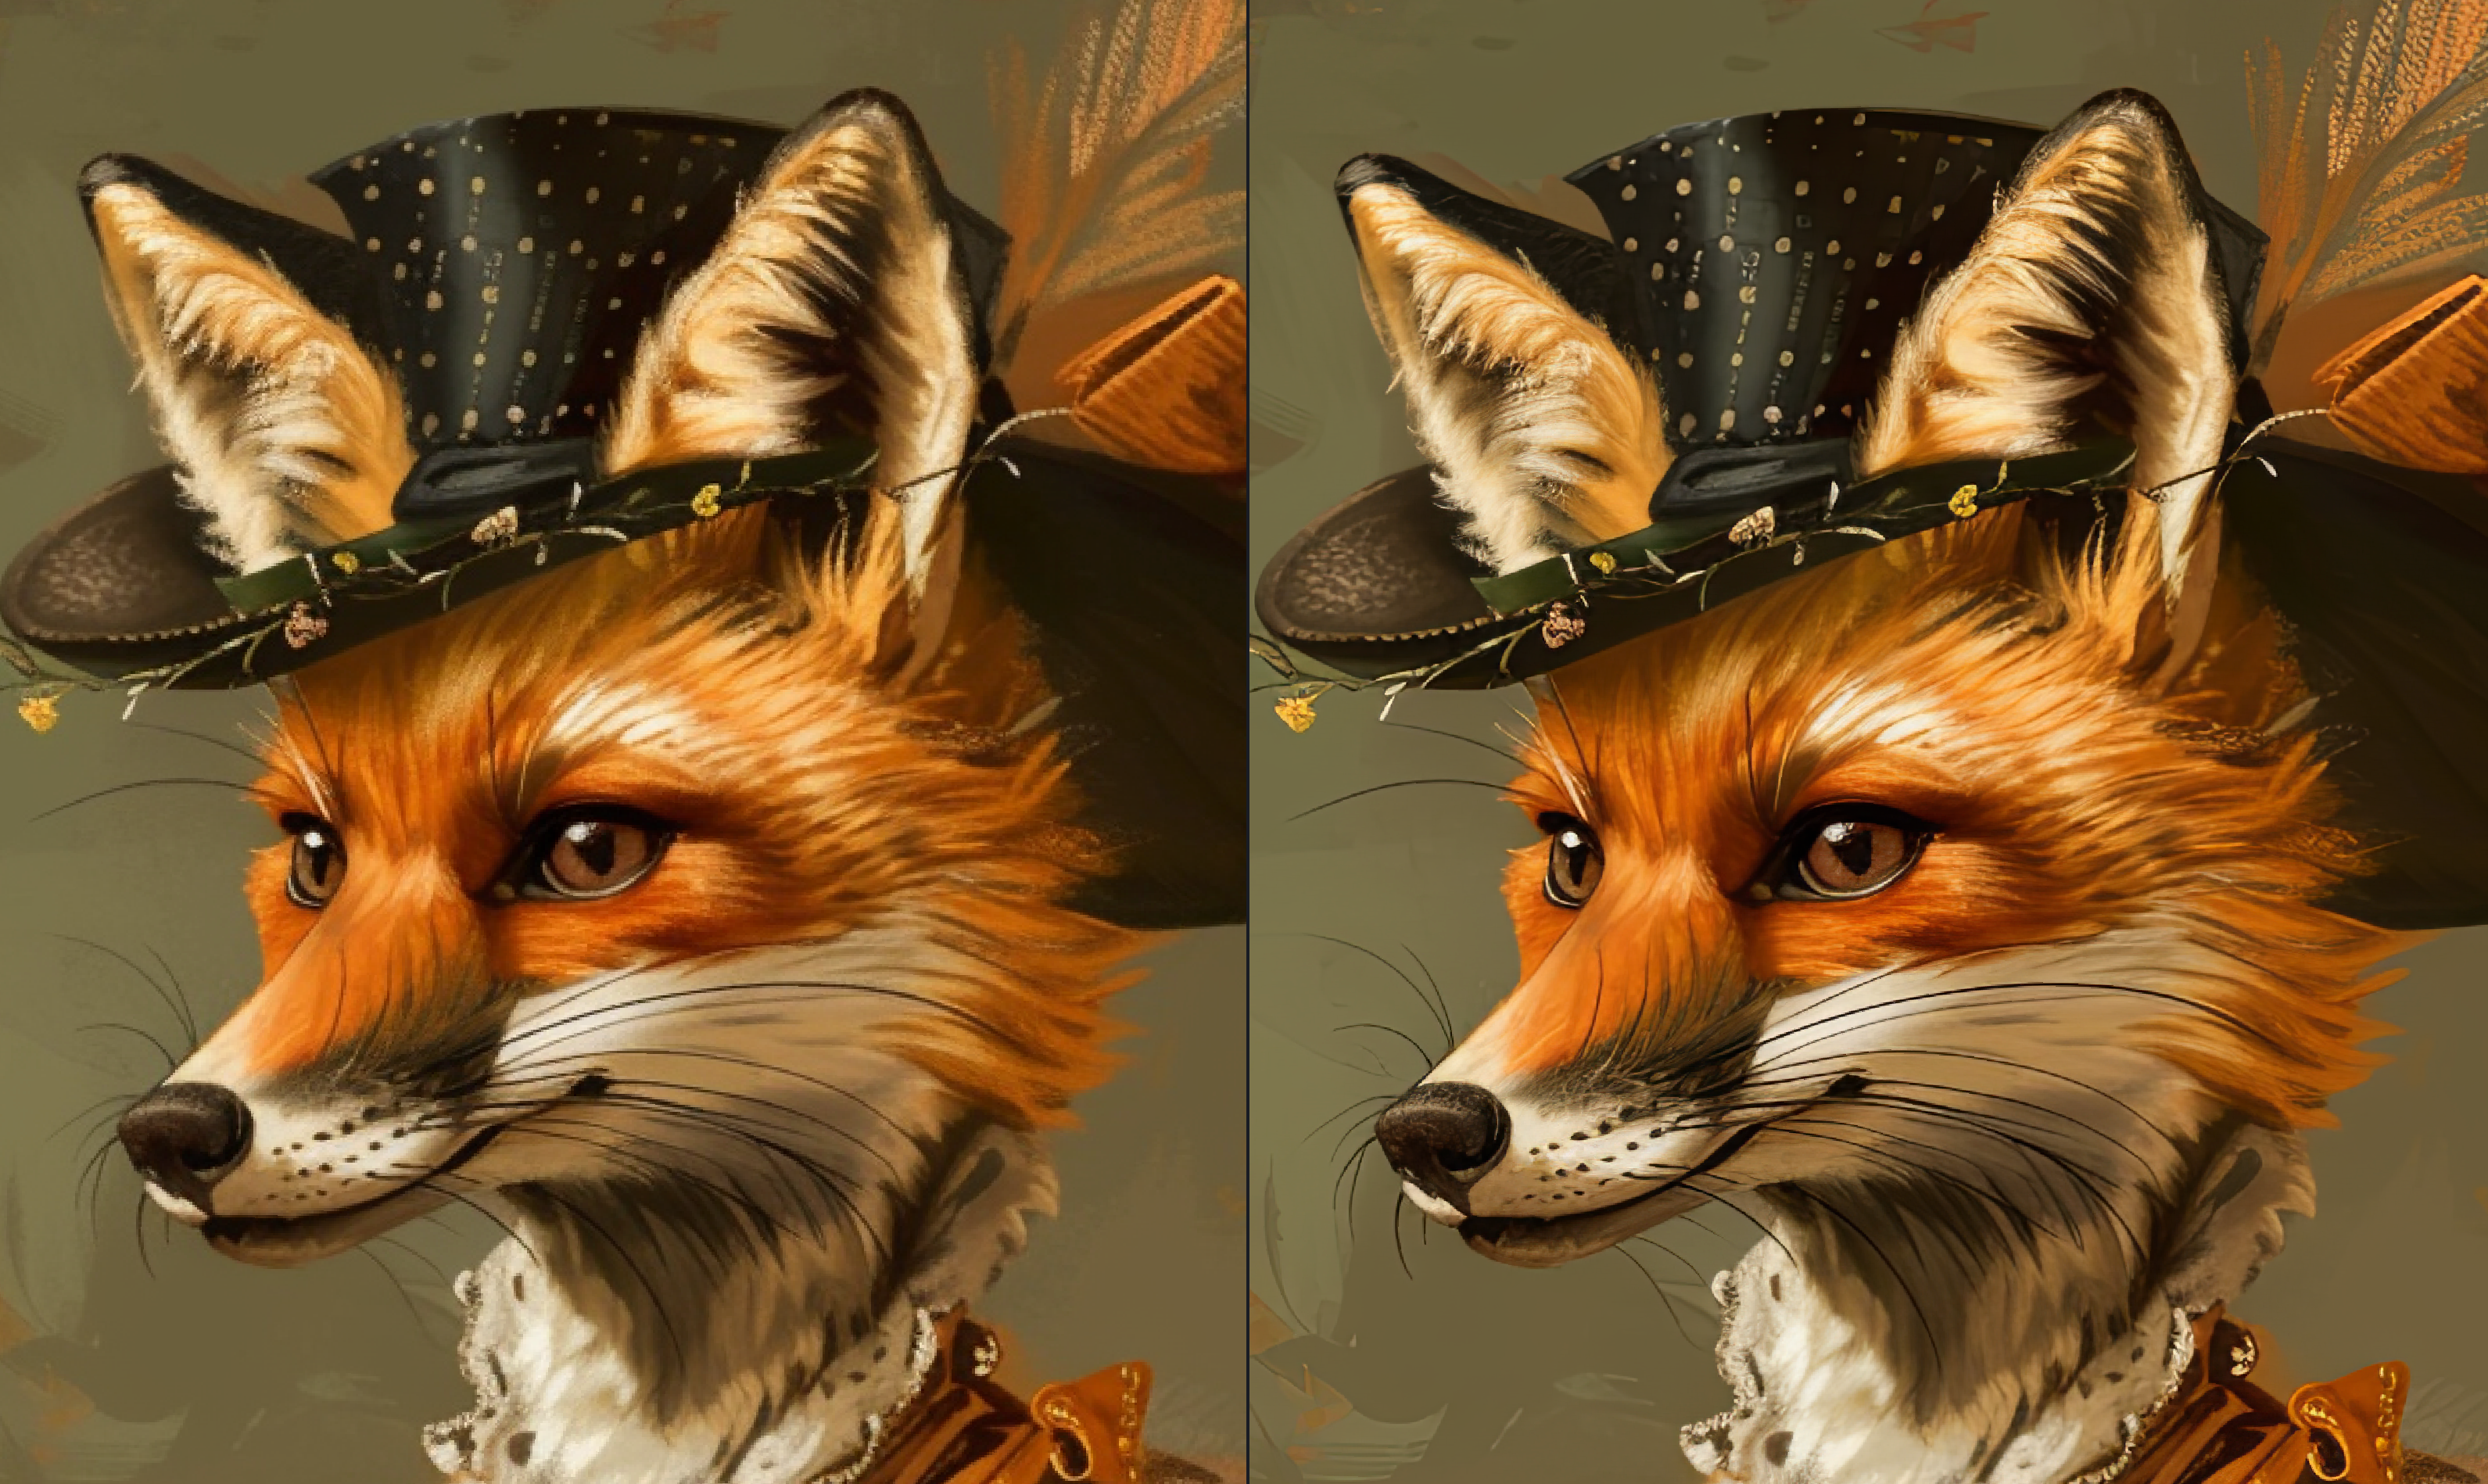
Midjourney Illustration created by legendary_fox_47504
The Lines AI Model emphasizes and heavily contrasts lines for architecture, cityscapes, and any image with thick lines.

The Very Compressed AI Model is best used for images with a lot of compression artifacts. Use this for images saved at a small size, scanned images or old digital images.
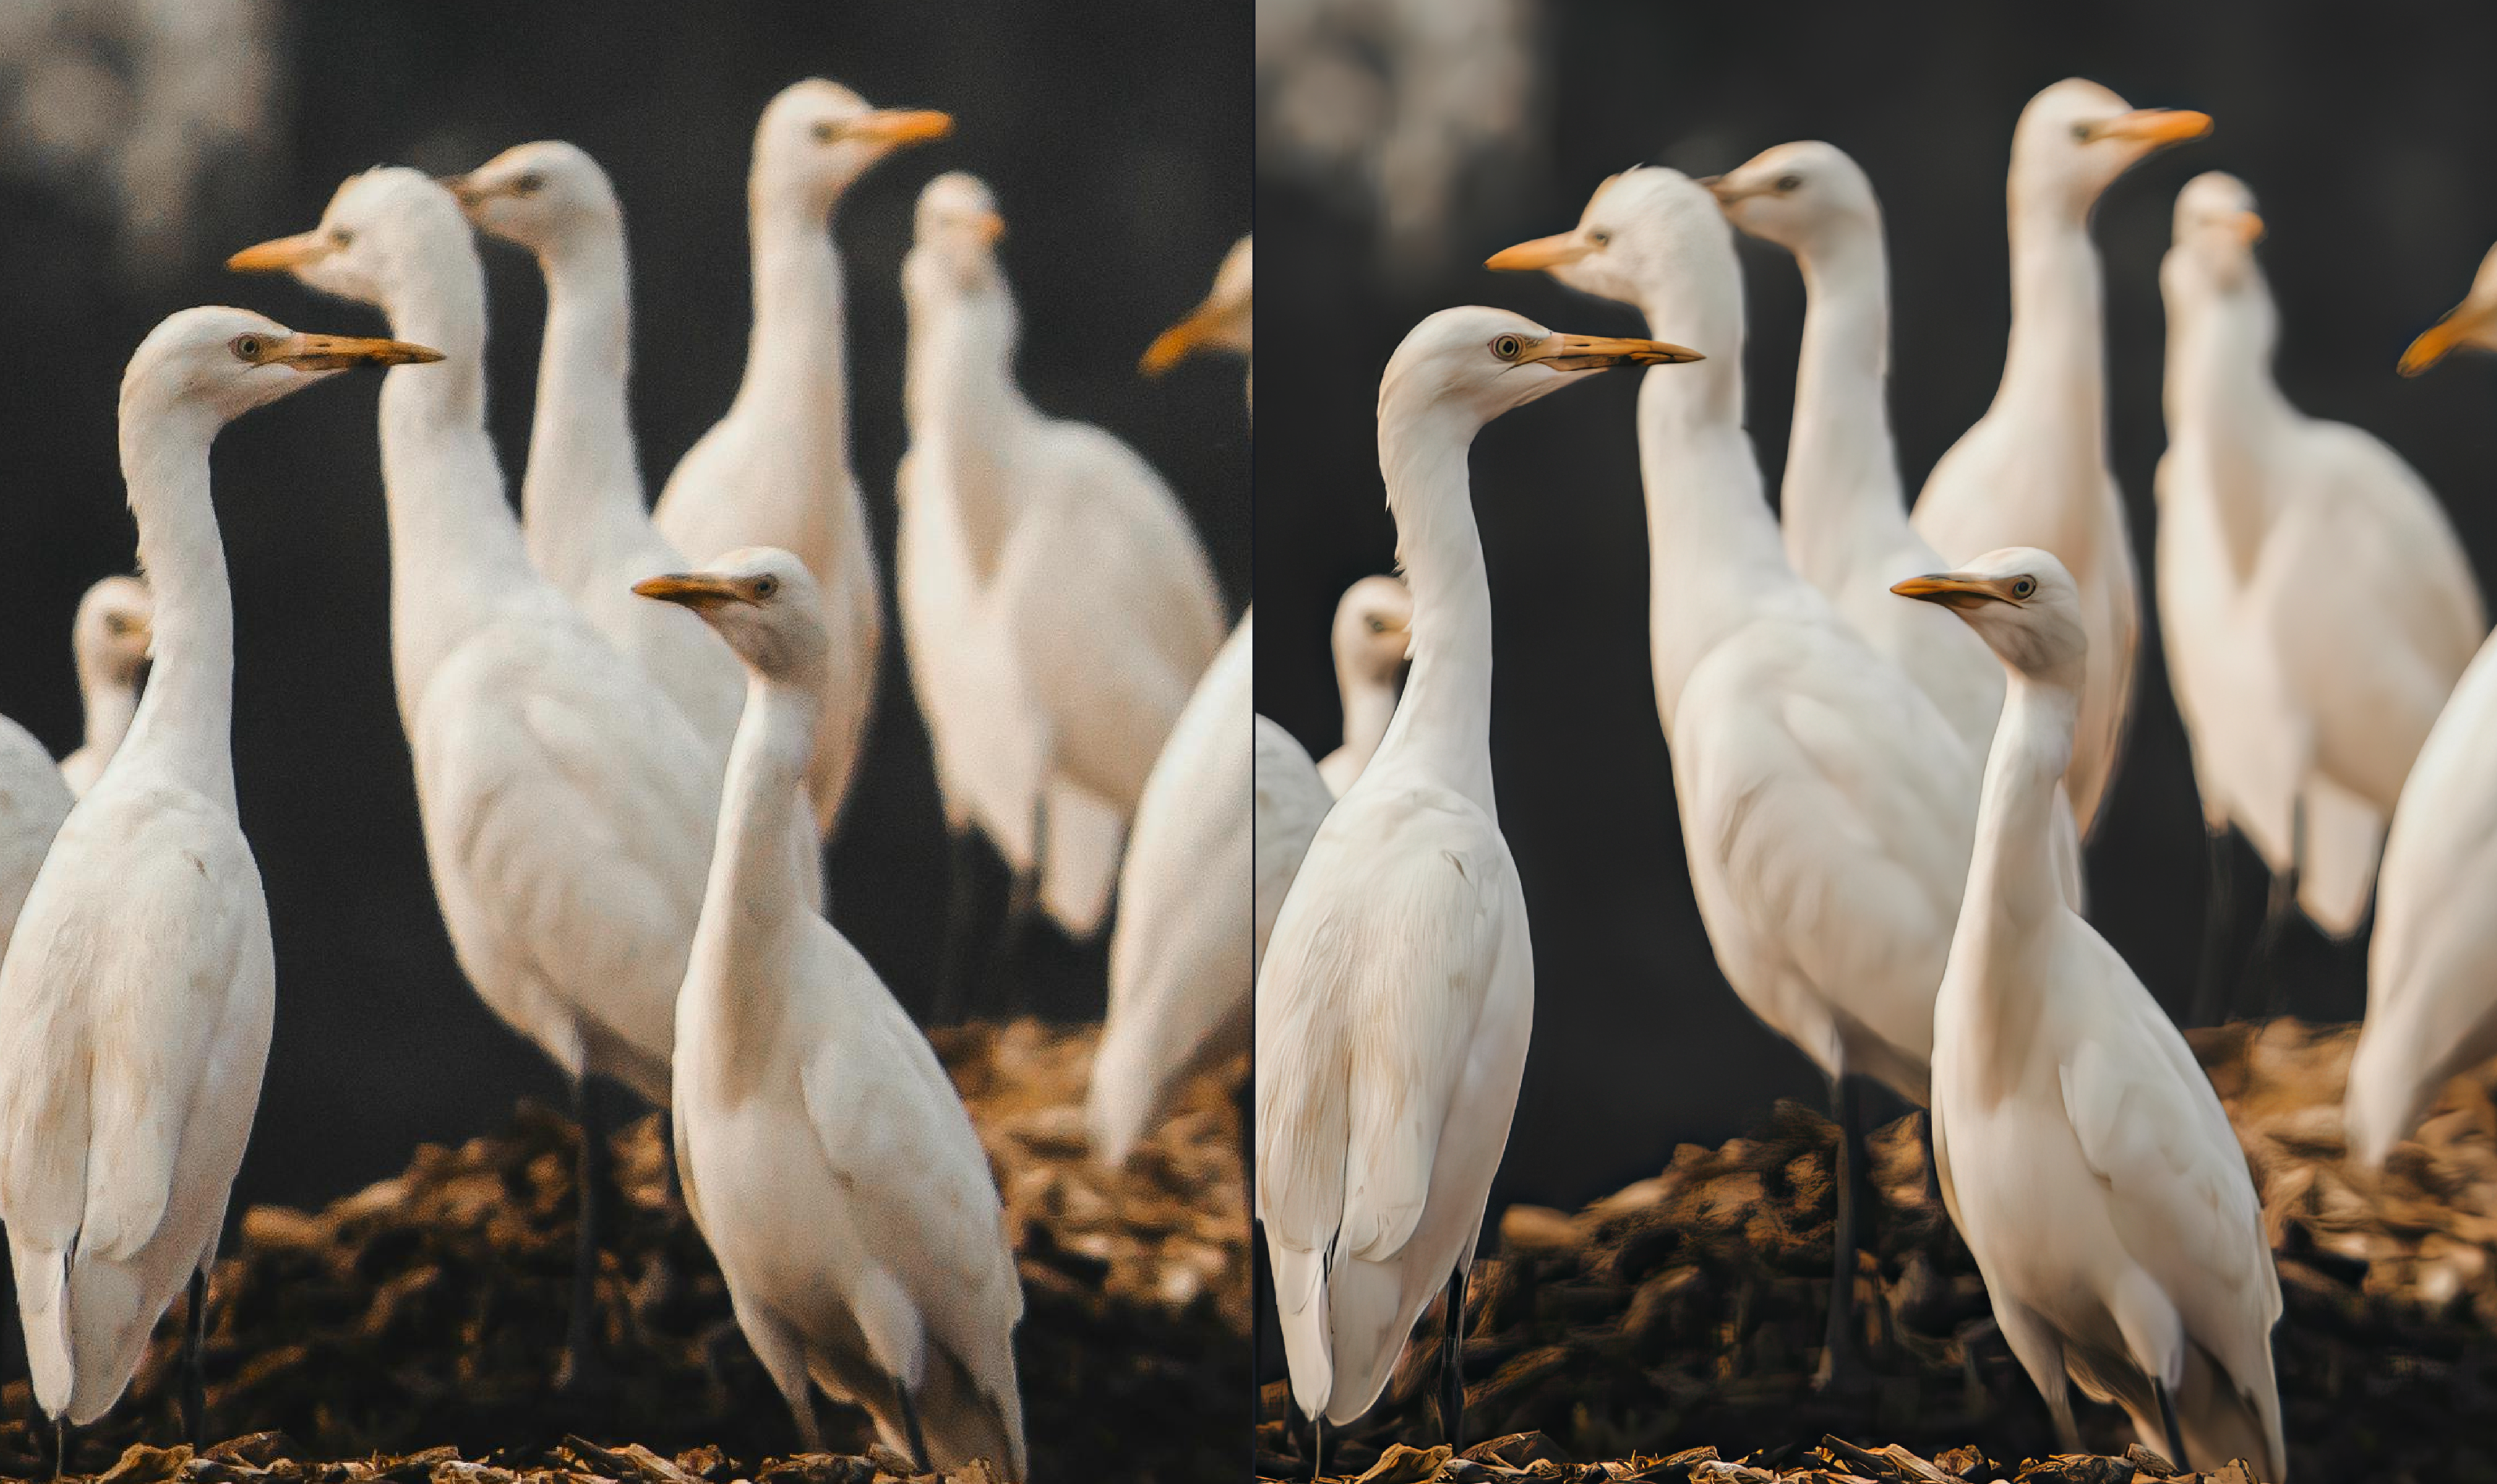
Photo by Rompalli Harish
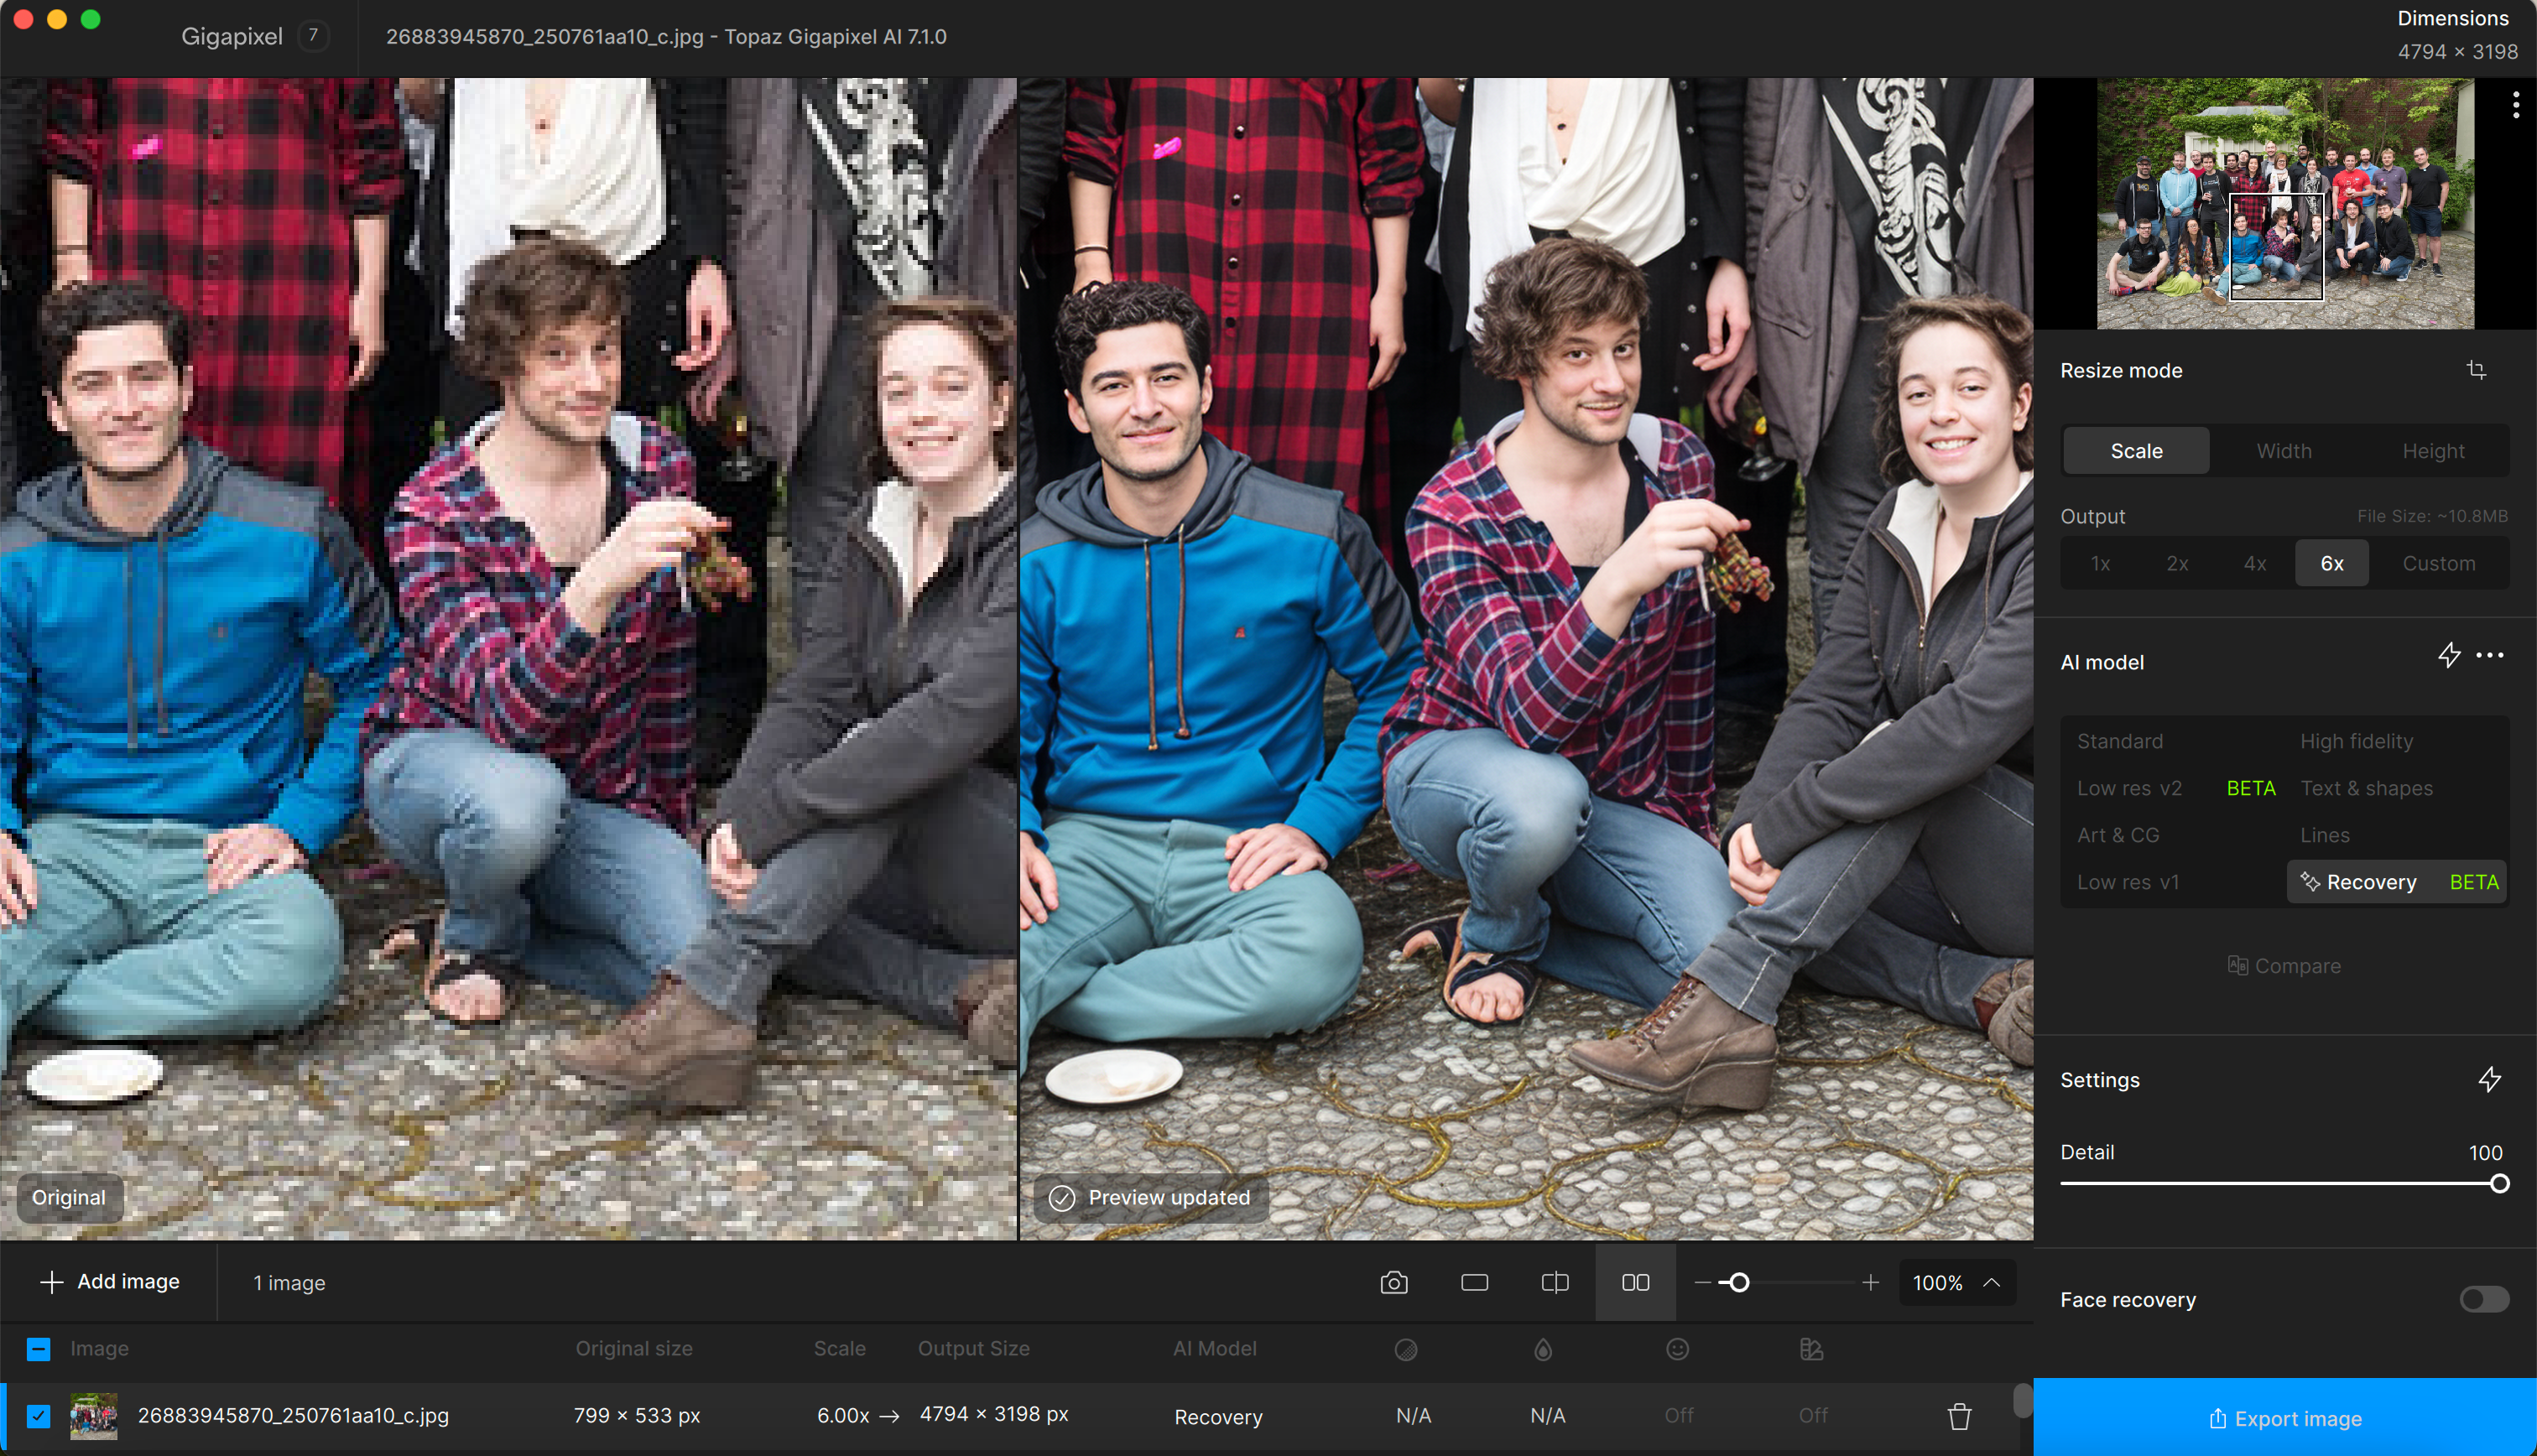
Recovery AI Model recognizes pixels and gives creative results. Designed with graphic designers, photographers, and web developers in mind, this model helps improve low resolution image quality from extremely small sized dimensions.
This Ai Model is currently in Beta version. There are a list of common conflicts and known issues that comes with attempting to use Recovery. Please review the Recovery FAQs before proceeding to run this AI model.
How to run Recovery
Import your image and select an upscale size, then click on Recovery.
For smaller images below 1000px, a 6x scale multiplier is recommended.

In the Settings section, click on a thumbnail to sample a preview of what the Ai model can output. Move the cursor to the Preview section to find a white box showing the parameter of the area you want to sample. Click anywhere in the Preview to begin rendering.
A new pop up panel appears and begins rendering your sample.
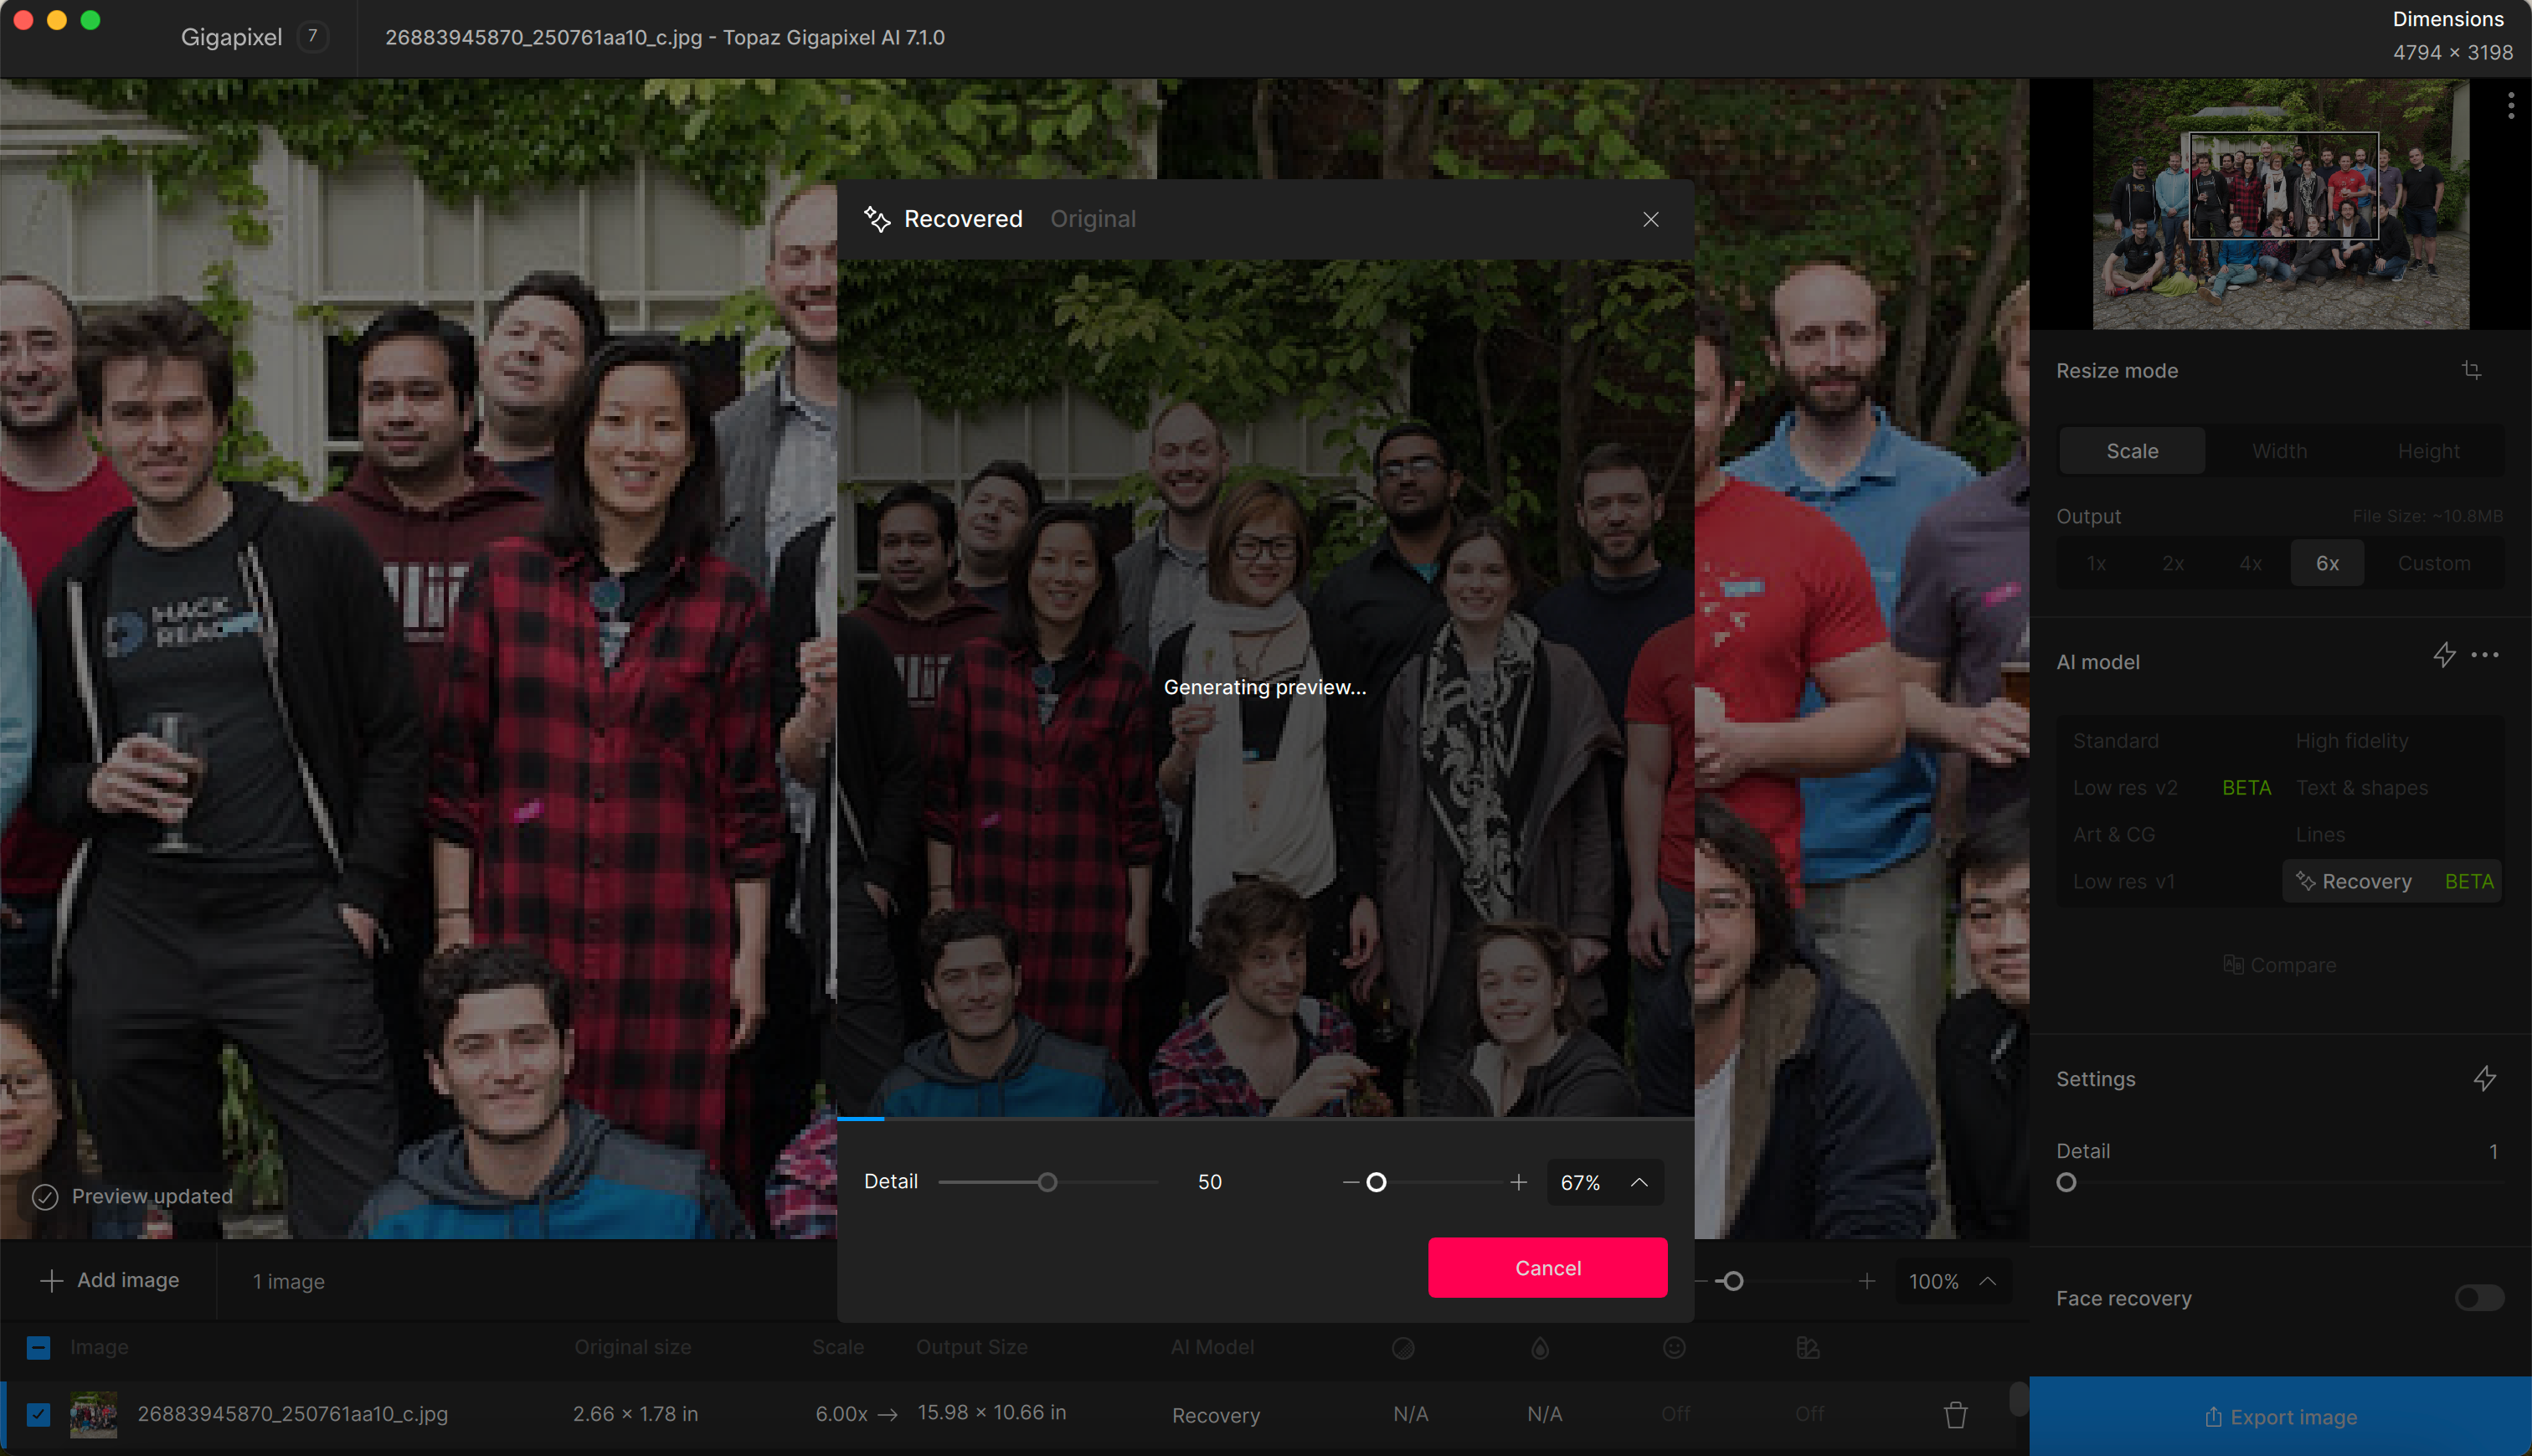
After the sample rendering is complete, use the Detail slider bar to adjust the generative results to be more creative.
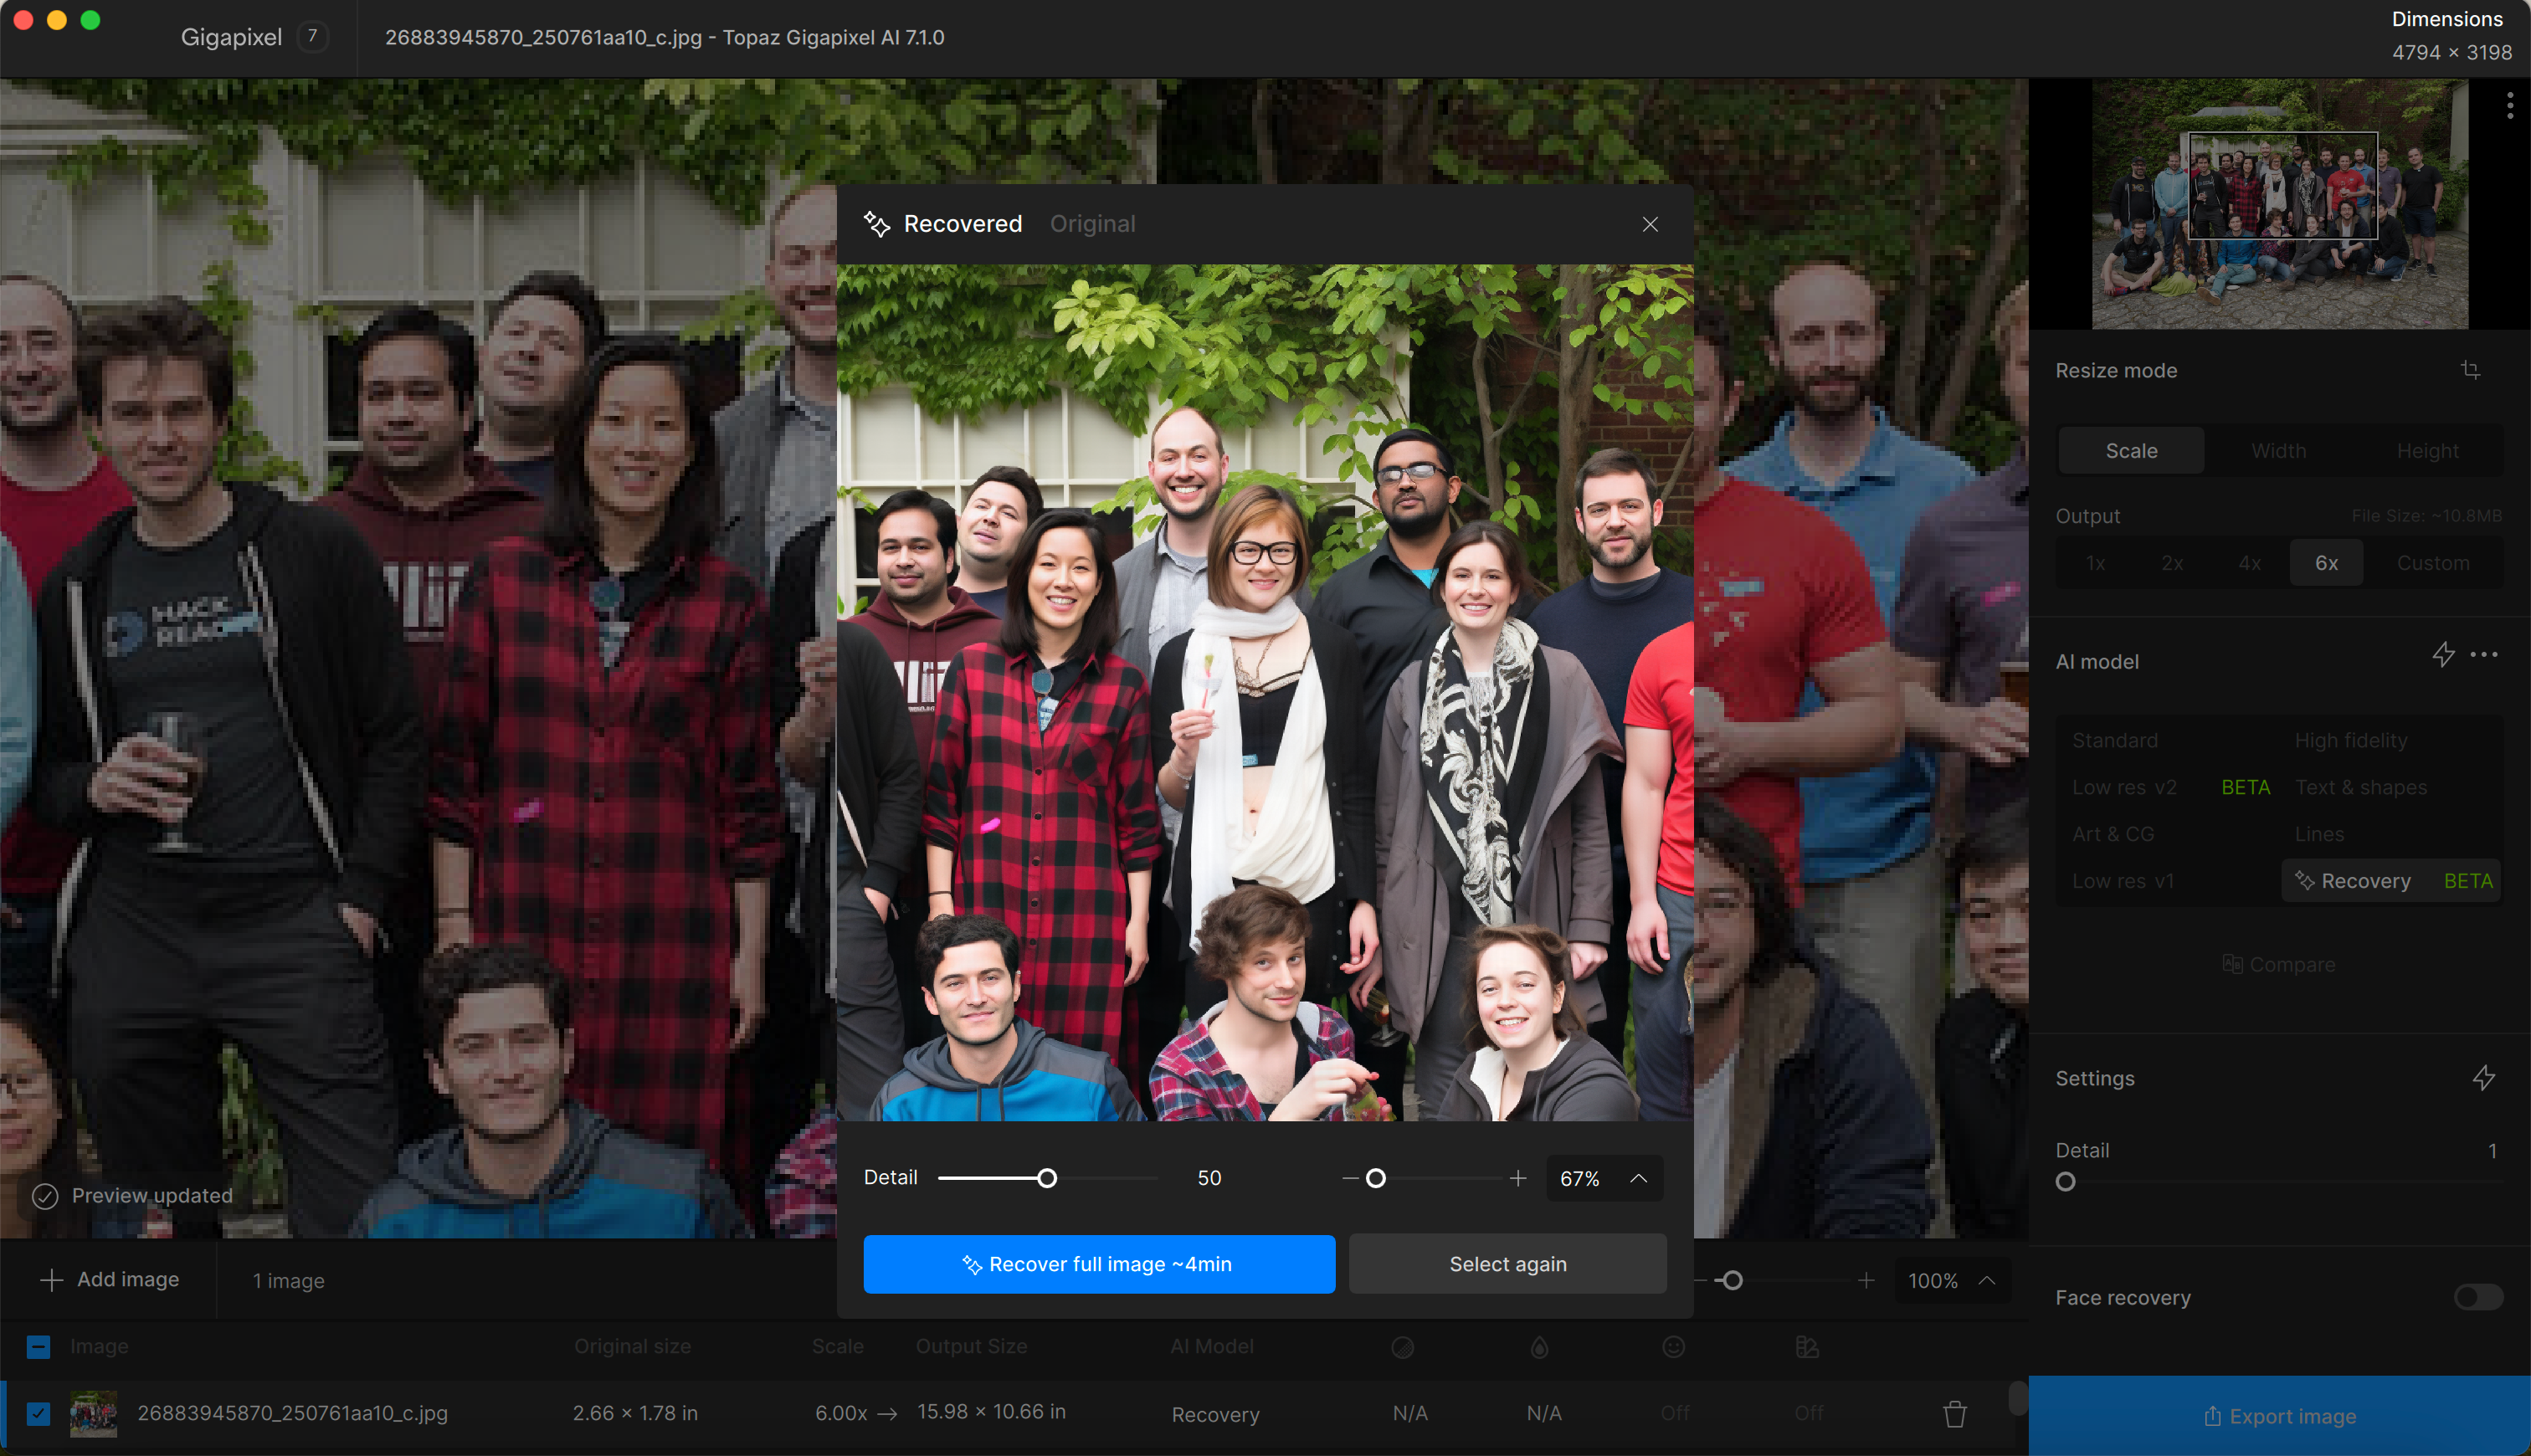
Zoom into the Preview sample to further inspect the details of the results or select the dropdown area to choose a fixed Zoom option
To view the original input file, select "Original" at the top of the Preview pop up box. Flip back to your enhanced sample by clicking "Recovered".

Click Select Again to adjust and change your preview sample area.
If you are satisfied with the rendering, click Recover Full Image to begin the full processing.
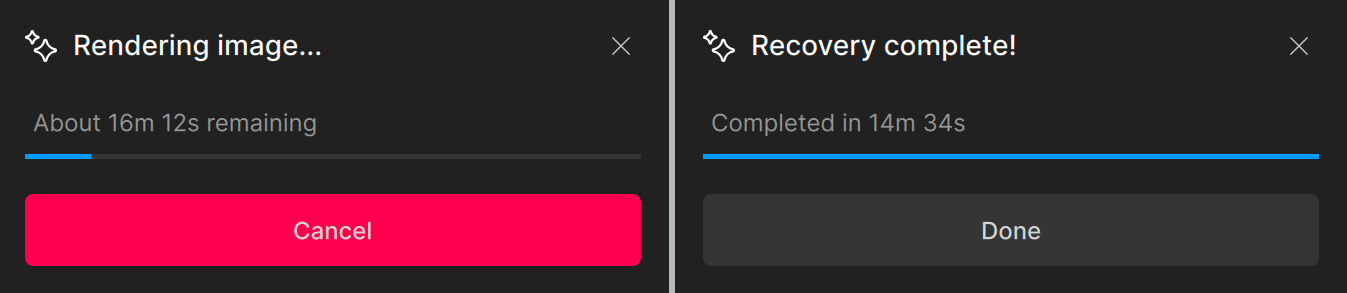
Once processing is completed, use the Detail slider to fine tune the details. You do not need to resample and preview the image again. Running Recover Full Image multiple times on the same image generates varied results every time.
Check out Recovery FAQs for related troubleshooting information
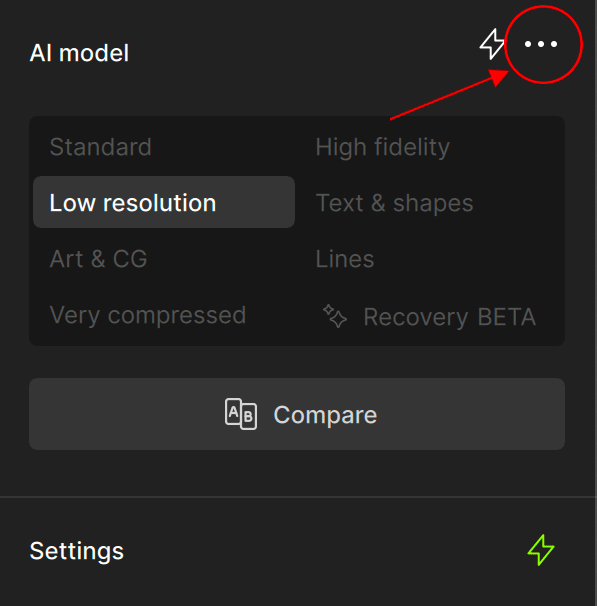
Legacy Models
Gigapixel's Generation 1 AI Models pulled from previous generations are considered Legacy Models.
To find Legacy Models in the AI Models section:
Select the three dots next to the Auto Symbol > Show Legacy Models
Compare Tool
Utilize the Compare Tool to review different AI models at a glance.
Select the Compare button below the Ai Model names.
A small pop up panel prompts you to select up to four different AI models to compare. You do not need to select four models every time. 2 or 3 models still make Comparison View accessible. Click Compare.
A quad view of four windows shows the AI models selected. A blue outline highlights the active quadrant. Once you've made settings, click Apply Model.
You can also utilize the Capture feature and View Original icons while in the Compare Tool panel.

AUTO Mode
Auto mode decides and suggests settings to enhance your photo by selecting an AI Model and/or Setting enhancements for you.
To select this mode, click on the thunderbolt symbol.
Auto Mode’s settings appear highlighted in a lime green color shown in the Filters panel and in the file list next to each image.
The Lime green dots indicate which setting has Auto applied.
Turn off AUTO by clicking on the Thunderbolt symbol or clicking anywhere on the AI Model or Settings to change the enhancement values. The thunderbolt appears gray when turned off.
Settings
To customize your settings, select the dropdown arrow.
- Denoise - slightly suppresses noise
- Sharpens - minimizes motion or lens blur
- Fix Compression - reduces compression artifacts to improve details. This setting is enabled only when “Standard” and “High Fidelity” models are used. (Note: Fix Compression values are not visible in the list)
These options have a sliding degree of intensity. You can input a custom value from a scale of 1 to 100.
Additional Settings
Apply color bleed reduction or face recovery to your images as an additional step.
How to Use Face Recovery
- Face Recovery - detects and recover human faces. It works best on blurry, low resolution, or artifacted faces, but may remove detail from high-quality faces.
- Face Selection - detects high and low confidence faces to enhance
- Face Recovery Strength - drag the slider to control how sharp the recovered faces are relative to the background.
- Gamma Correction - processes the image in a higher gamma color space. For images with highly saturated colors, this can enhance AI outputs with more details and less color bleed.