Preferences
Preferences
Topaz Video AI allows you to customize various settings that can improve performance and the overall user experience.
To access this menu:
- macOS - Select Topaz Video AI > Preferences
- Windows - Select File > Preferences
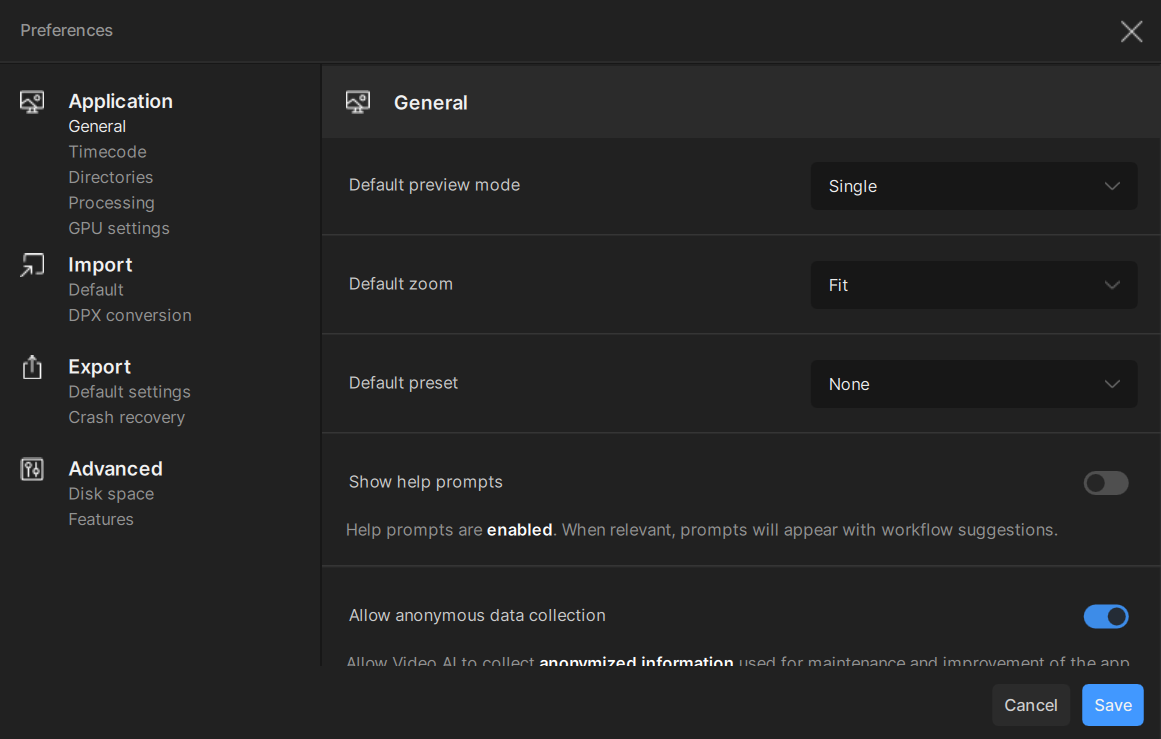
Preferences are categorized into 4 main sections:
- Application
- Import
- Export
- Advanced
Application
This category holds everything you need to adjust your preferences for the front end of the Topaz Video AI software. This section controls the preview experience, processing speed display, default preset, and the collection of anonymous data.
The Application Category is broken down into 5 subcategories:
- General
- Timecode
- Directories
- Processing
- GPU Settings
General
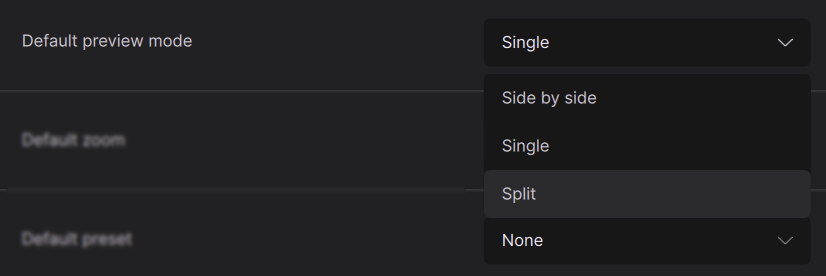
Default Preview Mode
Select the default view mode when initiating a preview task.
- Single will display the entire processed clip in the preview area, and will show the unprocessed input when holding the left mouse button.
- Side by Side will display the unprocessed clip in the left half of the preview area and the processed clip in the right half of the preview area.
- Split will display both the unprocessed and processed clips in the preview area and split them with a vertical bar that can be dragged left to display more of the processed video and dragged right to display more of the unprocessed video.
Default Zoom
Rate Control Mode
Select the default Control mode of either “Dynamic” or “Constant” and the corresponding quality level/bitrate.
Please note, larger bitrate values will result in a larger file size of the exported video file.
Default Audio Settings
By default Audio is set to “Copy”. You have a few choices when dealing with audio from your video. Choose between copy, convert, or none.
We recommend leaving the audio mode set to the default selection of "copy" for most cases. Use "convert" when necessary for a certain output format. Selecting "none" will remove the audio stream.
If it is necessary to choose "convert" when "copy" is selected, the app will notify you.
Default Container
Choose the default file format for exported video files.
Export Folder
This is the folder where all exported files will be saved. The input folder (.) is the default location for exported files.
To alter the selection, click on the folder icon.
Crash Recovery
Enable externally Previewable Exports
When enabled, you can preview the completed frames of the output while it is being processed via an external player opening the temporary file. Note that this will require 2x the storage space as a previewable temporary file is being generated.
Clean-Up Preview Headers
This clears the temporary previewable file once the rendering process is completed.
Use Temporary Directory
This setting determines where the preview files are stored on your machine.
Advanced
This category gives you options to adjust your disk space and enable certain features that are a bit more experimental.
The Application Category is broken down into 2 subcategories:
- Disk Space
- Features
Disk Space
Critical Low Disk Space Threshold
Defaulted to 5 gigabytes. This decides the threshold from which a confirmation is needed for a preview or export when there is low disk space.
Features
Show Second Enhancement Feature
When enabled, this allows for two enhancement passes. Note that this would increase render time for the additional pass, however this is a great way to experiment with mixing multiple AI models at one time.
Enable Previous Model
When enabled, you can utilize previous versions of AI models. This is not recommended since these models are no longer supported.
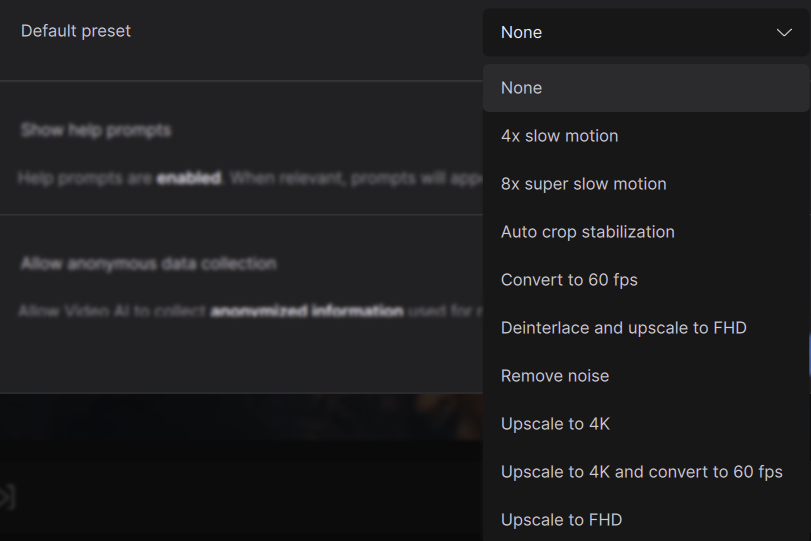
Default Preset
Set to “None” by default. You can decide to start every new session with a preset such as “Upscale to 4K”. Excluding “None”, there are 9 presets that you can make as your default.
Show Help Prompts
By default this setting is disabled. When enabled, relevant prompts will appear with workflow suggestions. Great for beginners.
Allow Anonymous Data Collection
Choose whether or not Topaz Video AI collects anonymous data for maintenance and application improvement.
Auto-Detect Proxy Settings
Enable when connecting to the model download server through a workplace/university proxy.
Start in A/B Comparison Mode
By default this is off so that you start in single view mode. You have the ability to start the app in A/B comparison mode by turning this feature on.
Timecode
Processing Speed Display
This represents the speed display order of a processing render/buffer.
Timecode Display Format
Choose between displaying the timecode or the frame number.
Altering the selection will require an app restart.
Directories
Resource Folder
This folder indicates where all AI model file are located.
Workspaces Folder
This setting controls the default location for preview files and project files (saved as ".tvai")
Processing
AI Processor
Determine which computer hardware is used to process, preview, and export tasks.
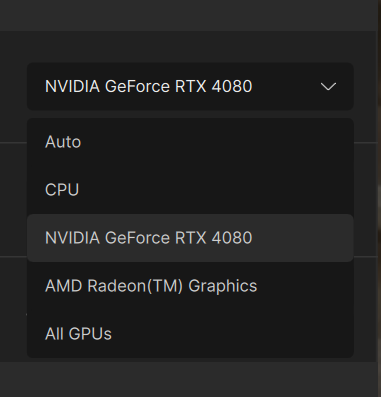
The options displayed in the dropdown may differ based on your computer. Note: Apple Silicon processors will not have this option available, and will always use a combination of the device's CPU, GPU, and Neural Engine.
Max Processes
Select the number of tasks to run in parallel.
- The maximum number of tasks is based on the hardware specifications of your system and will be limited in the dropdown to avoid system instability.
Max Memory %
Specify the amount of system memory to allocate.
- High resolution videos require a large amount of video memory and will benefit from a higher maximum memory usage limit. However, it's also possible to exceed machine resources and cause errors, which will require lowering the slider.
- Increasing max memory usage may impact the performance of other running applications.
GPU Settings
Processing Optimization (Video AI Pro)
Set at “Single Video” at default. For those with multiple GPUs, this gives the additional option to run “Multiple Videos” during export processing.
Import
This category strictly focuses on how files are being imported into the application.
The Application Category is broken down into 2 subcategories:
- Default
- DPX
Default
Default Import File Type
Default to video import. You can choose to default video or image sequences.
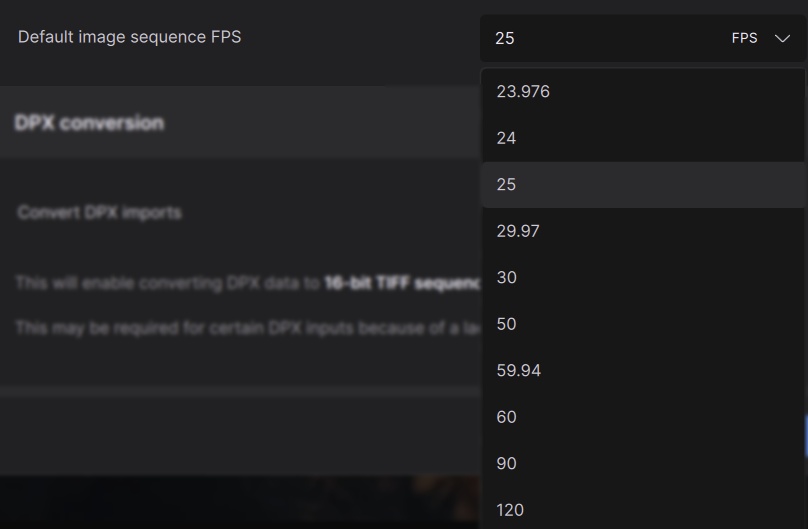
Default Image Sequence FPS
The default of 25 frames per second is set for image sequences. You can choose from a multitude of common frames rates.
DPX Conversion
Convert DPX Imports
DPX frames are defaulted to convert to 16-bit TIFF sequences. Video AI cannot directly process some high bit-depth DPX data, so this may be required for certain DPX inputs.
Export
Adjust the output preferences to control the default encoder / container, audio setting, and video export preview experience.
The Application Category is broken down into 2 subcategories:
- Default Settings
- Crash Recovery
Default Settings
Default Video Settings
Select the default video Codec and corresponding Profile.
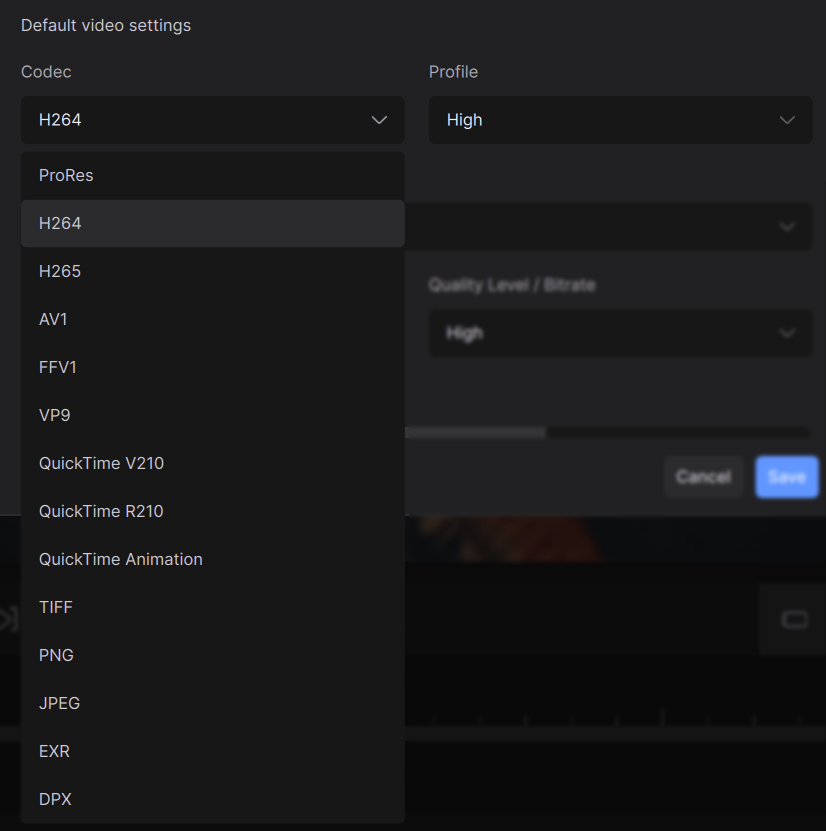
Please note, the following settings (within the red box) will change and adapt to the codec of your choosing.
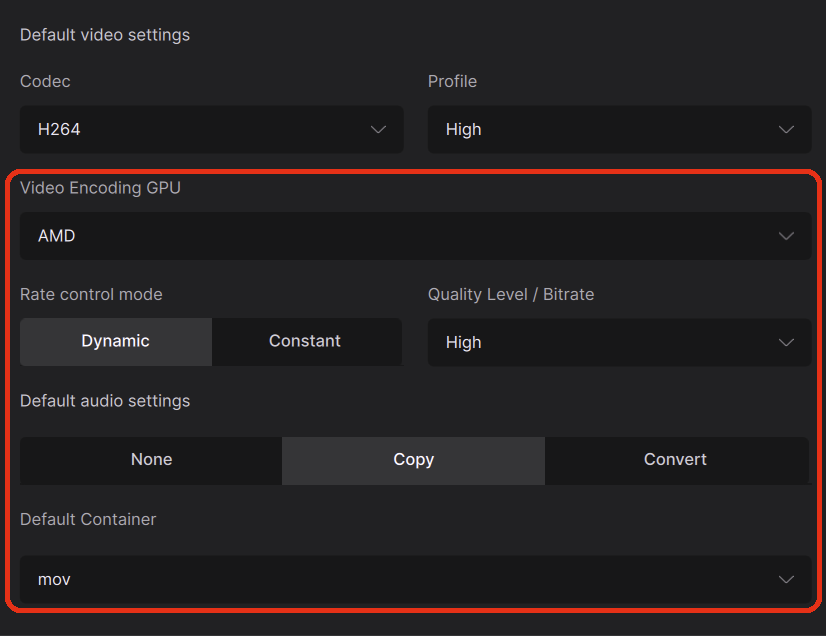
The following settings for this sub-category will continue with the default “H264” as the codec of choice.
Video Encoding GPU
Select the default video encoder to use when exporting files. Choose between video exports or an image sequence output.

Rate Control Mode
Select the default Control mode of either “Dynamic” or “Constant” and the corresponding quality level/bitrate.
Please note, larger bitrate values will result in a larger file size of the exported video file.
Default Audio Settings
At default Audio is set to “Copy”. You have a few choices when dealing with Audio from your video. Choose between copy, convert, or none.
We recommend leaving the audio mode set to the default selection of "copy" for most cases. Use "convert" when necessary for a certain output format. Selecting "none" will remove the audio stream.
If it is necessary to choose "convert" when "copy" is selected, the app will notify you.
Default Container
Choose the default file format for exported video files. Note, that this corresponds directly to the Default Video Codec.
Export Folder
This is the folder where all exported files will be saved. The input folder (.) is the default location for exported files.
To alter the selection, click on the folder icon.
Crash Recovery
Enable externally Previewable Exports
When enabled, you can preview the completed frames of the output while it is being processed via an external player opening the temporary file. Note that this will require 2x the storage space as a previewable temporary file is being generated.
Clean-Up Preview Headers
This clears the temporary previewable file once the rendering process is completed.
Use Temporary Directory
This setting determines where the preview files are stored on your machine.
Advanced
This category gives you options to adjust your disk space and enable certain features that are a bit more experimental.
The Application Category is broken down into 2 subcategories:
- Disk Space
- Features
Disk Space
Critical Low Disk Space Threshold
Defaulted to 5 gigabytes. This decides the threshold from which a confirmation is needed for a preview or export when there is low disk space.
Features
Show Second Enhancement Feature
When enabled, this allows for two enhancement passes. Note that this will increase render time, however this is a great way to experiment with mixing multiple AI models at one time.
Enable Previous Model
When enabled, you can utilize previous versions of AI models. This is not recommended since these models are no longer actively maintained, but can be used to match previously rendered footage from an older version of Video AI.
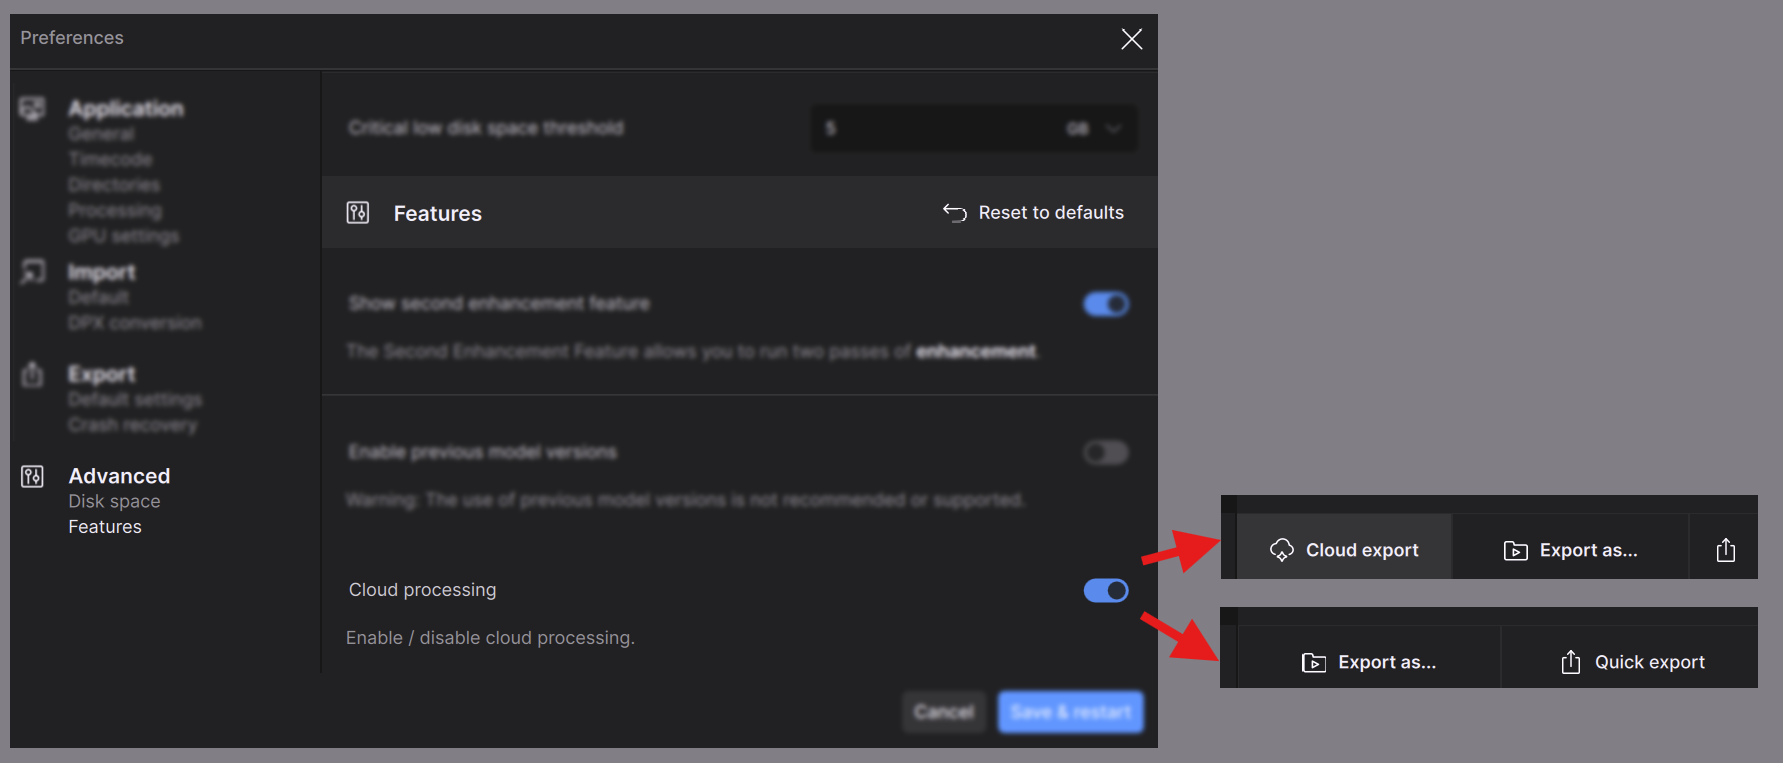
Cloud Processing
When enabled, this will give you access to the Cloud Processing service on the main application. This rendering option is located below the Controls Sidebar next to "Export as...". This is enabled at default. If you disable, the Cloud Processing service will be removed from the application. This option can always be re-enabled via this preference menu at any time. Learn more about Cloud Processing here.
Final Steps
Save or Cancel
When you are finished making any modifications be sure to click on the Save button on the lower screen right side of the menu. You can also dismiss any modifications by clicking on Cancel or simply exiting out.
Conclusion
This concludes the overview of the Preferences Menu. You are on your way to working on some wonderful projects within your customized environment!