Remove Object (Legacy)
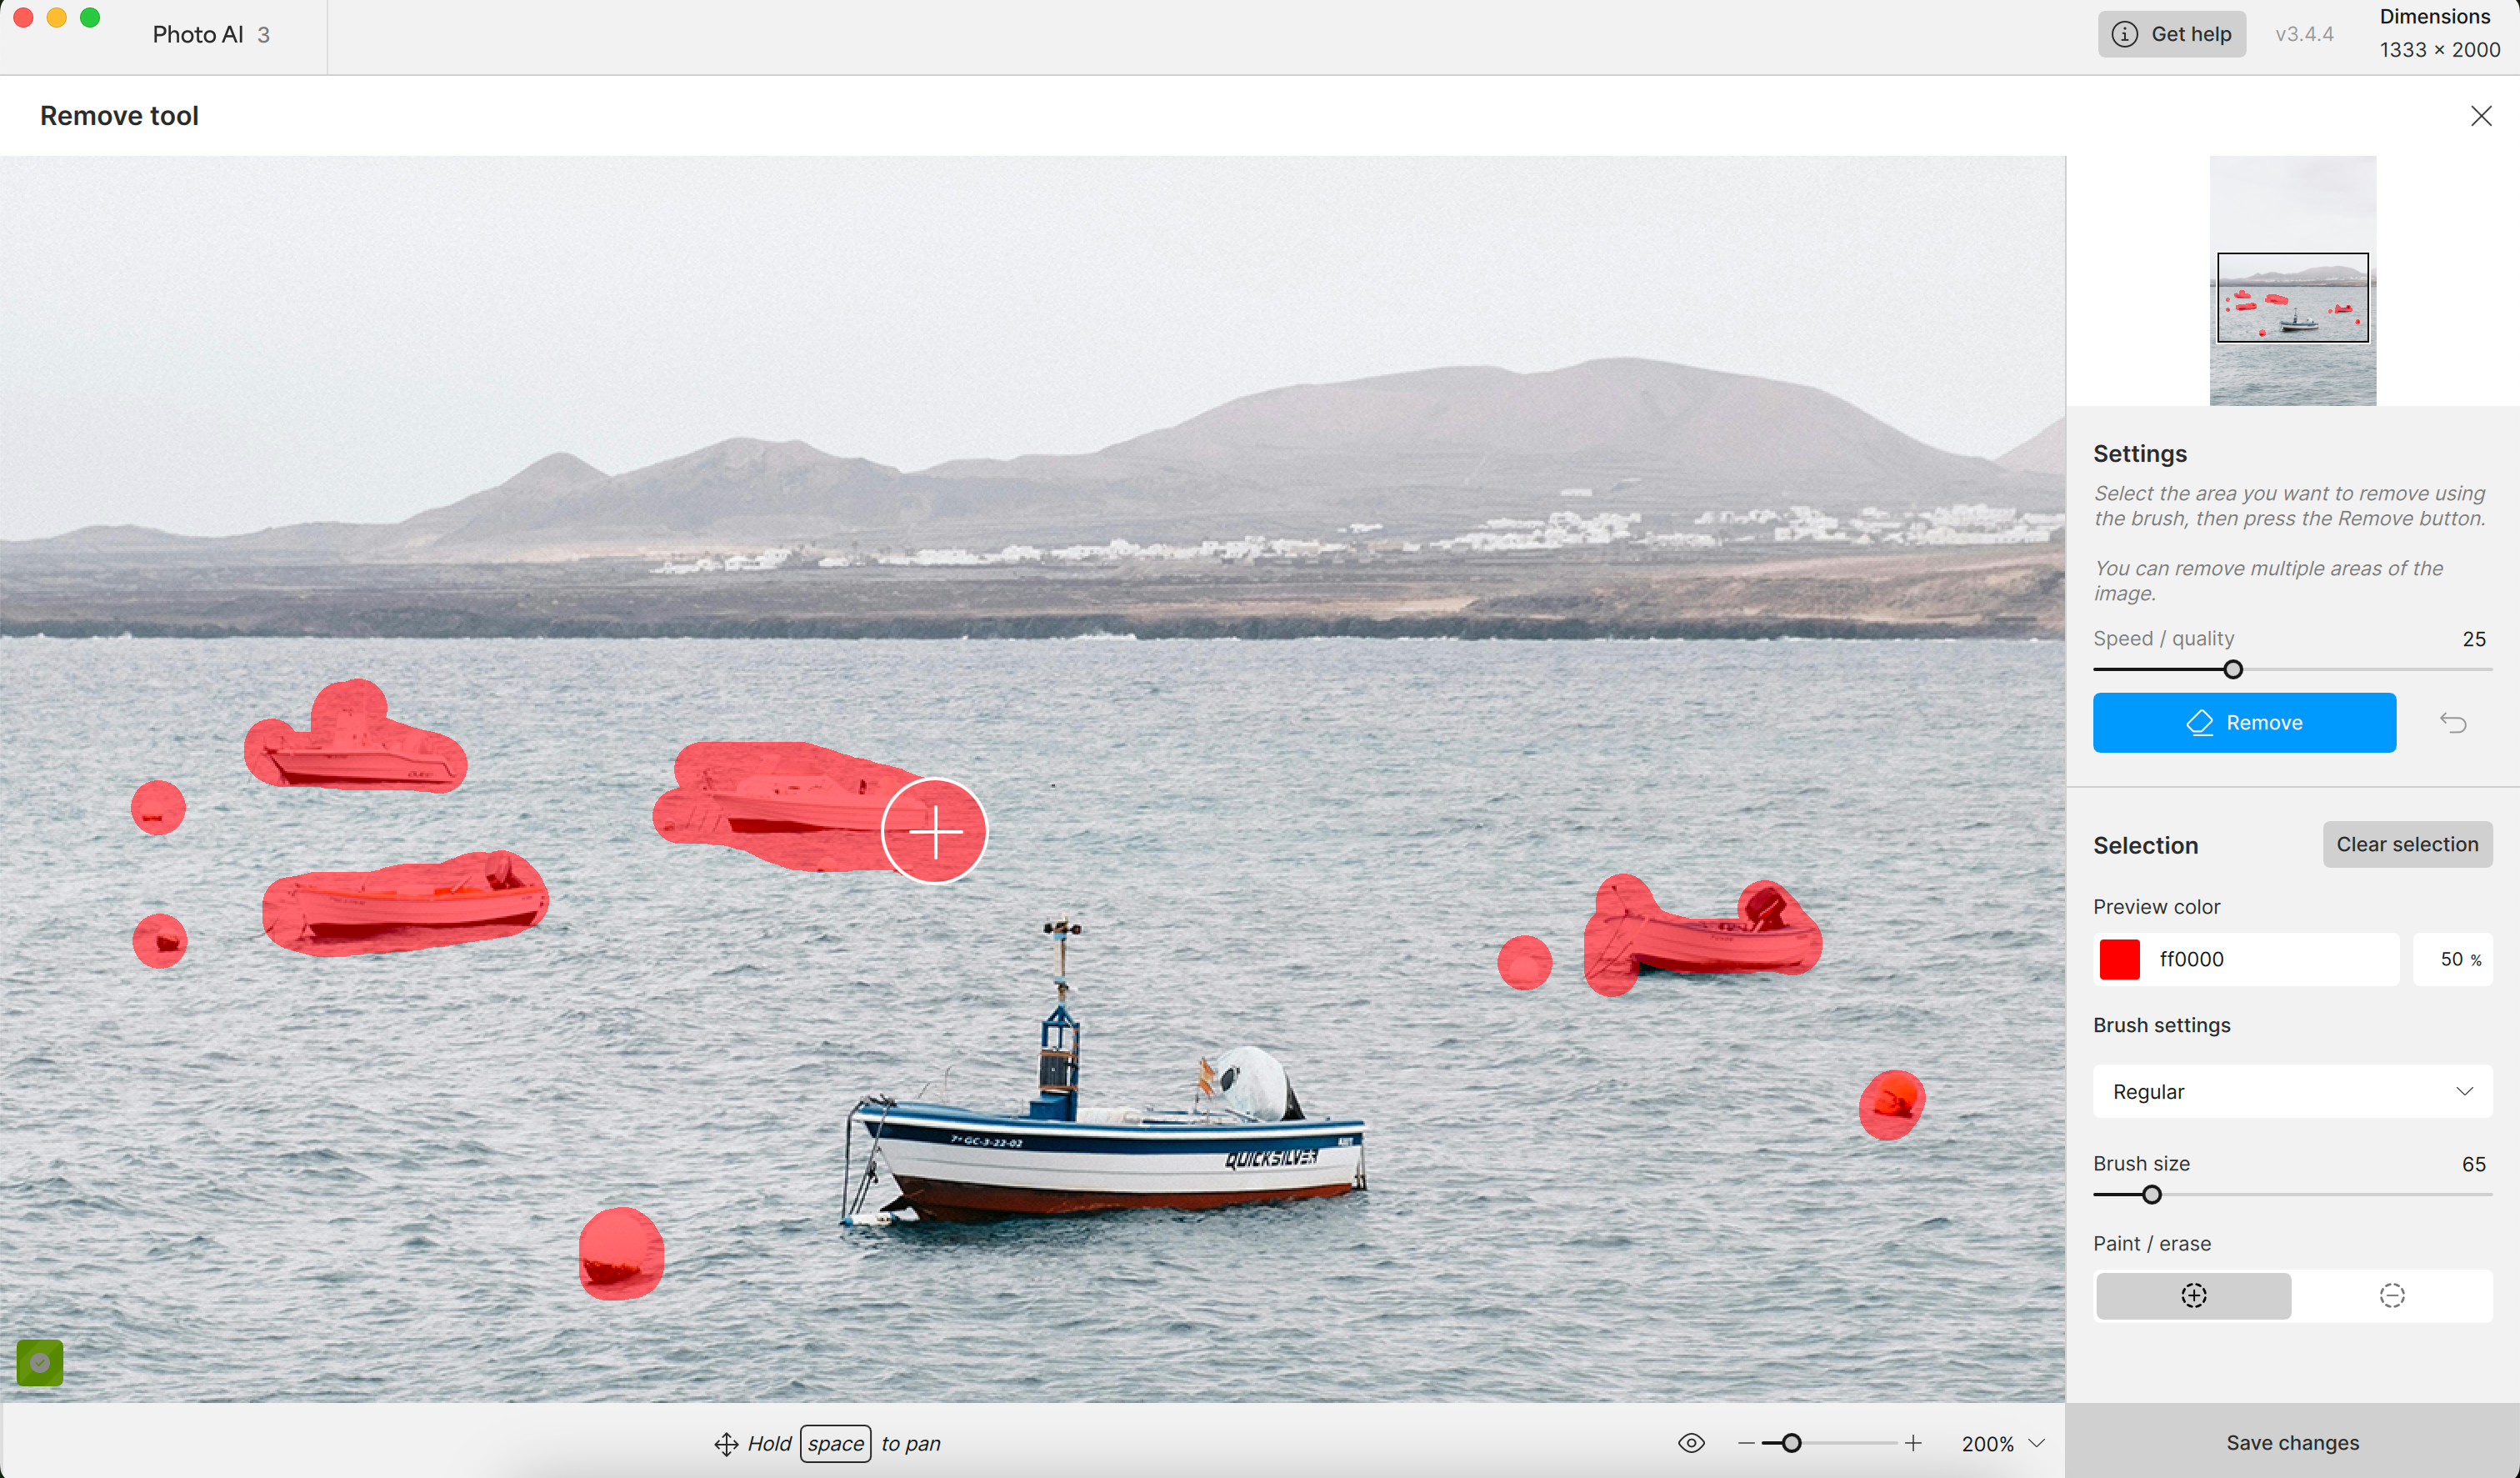
The Remove Tool uses generative AI to eliminate unwanted objects from your images. By analyzing the surrounding context not only erases the object, but also generates a background that blends with the rest of the image.
System Requirements
Due to the resource-intensive nature of this feature, the Remove tool is currently not supported on Macs with AMD GPUs. It also requires macOS 14 and higher to run with the most optimized results.
Locking edits
After clicking "Remove object" from the right side panel, a status bar update appears in the bottom left corner of the Preview screen indicating "Locking edits".
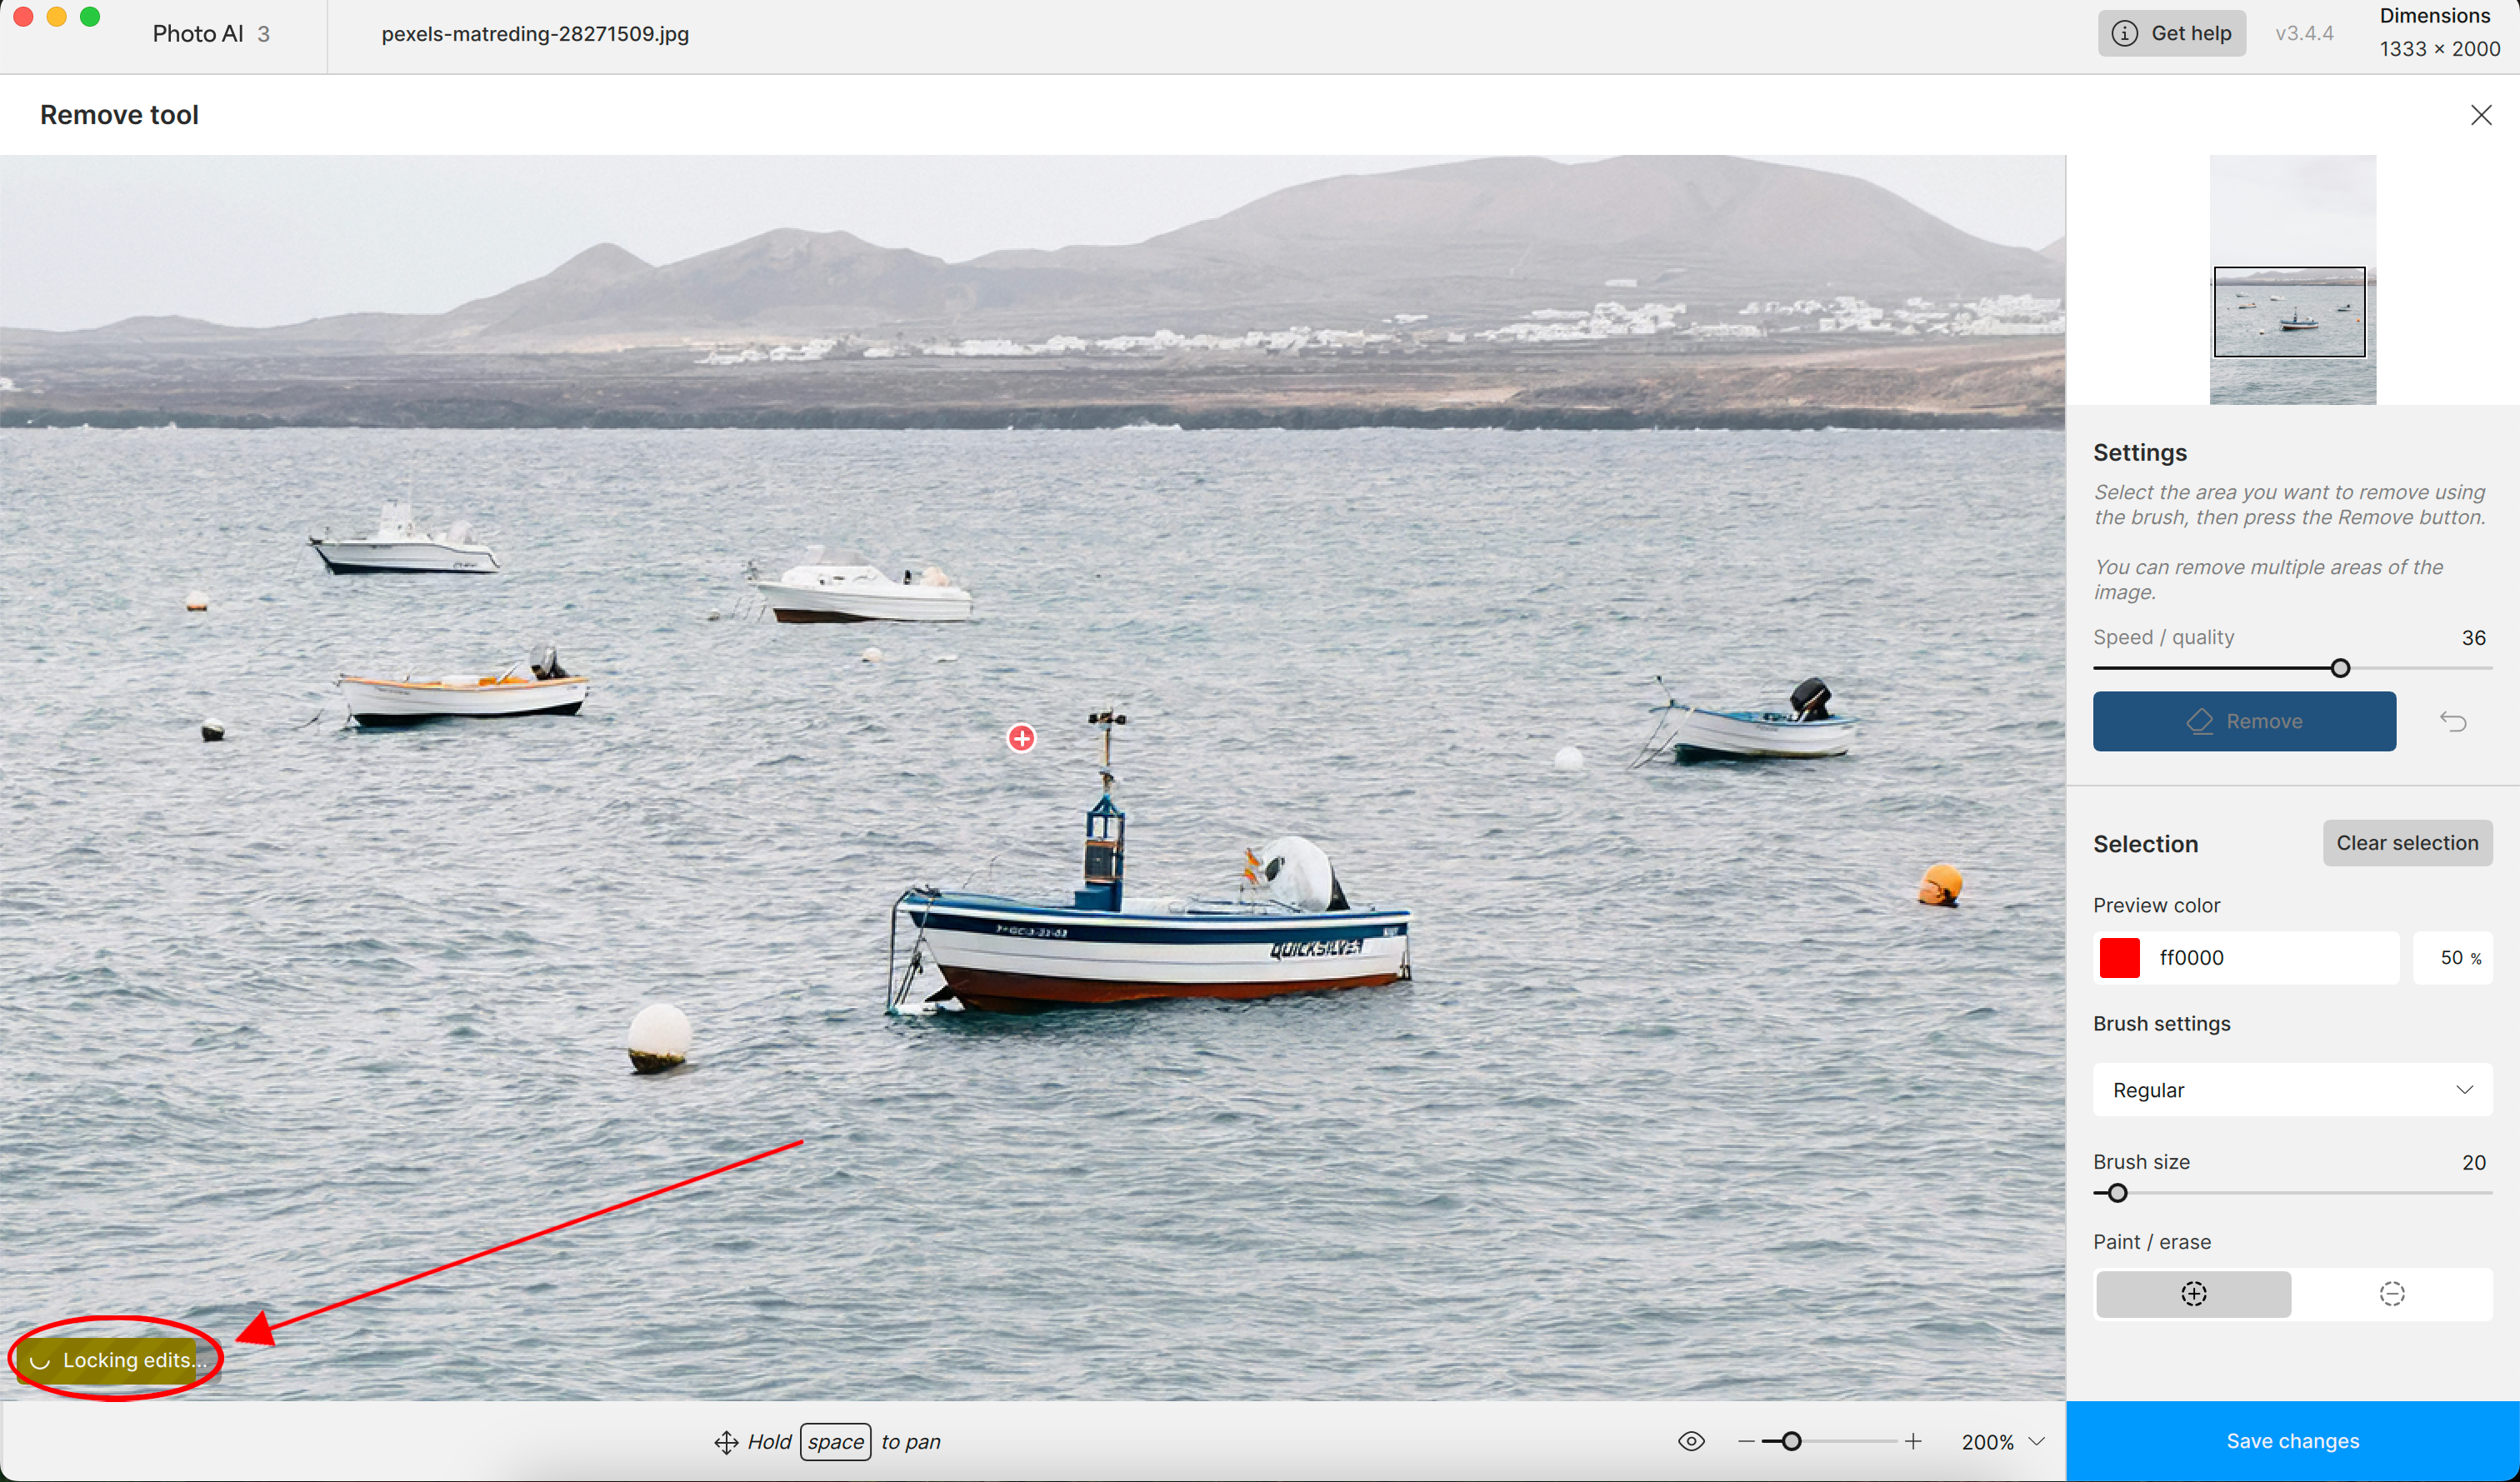
This status ensures that Photo AI locks your enhancements in order to safeguard the generative AI model output and prevents reprocessing generative models which can change the results.
It also processes all enhancements before the generative tool and prevents further changes to those enhancements.
Locking edits means you cannot make adjustments to other enhancements like sharpen, denoise, or color balance until the "Remove Object" process is completed.
Controls
Use the Controls tab to adjust the brush and control the processing.
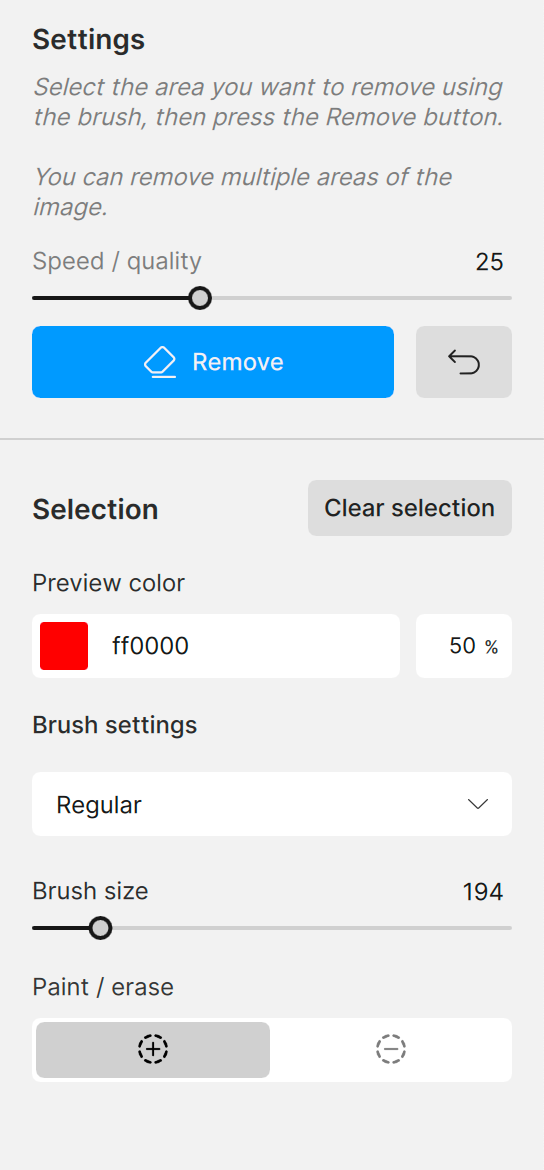
Settings
Speed / Quality Slider
The Remove Tool's performance depends on the computer's system profile and the selected editing priorities. Prioritizing speed conserves resources and reduces processing steps on weaker computers while prioritizing quality yields optimal results when hardware performance is not a constraint.
Click the Undo button to undo the most recent removal process. Click the Clear Selection button to erase the mask. Hit the Remove Selection button once you are satisfied with the mask to remove the object.
Selection
Preview color
Switch between the add and subtract mask buttons to refine the mask if necessary.
Brush settings
Choose between the Regular brush and the Object Selection brush. The Object Selection brush identifies and selects entire objects.
Brush size
Choose between the Regular brush and the Object Selection brush. The Object Selection brush identifies and selects entire objects.
Paint/erase
Switch between the add and subtract mask buttons to refine the mask if necessary.
Best Practices
Make the Remove Tool Your last step
Apply all initial edits first (such as denoise, sharpening, and color adjustments) before you use the Remove Tool. Make this the last step in your Photo AI workflow to prevent unexpected outcomes where earlier enhancements get locked or nullified during the object removal process.
Size & Distance
Keep mask sizes below ¼ of the total image size. Process each object individually when dealing with multiple objects requiring separate masks. Ensure that the maximum distance between masked objects does not exceed 2000 pixels.
Inclusion
Mask the entire object rather than a partial section. Include the shadows and reflections of the objects. If those are not removed, the AI model may attempt to replace the object with something similar.
Low Lighting
If your image was shot in low-light conditions, you can use RAW Denoise to remove the overall RAW noise, then can use Denoise to remove any remaining noise.
Photo by Mathias Reding