Quick Start (Legacy)
About Photo AI
Photo AI is a robust desktop app that enhances photographs by removing noise (including from RAW files and low-light conditions), sharpening images, and correcting missed focus. It also offers many other enhancements to help you get the most out of your shots; see the full list here.
It can be used as a standalone version or as a plugin from these supported programs.
Use the Free Trial Mode
There is a Free Trial version of Photo AI. It allows you to test your files and use the enhancements, and generates an in-app preview*.
Steps to test Photo AI as a Trial:
- You’ll need a computer that meets our minimum requirements to run the trial.
- You will also need a Topaz account. Use the same credentials if you already have an account for another Topaz Labs product.
- Then, install Photo AI and log in to the Trial/Demo mode using your new credentials.
- Import your files and test the different enhancements.
Activate your Photo AI
If you have a license, here is how to activate Photo AI:
- If needed, log into your “My Products" page and download the installer for your latest"Owned" Photo AI version. Once the installer is downloaded, find it in your Downloads and run this installer, it will open the Install Wizard. Follow the steps in the Install Wizard to Install Photo AI.
- Once Photo AI is installed, open Photo AI from the desktop shortcut, and click “Activate.” It will open your default browser, where you can log in with your Topaz account credentials.
User Interface (v4)
Photo AI v4's interface is more intuitive to use than ever before with this update, and you’re going to love the refreshed design.
Booting up Photo AI v4 for the first time will show the option to opt-in or out of Autopilot, and you can change this toggle at any time using a handy switch on the right hand panel. Suggestions also appear at the top of the filter stack, and are much easier to work with.
This Photo AI v4's revamped interface comes with different changes. You can read all these changes in detail here, in the Release Notes:
Photo AI v4 | Release Notes
Take a tour below and learn the different components of the Photo AI 4 interface.
If you choose to have Autopilot on, here is an overview of the interface:
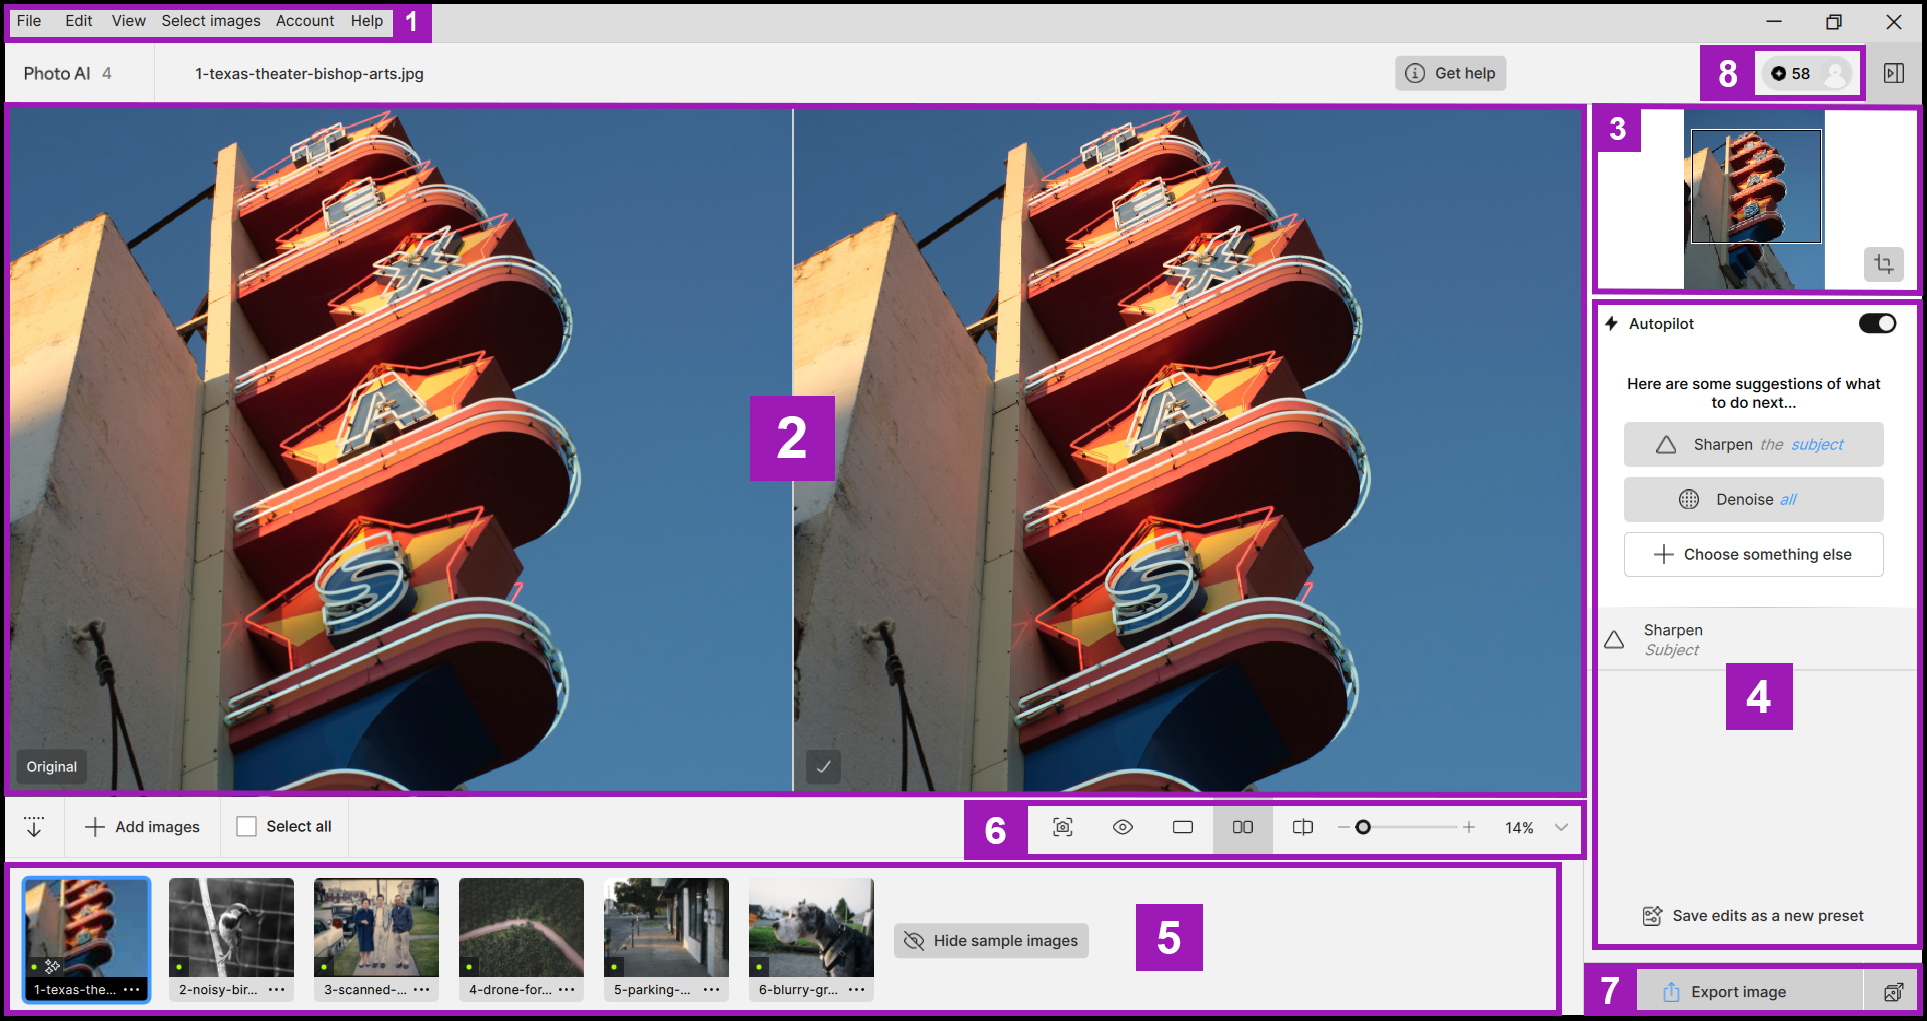
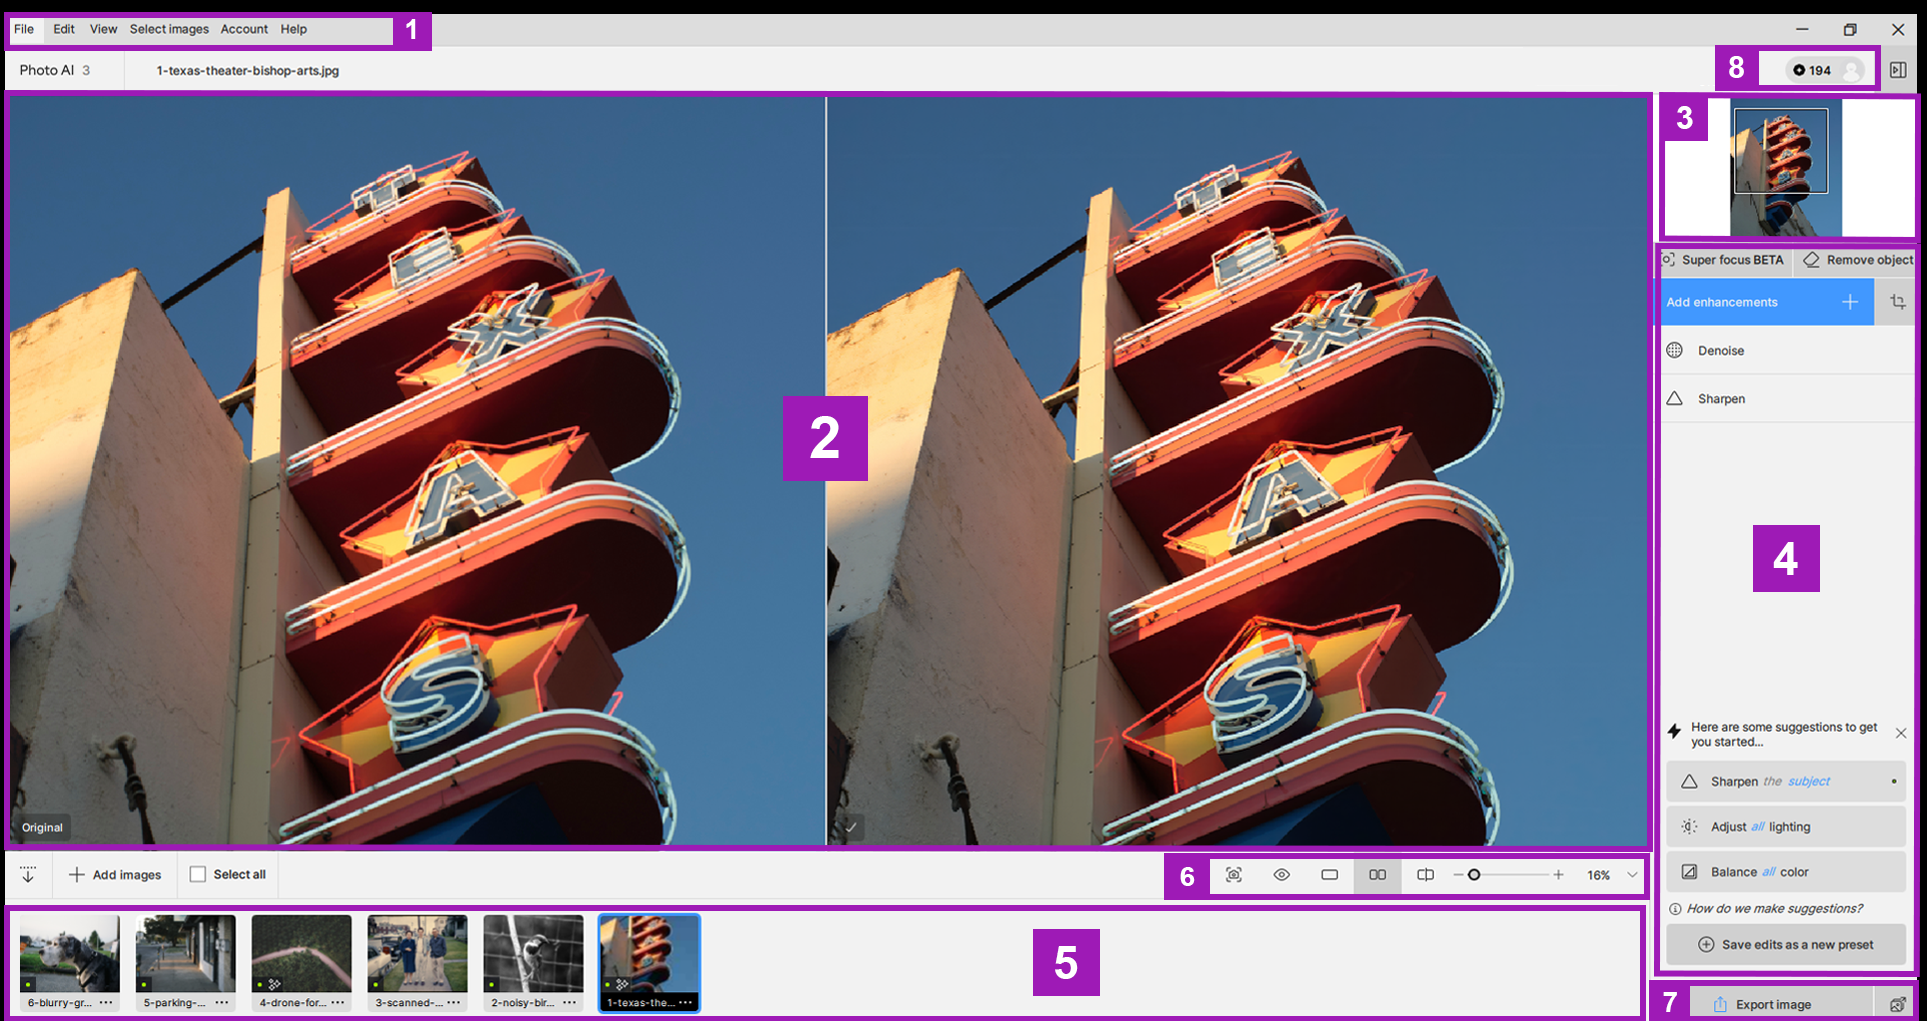
[1] - Menu Options
- Use these settings for file management, view customization, the Preferences menu, the Help menu, and Account management.
[2] - Preview Area
- View the comparison between the original and the processed result of your image here.
- See section number [6] for Preview options.
[3] - Mini Preview
- When you are very zoomed into your file in your Preview (Item number 2 above), this Mini Preview will help you see where you are within your file.
- Click on an area in this Mini Preview to jump to this specific area in your Preview window.
[4] - Sidebar Navigation Panel
- Manage the Autopilot status with the toggle button at the top of that section.
- Manage the enhancements and their settings here.
- Add enhancements with the "Choose something else" button and you can then tweak the settings and affected selection area of these enhancements.
- The "Choose something else" button will also allow to select a Preset that you have created.
- This panel can be collapsed away temporarily if you want to see your image bigger (by using this icon shown below to collape the panel, at the top-right).
[5] - Film Strip
- Manage here all the images that are imported in the batch. You can also access this filmstrip even if you edit 1 image at the time.
- The active image you see in your Preview area will be outlined in Blue in the film strip.
- You can select multiple files manually (Ctrl+Click on Windows or Command+Click on Mac) or click the "Select All" Checkmark to select all the images of the batch.
- Once the desired files are selected, Right-Click (Control+Click on Mac) on one of the images to see the available options for them.
- See Batch Processing documentation here.
- Images exported will remain in the filmstrip unless you go in Edit* > Preferences > General and enable "Close images after exporting" > Click Save. *Topaz Photo AI menu on Mac
[6] - Zoom Options
- Choose between Single, Split, and Side-by Side views and the Zoom Percentage.
- Photo AI will import by default at 100% to show pixel size for print. You can change this to "Fit" in your Edit menu (Topaz Photo AI menu on Mac), then Preferences > General > Default Zoom if you prefer to see the full image on import.
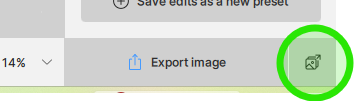
[7] - Export/Save Options
- Recommended: Once your edits are done, click "Export Image" and set up your export settings to save your image.
- Optional: There is also a Quick Export icon, to use if want to use the exact same export settings as your prior export.
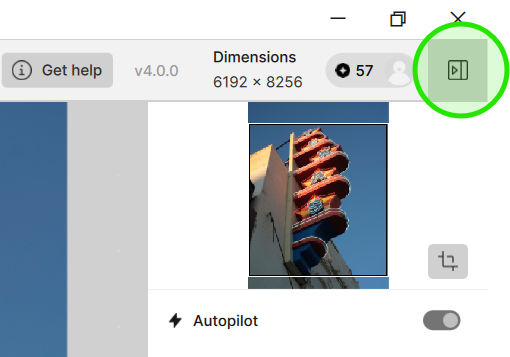
[8] - Cloud Credits section:
- This is where you will see the amount of Cloud Credits you have to use that option to process Super Focus or Dust & Scratch on the cloud instead of rendering locally on your machine.
- Cloud rendering is optional and you can continue to render locally if you prefer.
- More details on how to purchase Cloud Credits here and how to use your Cloud Credits.
If you choose to have Autopilot off, and add your enhancements manually on every file, here is an overview of the interface:
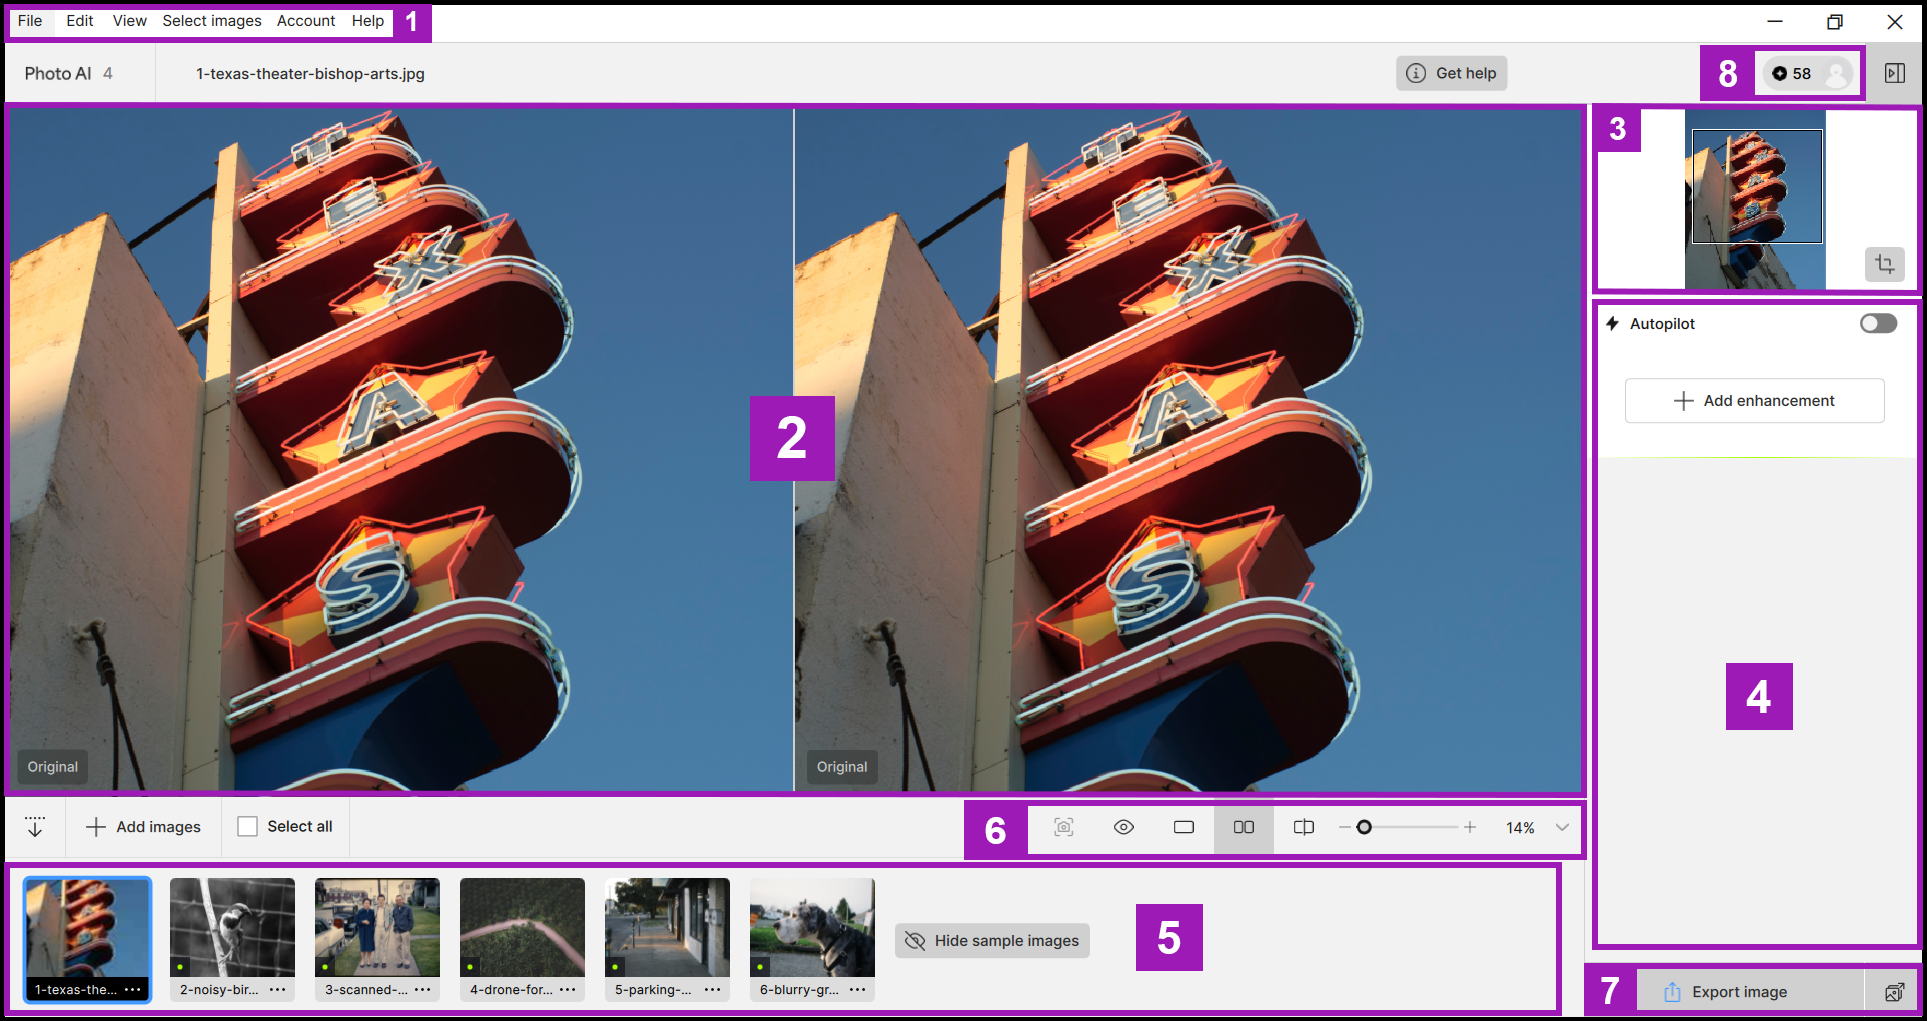
[1] - Menu Options
- Use these settings for file management, view customization, the Preferences menu, the Help menu, and Account management.
[2] - Preview Area
- View the comparison between the original and the processed result of your image here.
- See section number [6] for Preview options.
[3] - Mini Preview
- When you are very zoomed into your file in your Preview (Item number 2 above), this Mini Preview will help you see where you are within your file.
- Click on an area in this Mini Preview to jump to this specific area in your Preview window.
[4] - Sidebar Navigation Panel
- Manage the Autopilot status with the toggle button at the top of that section.
- Manage the enhancements and their settings here.
- Add enhancements with the "Add enhancement" button and you can then tweak the settings and affected selection area of these enhancements.
- The "Add enhancement" button will also allow to select a Preset that you have created.
- This panel can be collapsed away temporarily if you want to see your image bigger (by using this icon shown below to collape the panel, at the top-right).
[5] - Film Strip
- Manage here all the images that are imported in the batch. You can also access this filmstrip even if you edit 1 image at the time.
- The active image you see in your Preview area will be outlined in Blue in the film strip.
- You can select multiple files manually (Ctrl+Click on Windows or Command+Click on Mac) or click the "Select All" Checkmark to select all the images of the batch.
- Once the desired files are selected, Right-Click (Control+Click on Mac) on one of the images to see the available options for them.
- See Batch Processing documentation here.
- Images exported will remain in the filmstrip unless you go in Edit* > Preferences > General and enable "Close images after exporting" > Click Save. *Topaz Photo AI menu on Mac
[6] - Zoom Options
- Choose between Single, Split, and Side-by Side views and the Zoom Percentage.
- Photo AI will import by default at 100% to show pixel size for print. You can change this to "Fit" in your Edit menu (Topaz Photo AI menu on Mac), then Preferences > General > Default Zoom if you prefer to see the full image on import.
[7] - Export/Save Options
- Recommended: Once your edits are done, click "Export Image" and set up your export settings to save your image.
- Optional: There is also a Quick Export icon, to use if want to use the exact same export settings as your prior export.
[8] - Cloud Credits section:
- This is where you will see the amount of Cloud Credits you have to use that option to process Super Focus or Dust & Scratch on the cloud instead of rendering locally on your machine.
- Cloud rendering is optional and you can continue to render locally if you prefer.
- More details on how to purchase Cloud Credits here and how to use your Cloud Credits.
User Interface (v3)
Take a tour below and learn the different components of the Photo AI 3 interface.
[1] - Menu Options
- Use these settings for file management, view customization, the Preferences menu, the Help menu, and Account management.
[2] - Preview Area
- View the processed result of your image here.
- See section number [6] for Preview options.
[3] - Mini Preview
- When you are very zoomed into your file in your Preview (Item number 2 above), this Mini Preview will help you see where you are within your file.
- Click on an area in this Mini Preview to jump to this specific area in your Preview window.
[4] - Sidebar Navigation Panel
- Manage the enhancements and their settings here.
- Add enhancements with the "Add enhancement" button and you can then tweak the settings and affected selection area of these enhancements.
- The "Add enhancement" button will also allow to select a Preset that you have created.
- The "Add enhancement" button will also allow to Apply Auto-Pilot. You can turn on Auto-Pilot in your Preferences to kick in automatically on every file import, to save having to manually do this step.
- This panel can be collapsed away temporarily if you want to see your image bigger (by using this icon shown below to collape the panel, at the top-right).

[5] - Film Strip
- Manage here all the images that are imported in the batch. You can also access this filmstrip even if you edit 1 image at the time.
- The active image you see in your Preview area will be outlined in Blue in the film strip.
- You can select multiple files manually (Ctrl+Click on Windows or Command+Click on Mac) or click the "Select All" Checkmark to select all the images of the batch.
- Once the desired files are selected, Right-Click (Control+Click on Mac) on one of the images to see the available options for them.
- See Batch Processing documentation here.
- Images exported will remain in the filmstrip unless you go in Edit* > Preferences > General and enable "Close images after exporting" > Click Save. *Topaz Photo AI menu on Mac
[6] - Zoom Options
- Choose between Single, Split, and Side-by Side views and the Zoom Percentage.
- Photo AI will import by default at 100% to show pixel size for print. You can change this to "Fit" in your Edit menu (Topaz Photo AI menu on Mac), then Preferences > General > Default Zoom if you prefer to see the full image on import.
[7] - Export/Save Options
- Recommended: Once your edits are done, click "Export Image" and set up your export settings to save your image.
- Optional: There is also a Quick Export icon, to use if want to use the exact same export settings as your prior export.
[8] - Cloud Credits section:
- This is where you will see the amount of Cloud Credits you have to use that option to process Super Focus or Dust & Scratch on the cloud instead of rendering locally on your machine.
- Cloud rendering is optional and you can continue to render locally if you prefer.
- More details on how to purchase Cloud Credits here and how to use your Cloud Credits.
How to use Photo AI
If Auto-Pilot is turned on in Preferences:
- When you import an image or a batch of images into Photo AI, it analyses the image and applies the necessary Enhancements automatically.
- You can Fine-tune Auto-Pilot's behavior in your Preferences.
- You can tweak the settings of each enhancement that was added, remove enhancements, or add enhancements to suit your needs.
If Auto-Pilot is off (that is the default):
- On image import Photo AI will still analyse the file.
- When an Enhancement is manually added from the "Add enhancement" button, it will add it with the recommended AI model and strength, based on the AI Analysis made on file import.
- Use the Controls tab within the Enhancement, to adjust the settings and the Edit Selection tab, when available, to adjust what areas of your file are affected by the Enhancement.
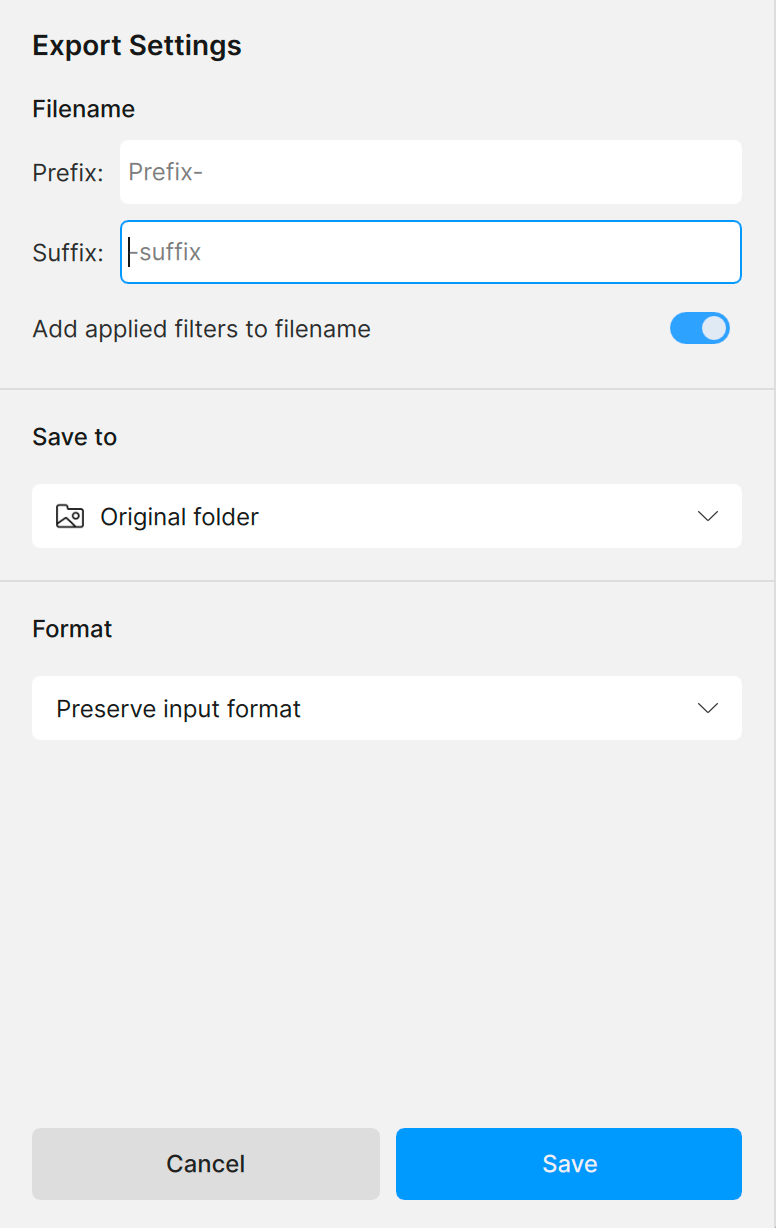
Export Process
Once you have made enhancements on all your files, export your file and the export window settings will help you control the file name, file format, and export location.
- Leave the Prefix and Suffix fields empty if you do not want any added on the file name.
- The Add applied filters to filename option is on by default. Toggle it off to avoid having the enhancements you used be named in the file name of the exported file.
- The Save To will give you control on where the file is saved on your computer or hard drive. To quickly find your Topaz export, look into saving the files into a subfolder that you can create.
- The Format options will give you control on the file format and compression options. Read this article for more information on the Export process and all the available export formats.
Click the Save button once all your options are set to your needs, and the file will go into the queue and export.
Queue
When exporting multiple images, the queue provides a visual representation of processed and pending files for saving. Preview the file name, size, and format.

Tutorials & Additional Docs
Click below for Photo AI Youtube video tutorials on how to get started with Photo AI and how to use the different enhancements:
Photo AI Tutorials | Youtube Playlist
Also see the other useful sections of the Photo AI Docs:
Enhancements
Functions
Plugins
Selection
Supported Cameras and Files
Need help?
To contact us directly, email support@topazlabs.com. Provide as much information as possible, including your System Profile and Screenshots of any errors you encounter. We can then troubleshoot with you!
You can also check out our Troubleshooting Docs page below: