Importing, Previewing & Exporting
Import, Preview & Export
Learn how to import, preview, and export.
Launch Screen
Import a Video File
When Video AI is opened, drag-and-drop a video into the main window or browse for items.
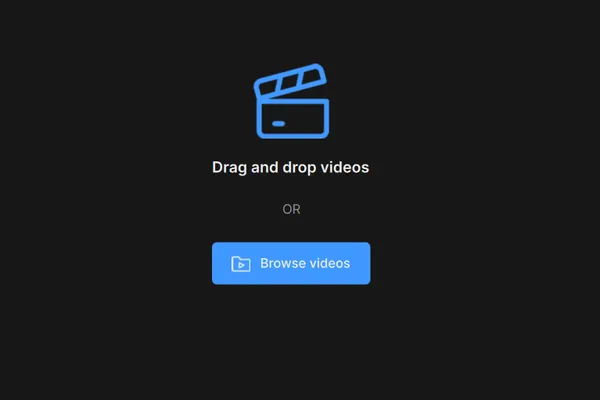
There are five ways to bring files into Topaz Video AI.
- Open the app and select "Browse Videos" to navigate to your file.
- Click anywhere on the screen to open a file path.
- Drag-and-drop files directly into the app.
- Use the “File” drop down menu and select “Import”
- Use a keyboard shortcut of CTRL+I (windows) or Cmd+I (mac).
Import an Image Sequence
In the import folder, on the lower screen right side, make sure to change from “Video Files” to “Image Sequences”.
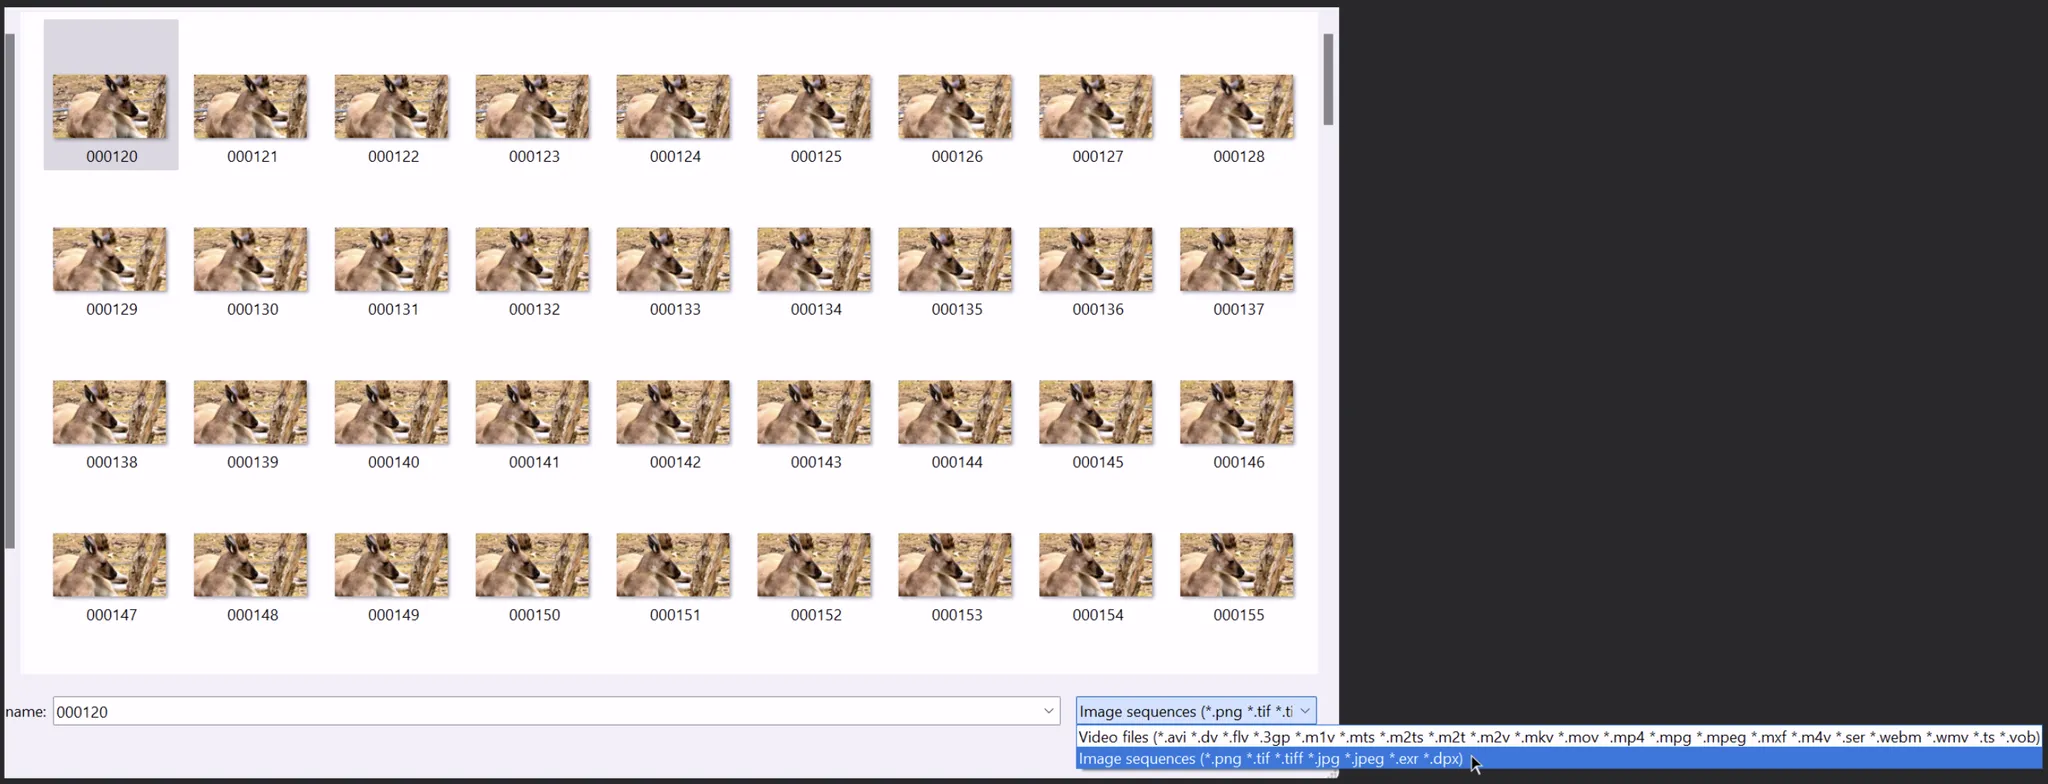
- Make sure all frames are in one folder.
- Check that all frames are in consecutive order.
- At least 5 frames must be in the sequence.
Start from Scratch/Preset Pop Up Menu
Once you’ve imported your video, you are presented with a pop-up menu.
This menu lists existing presets, or the option to start from scratch.
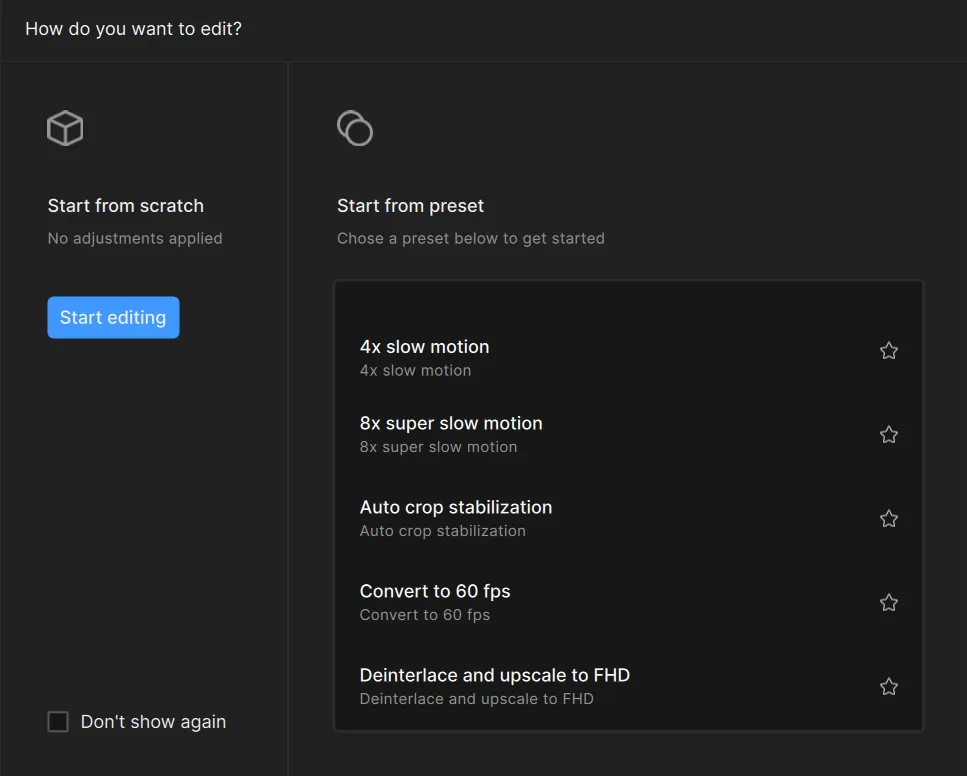
You can prevent the menu from popping up every time the application is started by clicking on “Don’t Show Again” on the lower screen left corner of this menu.
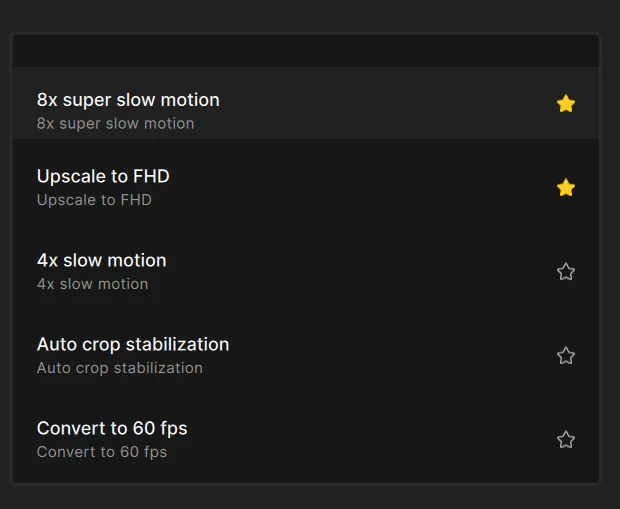
There are 9 default presets. Be sure to use the middle mouse button to scroll through the menu.
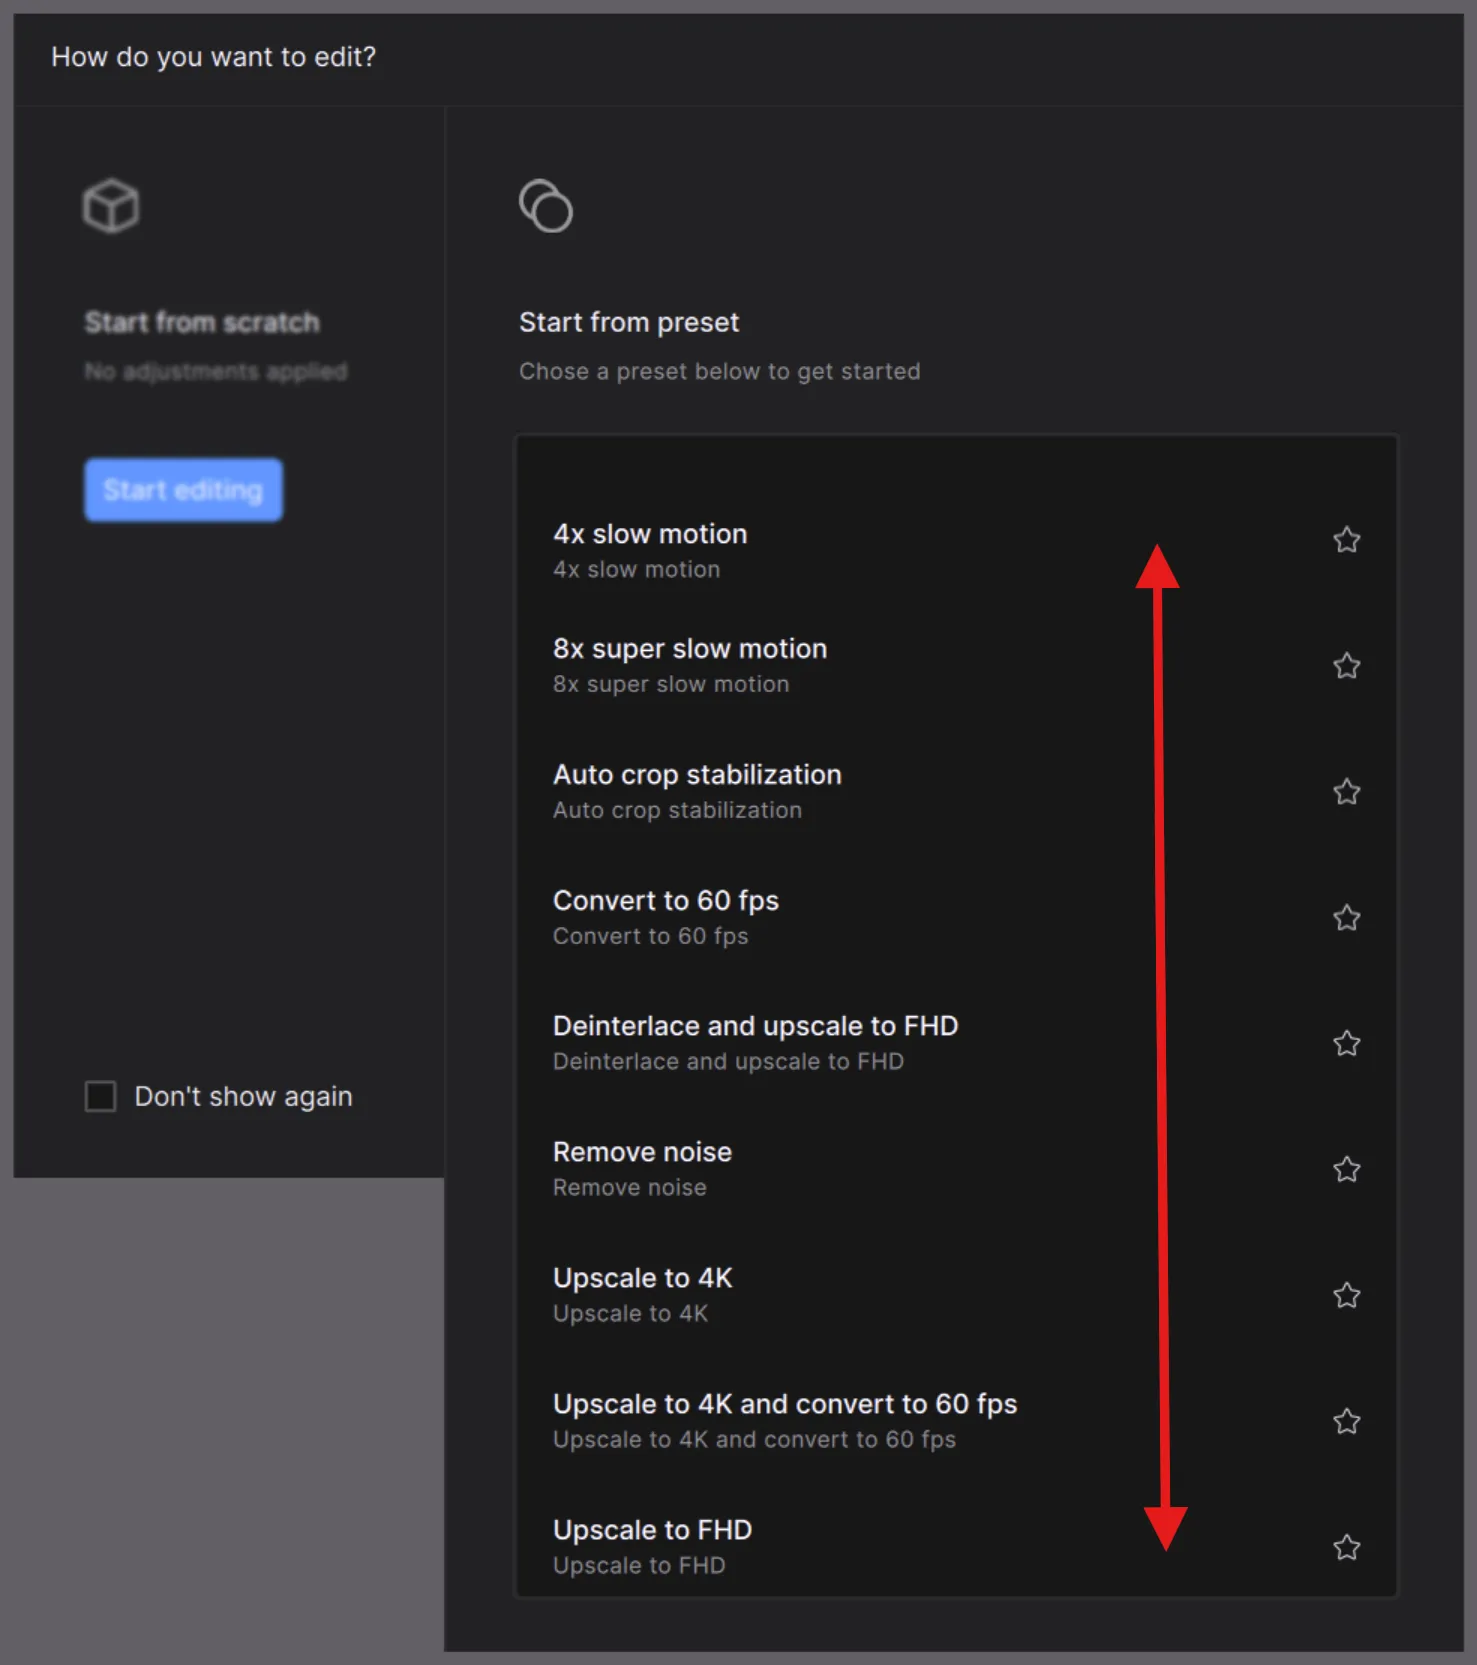
If you have custom presets that you use often, you can click on the star to ensure that your favorites are brought up to the top of the list.
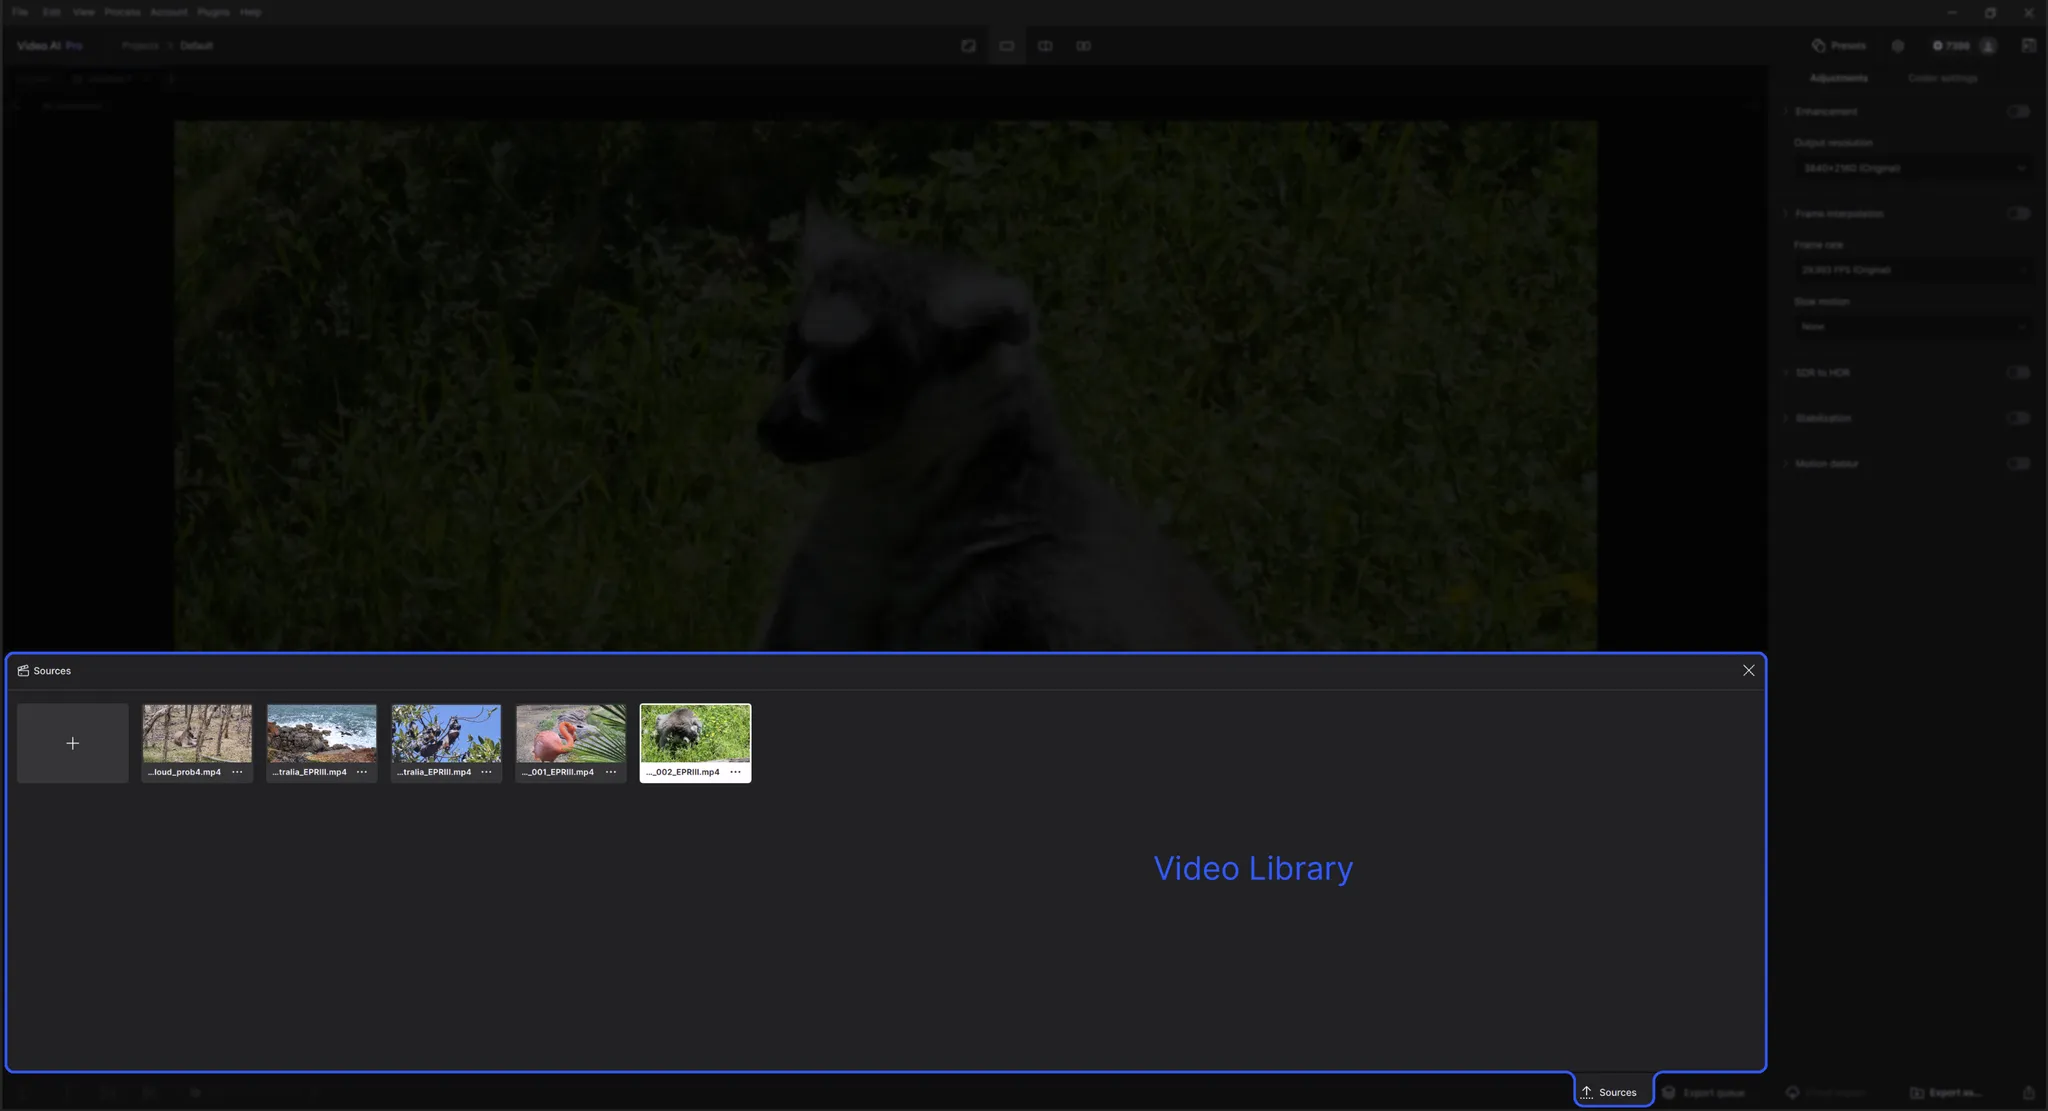
Using the Video Library
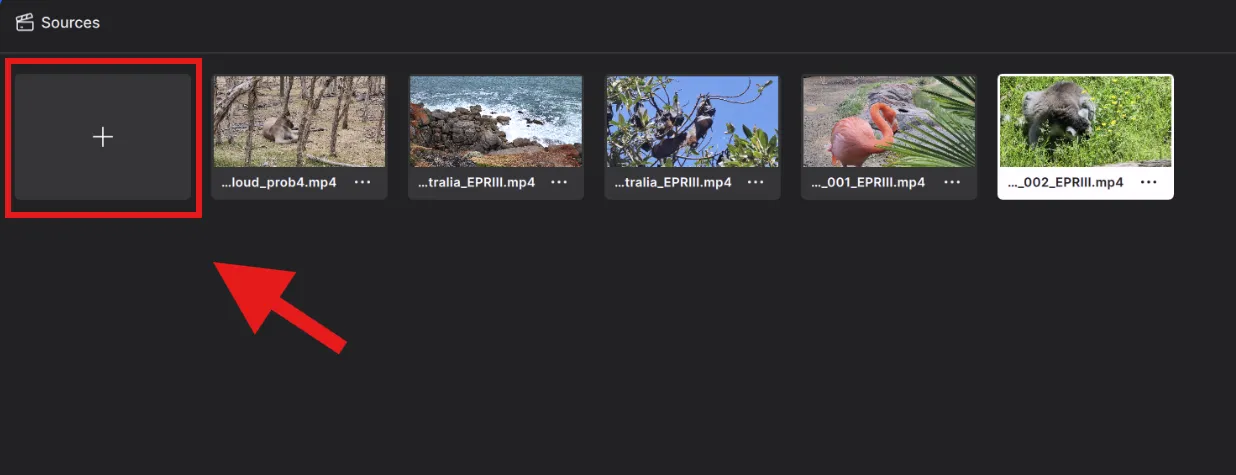
The video library will display the Source files you are working with. You can add or remove files at any time with ease.
Keep the following in mind:
- Files will be displayed in the order that they are imported.
- Each one will show the Start from Scratch or Start from Preset menu unless you turn off this notification.
- When working with a large batch, use the scroll bar or mouse wheel to scan through the files.
- Add additional files by dragging into this panel or use the + icon.
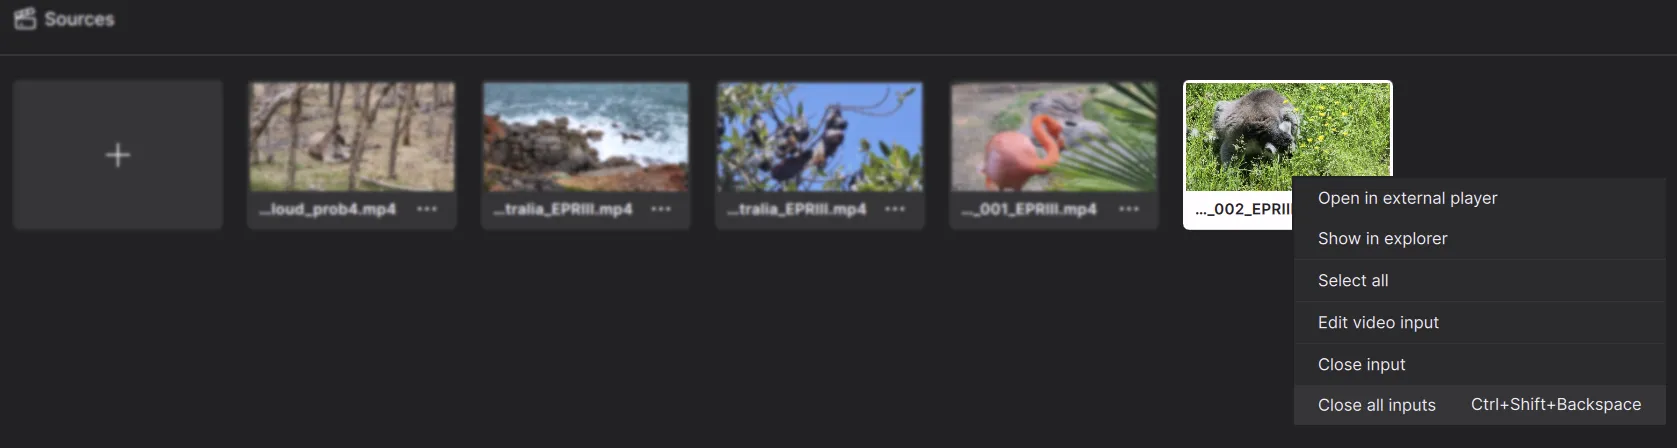
- To remove a file, select the triple dot menu and Close Input or use the keyboard shortcut (Ctrl/Cmd+Backspace).
- Reduce the menu height by dragging the top edge down.
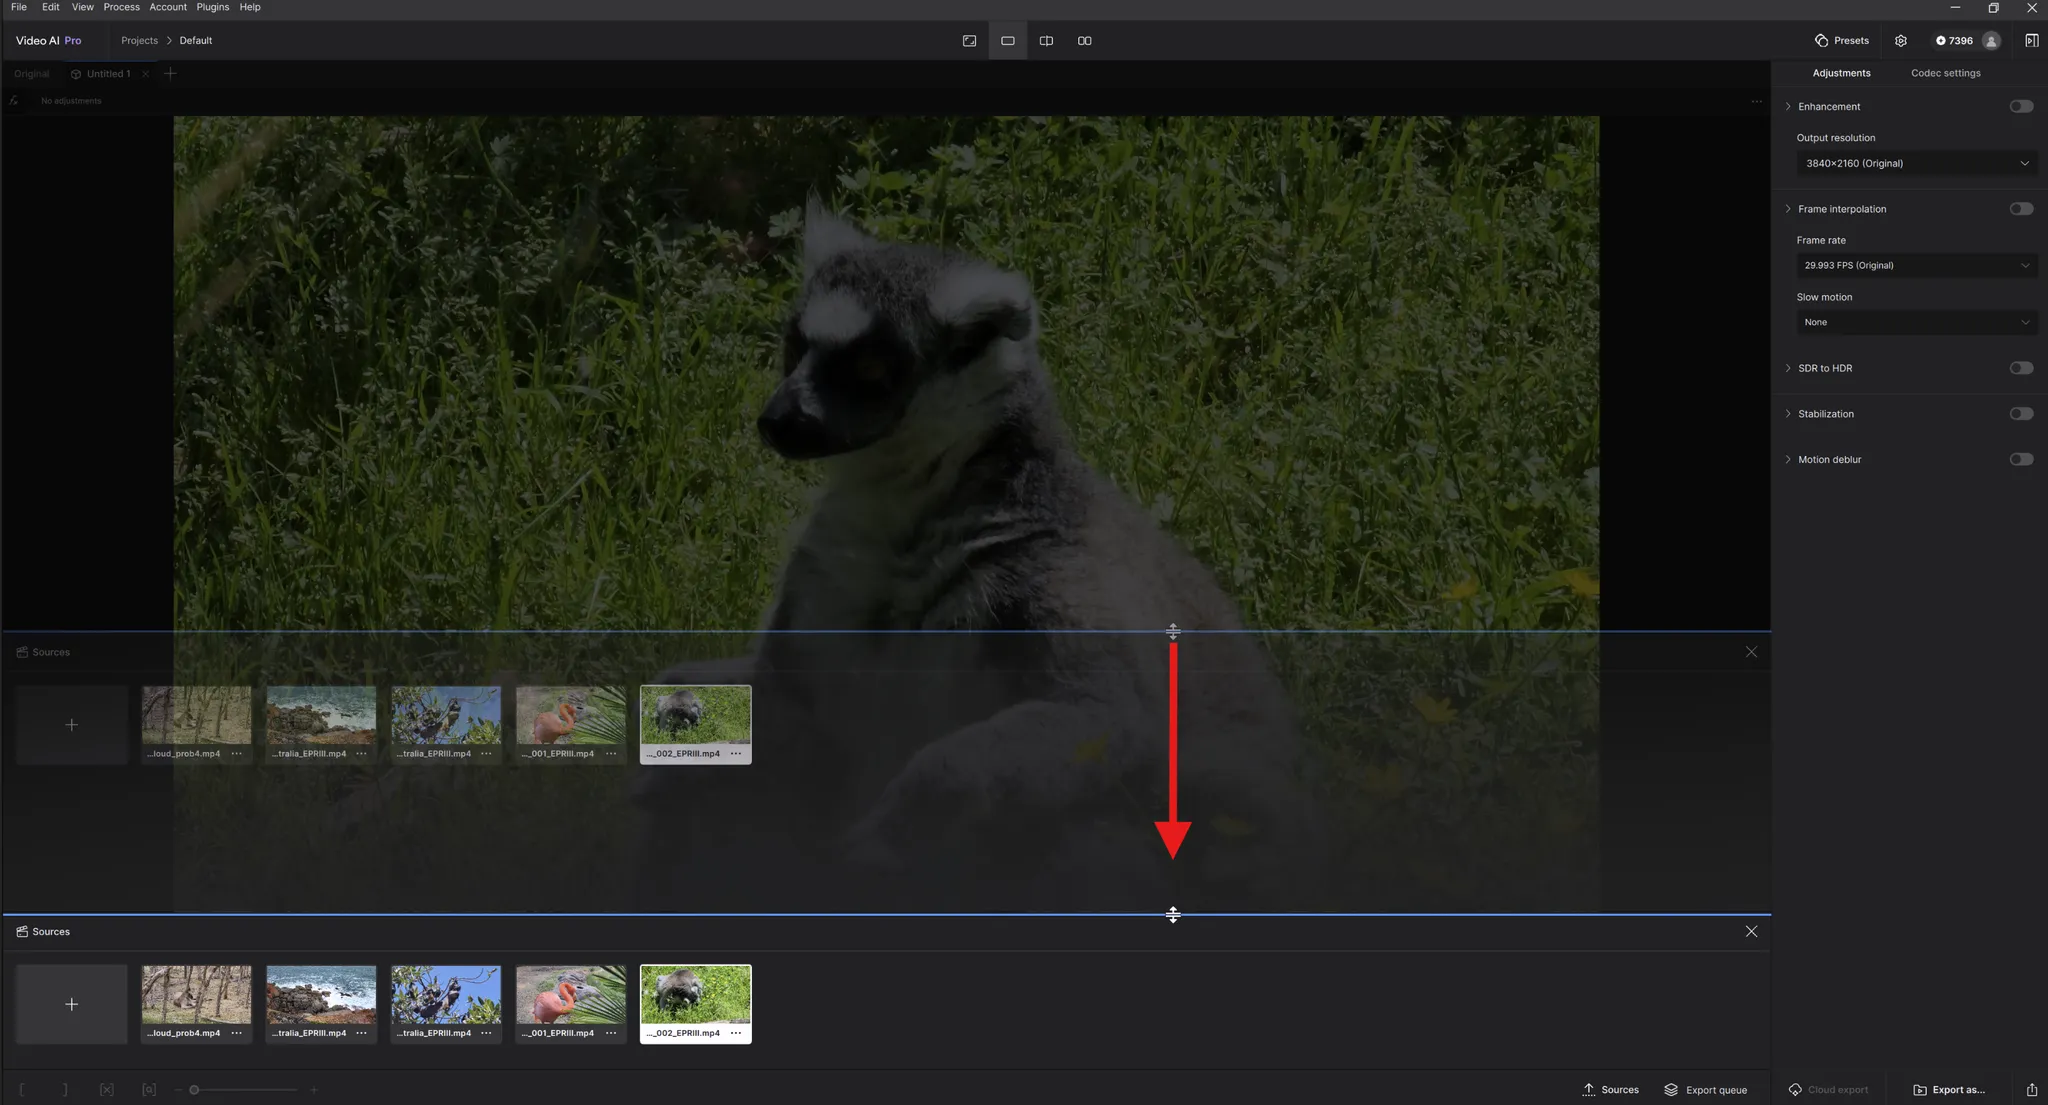
- Press the X icon to exit the menu.
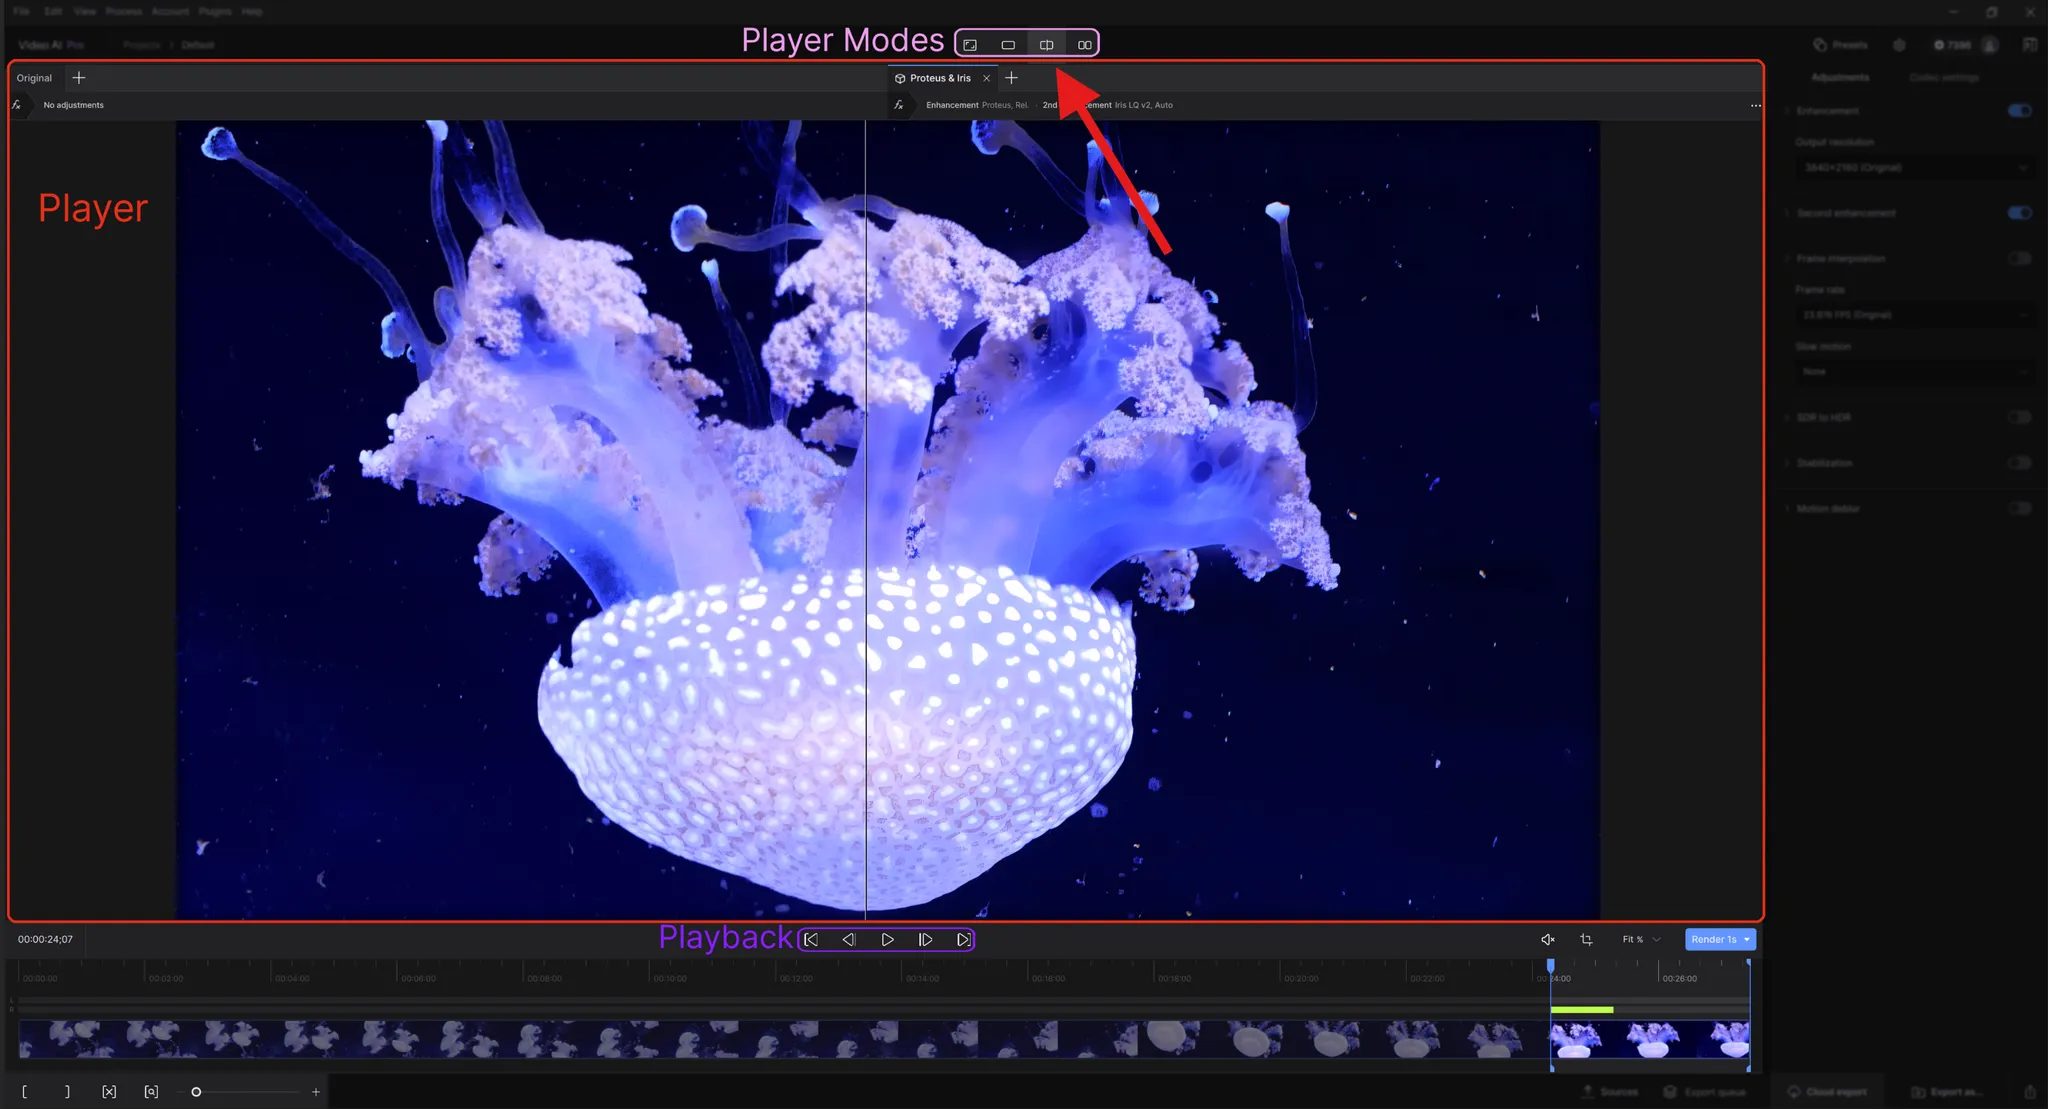
Playback and Video Edit Toolbar
Use the playback and video edit toolbar to control playback on previews, crop, trim, play sound and more.
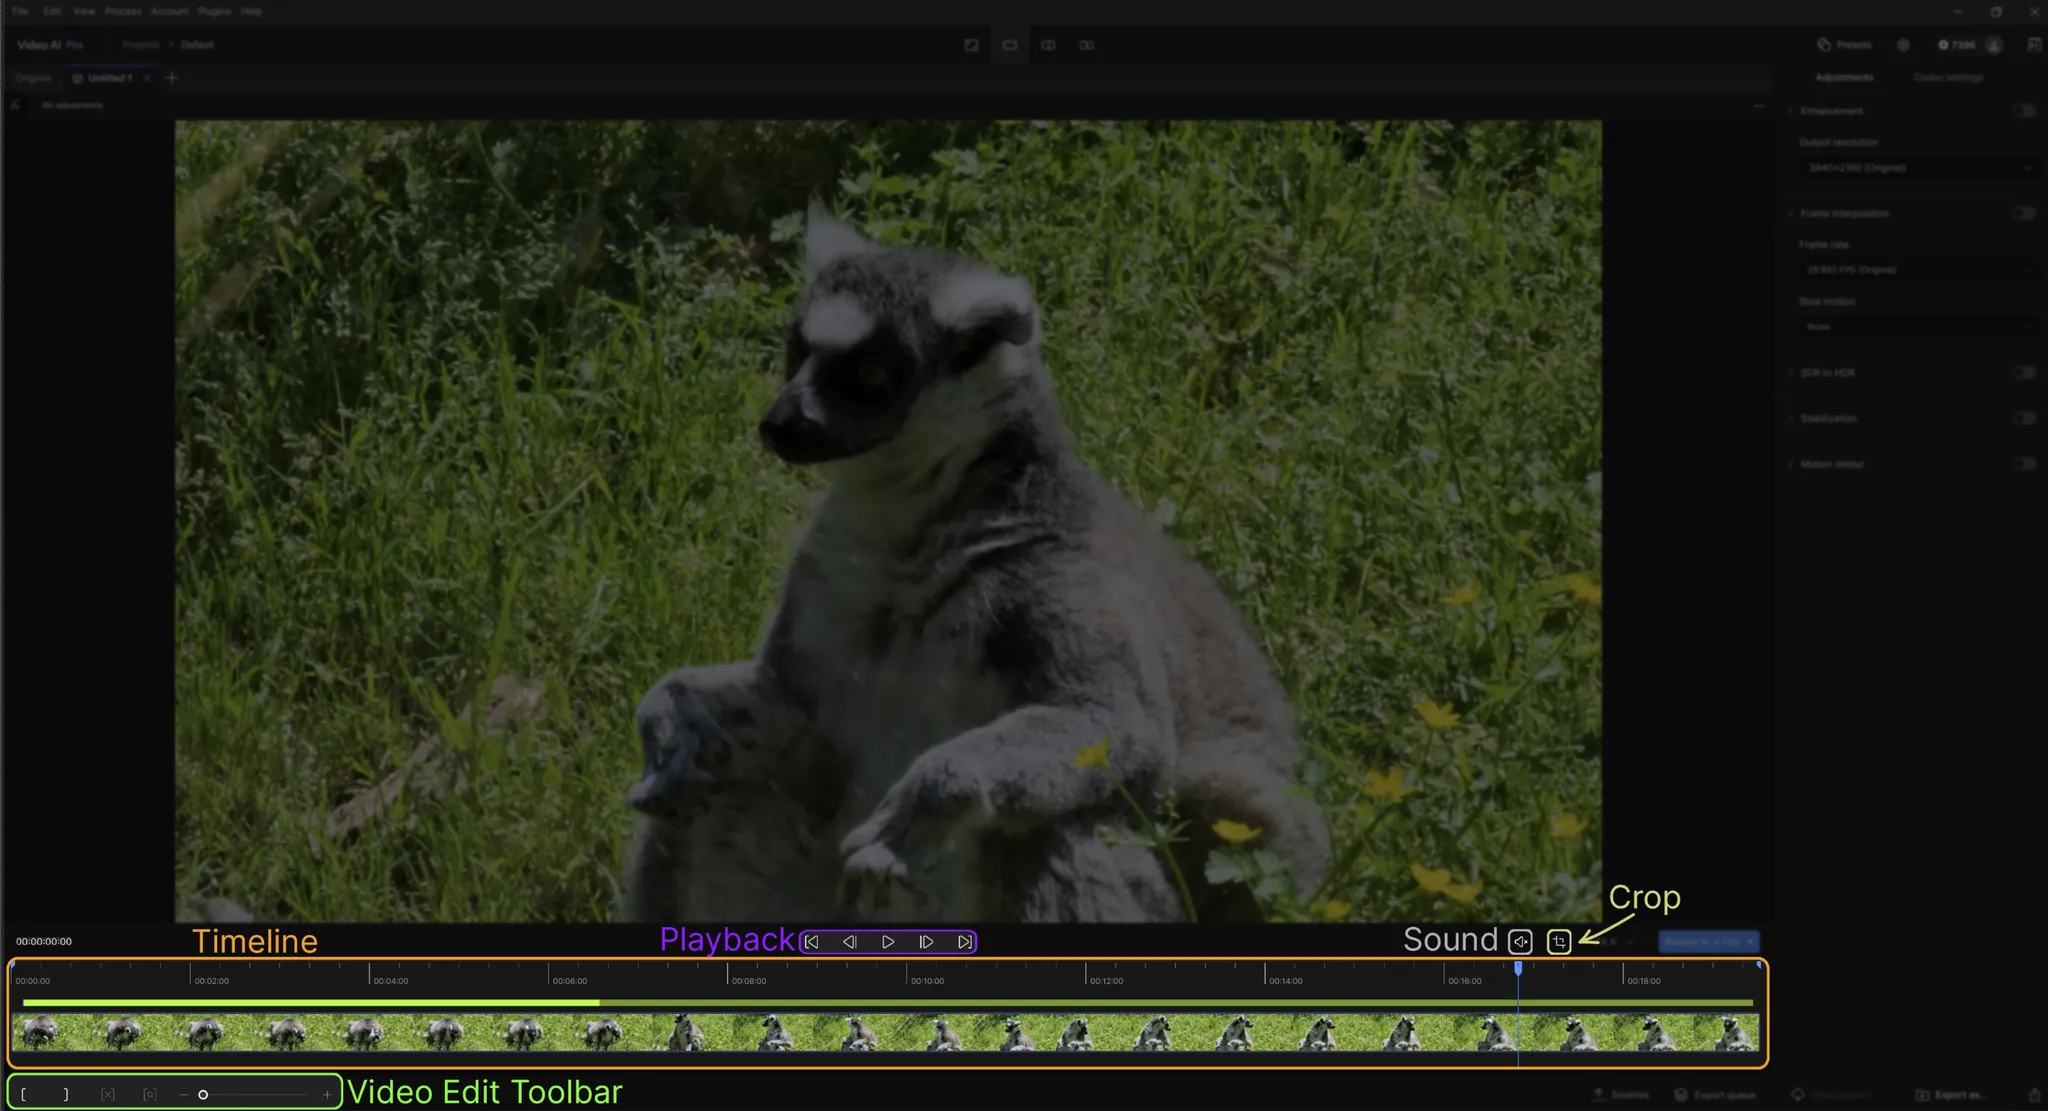
Playback Controls

These controls are the main way you will manage content playback on the Player.
- On the left, we have the “Jump to Timeline Start” button. You could quickly get the Playhead to start at the beginning or at your established “In” position.
- Second is the “Step Back” button. This allows the user to go back by a single frame.
- The center button is the Play/Pause button. Pressing the arrow button, allows the user to play the footage forward. Alternatively you can press the spacebar. When the Play button is pressed, it is immediately replaced by the Pause button. Pressing the Pause button will halt the playing video.
- The fourth button is the “Step Forward” button. This allows the user to move forward by a single frame.
- Lastly on the right, we have the “Jump to Timeline End” button. You could quickly get the Playhead to End at the final point of the video or at your established “Out” position.
Sound and Crop
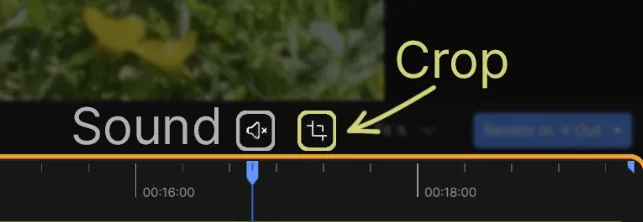
The Sound button allows the user to be able to monitor the input's sound track. By default, this is disabled with the “x” icon next to the speaker.
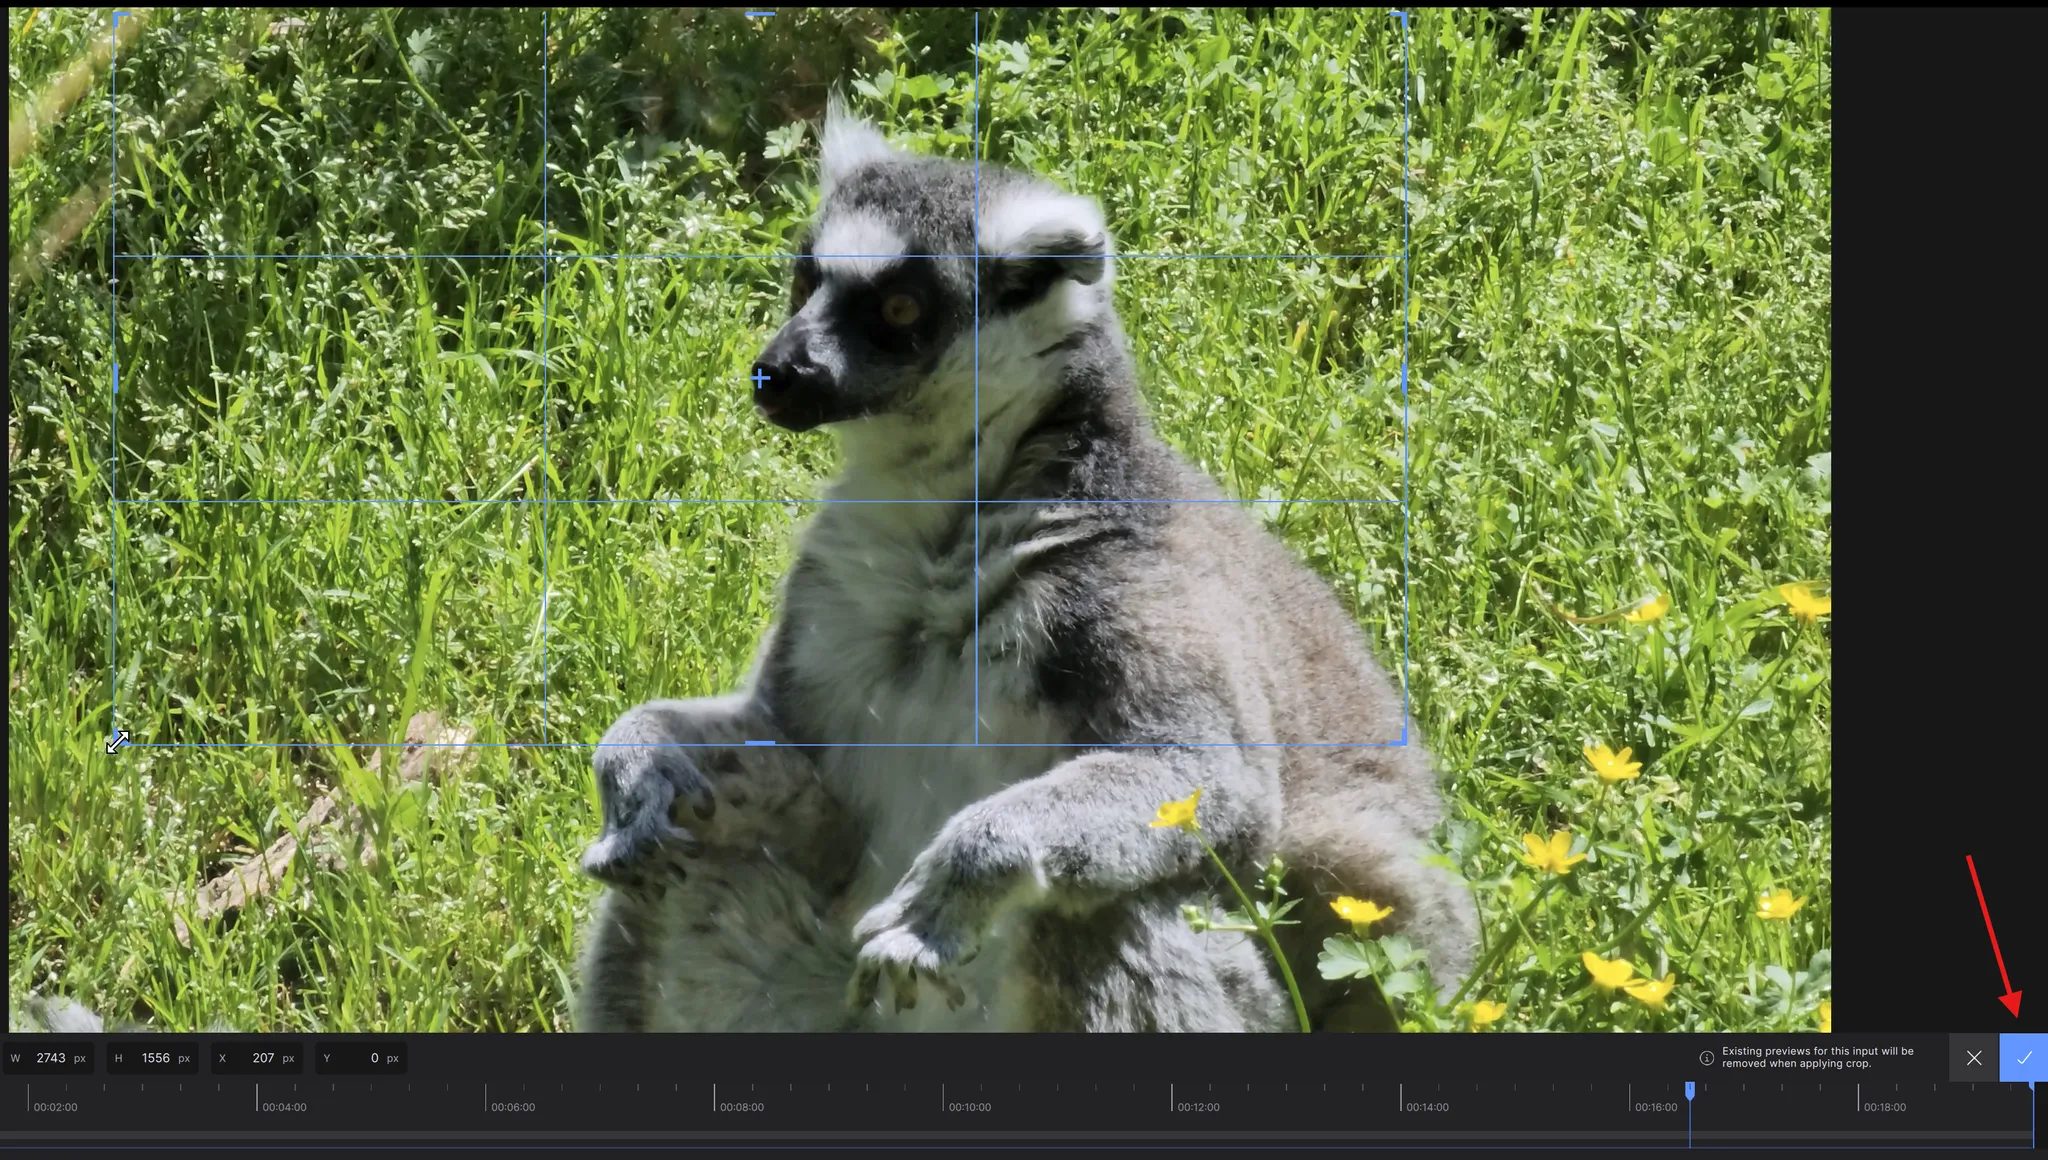
The Crop button, when selected, opens another menu allowing the user to crop into their footage. Be sure to click on the check mark to save the current setting.
Video Edit Toolbar

Click and drag the the playhead to scan through the file and determine which section of the file you wish to preview.
When you move the playhead, you'll see the length of the file and specific timestamp.
Trimming
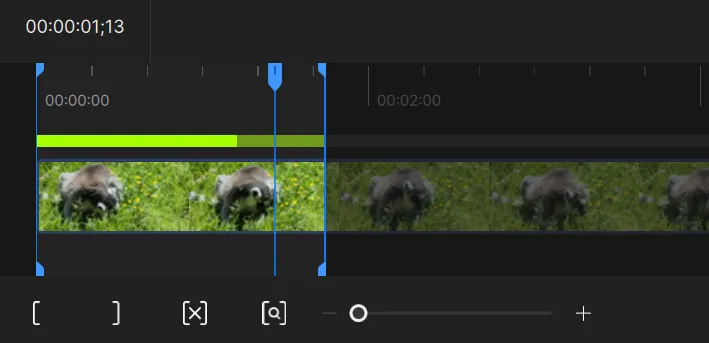
Use the [ ] buttons to select the range of the input video that will be processed during exports. Keyboard shortcuts "I" and "O" can also be used to set this range.
Presets
Choose from one of the default presets near the upper screen right side of the application.
Be sure to scroll down to see all available presets or add your own by clicking on the +Create New button.
Presets can be edited from the Edit menu option.
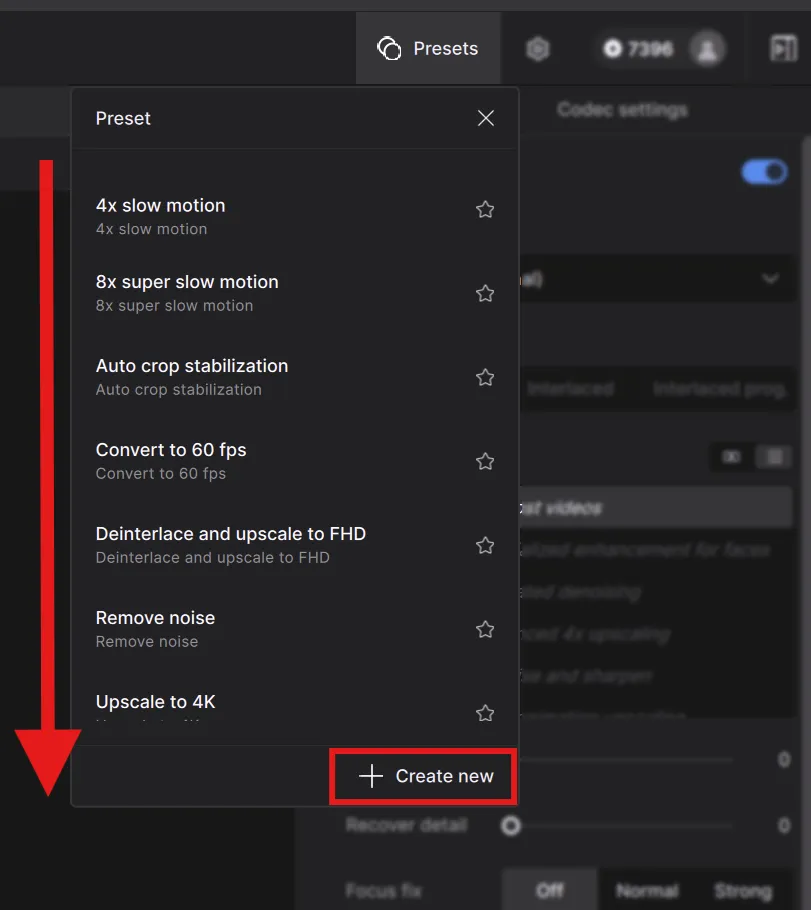
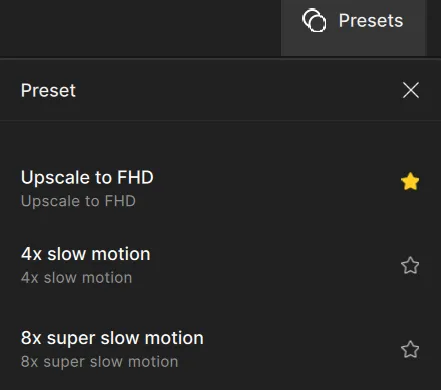
You can click on the star on the right side of the preset to bring these to the top.
Go deeper into Topaz Video AI's Presets.
Input Settings
The input settings is where you can refine a few parameters to your video before adding any enhancements.
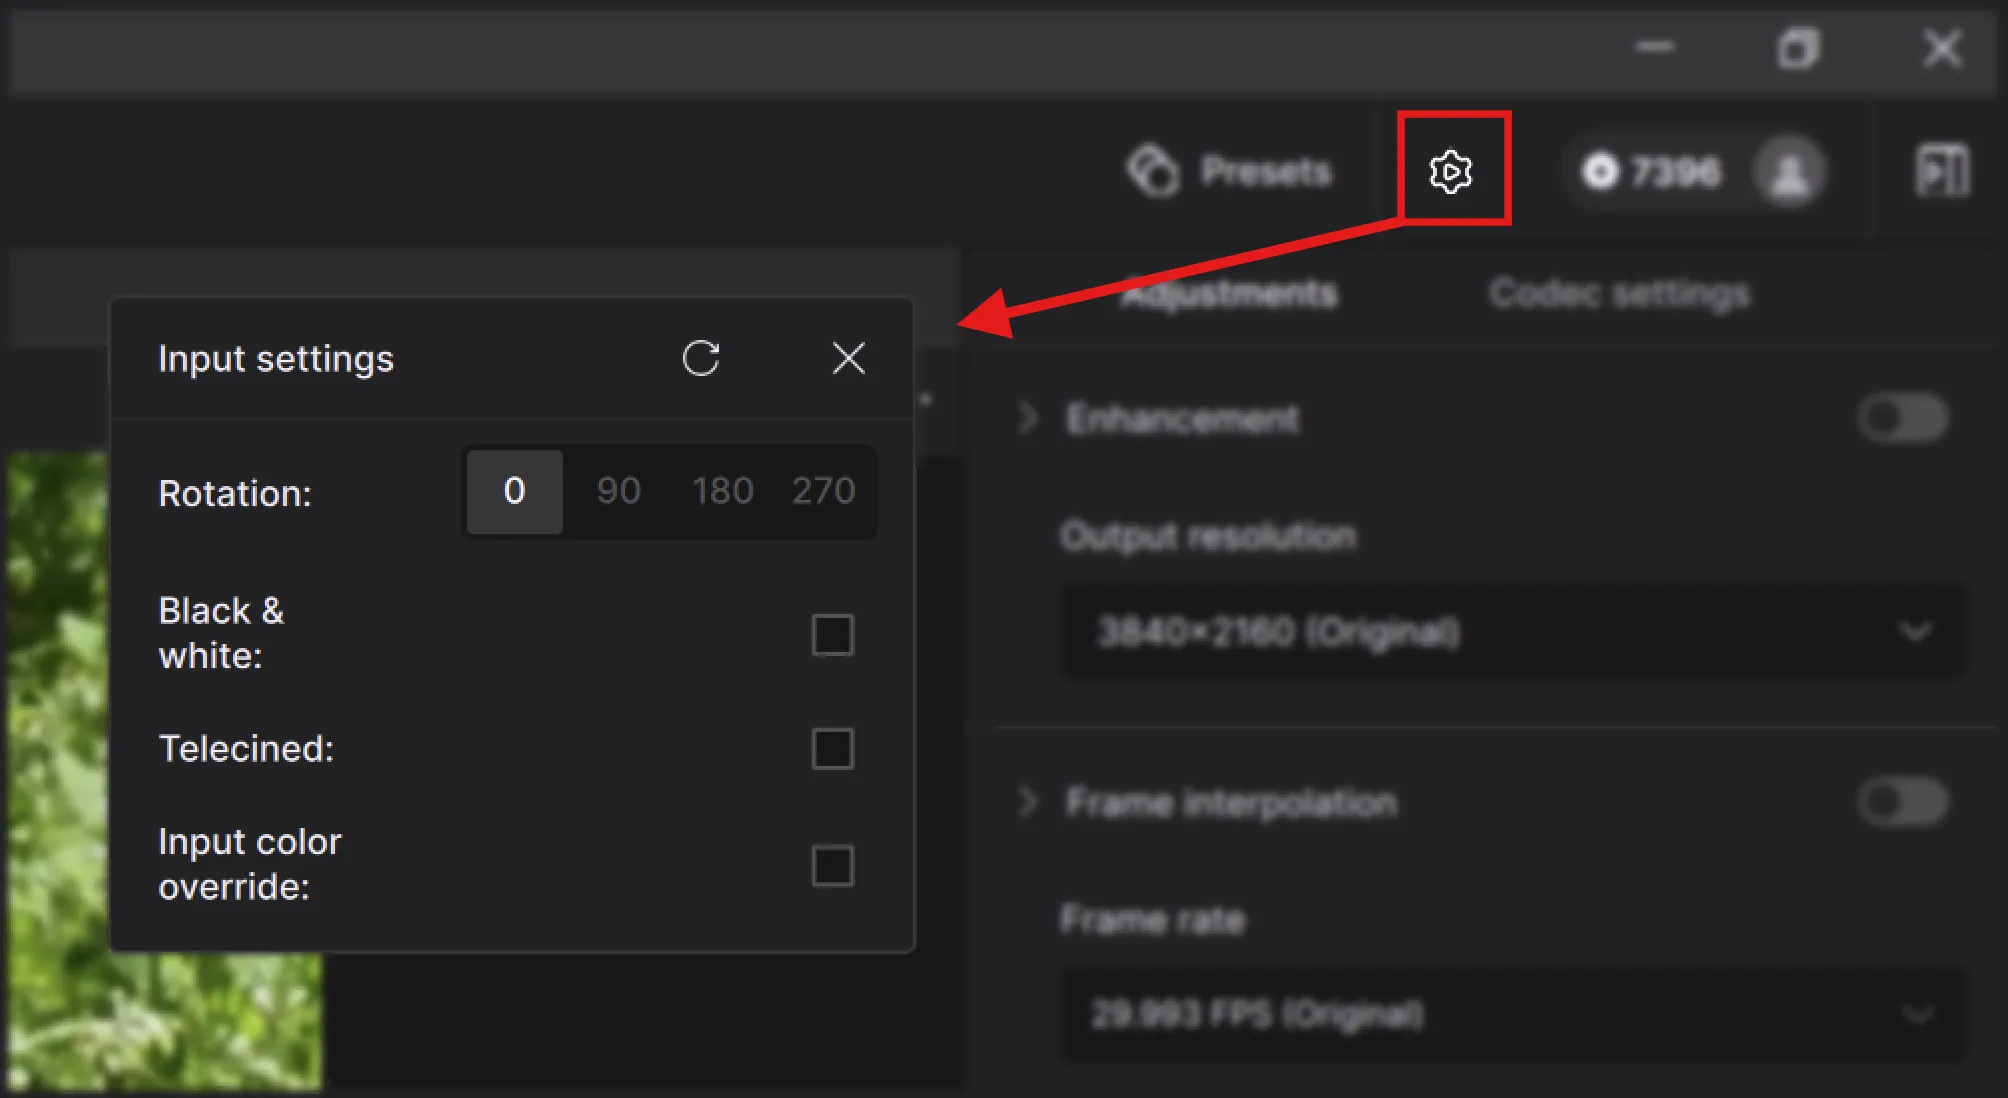
- Rotation: Rotate your video by selecting the degree rotation options.
- Black & White: select if your video is originally black and white.
- Telecined: Select if your video is a result from a telecined process.
- Input Color Override: Here you can modify how color will be treated for your video.
For Image sequences Telecined is replaced with Frame Rate. Here, you are able to define the image sequence FPS.
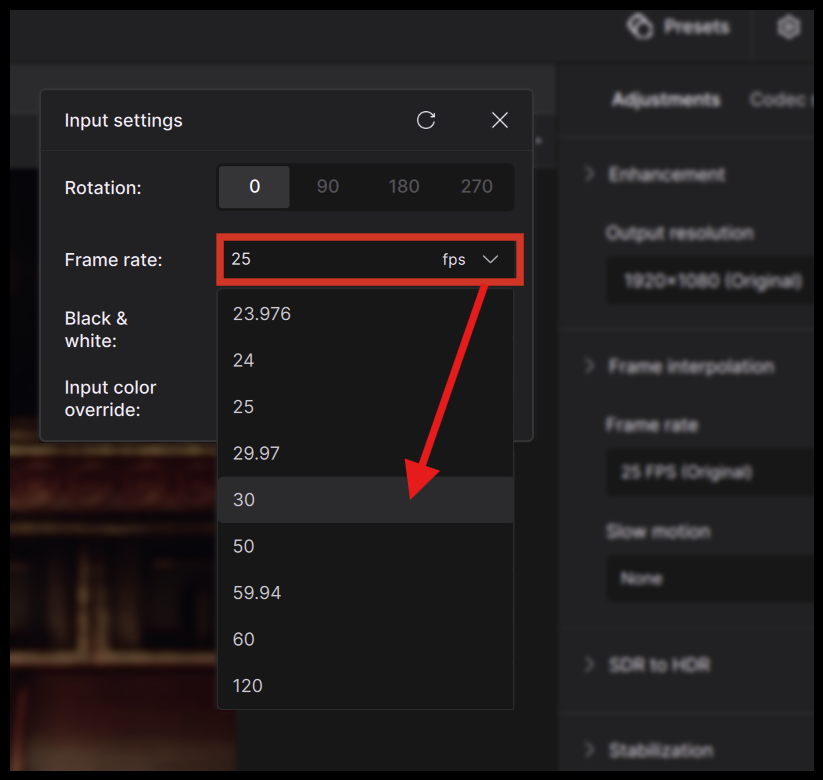
- You can click on the drop down menu to select the correct frame rate. However, if you are seeking an unavailable option such as 18fps, you can change the value.
- Select any frame rate other than the default.
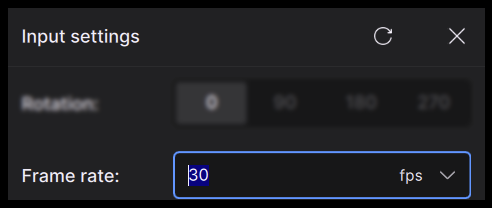
- To input a frame rate manually, highlight the value and type in the new rate.
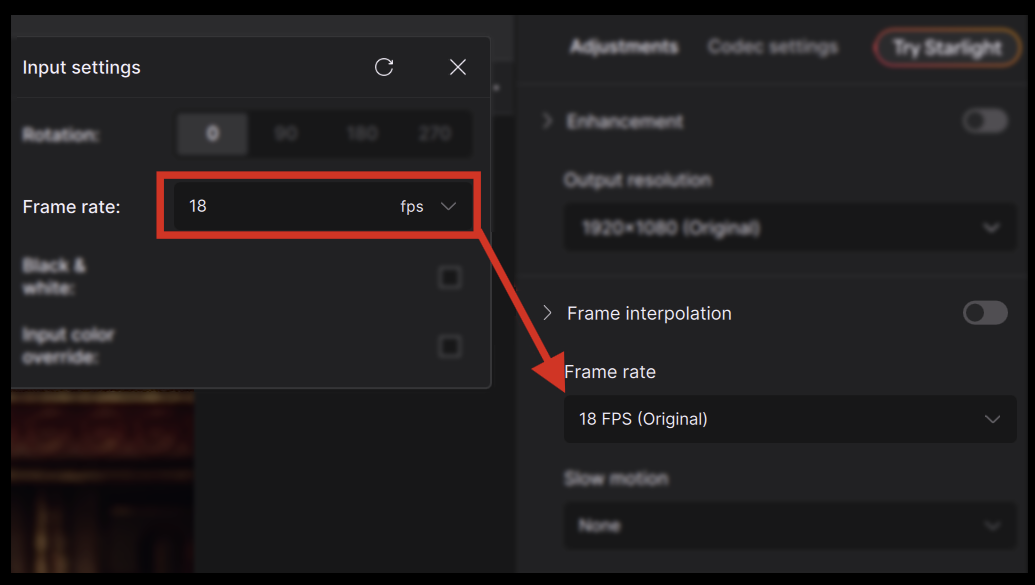
- Once this new rate is entered, you will now see this FPS value replicated at the Frame Interpolation section under the Frame Rate selection.
- Close the Input Settings menu.
- Moving forward, the application will see the new FPS as the original rate.
Preview
Previewing will determine if the best filter(s) have been selected for your project.
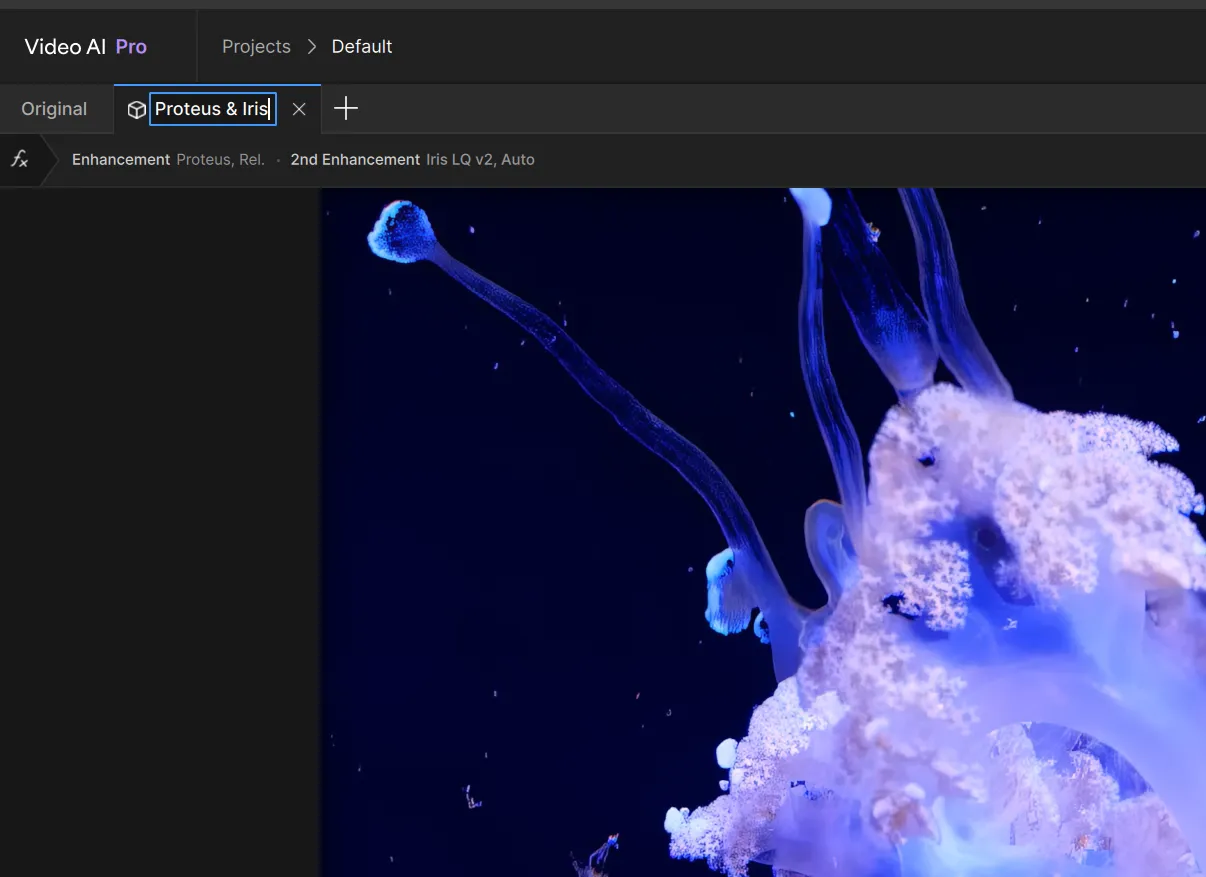
You can custom rename tabs.
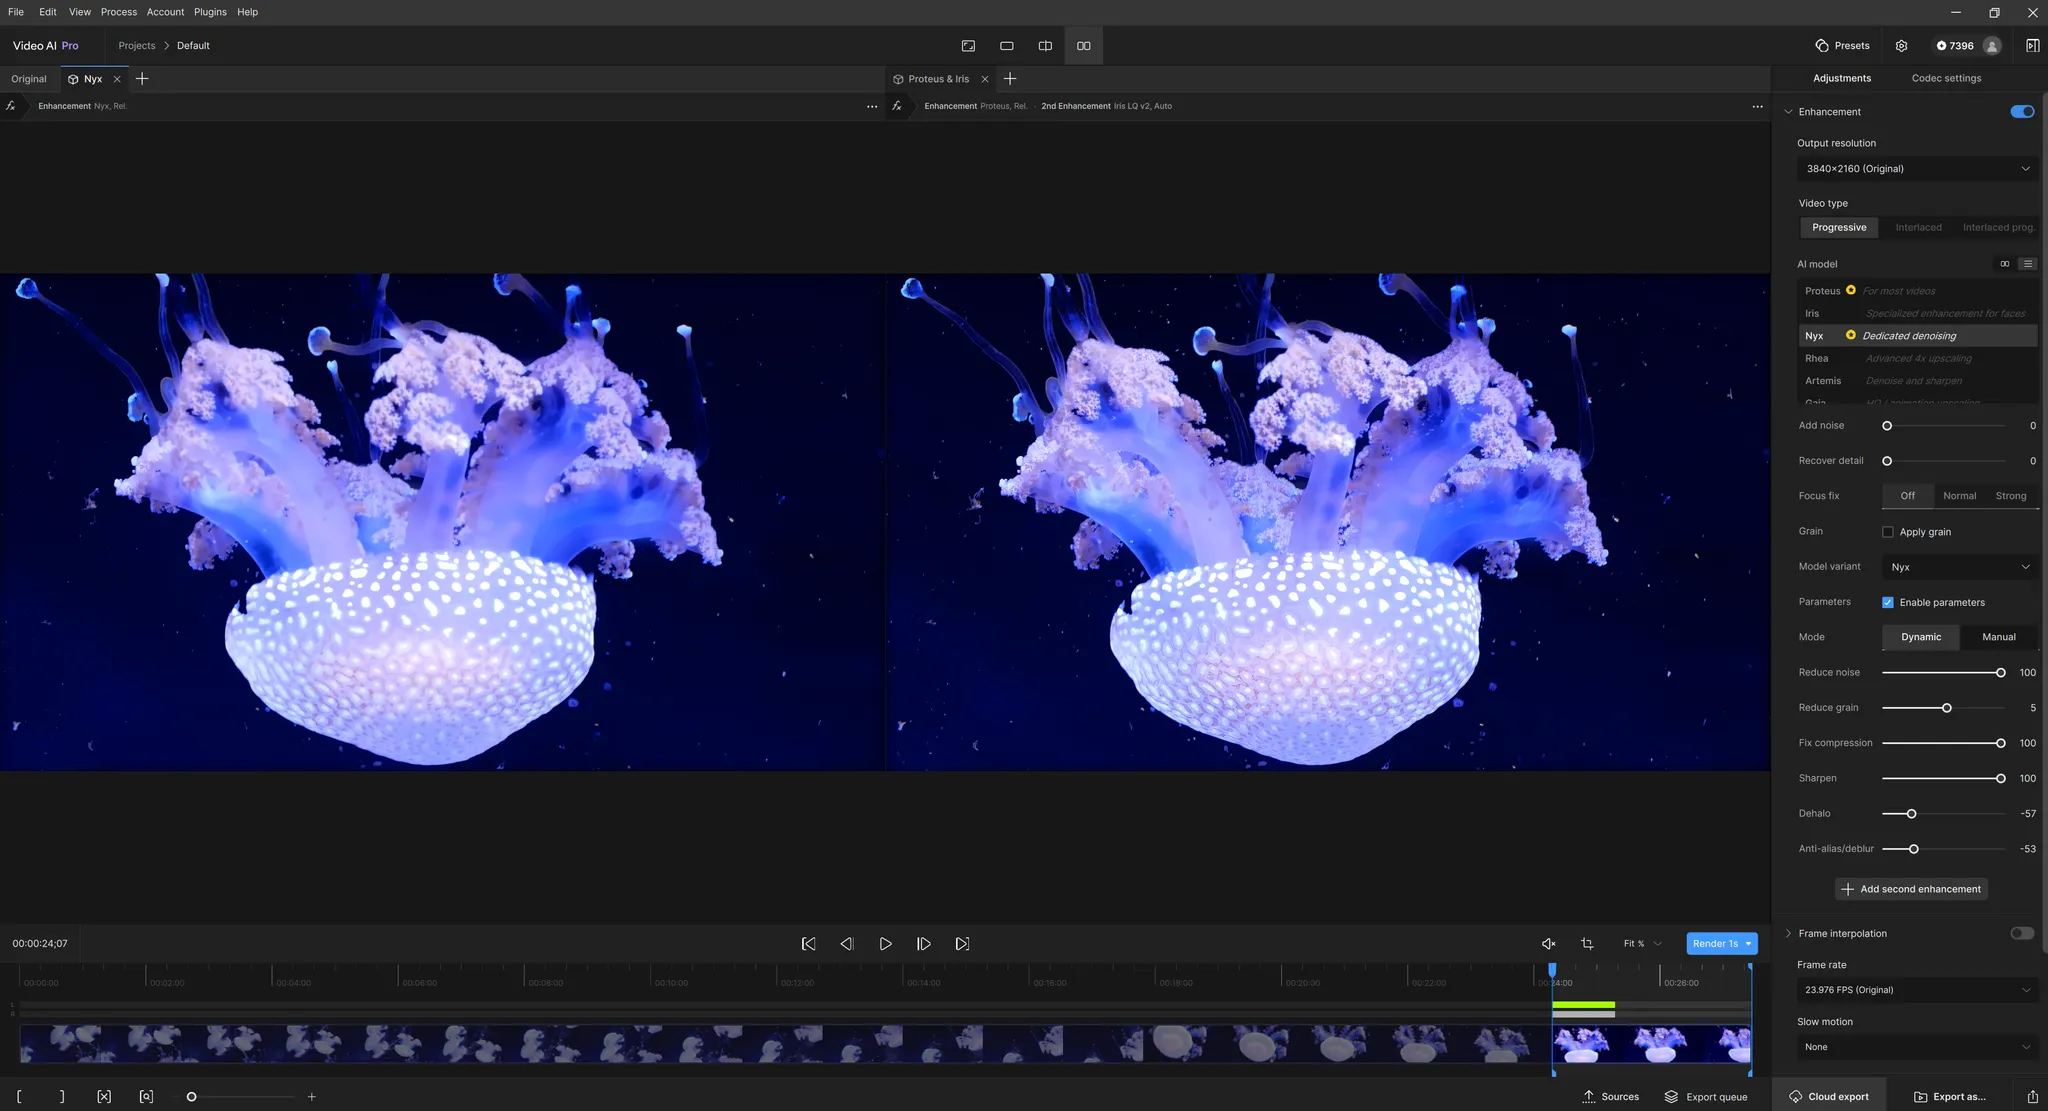
To Side by Side (SBS) compare, you can “pull” the tab and drag to the screen right or left side of the player.
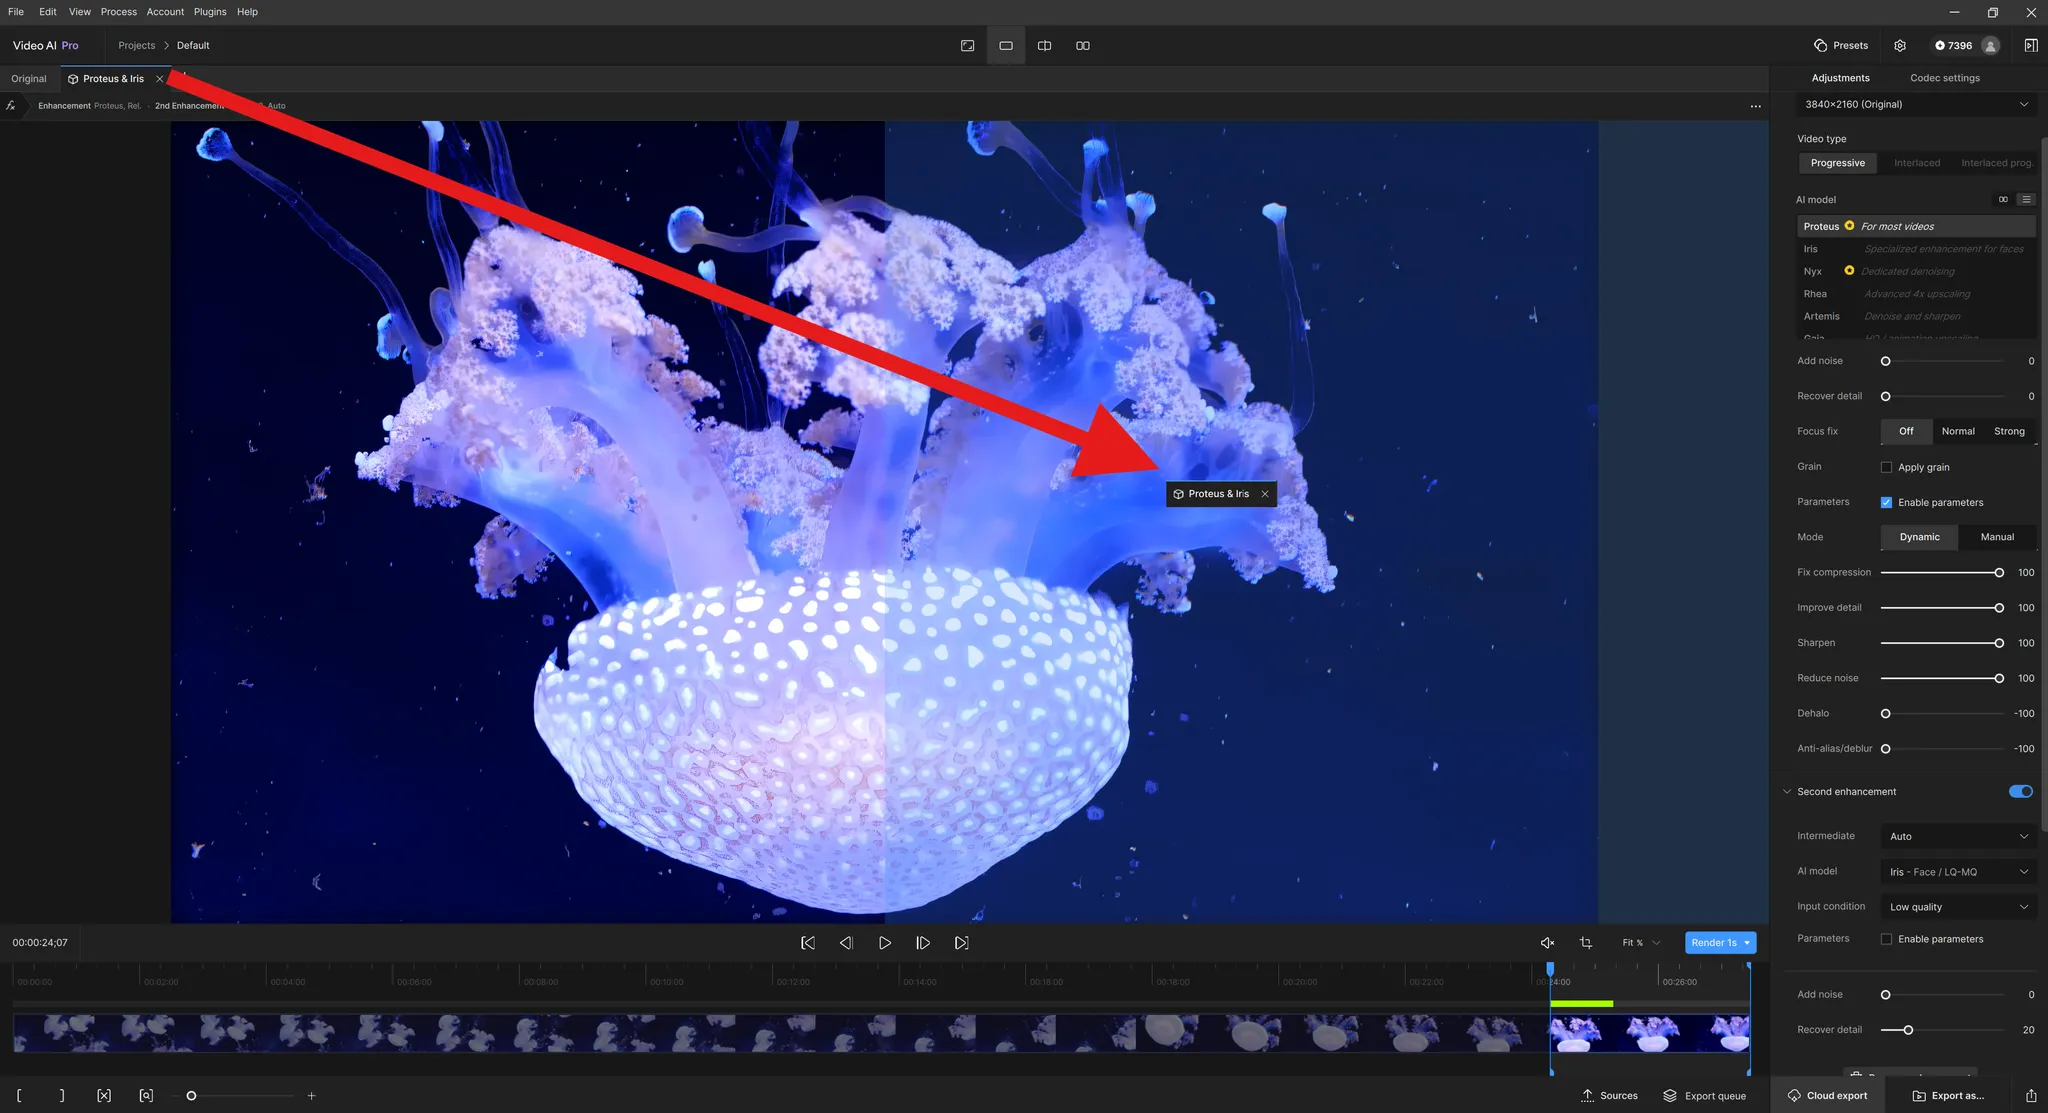
The “pulled tab” has now become a second player. By making the SBS players, this will automatically update the viewer mode selection. Note, that both players will always be in sync.
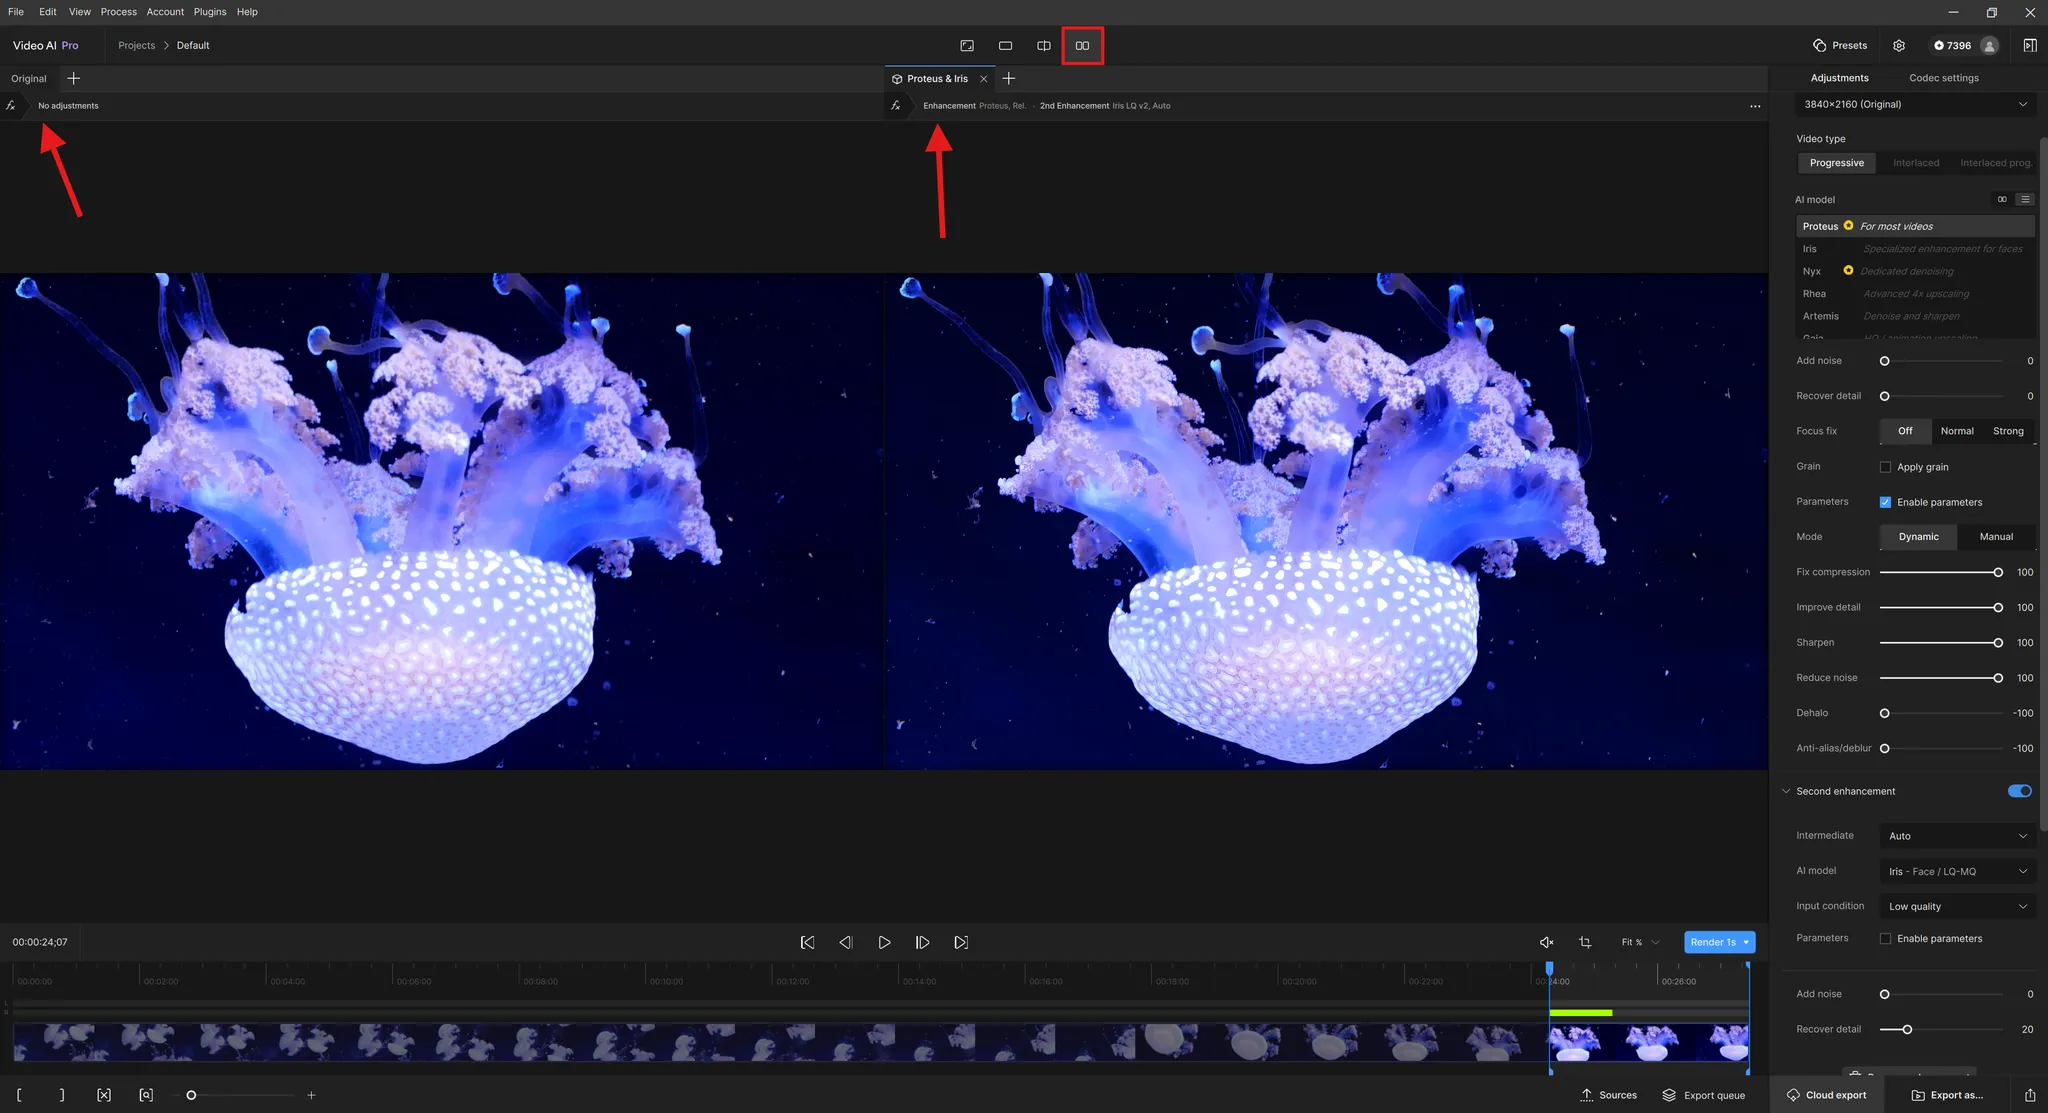
Instead of pulling tabs, you can alternatively just click on the SBS button, the Split View or Single View on the Player Modes section.
If you want to try different combinations or modifications of filters, you can press the + button to add a new preview.

The great thing with tabs is that you can drag the tab with one set of enhancements from one side to the other, thus you can compare against another preview.
Learn more about Tabs with these video:
Video AI Tutorials: Player Tab Views (v6)
Video AI Tutorials: Renaming, Viewing, Moving & Filters (v6)
Video AI Tutorials: Set Tab Comparison (v6)
Video AI Tutorials: Copy Paste Tabs (v6)
Live Render Preview vs Manual Render Preview
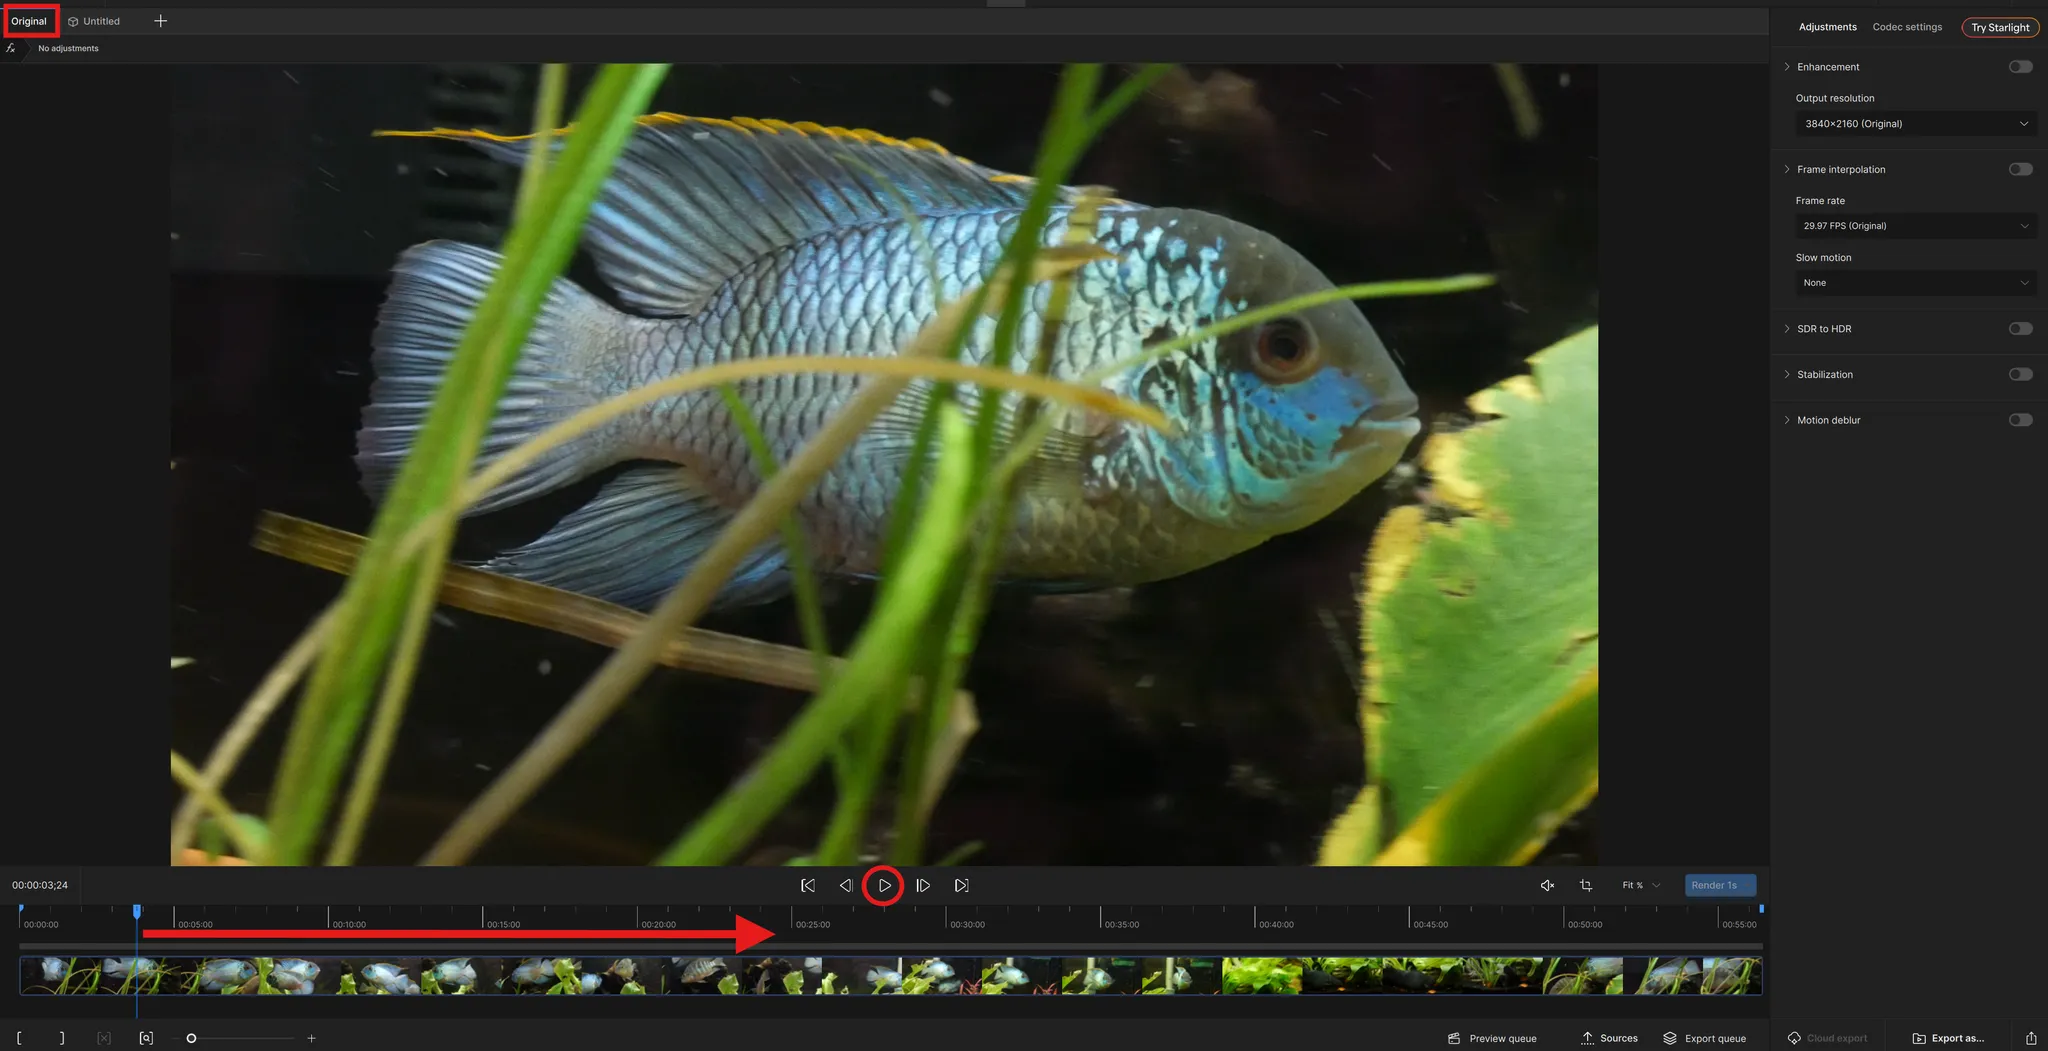
Playing your Original footage (conveniently within it’s own tab) is as easy as hitting the spacebar on your keyboard or clicking on the Play button.
Pausing/Stopping can be achieved by either pressing the Pause button or hitting the Spacebar on your keyboard.
This allows you to easily preview your footage and decide the plan of action that you are wanting to take with this footage.
When adding an Enhancement, Frame Interpolation, SDR to HDR, Stabilization, Motion Deblur or any combination of the lot, doing a preview before rendering the whole video is ideal.
There are two ways to do a preview. One is with Live Render Preview and the other is with Manual Render Preview.
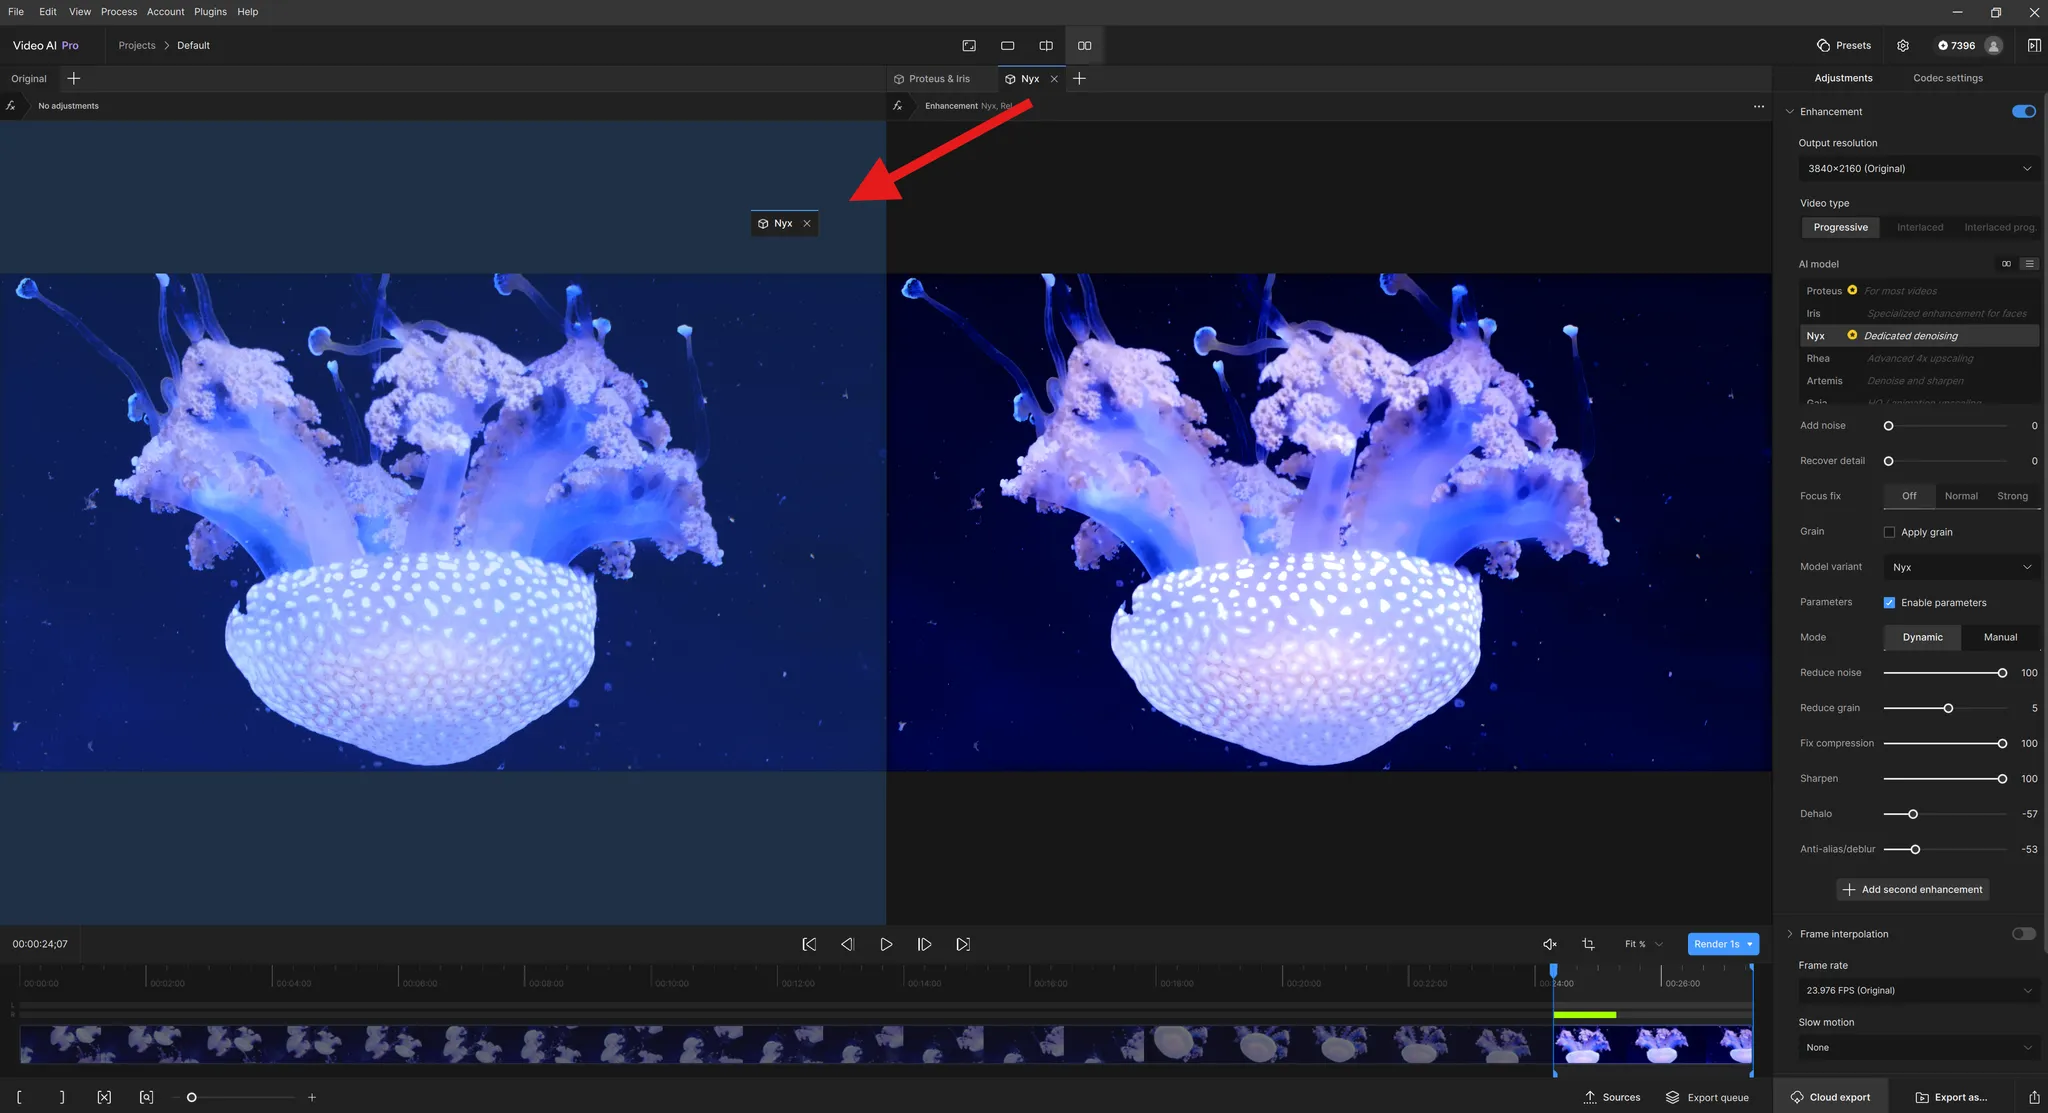
Live Render Preview
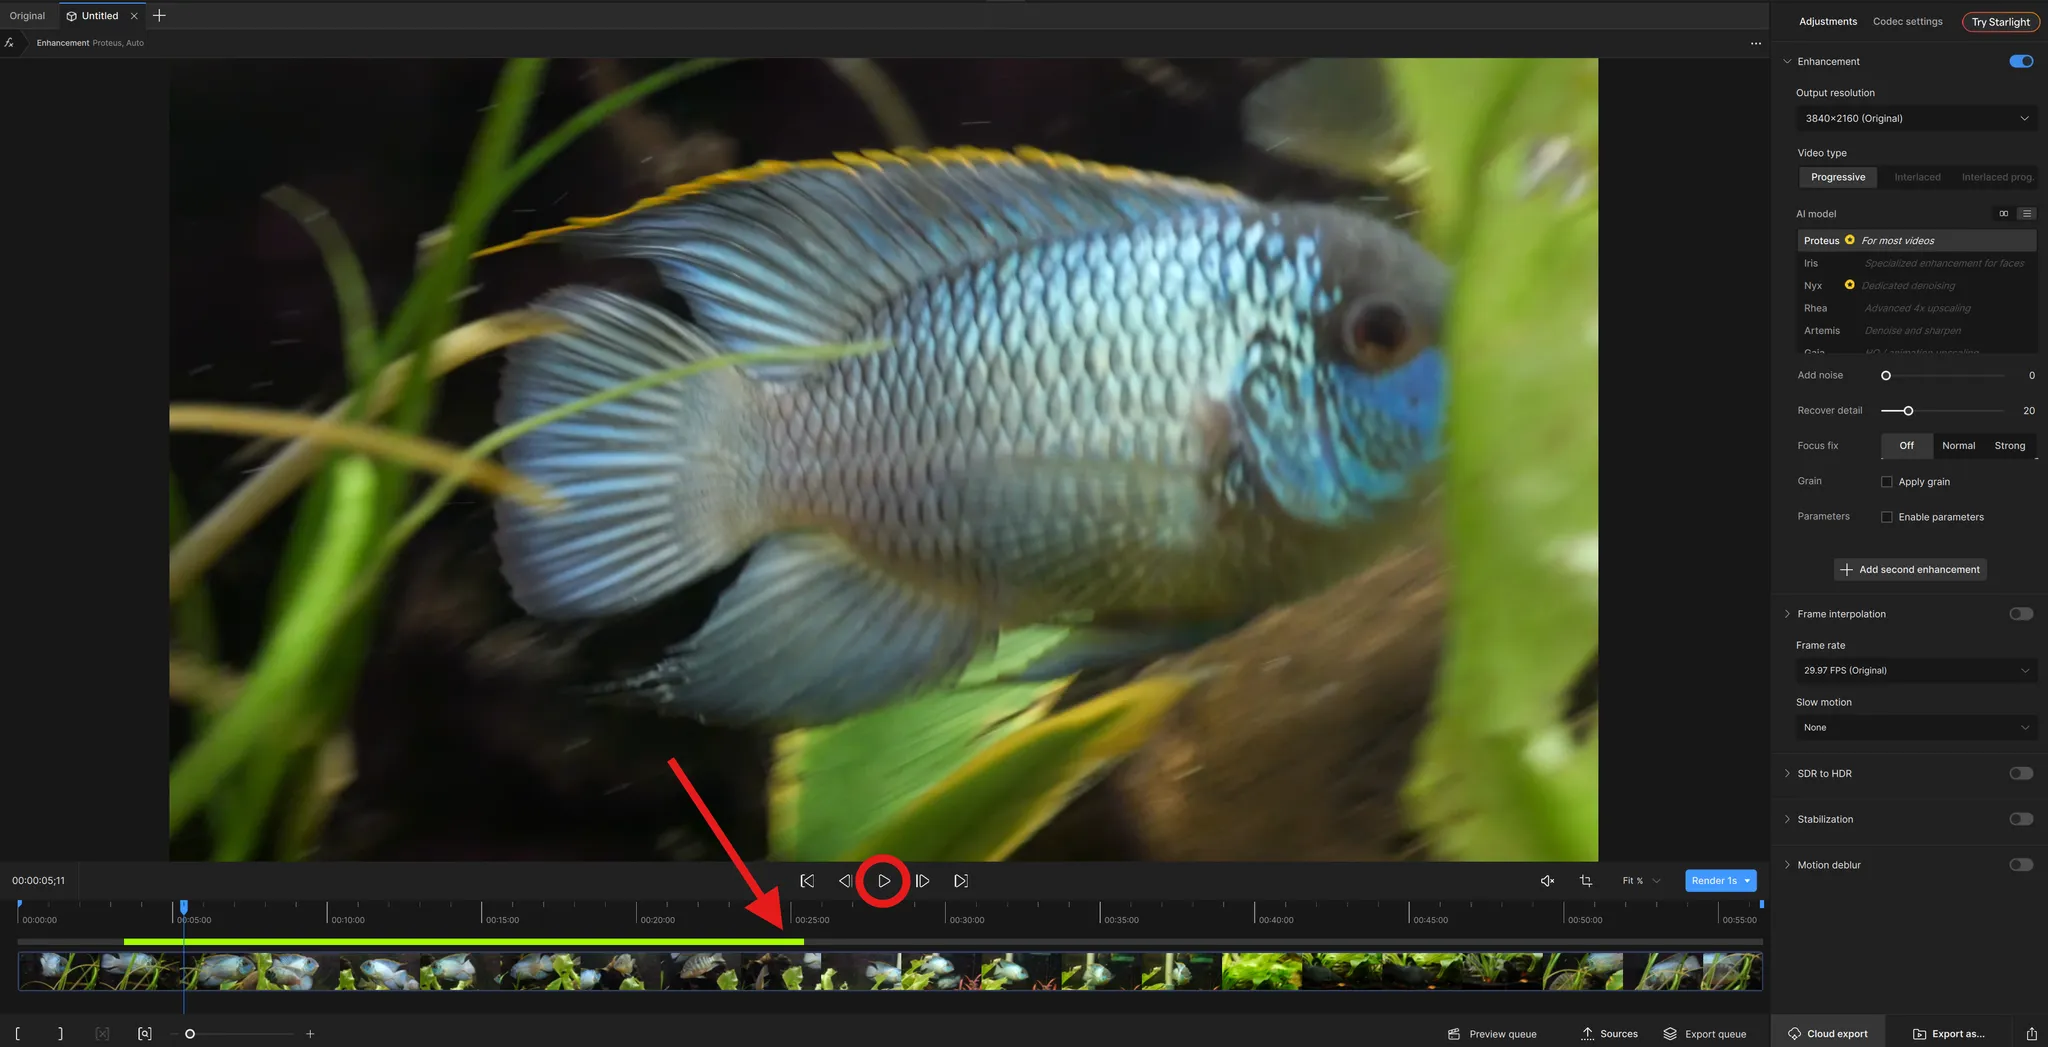
Live Render was a heavily requested preview mode. It works by immediately doing a preview once an enhancement is applied and gets initiated by either the Spacebar being pressed or the Play button. This is great for short videos with light enhancements to see an instant update with your video enhancement applied.
Below, the Enhancements section has been enabled and the AI Model, Proteus has been selected. The spinning wheel icon replaces the Play button to indicate that a preview is being generated. The dark green line on the timeline shows where the preview will begin.
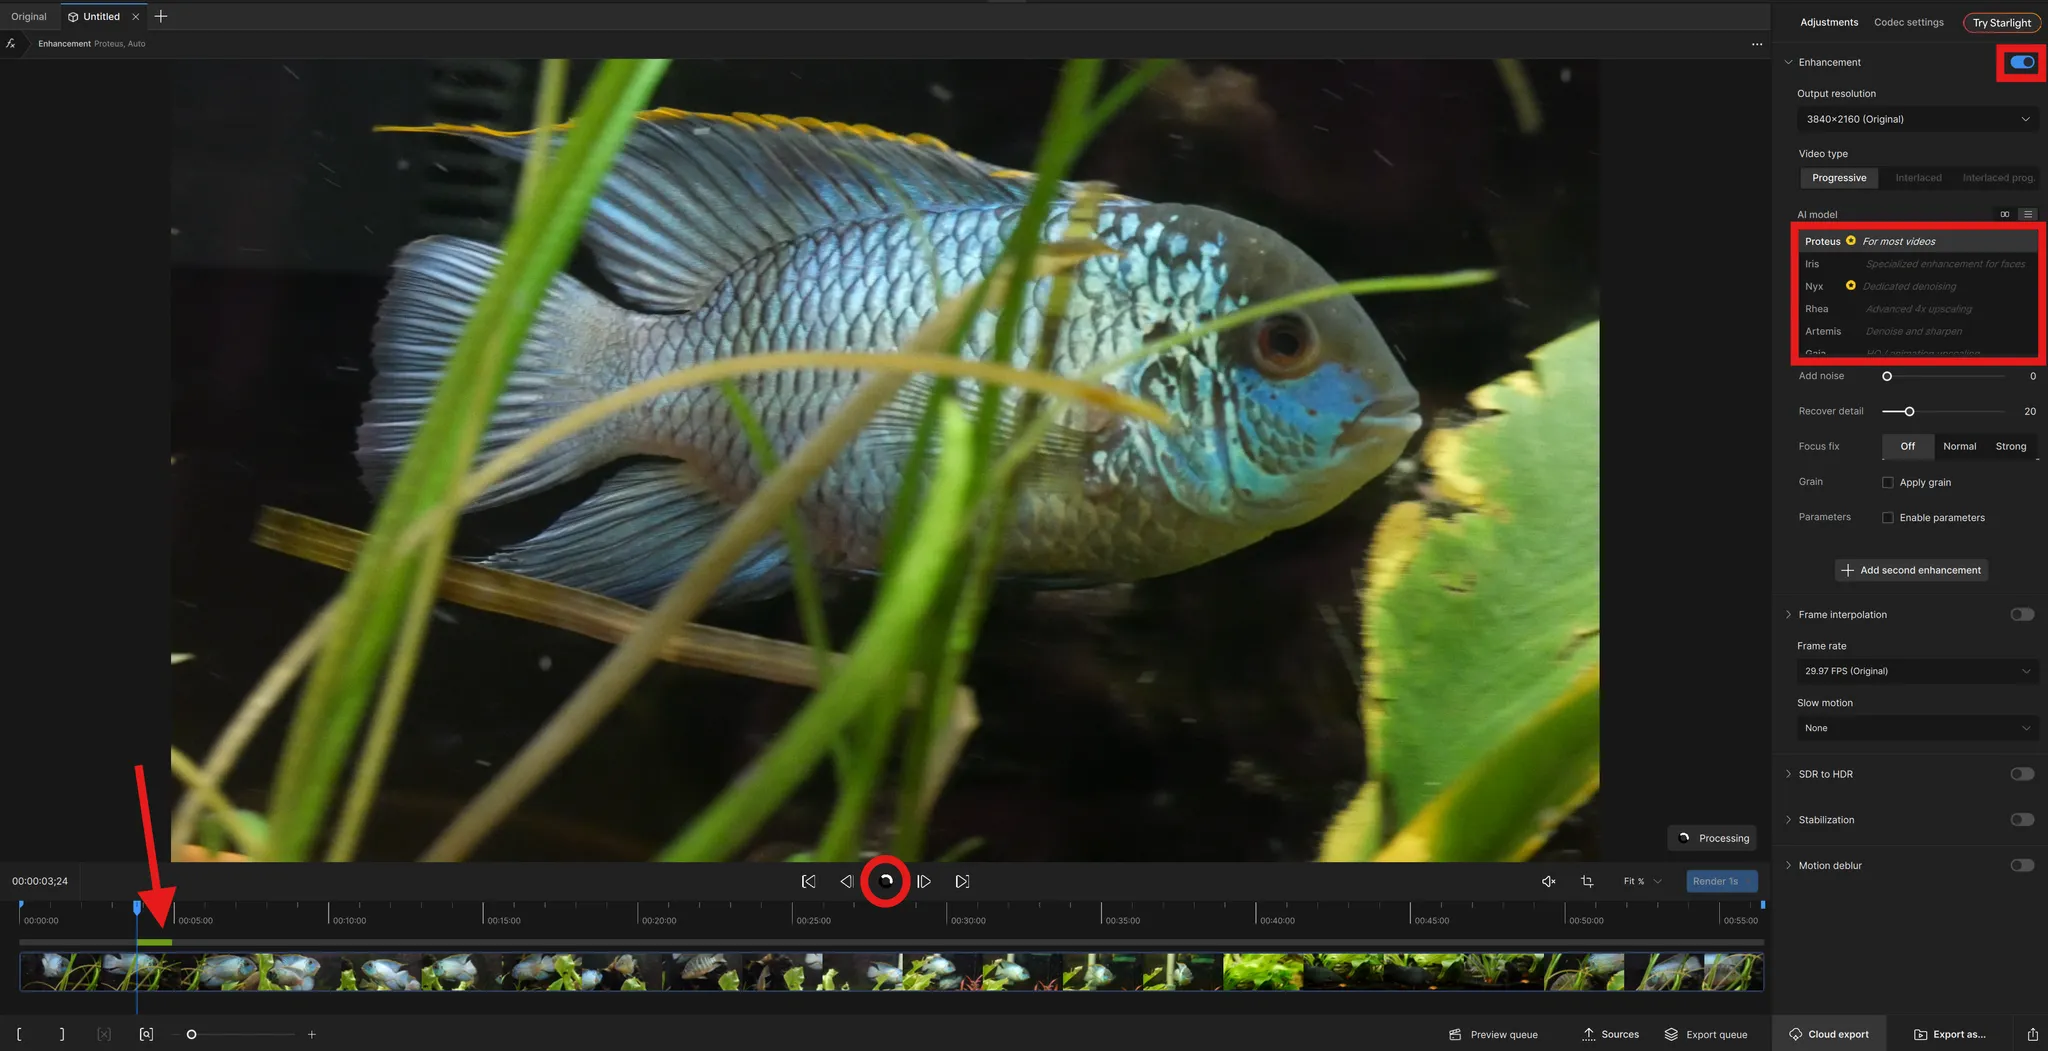
Notice that as the wheel spins, the live render is still caching.
The lime green color on the timeline indicates sections of the timeline already cached. The dark leading green line on the timeline shows the continued progress of the live render.
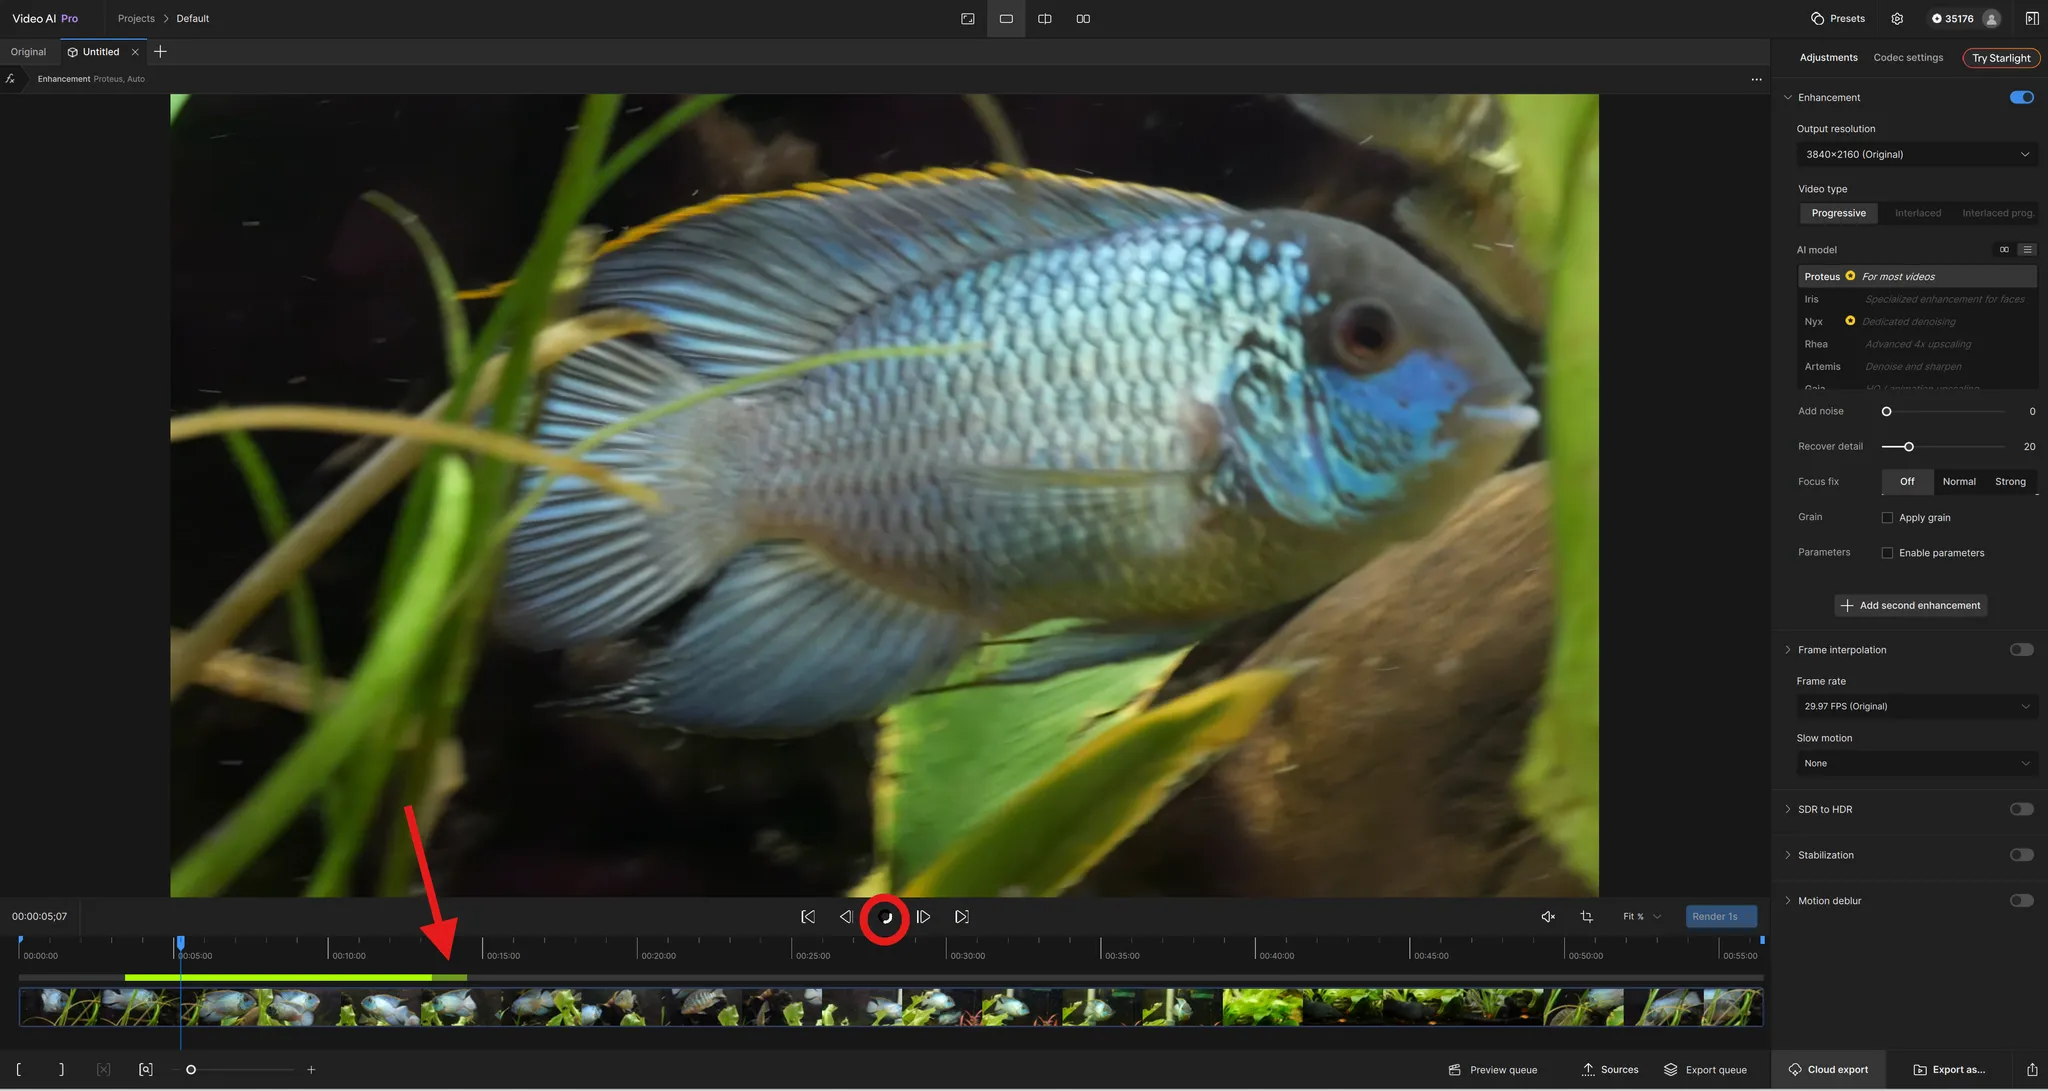
Here, the live render has been paused by double clicking the spacebar on the keyboard. This can also be done by pressing the spinning wheel to stop the live render task.
Stop a Live Render Preview:
- Double press the Spacebar on your keyboard
- Press the spinning Play/Wheel button
- Selecting a different AI model*
- Changing a parameter value*
Things to Keep in Mind:
- Selecting a different AI Model will clear the lime green preview. However, returning to the same AI Model usually keeps the same lime green preview.
- Changing a parameter will clear the lime green preview. However, if you return to the same parameters, the lime green preview will return. Disabling “Enable Parameters” will fully clear these cached previews.
Manual Render Preview
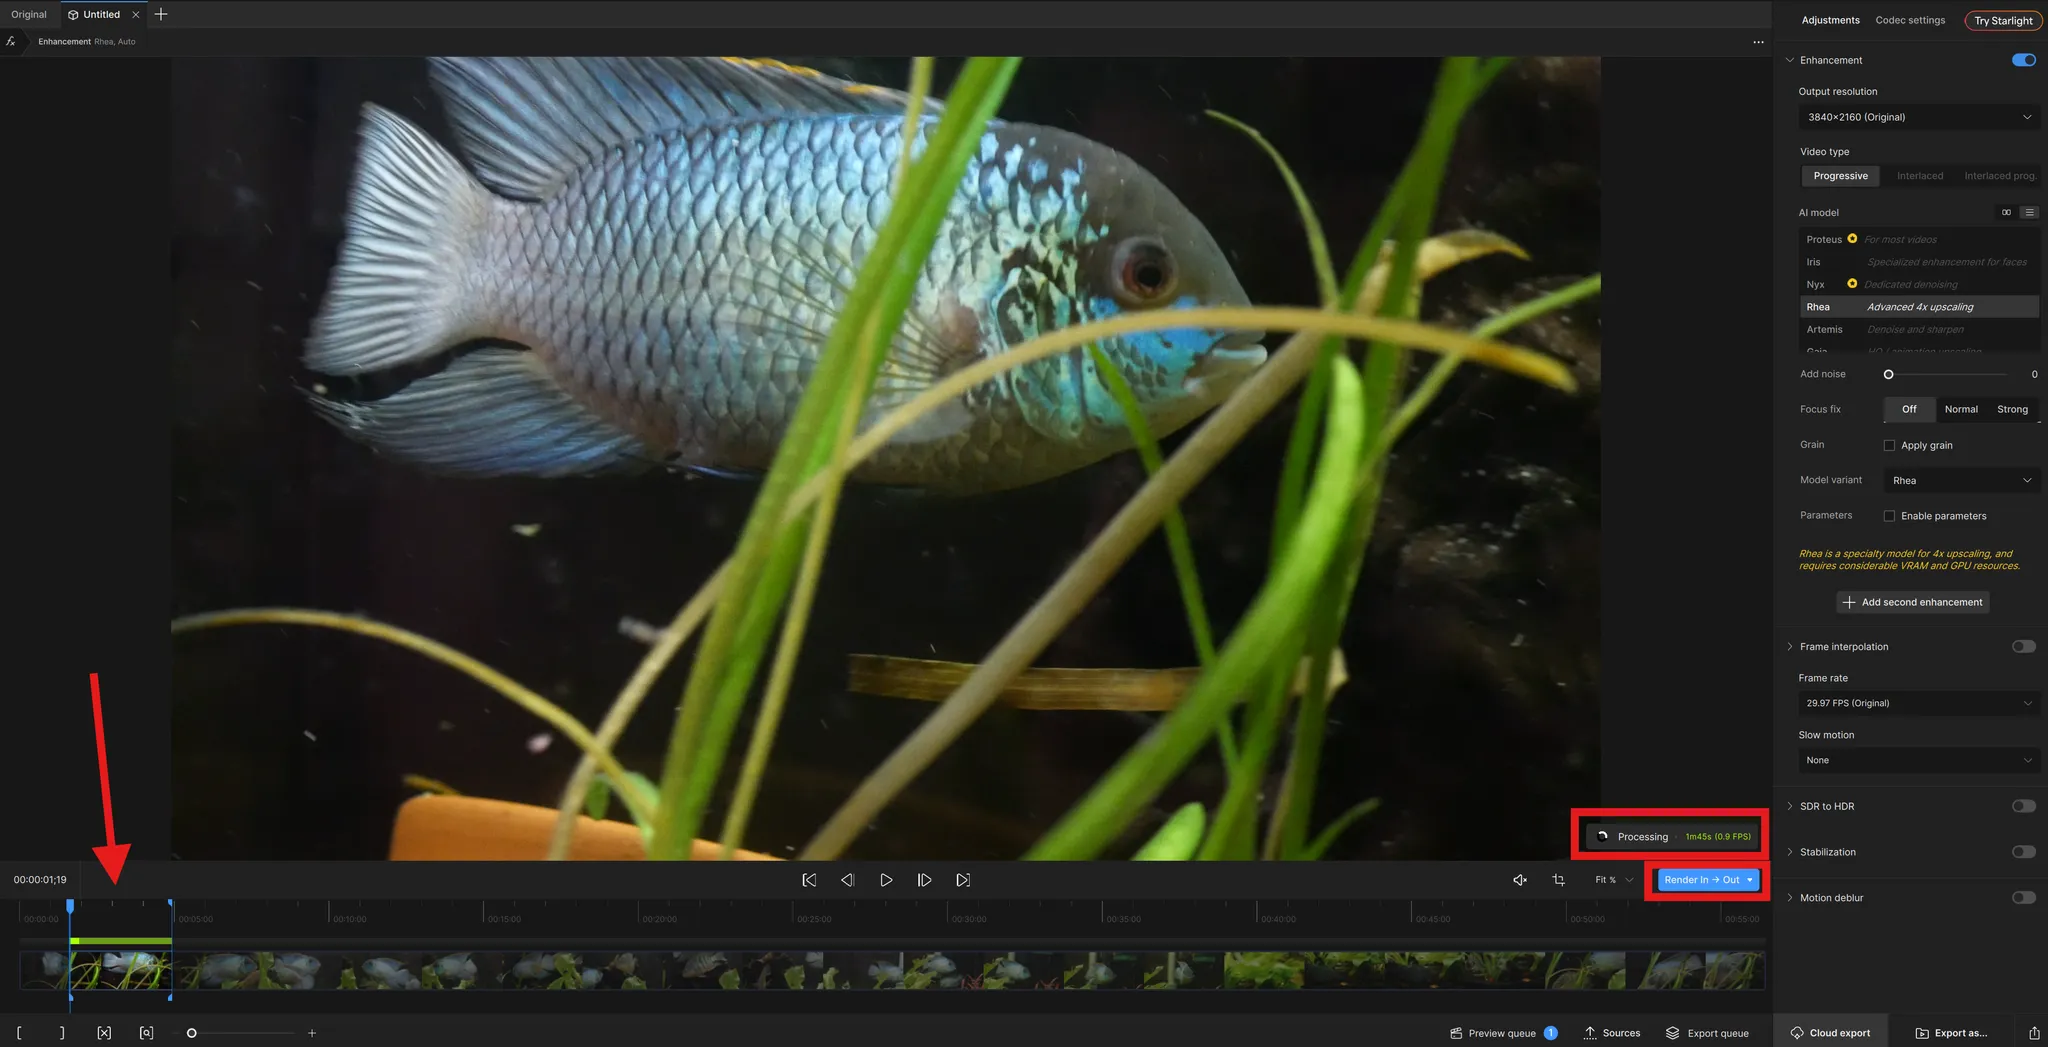
If you have a long piece of footage, isolating render points plays a more pivotal role since caching the whole video can be a waste of local memory resources and take a significant amount of time.
This is where Mark In (I) and Mark Out (O) points will prove most useful. Here you can isolate a very specific region on the timeline to render a preview. If this is short enough, you can change the “Preview” render range to “In to Out” to encompass the full selected render region.

In this example, with the Preview set to “Render In → Out”, this is now isolated to the region of interest that’s established with the Mark In and Out points.
With this designated render area (just above the preview) there is a little status popup that shows the following: animated spinning wheel icon, processing status, remaining time estimate and number of FPS of the task rendering.
This small preview can give the user some valuable insight on the AI model results without having to preview the entire video.
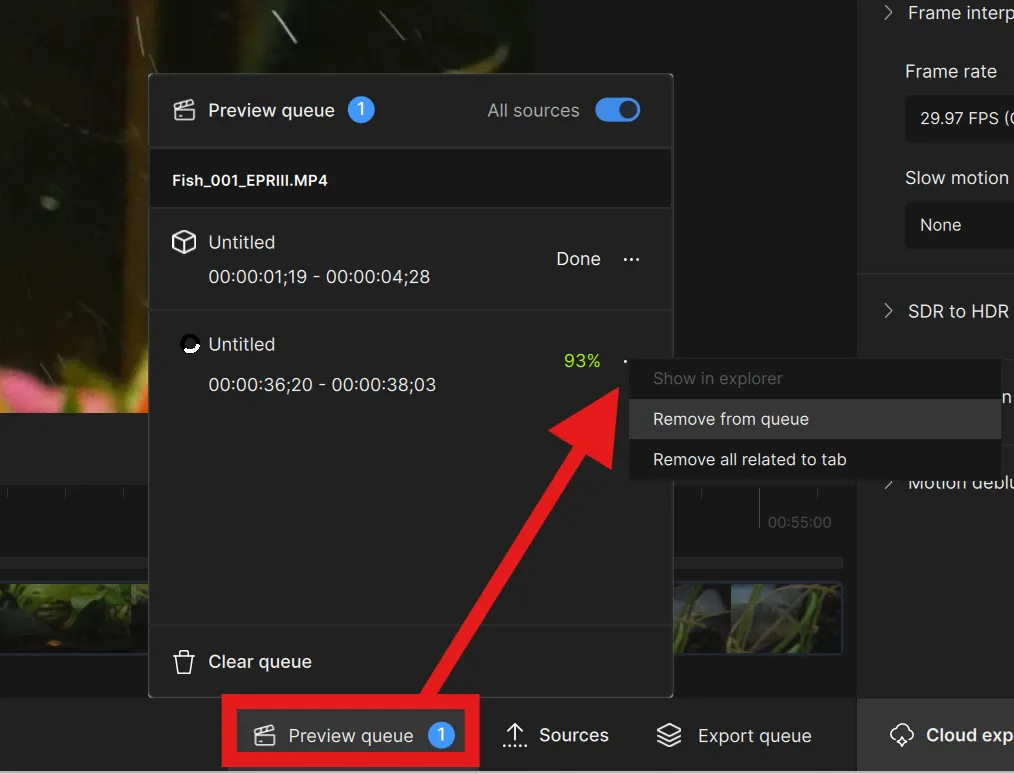
If you want to stop the Preview from continuing, you can double press the spacebar. Additionally, you can fully remove it by going to the Preview Queue.
The Preview Queue, holds all your previews that are complete or in progress. Those in progress will show a percentage of completion.
To stop a preview, on the task next to the percentage of completion, clicking the three dots to reveal a small menu where you can “Remove from queue”.
Additionally, cached previews can be removed from here.
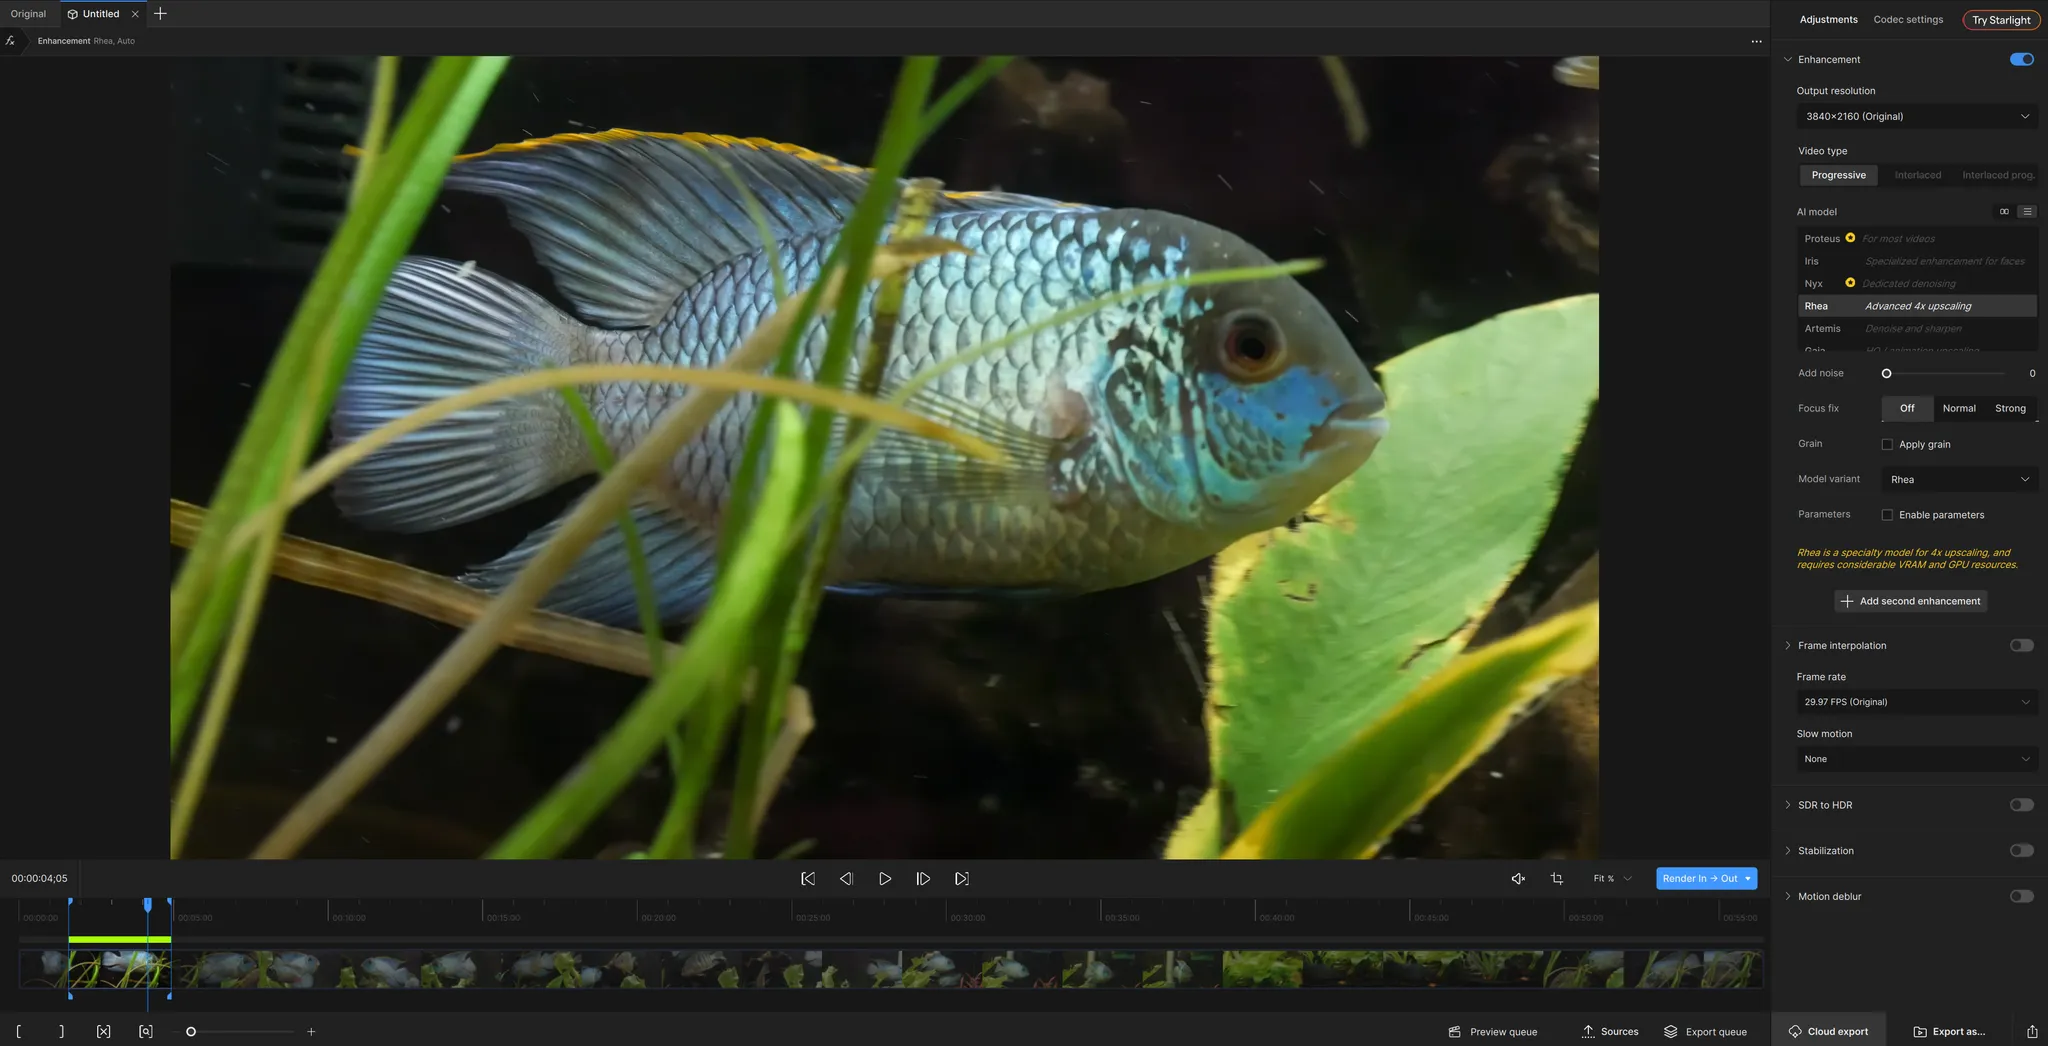
Notice, when complete (with the solid lime green line), only the region of interest is rendered for preview. You can playback within this section and it will loop.
Please note, if you decide to remove the Mark In and Mark Out, the Live Render will take effect as the default. This will be initiated with either the spacebar being pressed or play button gets a click.
Learn more about previewing between different tabs with these videos:
Video AI Tutorials: Timeline Mark In/Out & Previews (v6)
Video AI Tutorials: Set Tab Comparison (v6)
Duplicate Tabs
There are many instances where you may want to take identical settings from one video clip and apply this to multiple similar videos.
Here is a quick guide on just how to do that.
- Prepare the settings on a video until you are satisfied with the results.
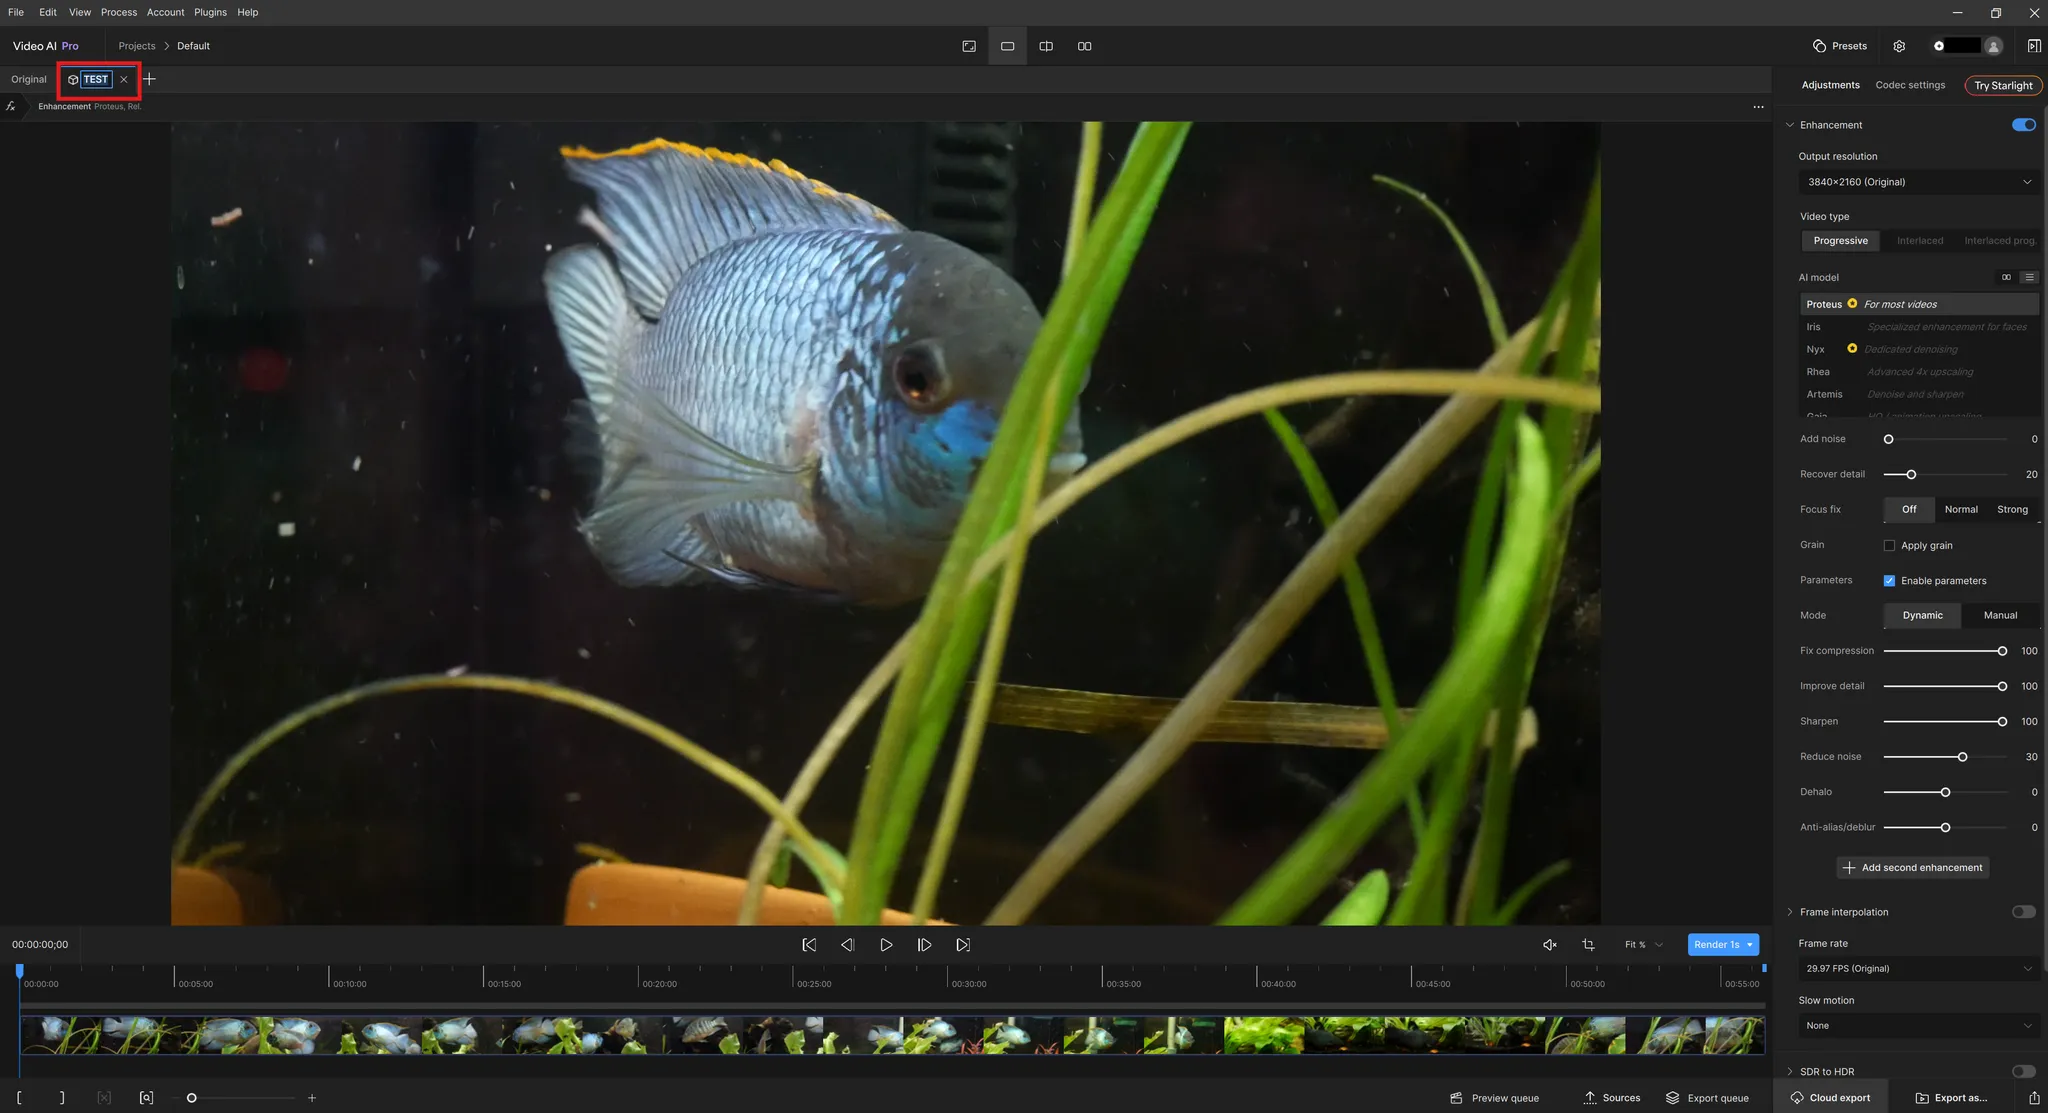
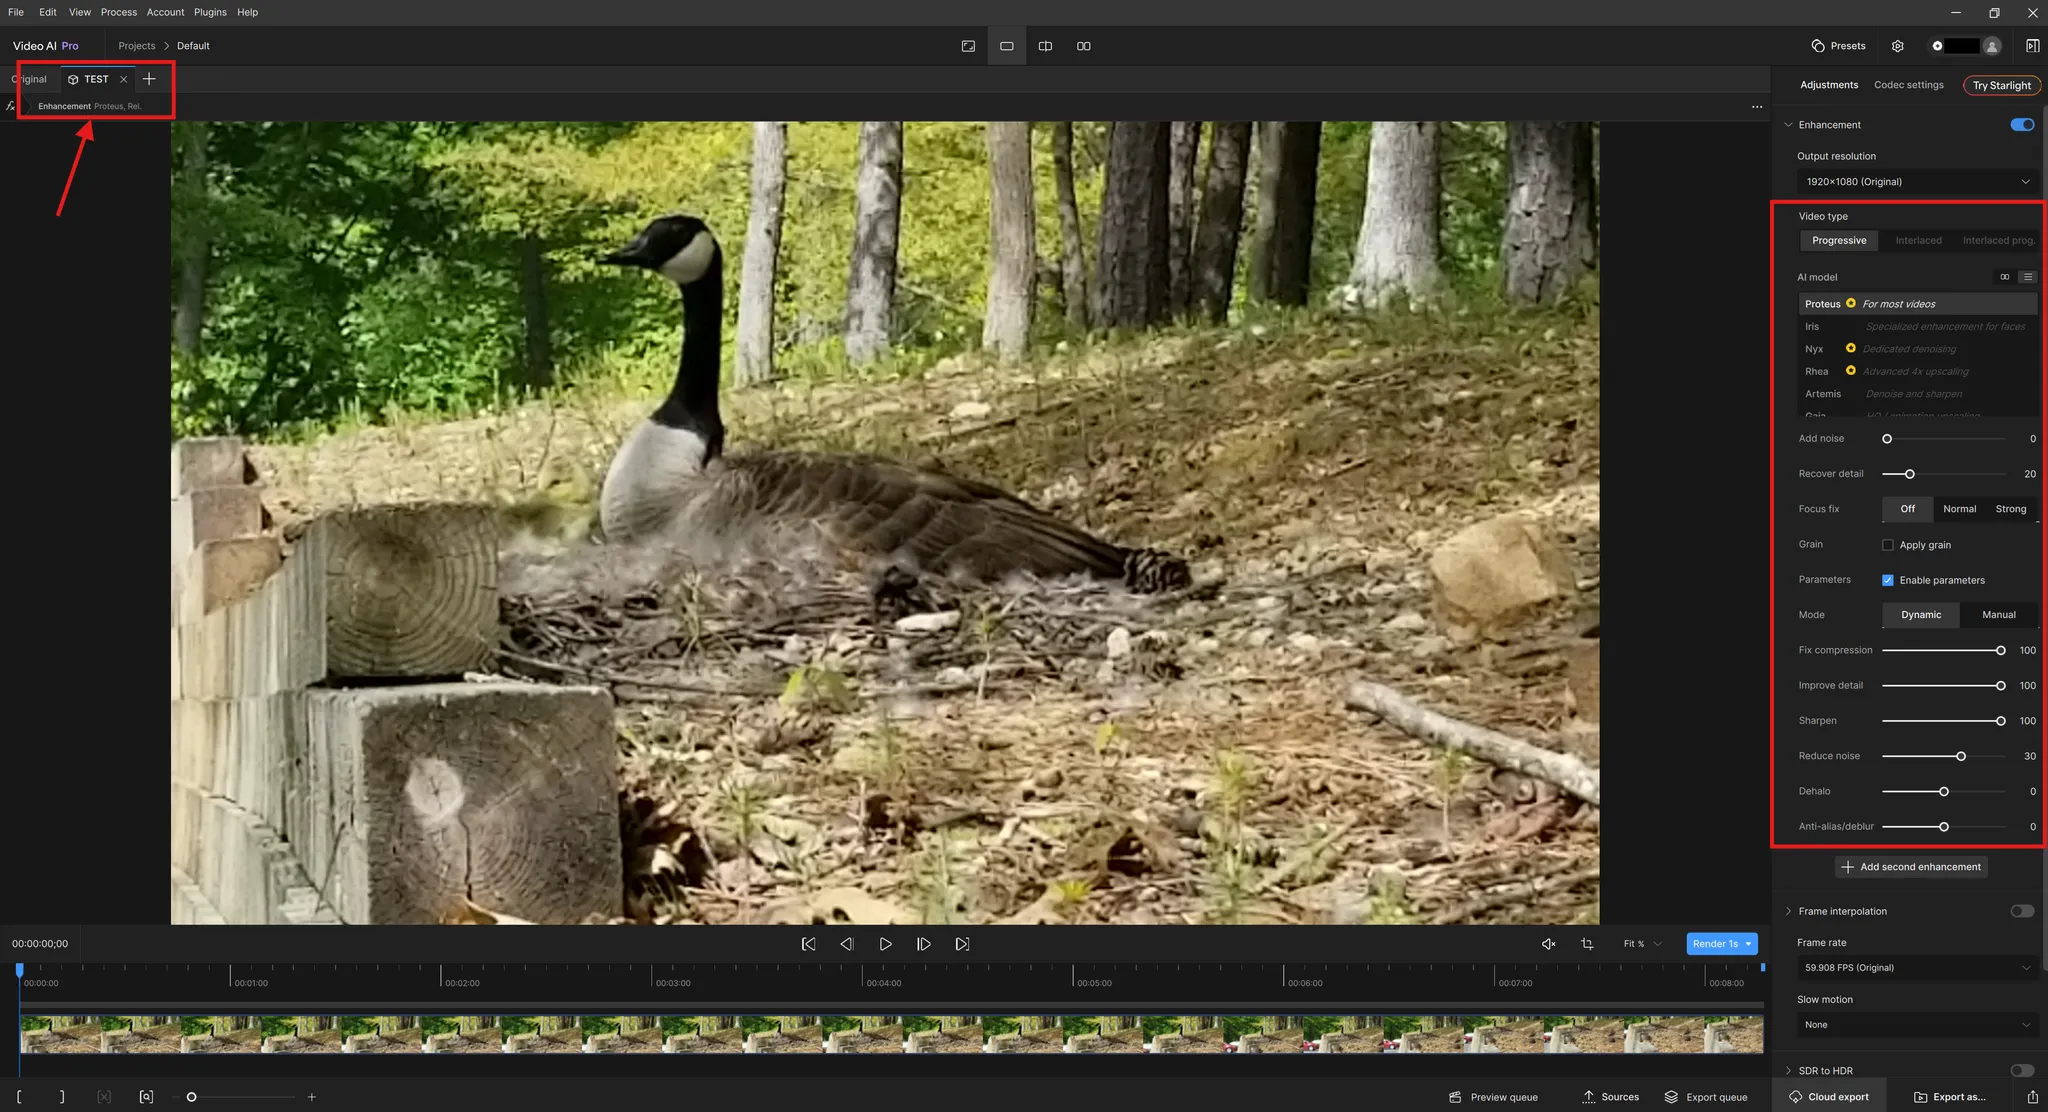
- Name the Tab (if you haven't already). I have named the example as "TEST".
- Right Click on the Tab or click on the three dots (…) on the right side of the player tab to reveal the menu.
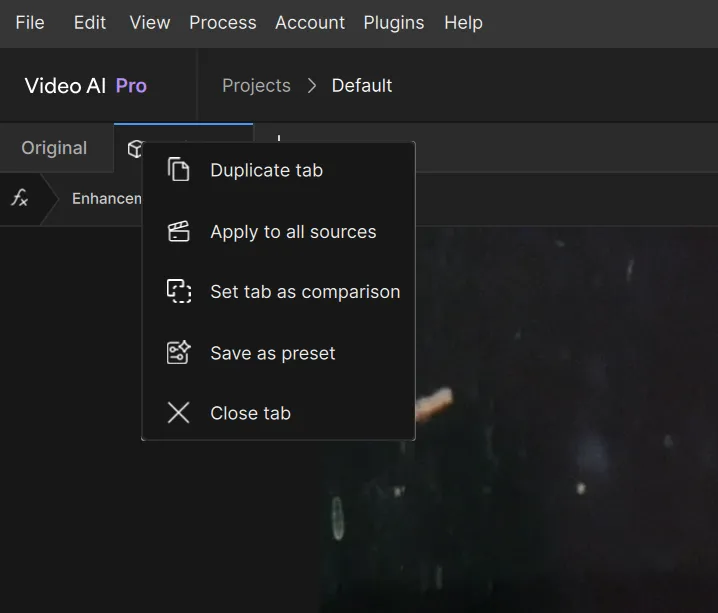
- This Menu will provide many options for duplicating or viewing your results. In this example, the focus will be to “Apply to all sources”. Select that option.
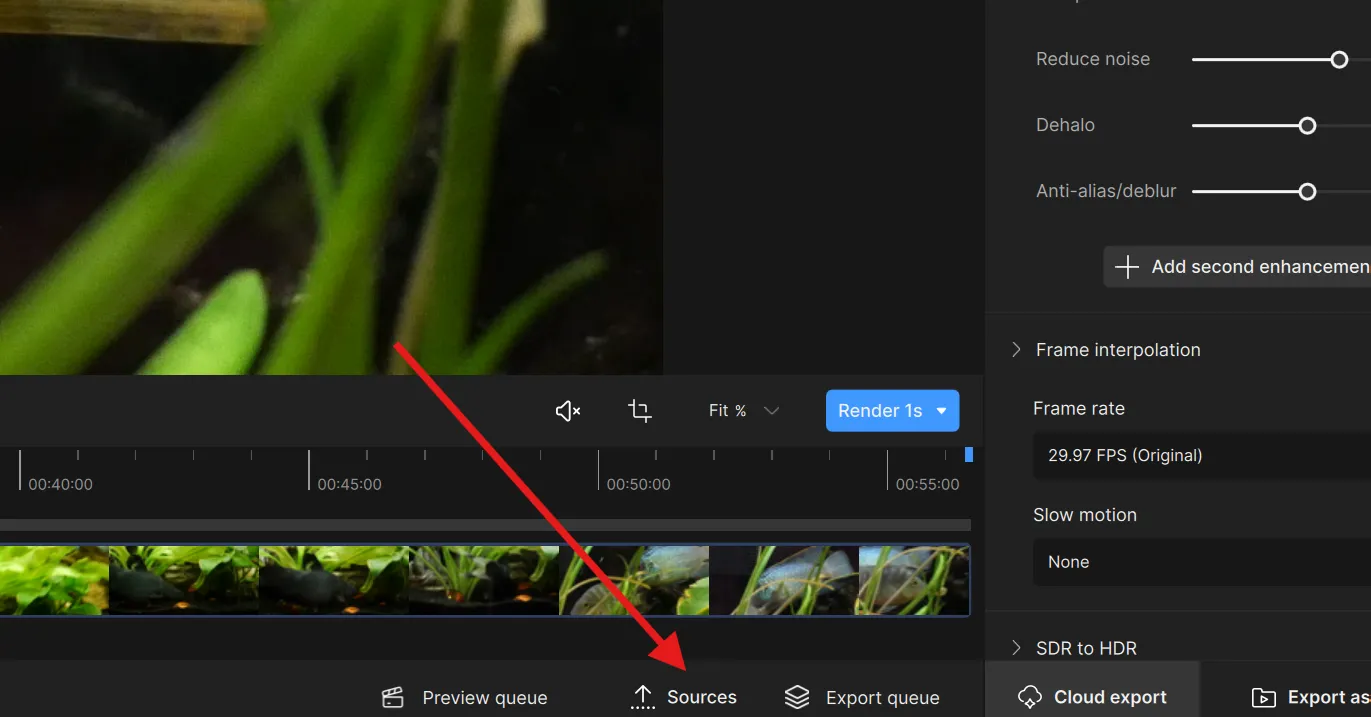
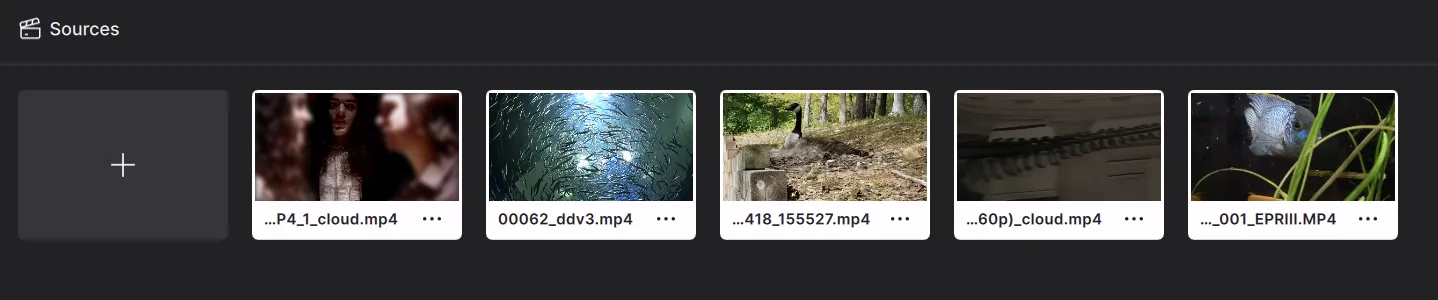
- Navigate down to the bottom of the application, on the screen right side of the player. Here you will find “Sources”. Click this button.
- Select any of your current Source files.
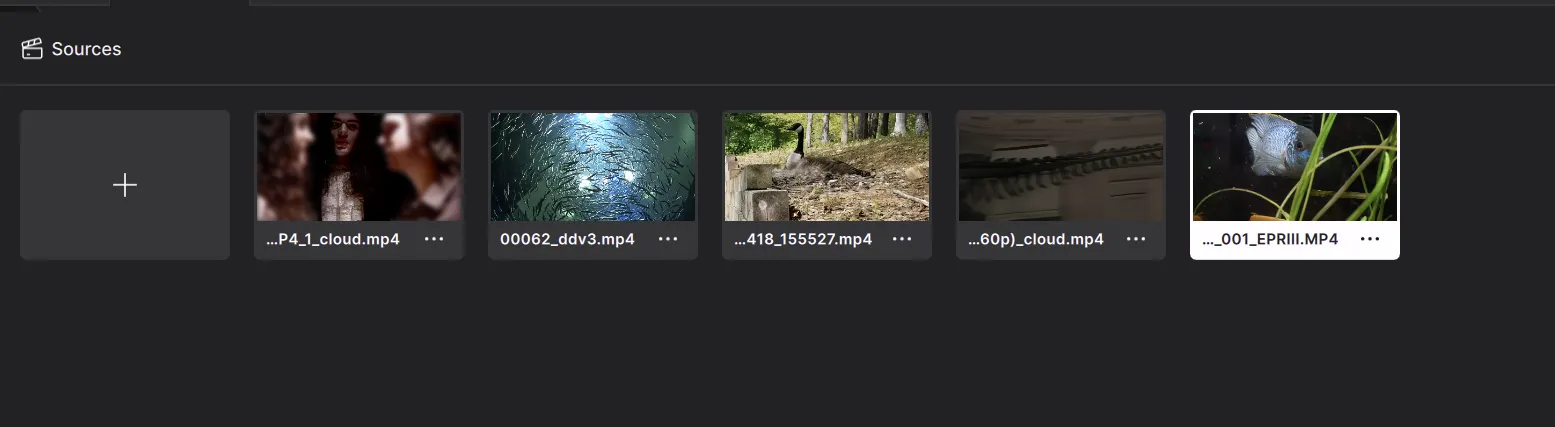
- Notice that the exact same Tab name and settings have been applied.
This will also be true for all your other Source files.
Alternatively, you could apply the same settings to a specific source:
- From the first source, go to the tab you want to copy and hit “Control + C” (pc) or “Command + C” (mac).
- Then go to the other source, and on the new tab, paste the settings by pressing “Command + V” (pc) or “Command + V” (mac).
- This will instantly duplicate the settings from your first source onto the secondary source.
Learn more about Duplicating Tabs with this video:
Video AI Tutorials: Copy + Paste Tabs (v6)
Export
Once you have found the best settings for your file in the Codec Settings and you have inspected the preview, you are ready to Export.
Exporting your file is the final step in the Topaz Video AI workflow. By default, the exported file will be saved to the input file's location.
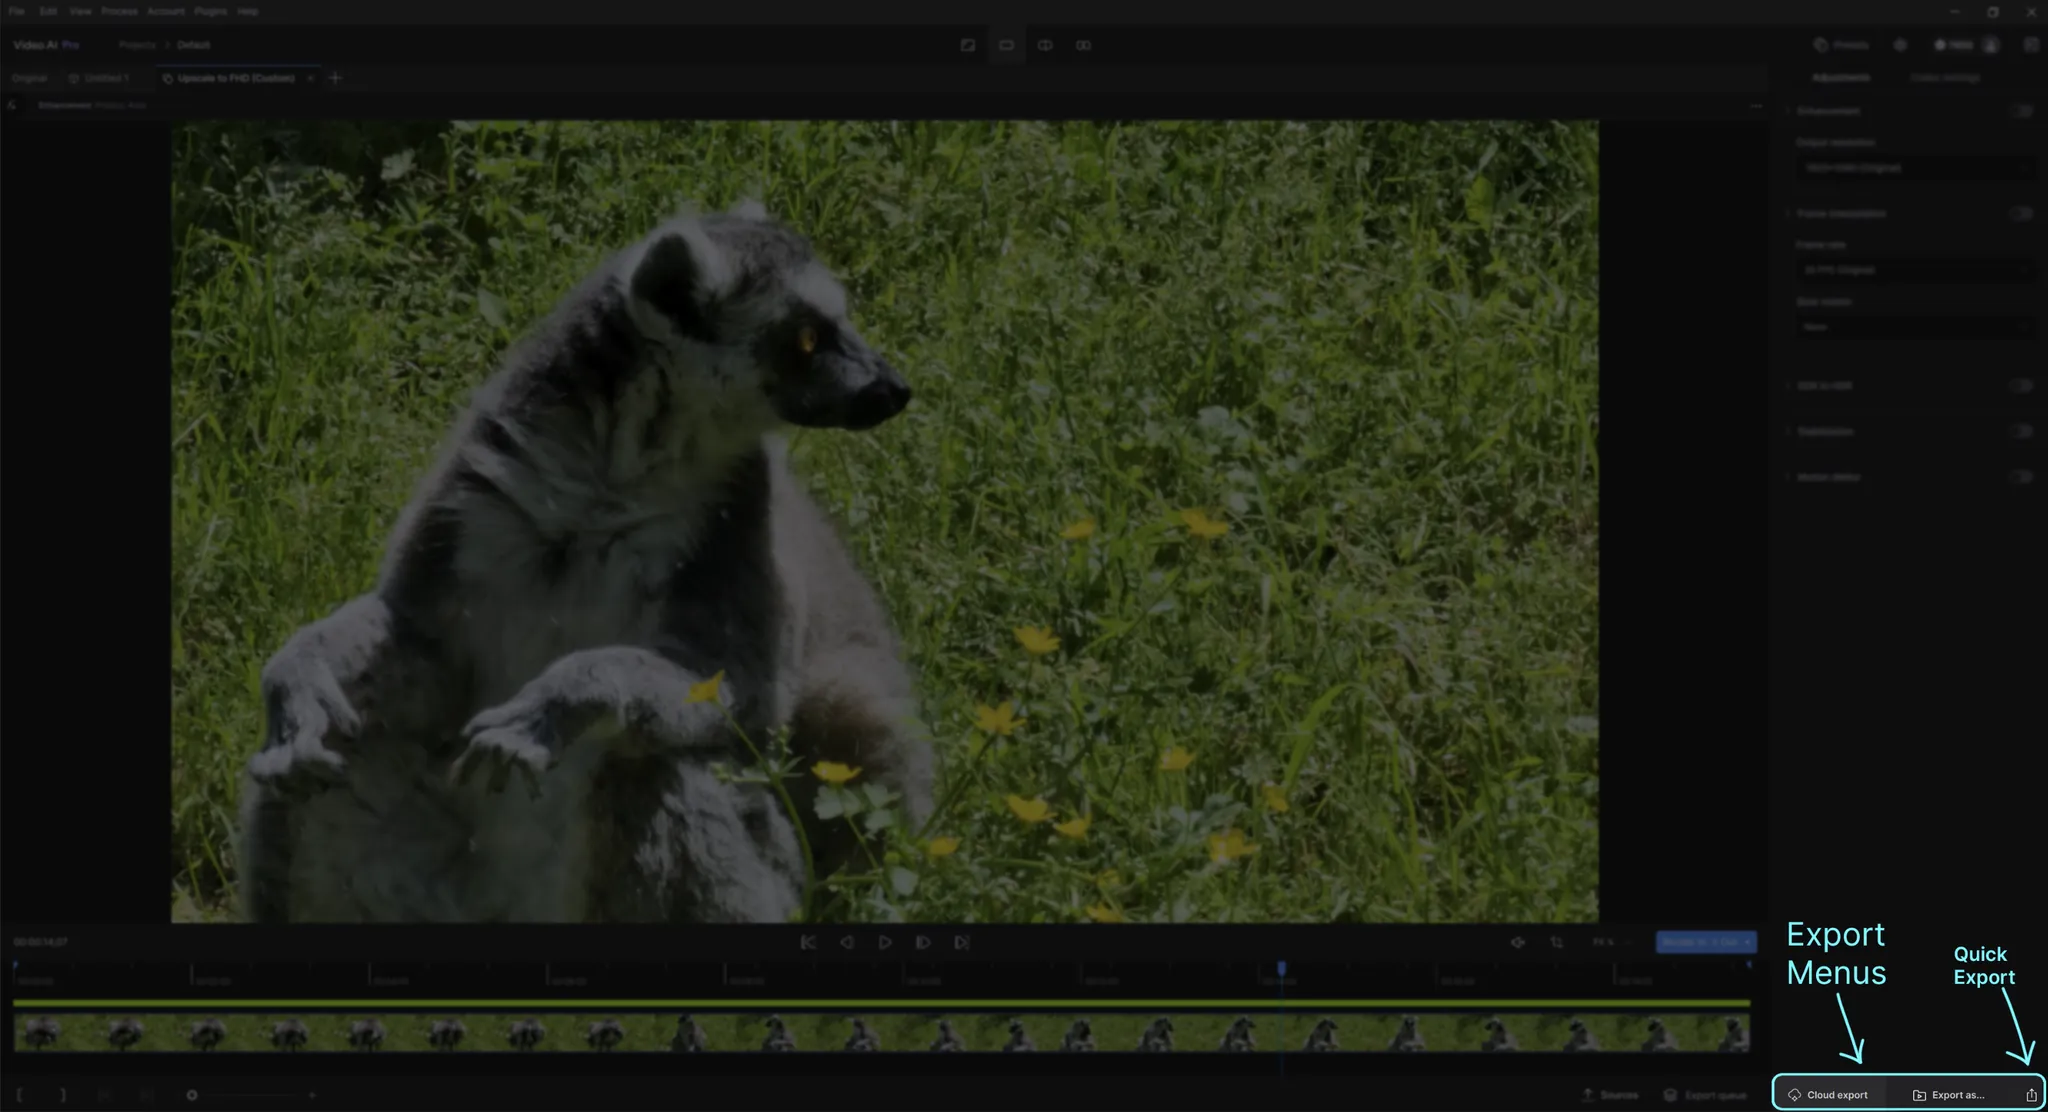
- Select Quick Export to save the file to the default output location.
- Select Export As to save the file to a new location output location and rename the final output.
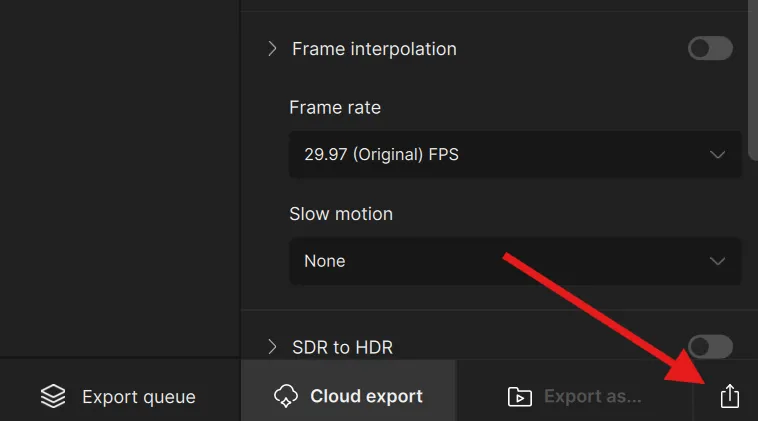
- Select Cloud Export to free up your machine from overwhelming renders by using credits. More details on Cloud Rendering can be found here.
Batch Rendering
Batch rendering is a useful way to have several files in line to render rather than specifically rendering one video at a time.
Follow the steps below to do a Batch Render:
- In the Source menu, make sure to select all the source files that you want to render.
- In this example I will select all 5 of my imported source. Each of these have been prepared with settings. One way to select the entire lot is my clicking on three dots (…) and pressing the “Select All” option.
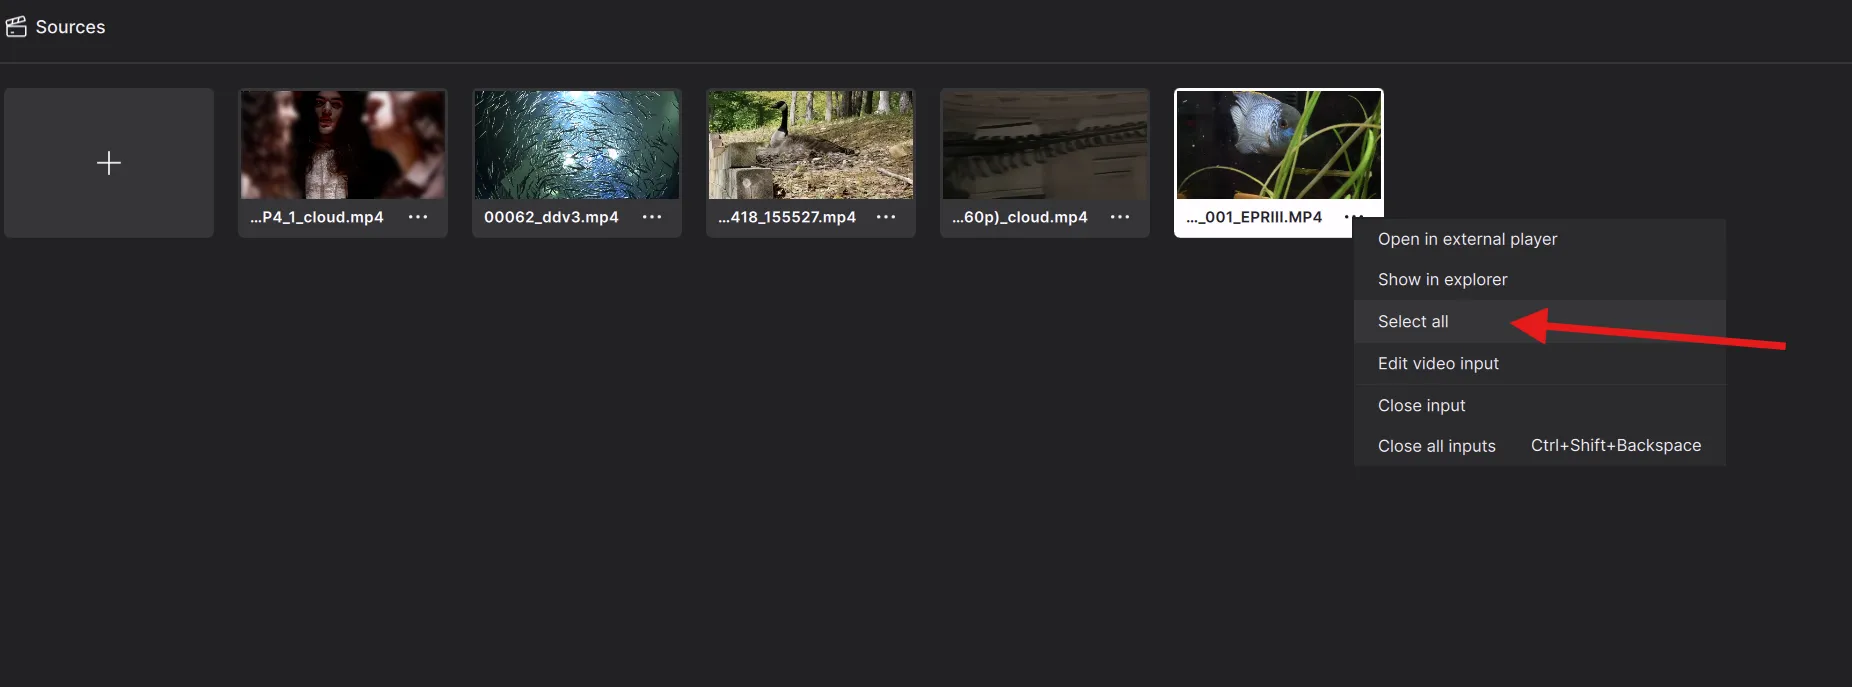
- This will then highlight all the Source files.
- Once all the files are selected, go to the bottom screen right side of the application and click on the Quick Export button.
- This will begin rendering your files. Please note, by default, this will render into the same folder path where the Source File originates from.
- You can then view the progress on the Export Queue for all of your files.

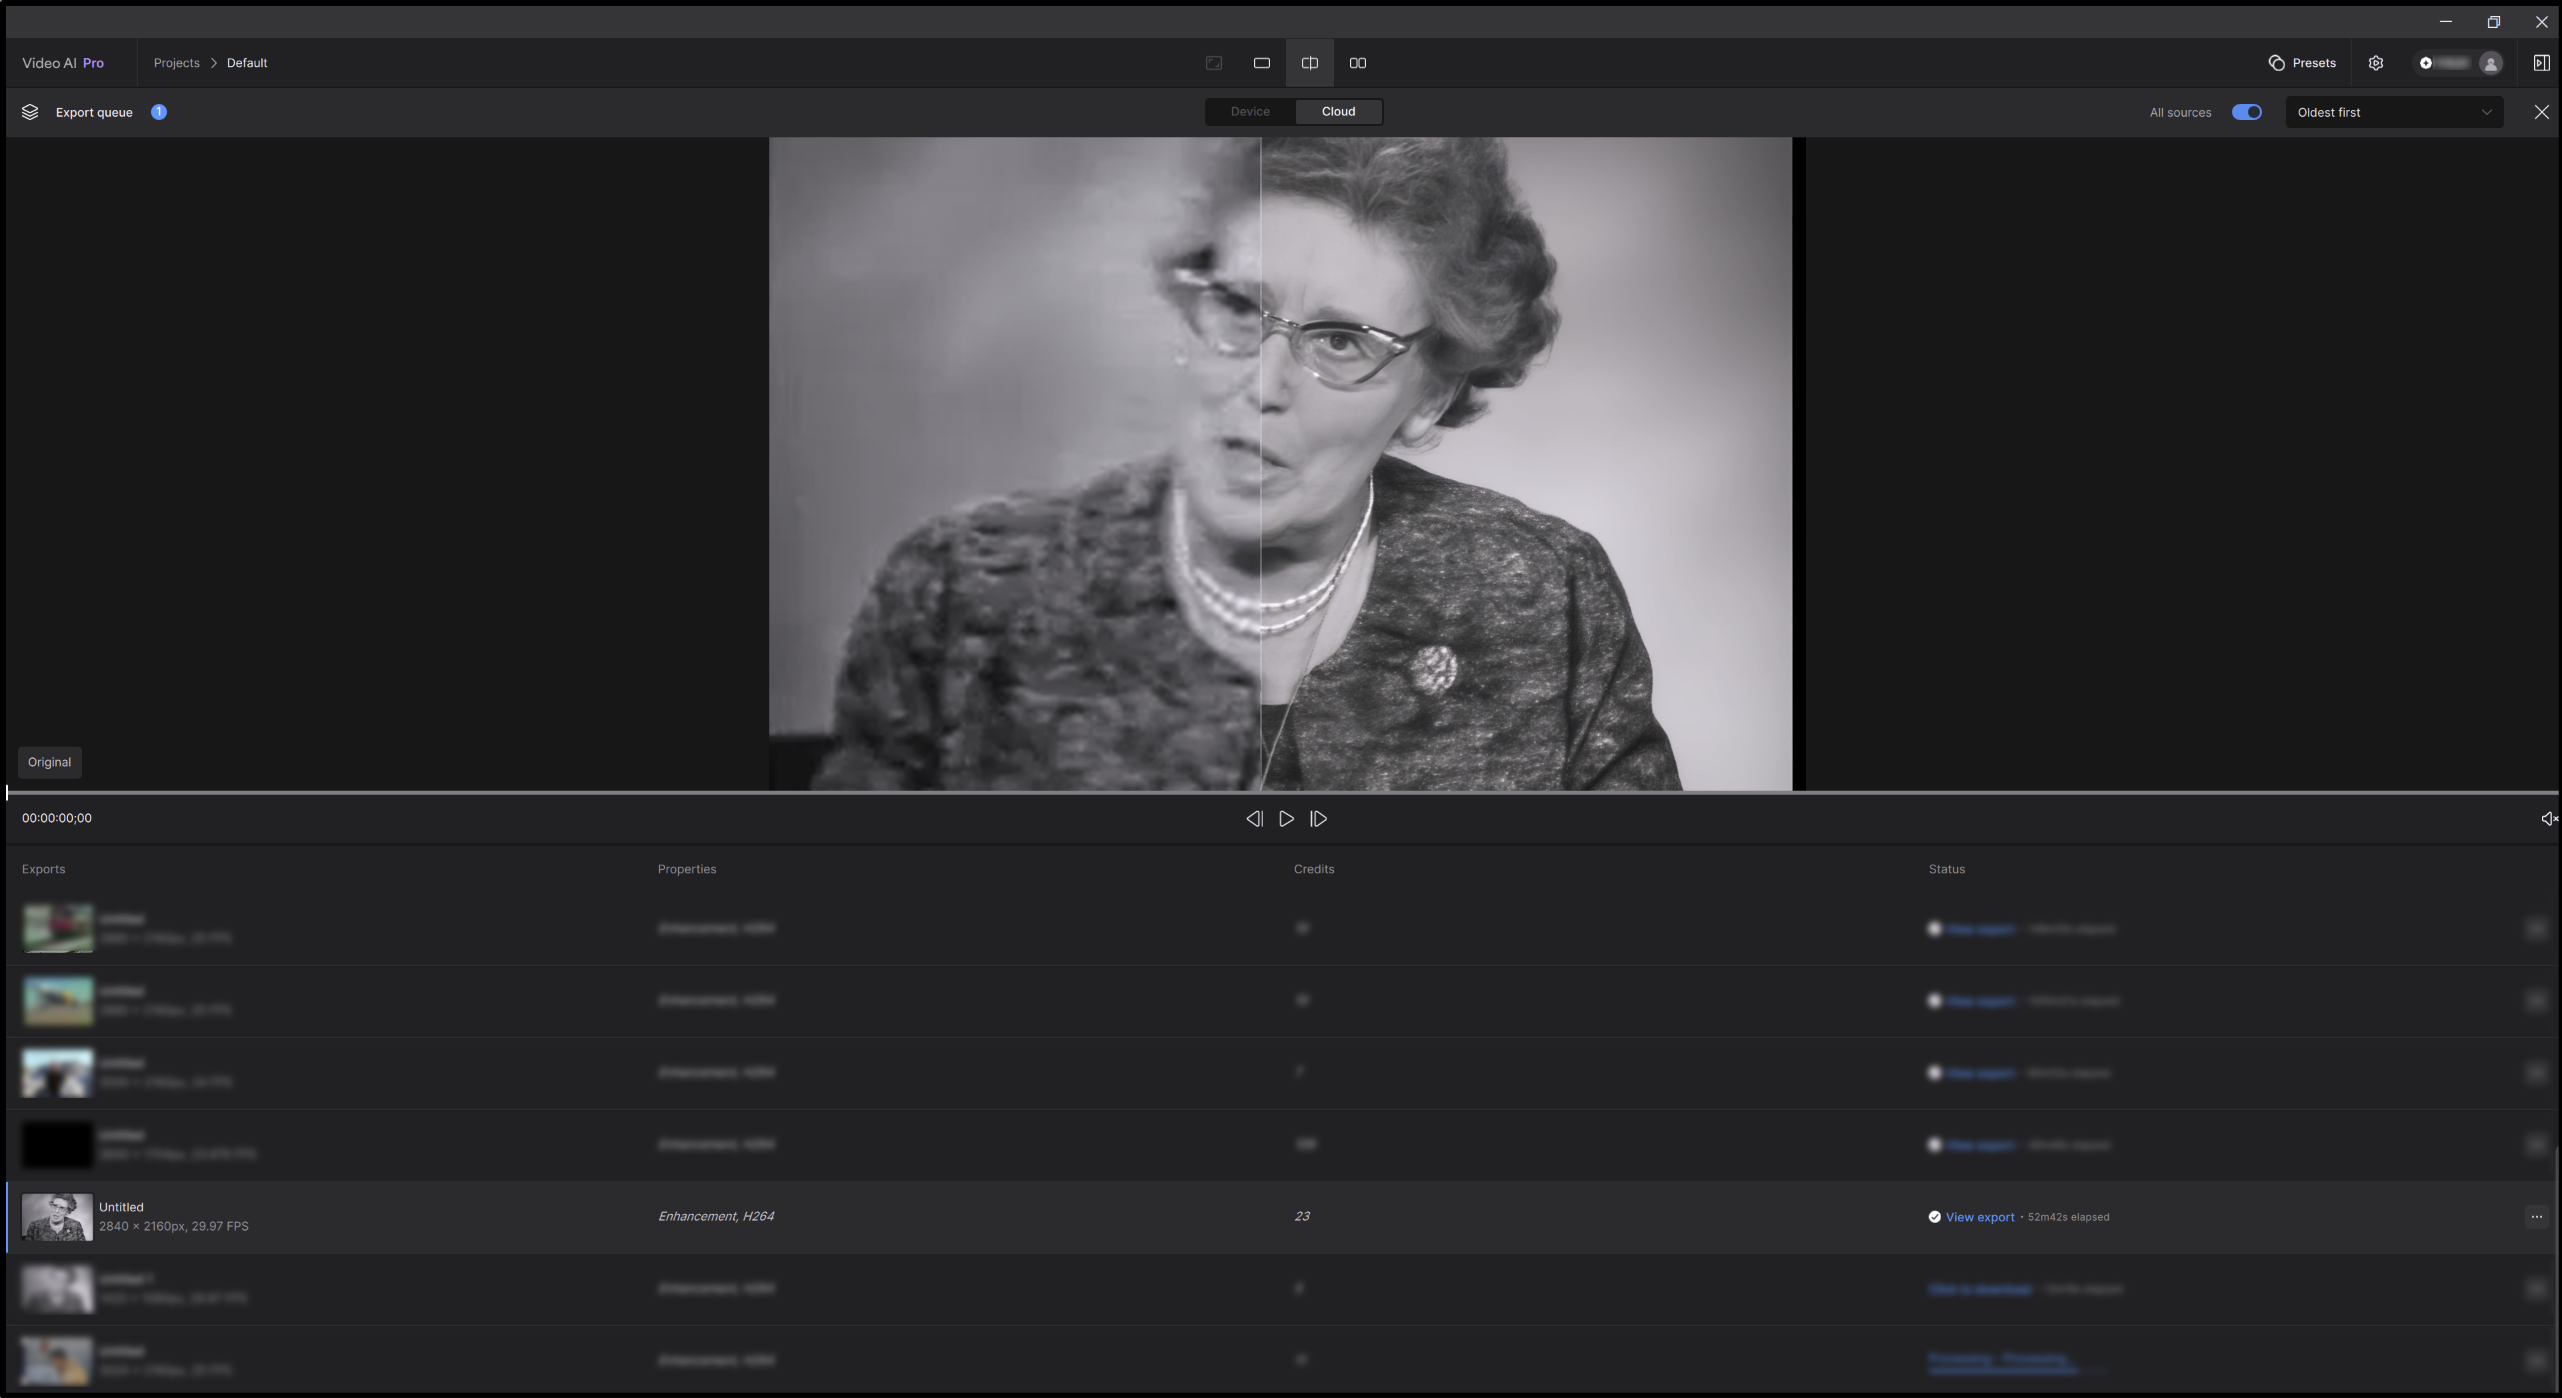
Export Queue

In the Export Queue, all the files from your renders will be in a list. Each video line item has different categories.
- The first column is Exports
- File thumbnail
- Tab name
- Output Resolution
- FPS
- The secondary column is Properties
- Task(s)
- Codec Type
- The third column is the Output File Path
- Truncated file path. Shows Drive letter, output name and file type.
- The fourth column is Status
- Describes current processing position
- Total time processing.
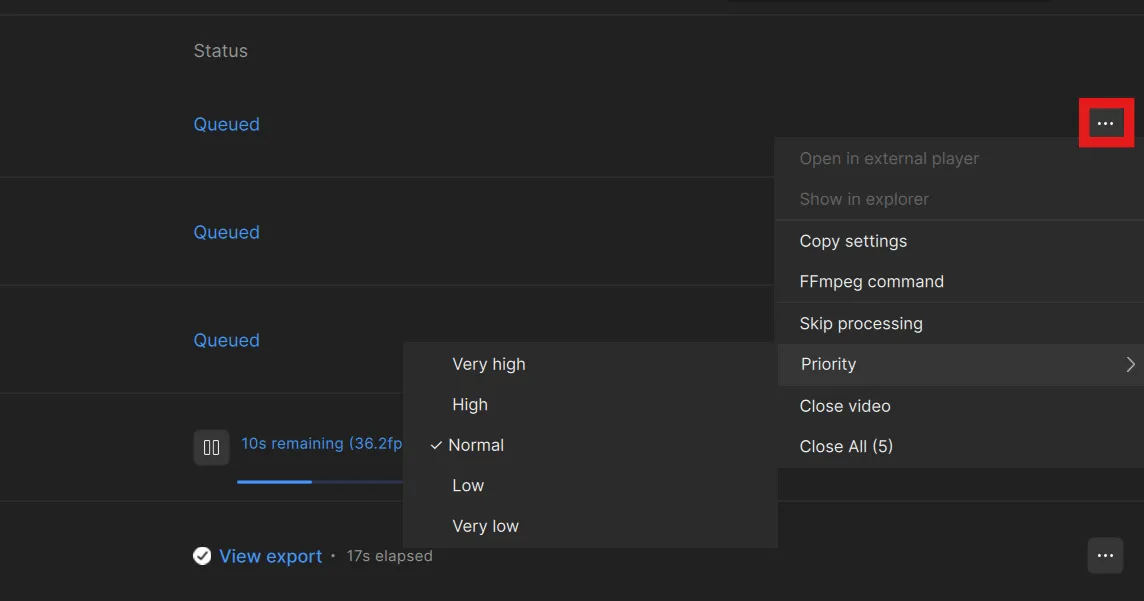
- The fifth column (furthest to the right) is additional selections for the processing output video. This is represented by three dots which opens a popup menu of additional selections.
- Open in External Player, opens the video with your choice of an external video player.
- Show in Explorer, simply opens the folder where the video render is pathed to.
- Copy Settings, allows the user to duplicate this currently selected preview group’s filters and enhancements to another source. Ctrl+C then Ctrl+V on the other source (windows) or Cmd+C then Cmd+V on the other source (mac).
- FFmpeg Command, opens a separate popup with the FFmpeg Command details.
- Restart Process, is available only if the render is in progress, otherwise this is greyed out. Essentially, you are able to re-render the footage.
- Priority, is available only if the render is in progress, otherwise this is greyed out. This essentially allows the user to set render priorities if multiple renders are running.
- Close Video, removes the selected video from the Export Queue.
- Close all, removes all the selected videos from the Export Queue.
Live Export Previews
From Video AI v7, Live Previews are now visible in the export queue. As long as your video output is on the queue, then you can take advantage of the preview.
- Confirm that your outputs are matching your intended look without having to wait for a complete render.
- Device (Local) and Cloud exports are supported
- Compare with the Single, Split or Side by Side modes
- Previews compares rendering/completed output against the original source video.
- Starlight AI Models can be previewed once completed within the app.
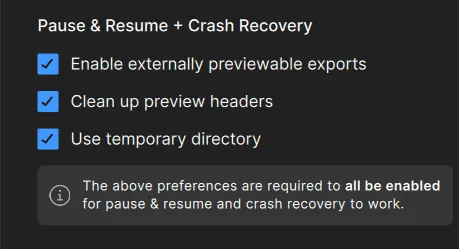
Pausing & Resuming Exports
From Video AI v5, exports can be paused and resumed even after closing the app or rebooting your system.
Paused exports will be saved in multiple segments and joined together once processing completes.
The following settings must be enabled in Preferences -> Export for pause/resume to be available in the app menu:
Learn More with Video tutorials!
View the full Video AI 6.0 series in either of these two locations!