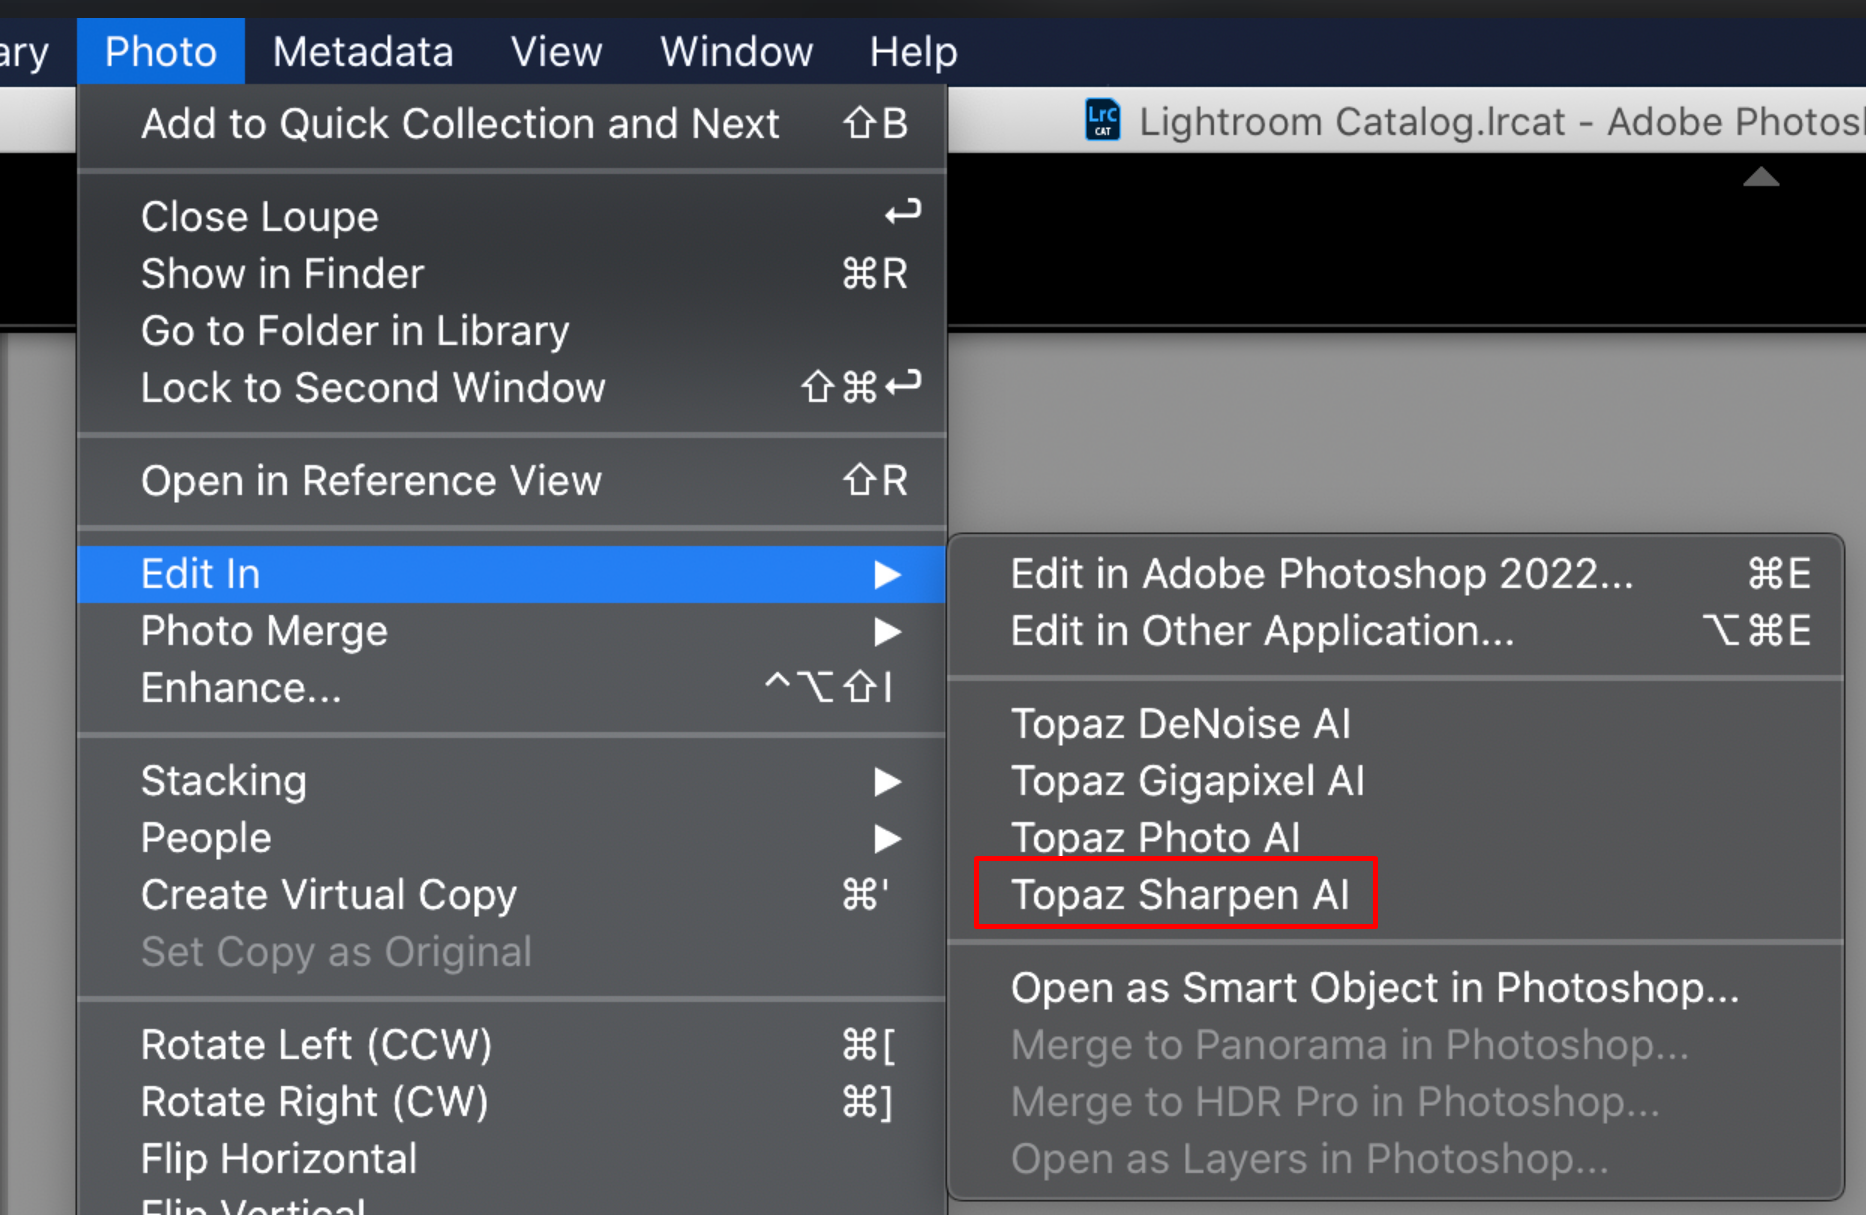
My Sharpen AI or DeNoise AI Plugin for Lightroom Is Not Working
Follow the steps below to reset your Sharpen AI plugin in Adobe Lightroom Classic.
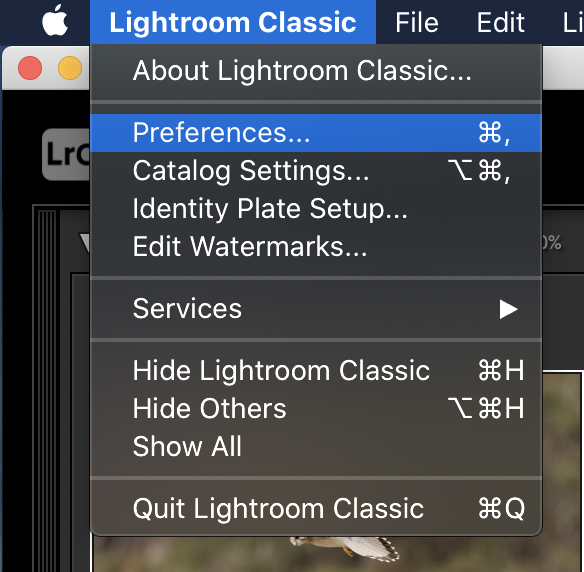
Step 1
In Lightroom Classic, open Preferences.
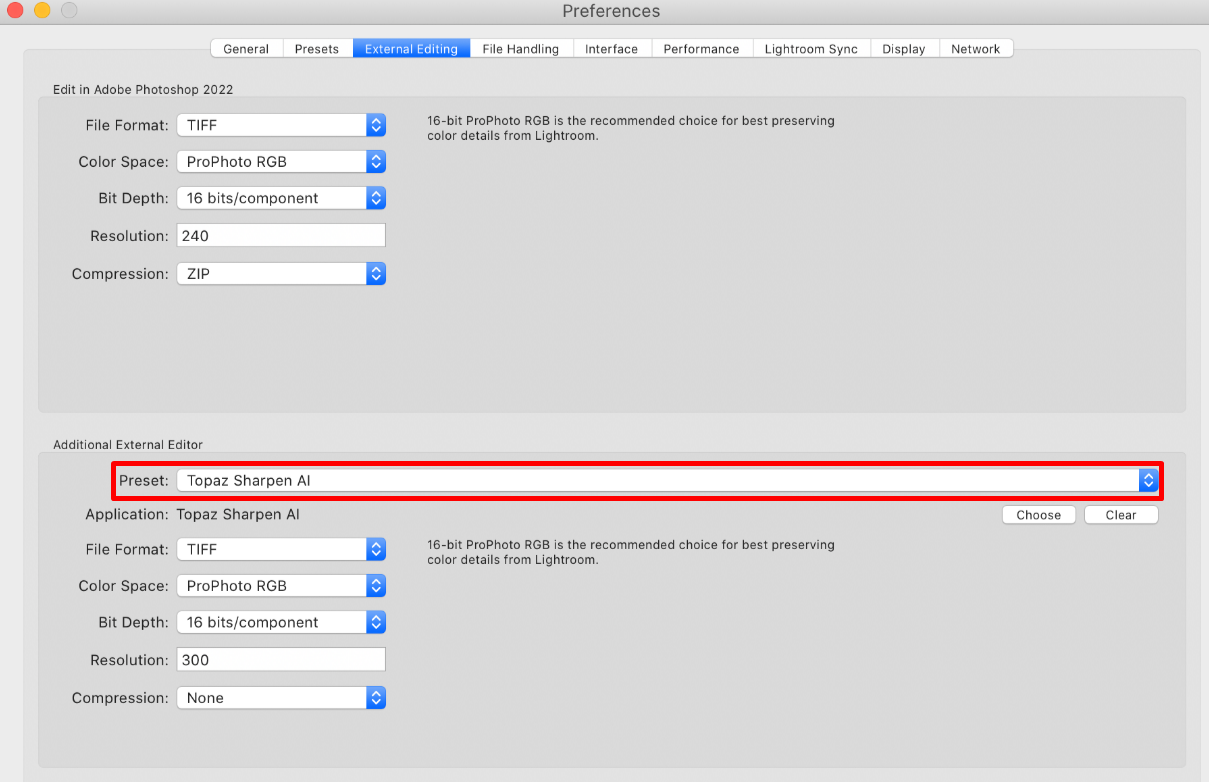
Step 2
Click the External Editing tab at the top of the window, then click the Preset box below.
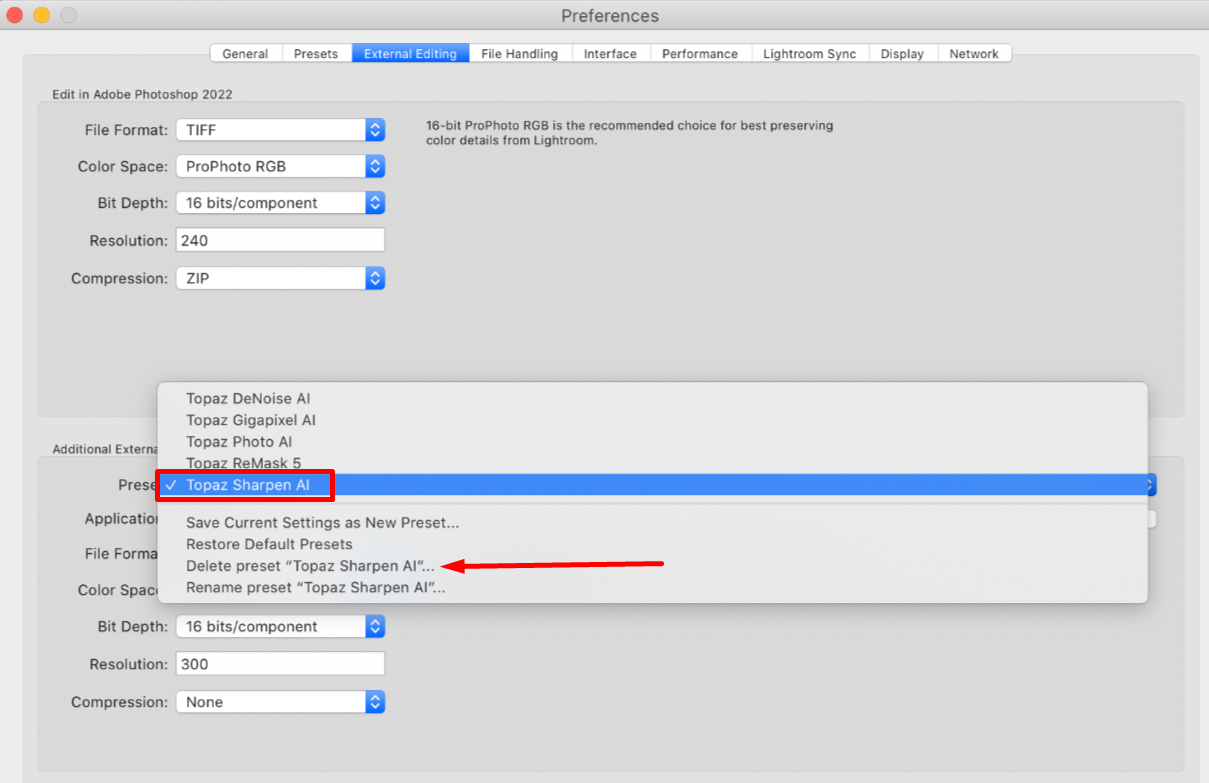
Step 3
Click the Sharpen AI preset in the dropdown, then click Delete preset "Topaz Sharpen AI"...
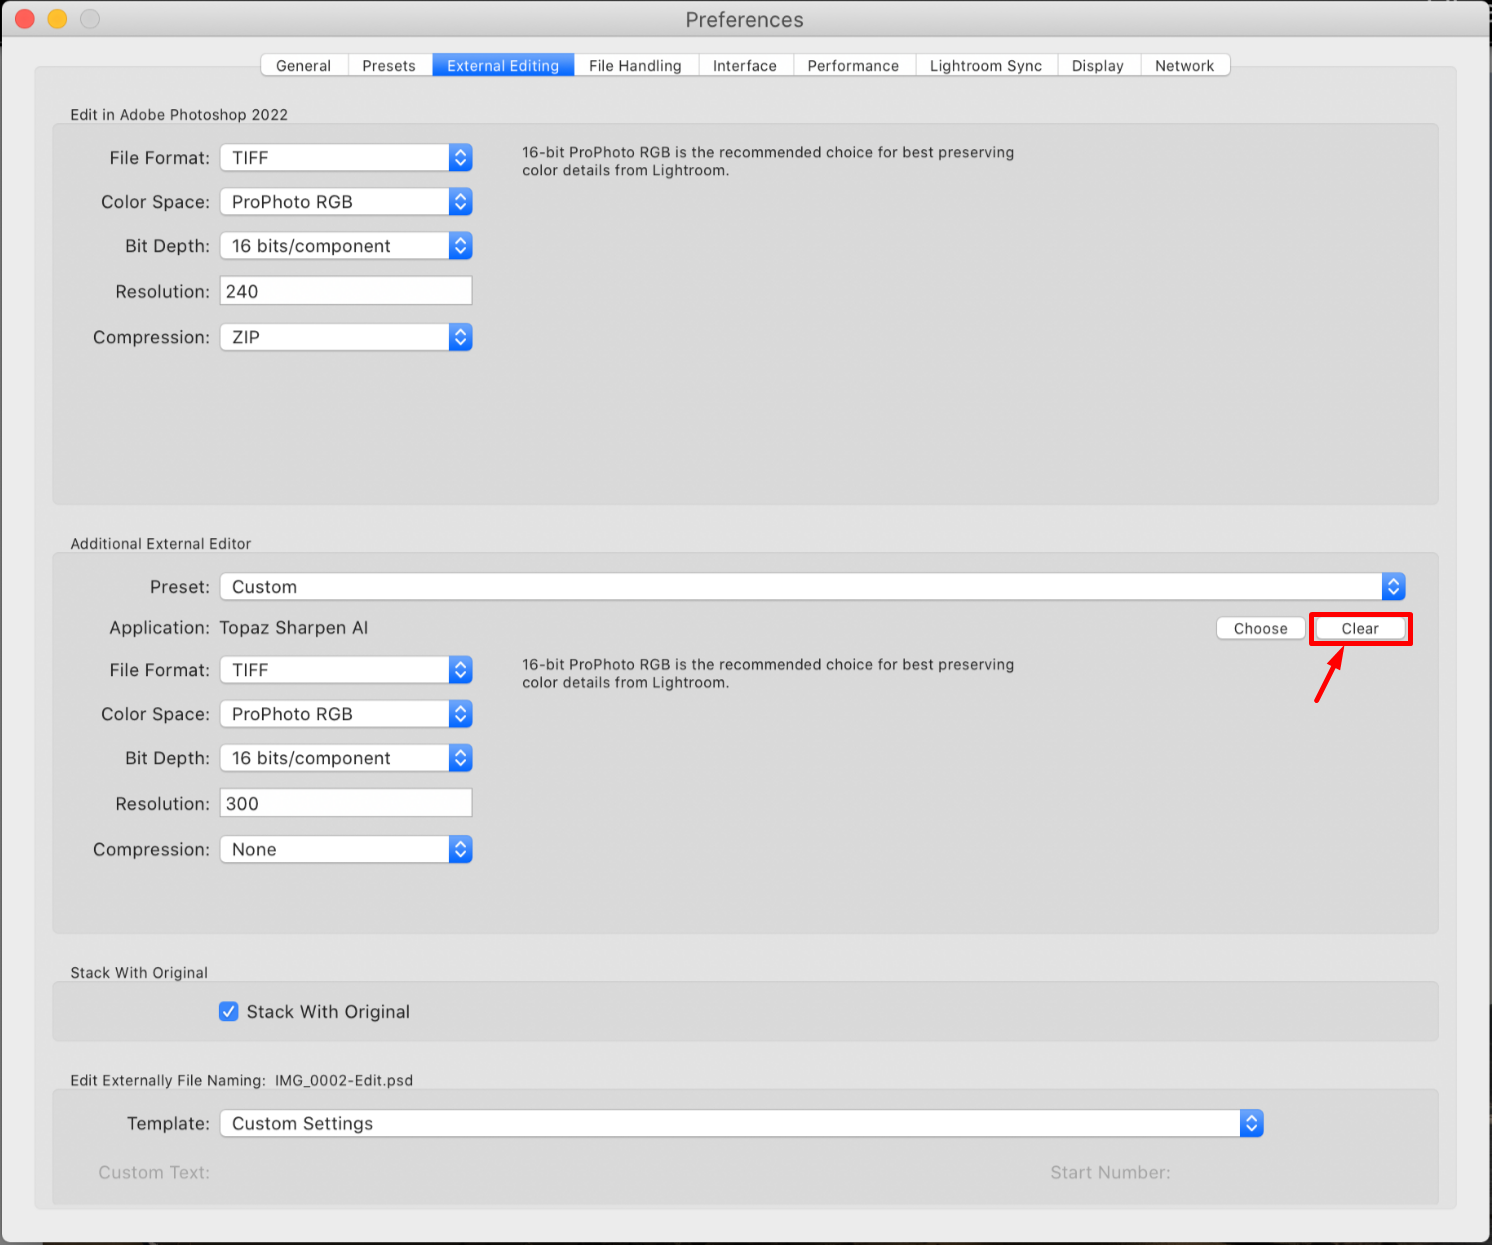
Step 4
Click the Clear button and close Lightroom completely.
Step 5
Launch Sharpen AI from the Applications folder. After it has fully loaded, close Sharpen AI again.
Step 6
Launch Lightroom and use the new Topaz Sharpen AI preset.
If the above steps do not work and your Lightroom catalog is installed on an external drive, follow the instructions in this video.