Workflow Tutorials (Legacy)
View the Quick Start article for the basics on how to get started with Photo AI. Follow along with this article for more advanced workflow recommendations and tutorials.
Recommended order
RAW Denoise (if RAW file) → Dust and Scratch → Super Focus → Remove Noise → Sharpen → Remove Object → Adjust Lighting → Balance Color → Recover Faces → Preserve Text → Upscale
Experiment with your images to get the best result. In general, follow this simple 3-step process:
- Choose an enhancement model and adjust the settings to fine-tune the strength in the Controls tab.
- If necessary, use the Selection tab to select the parts of the image to include or exclude from processing.
- Preview the final result and decide if further edits are needed.
Here are some examples:
Download the image below, open it in Photo AI, and follow along. Sample image
The RAW Denoise enhancement will run first for all RAW images. This is because of our proprietary demosaicing process. It converts sensor data to pixel information that the other enhancements use to edit the image.
Instead of estimating the missing color information for each pixel based on the values of neighboring pixels, the AI model uses context from the entire image. It also considers and compensates for noise that hinders traditional demosaicing methods.
It can only run once and cannot be removed.
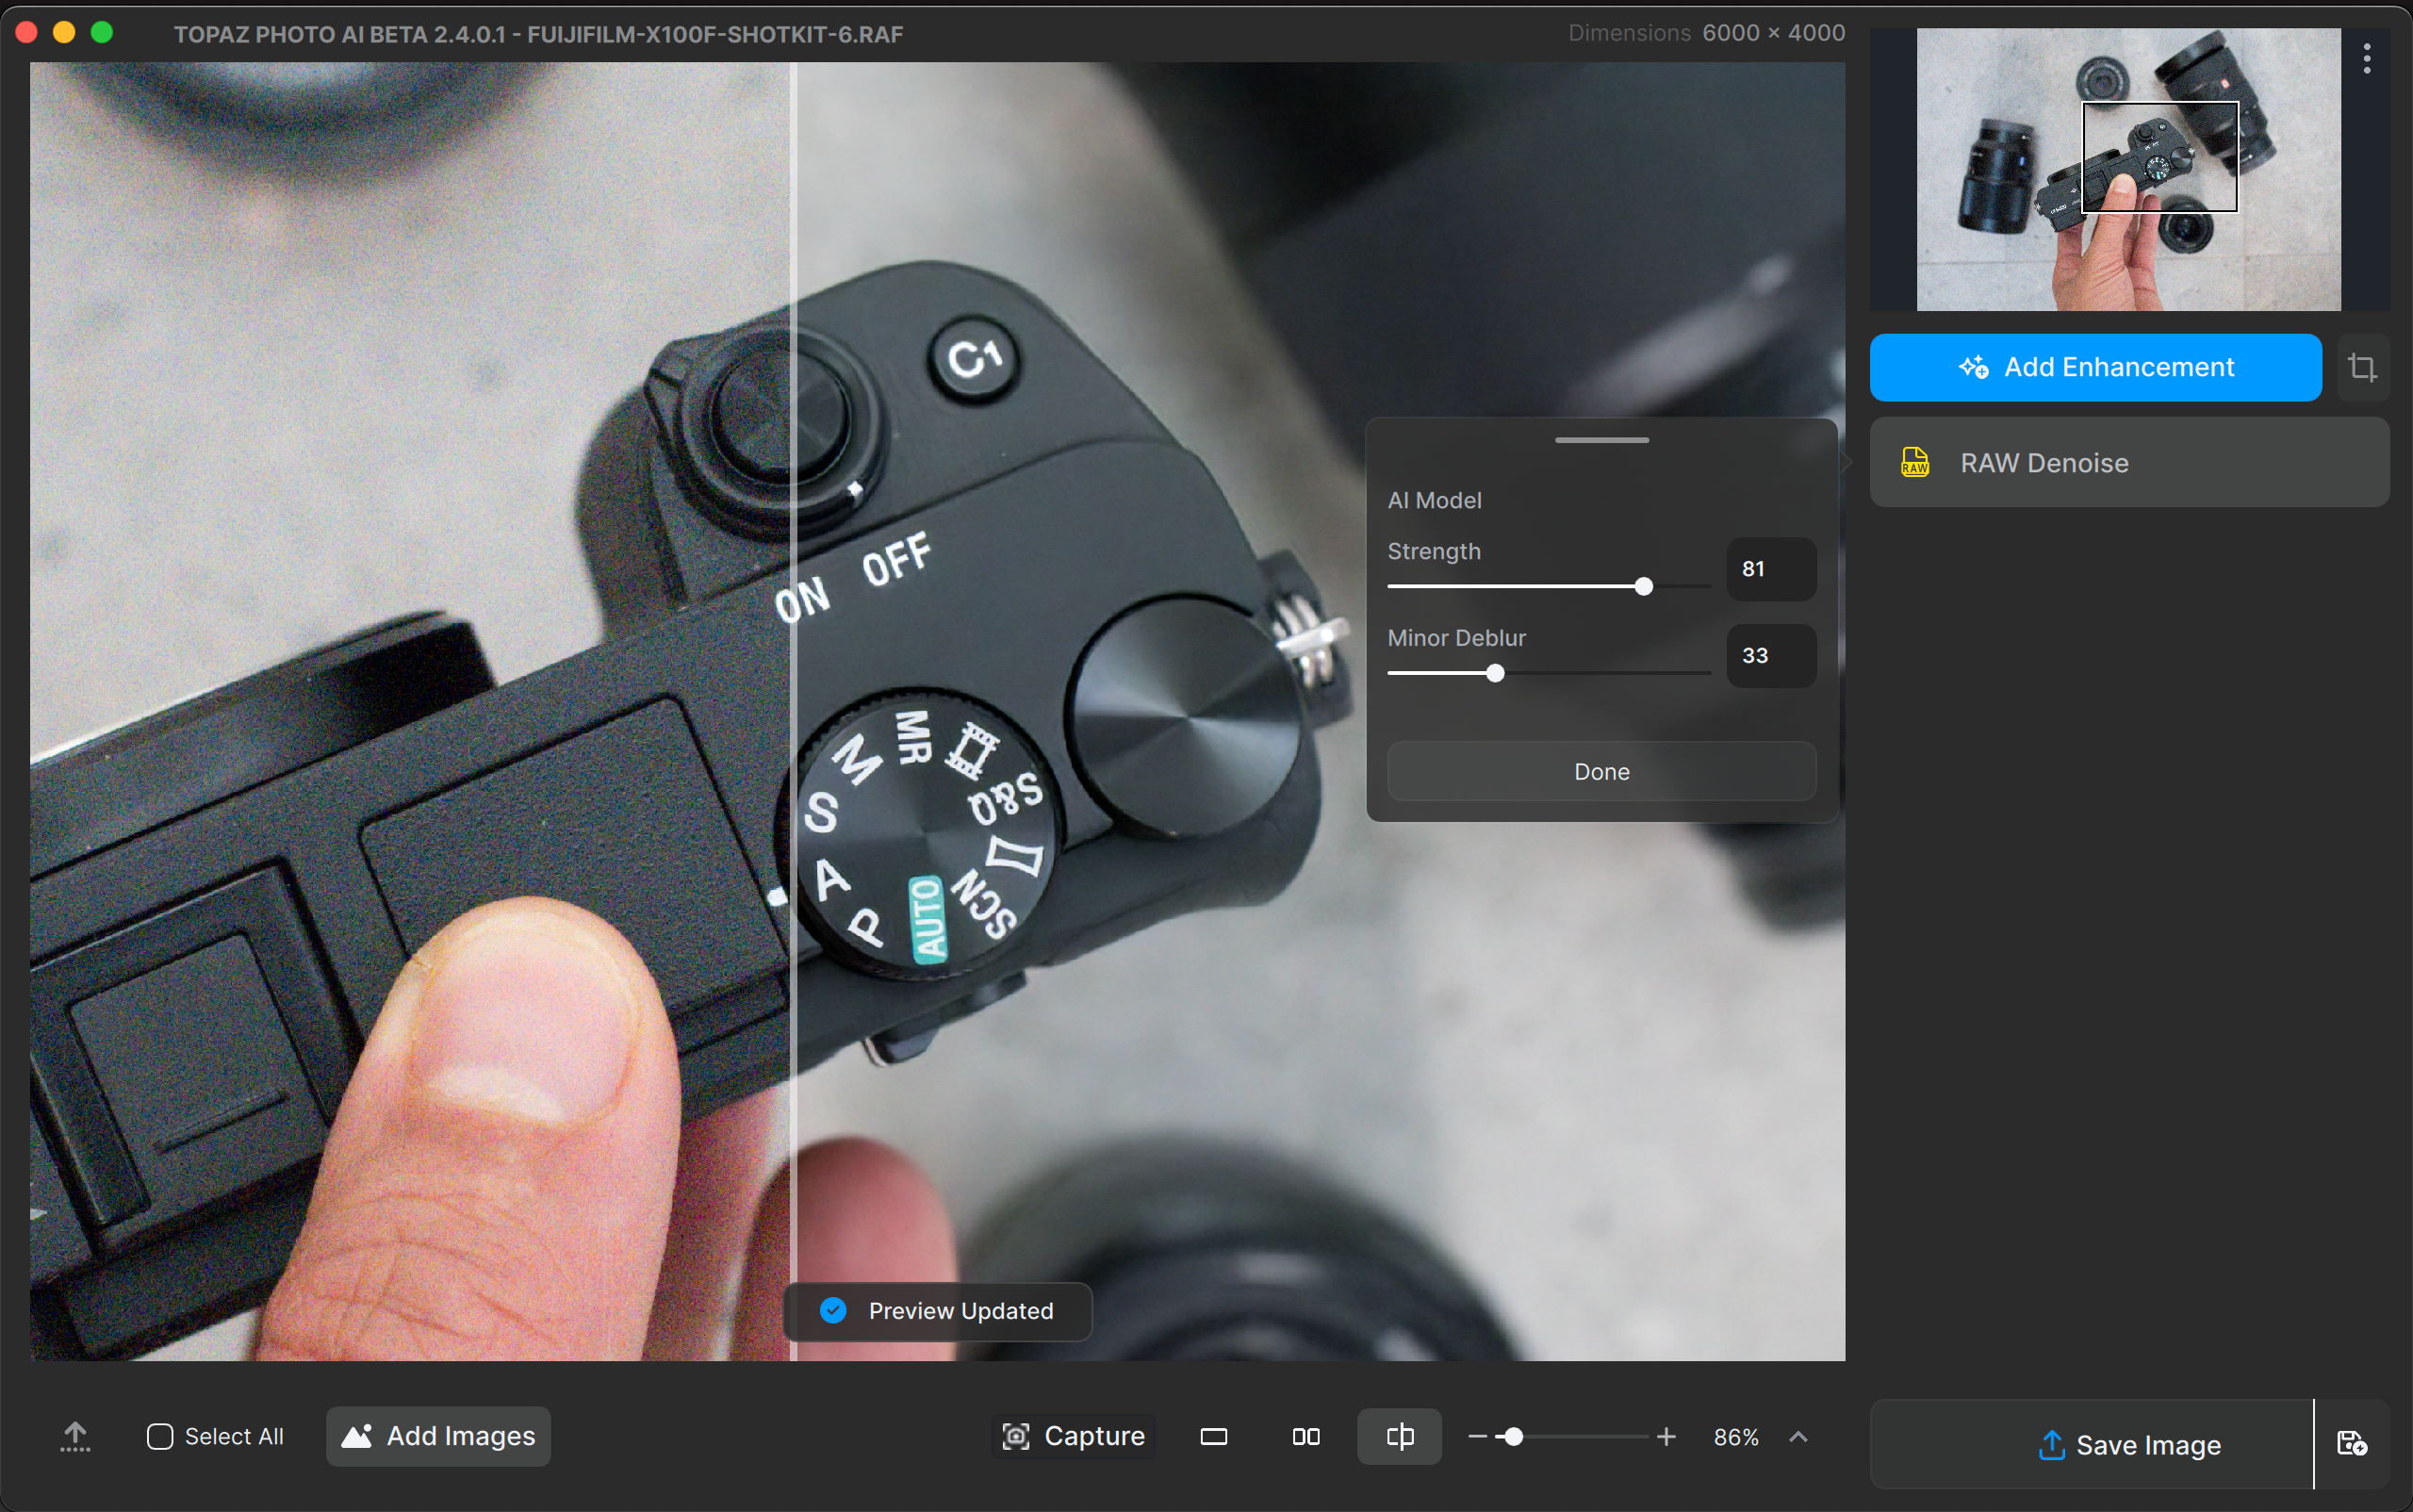
Step 1: Adjust Settings
There is only one model but you can adjust the Strength slider. Use the Minor Deblur slider to slightly sharpen the image.
The RAW Denoise enhancement applies to the entire image so there is no Selection tab.
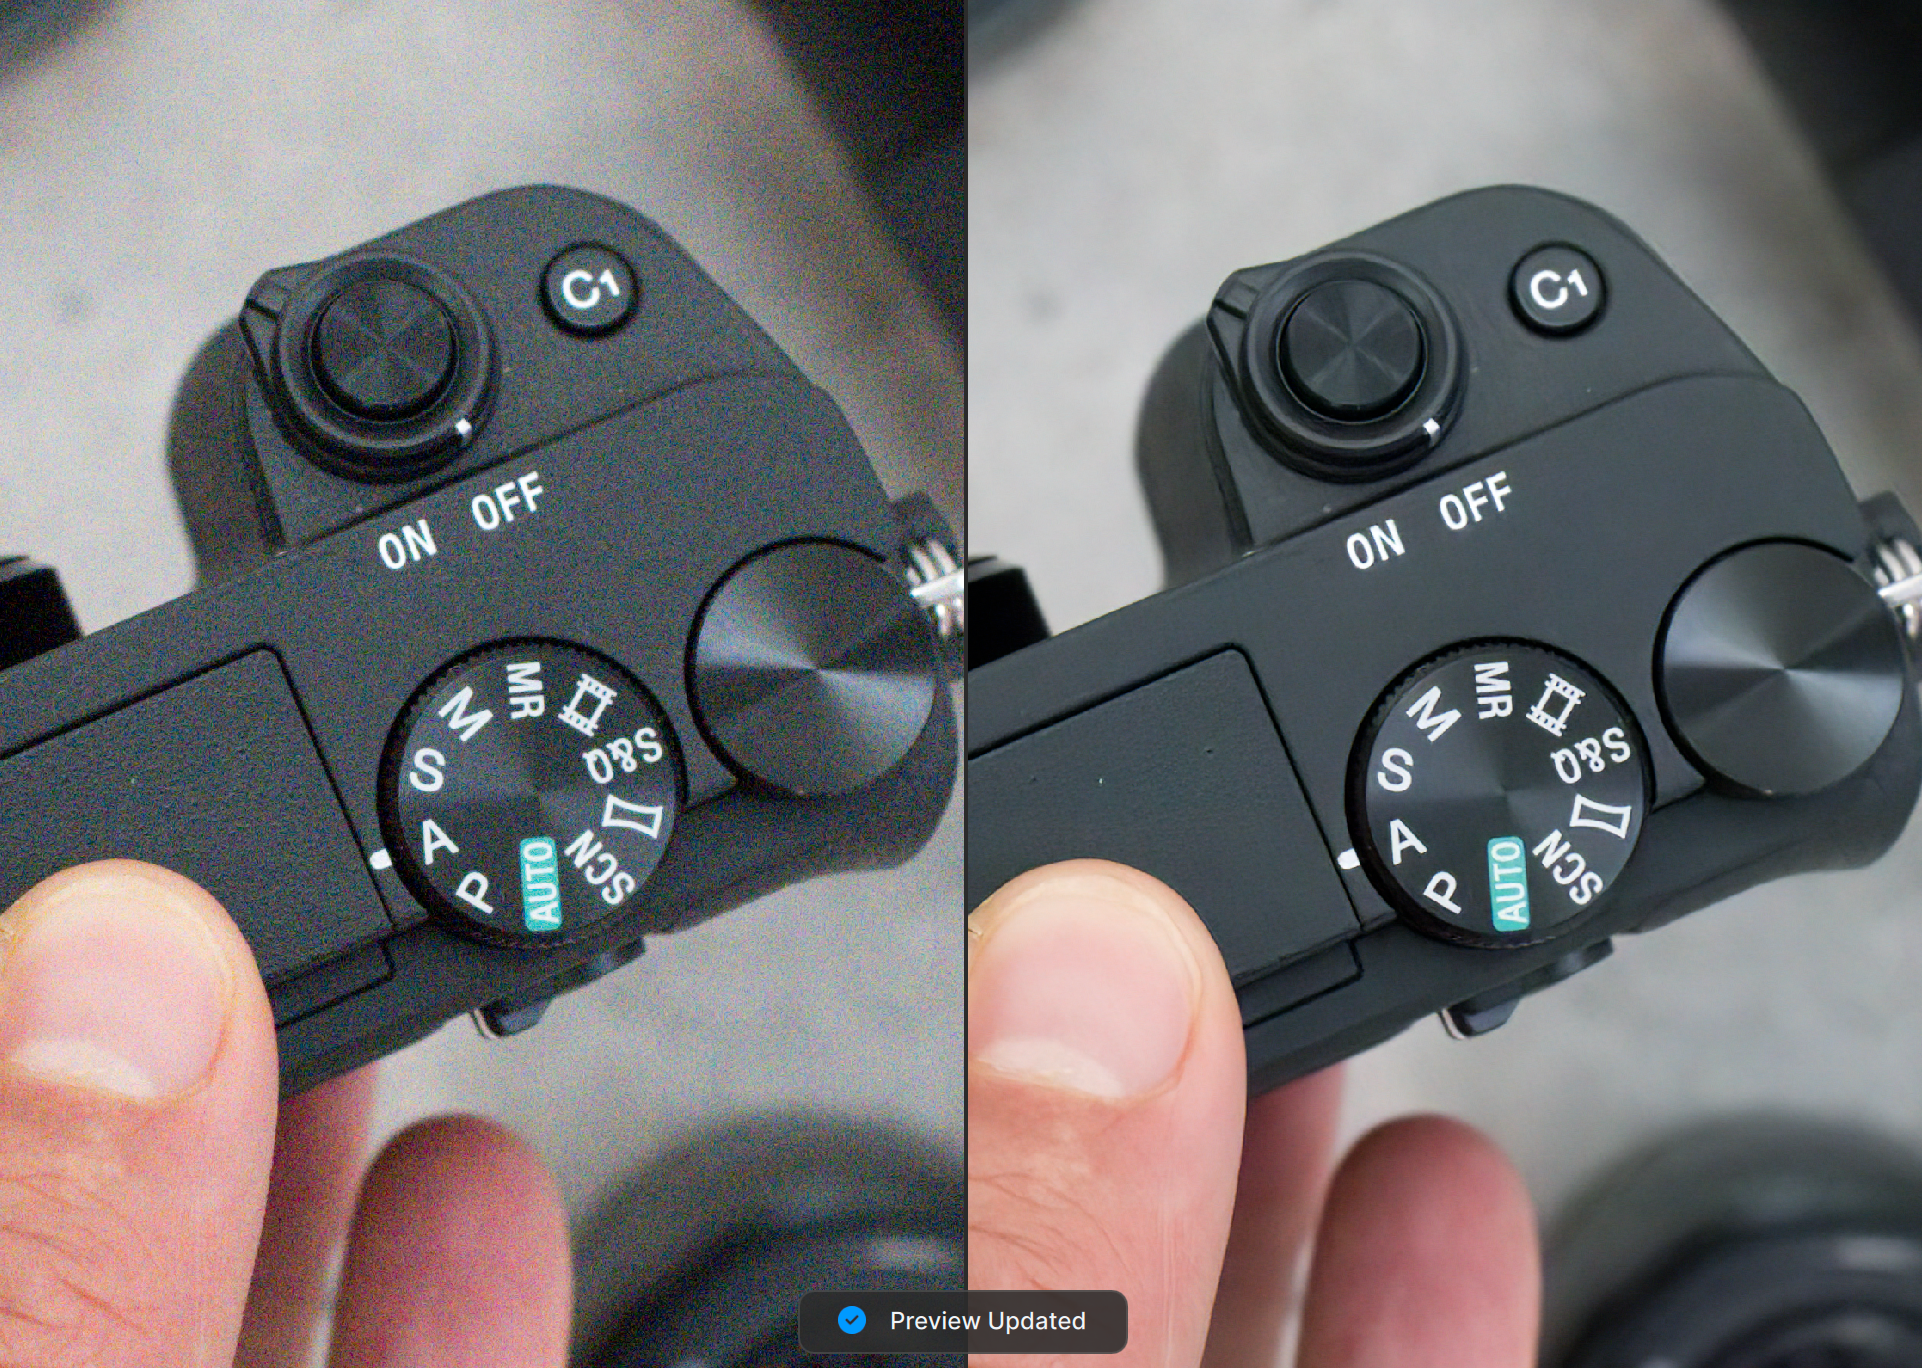
Step 2: Preview the Result
Decide whether you want to make further edits. Once you’re satisfied, you can export the image!
Download the image below, open it in Photo AI, and follow along. Sample image
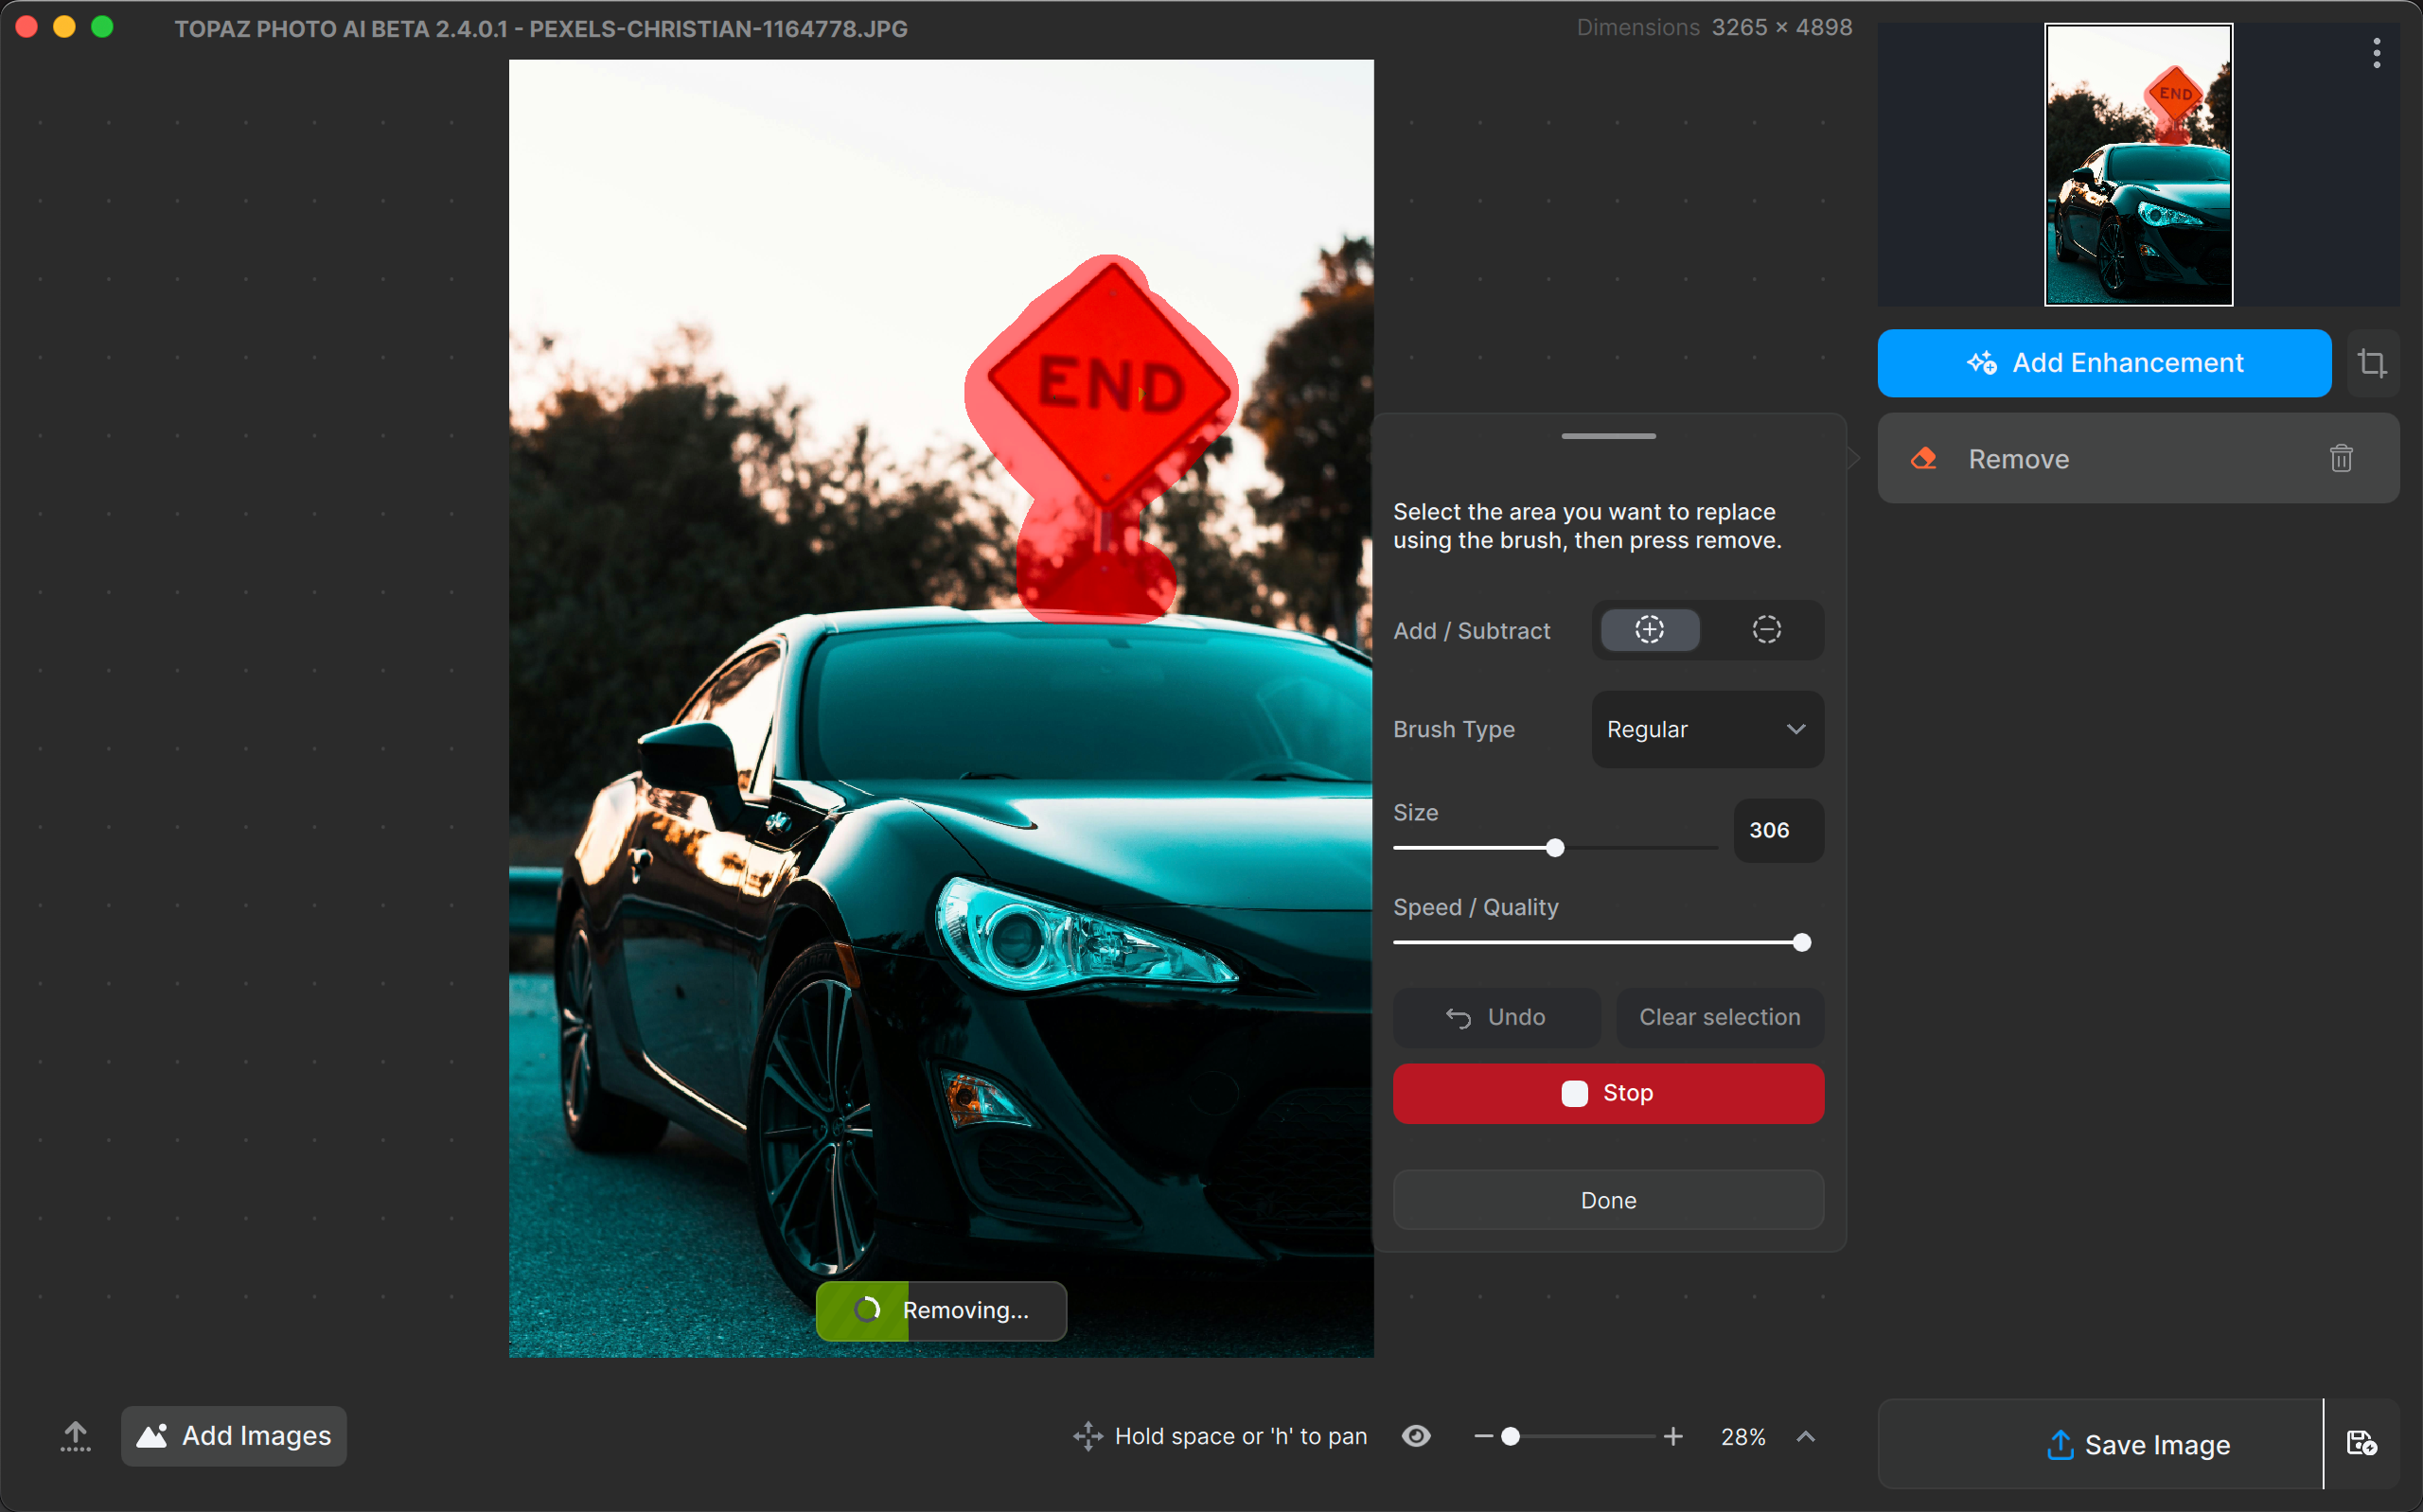
Step 1: Mask the Object
Use the brush to mask the object you want to remove. Make sure to keep mask sizes below ¼ of the total image size. Include the shadows and reflections of the objects.
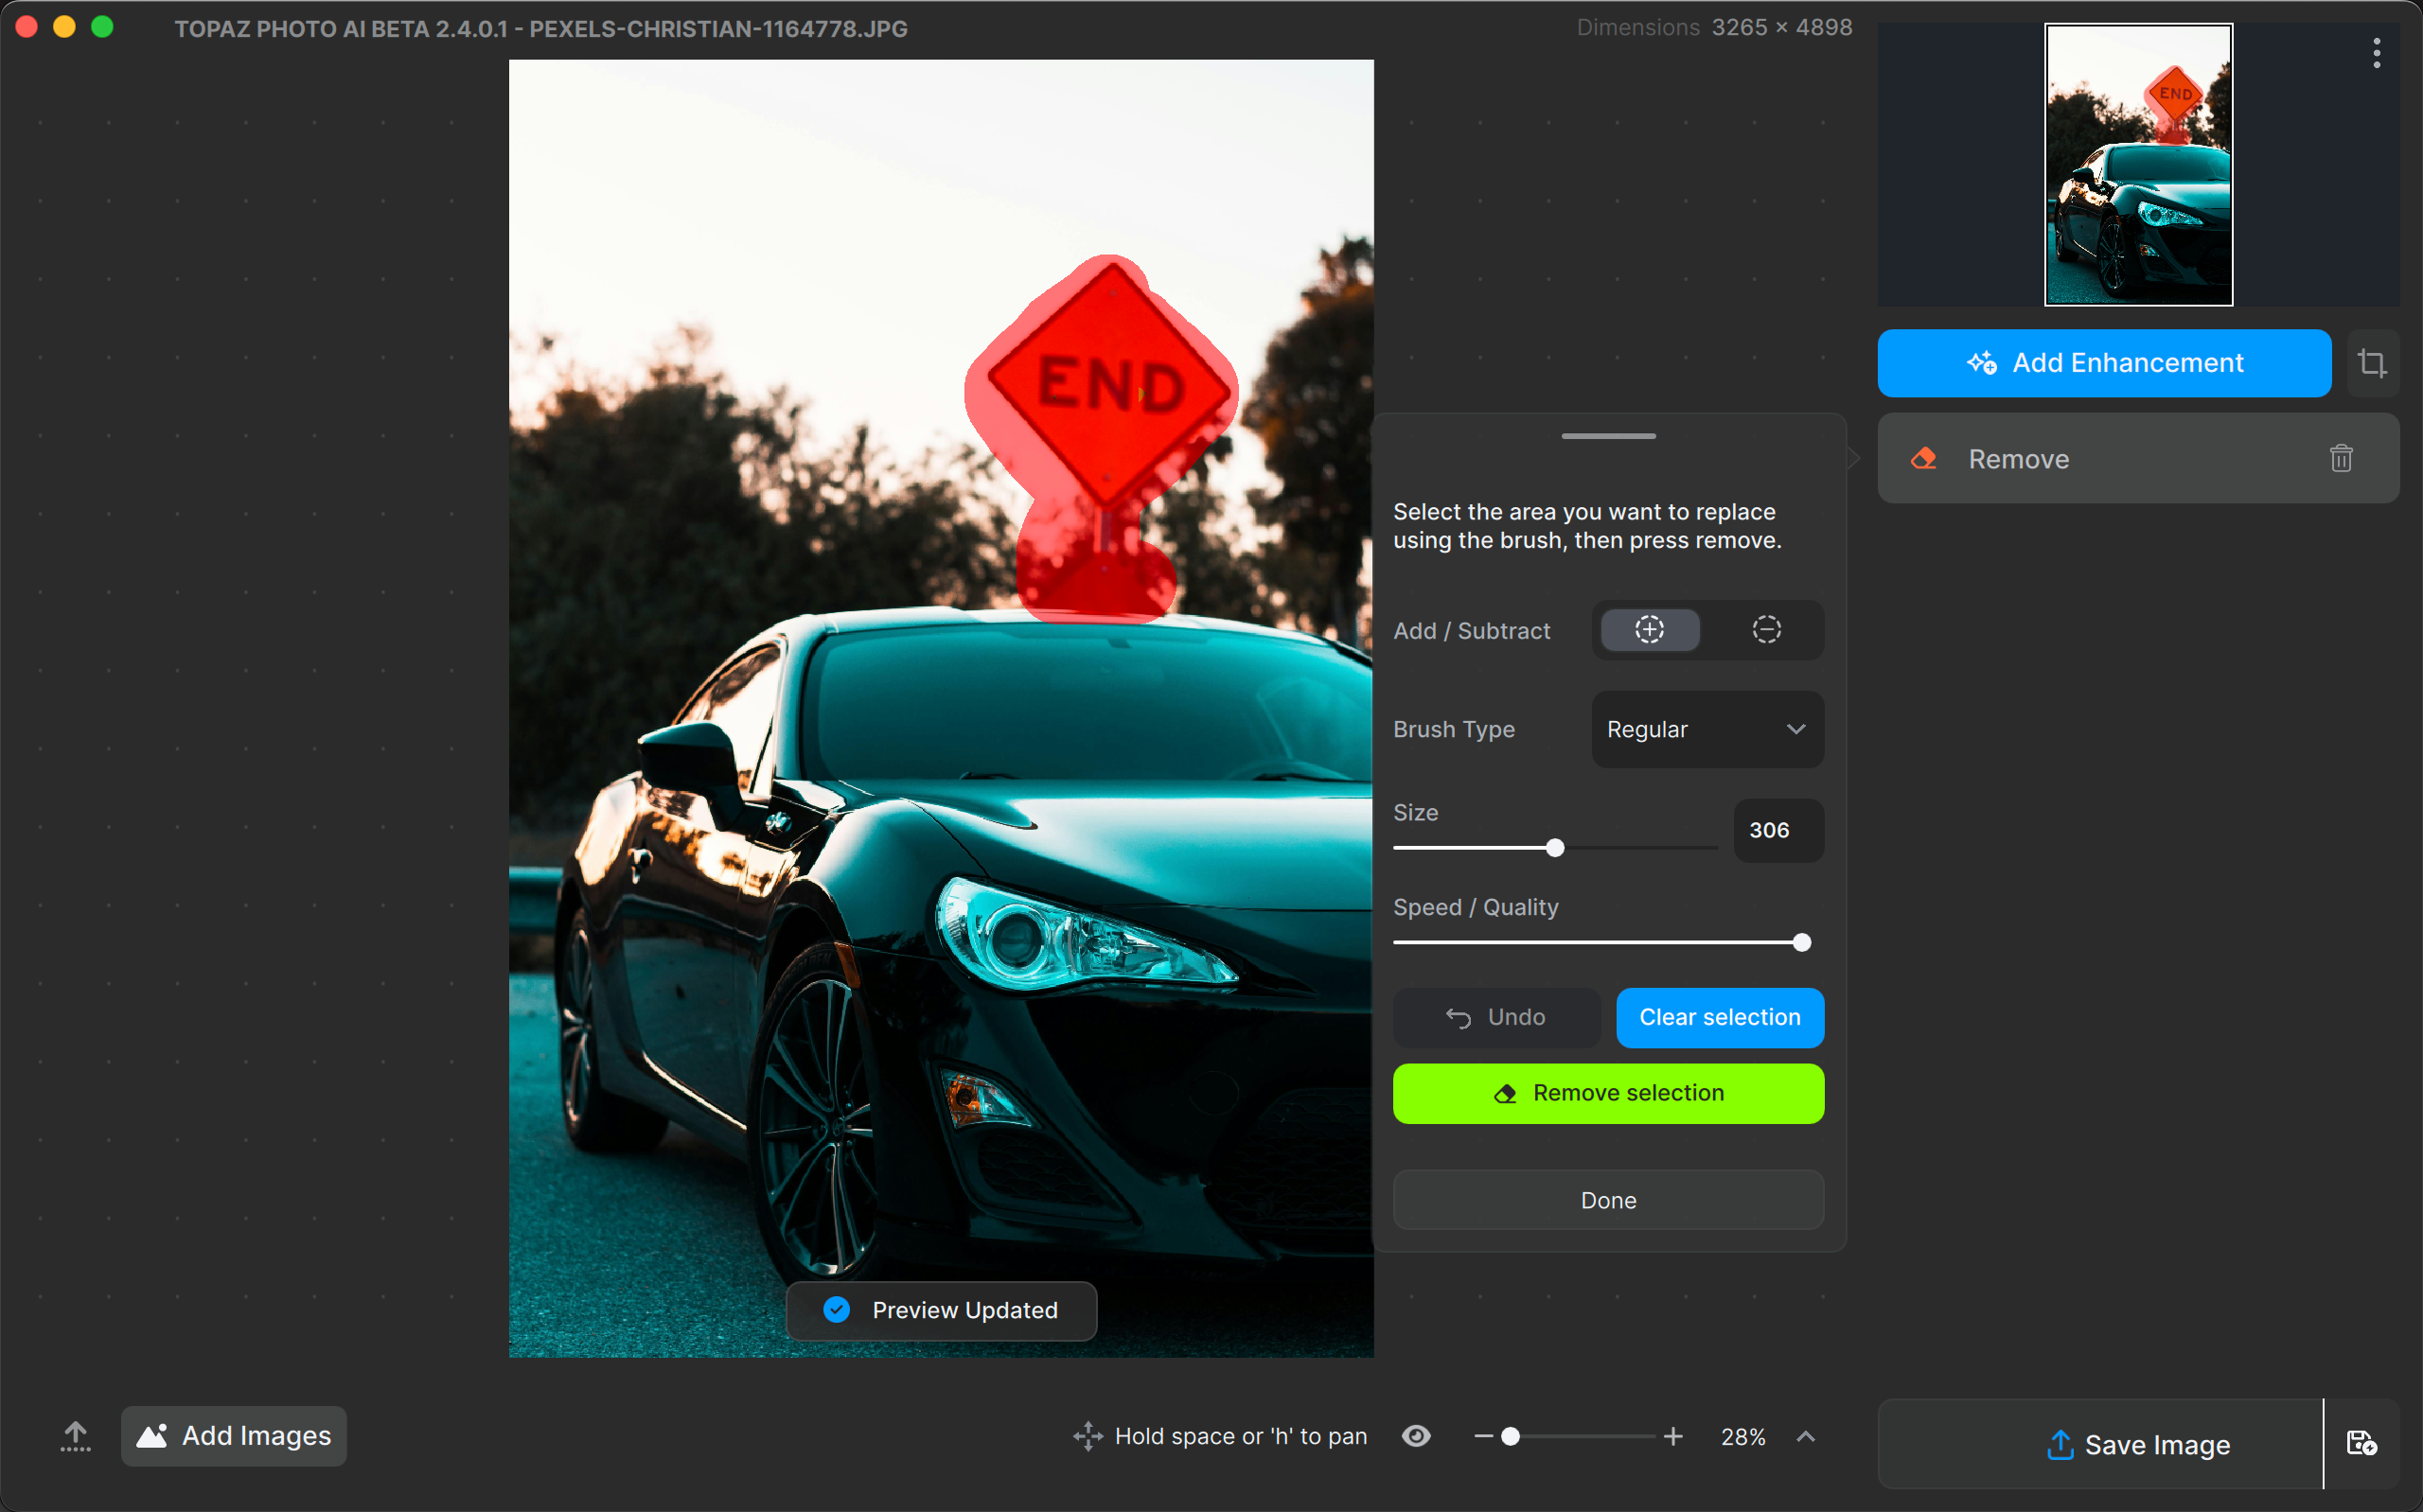
Step 2: Remove the Selection
Adjust the Speed / Quality slider depending on your computer's specifications. Setting the slider to the left is approximately 3x faster than to the right.
Press the Remove Selection button and let it process. You can stop the processing if it is taking too long or if you want to adjust the mask by clicking the Stop button.
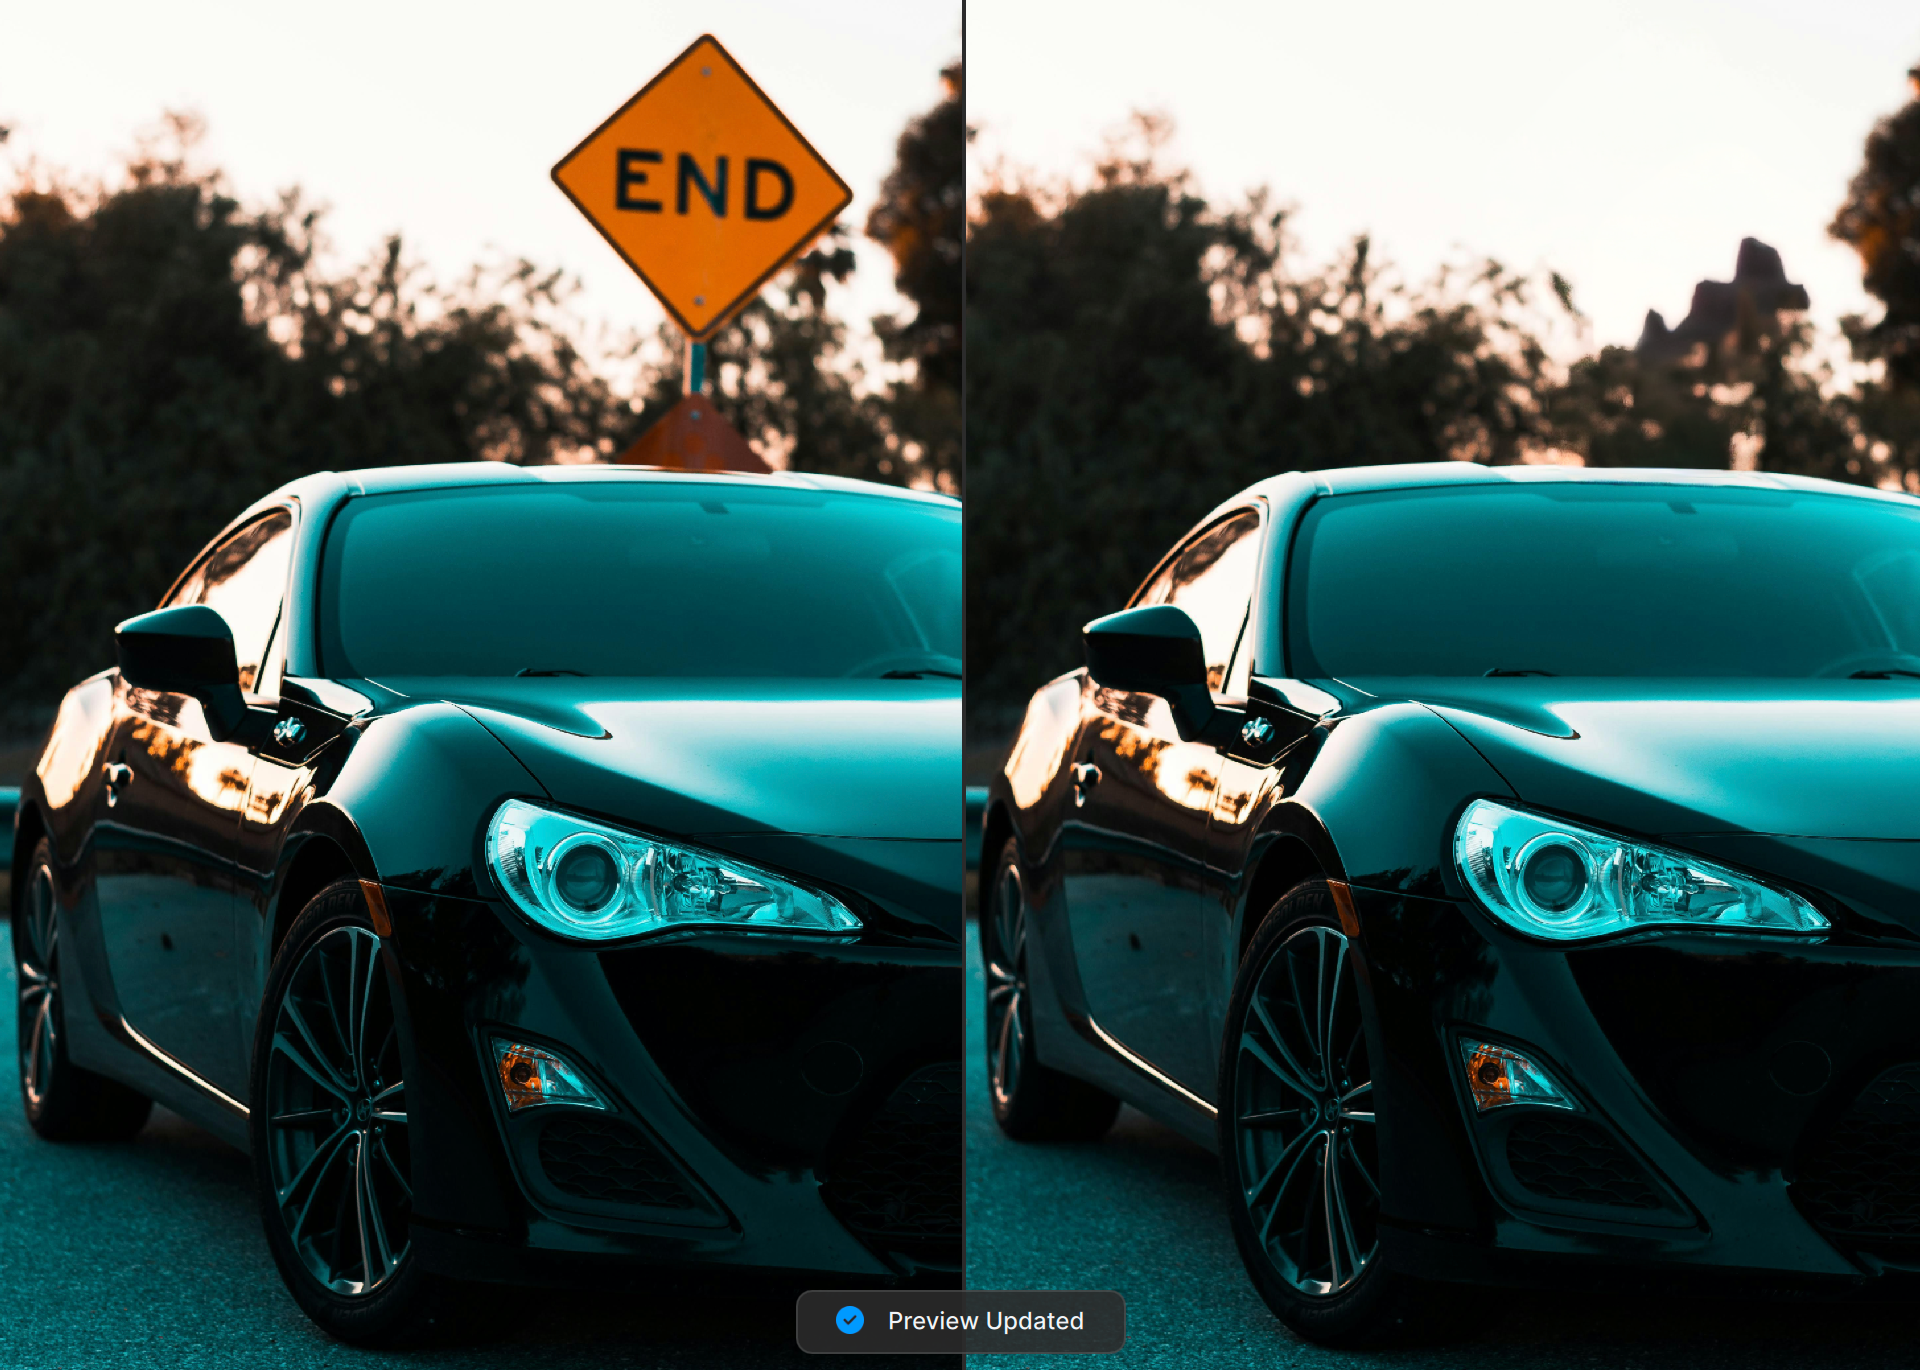
Step 3: Preview the Final Result
Decide whether you want to make further edits. Once you’re satisfied, you can export the image!
Download the image below, open it in Photo AI, and follow along. Sample image
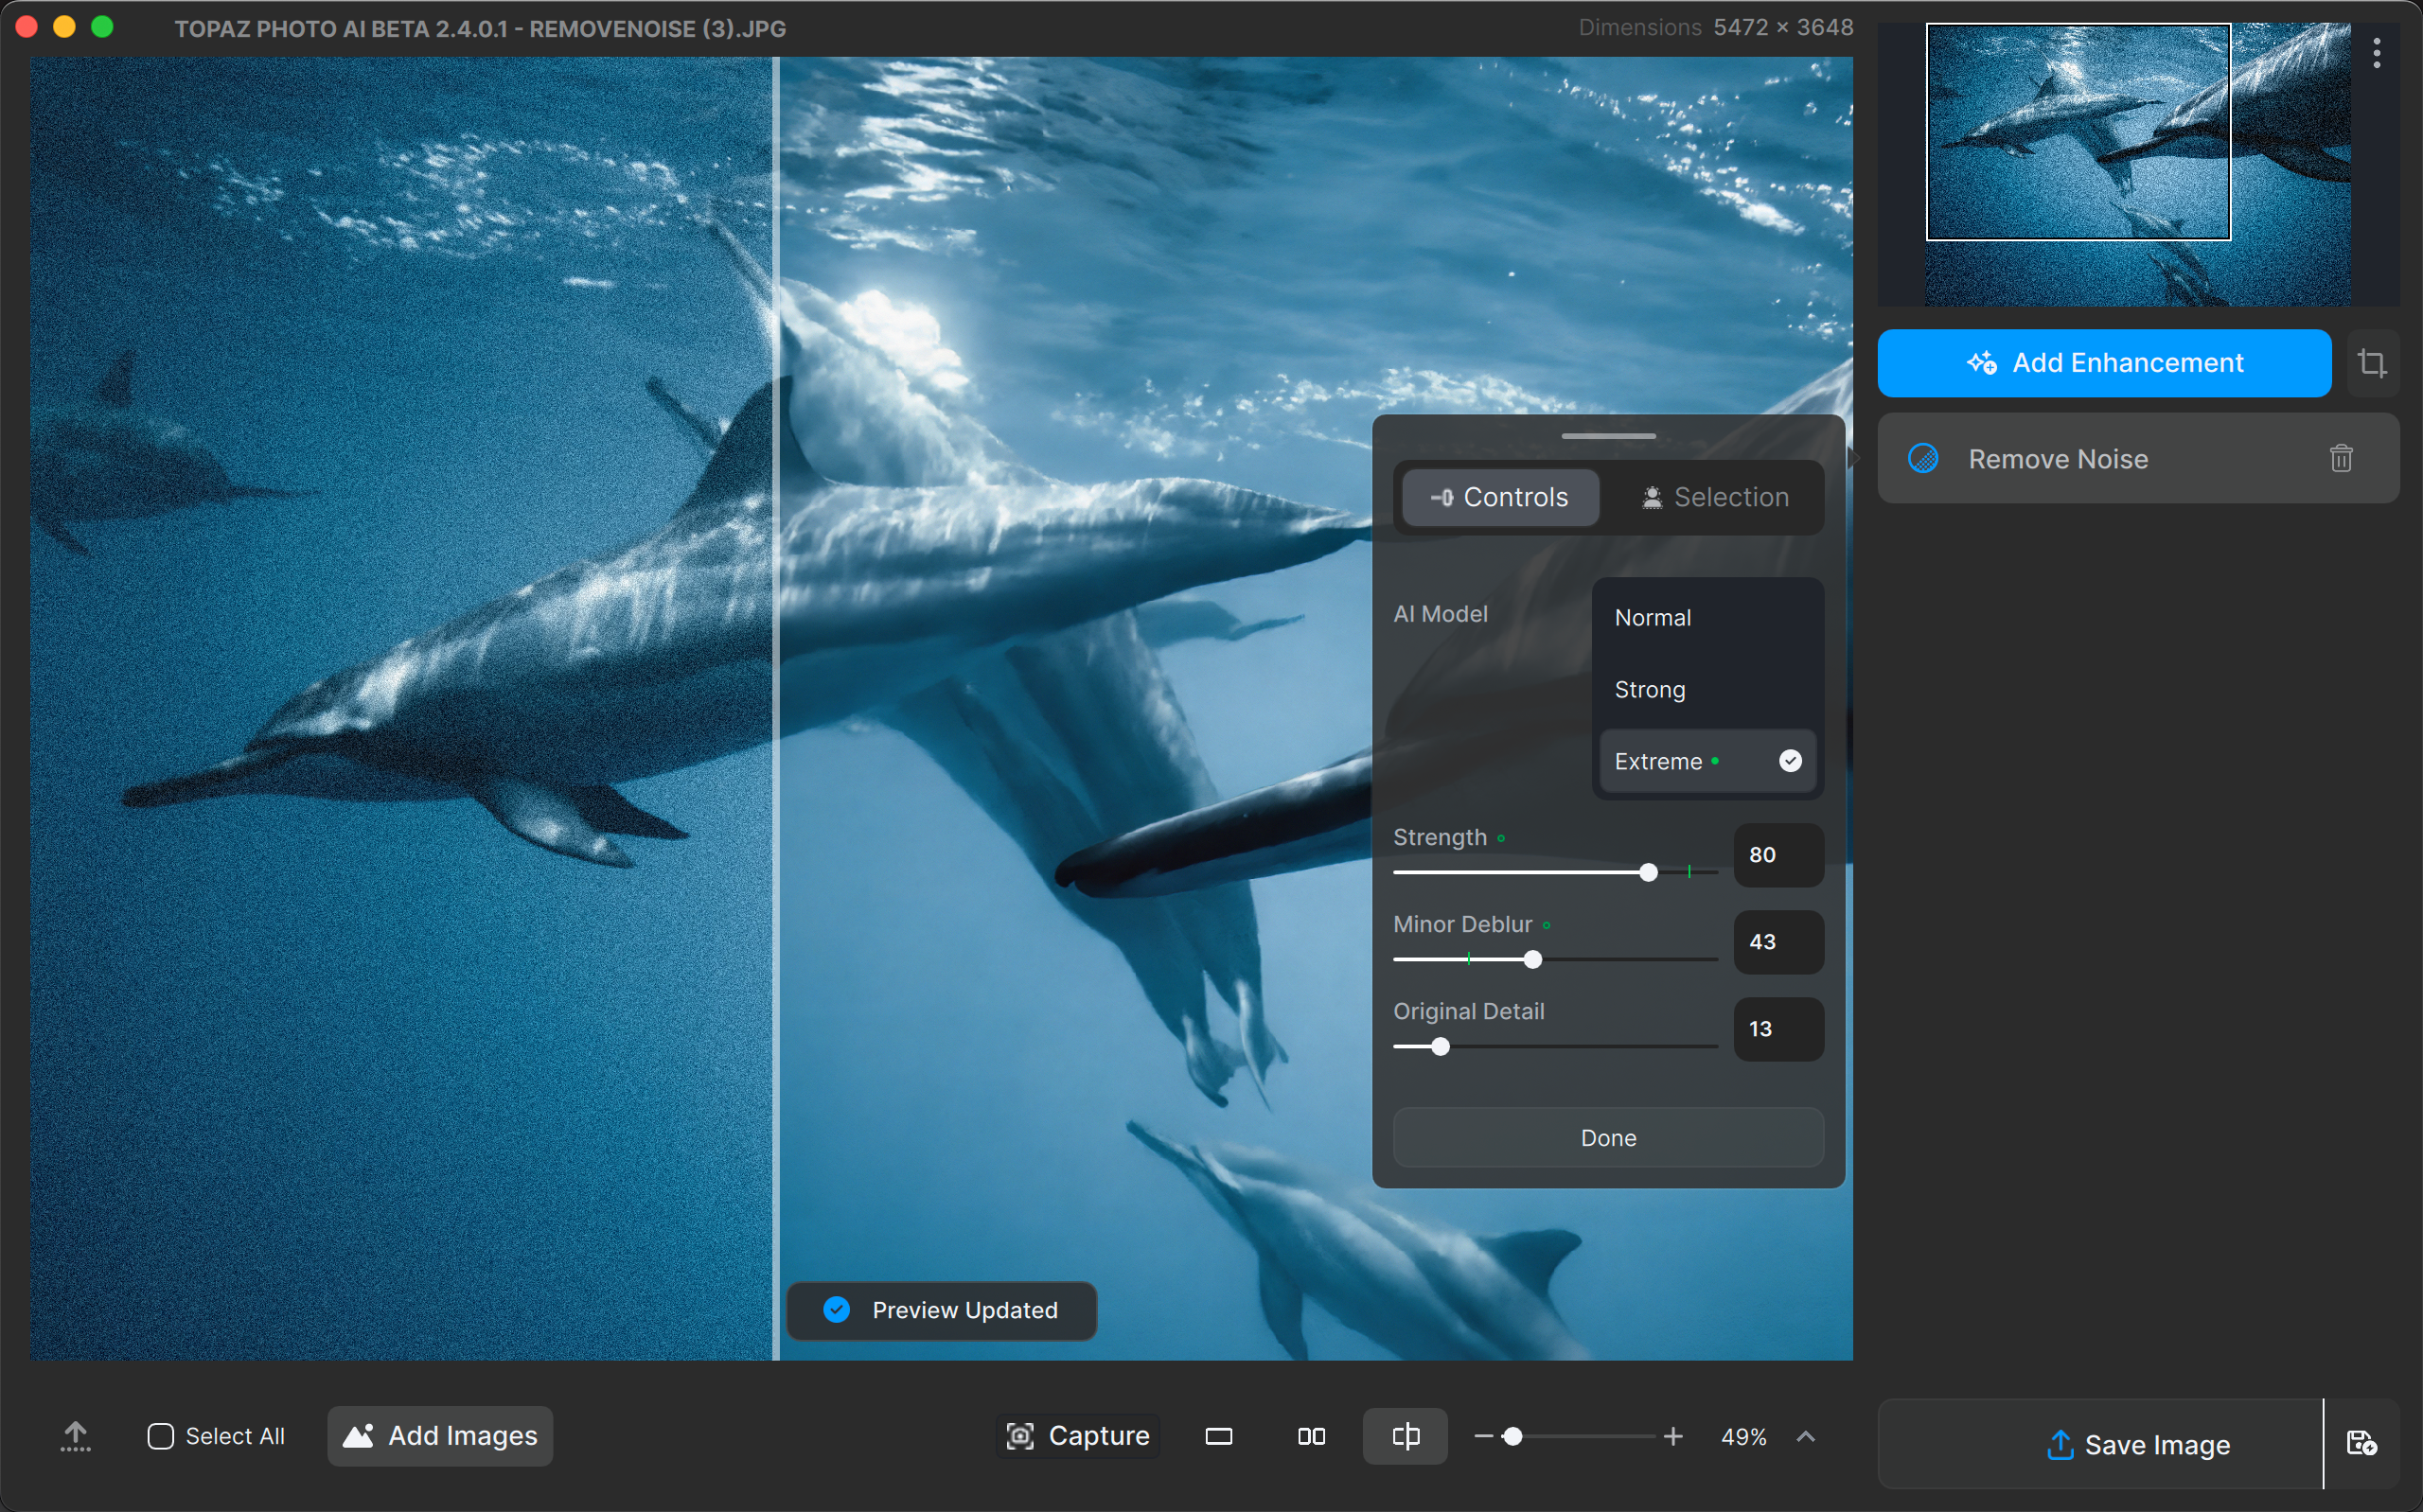
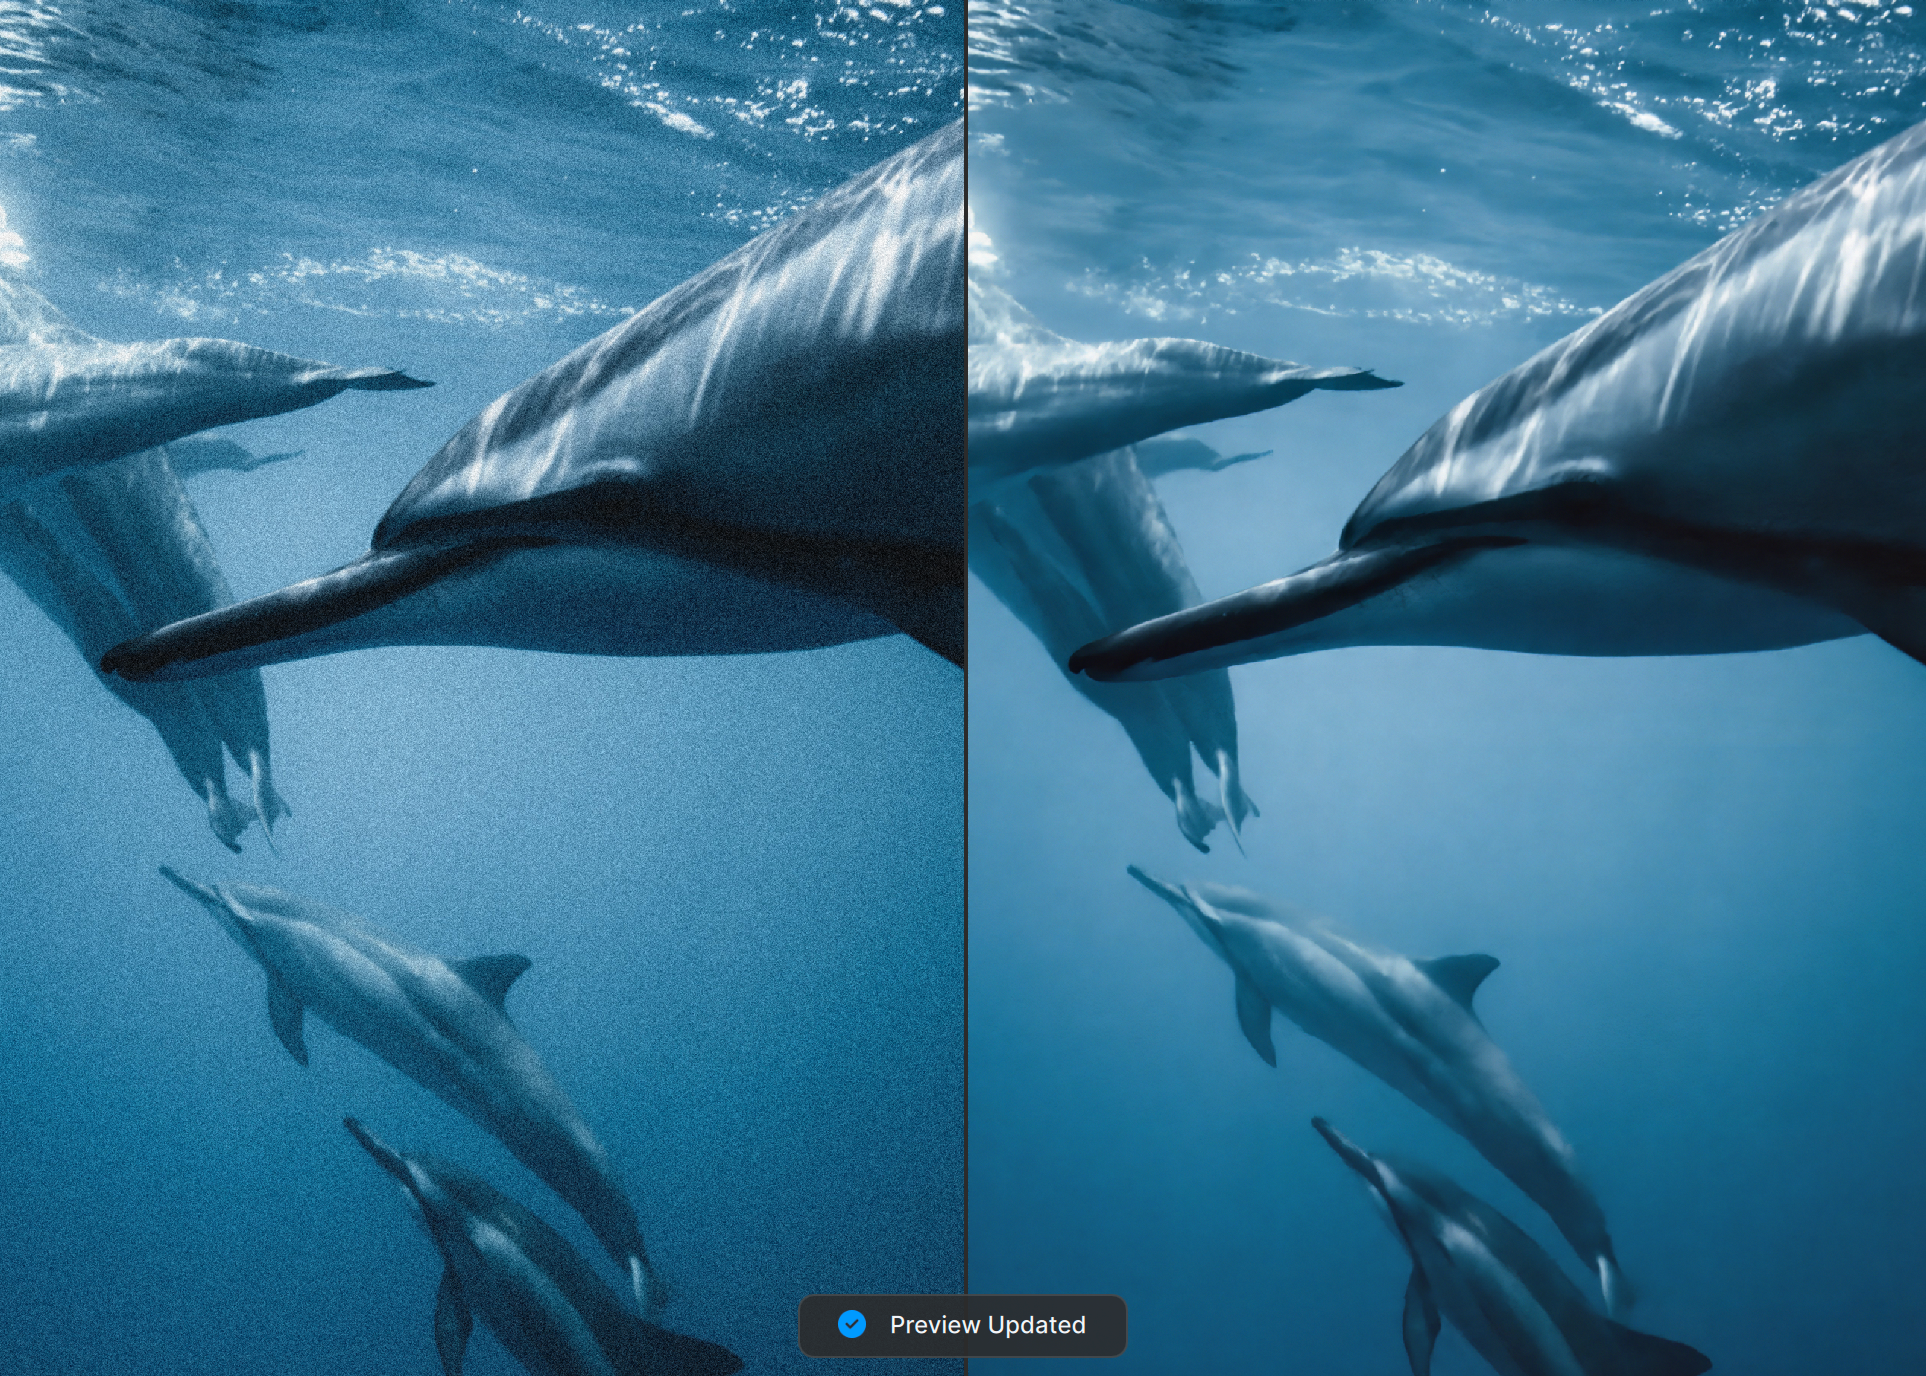
Step 1: Choose Model and Strength
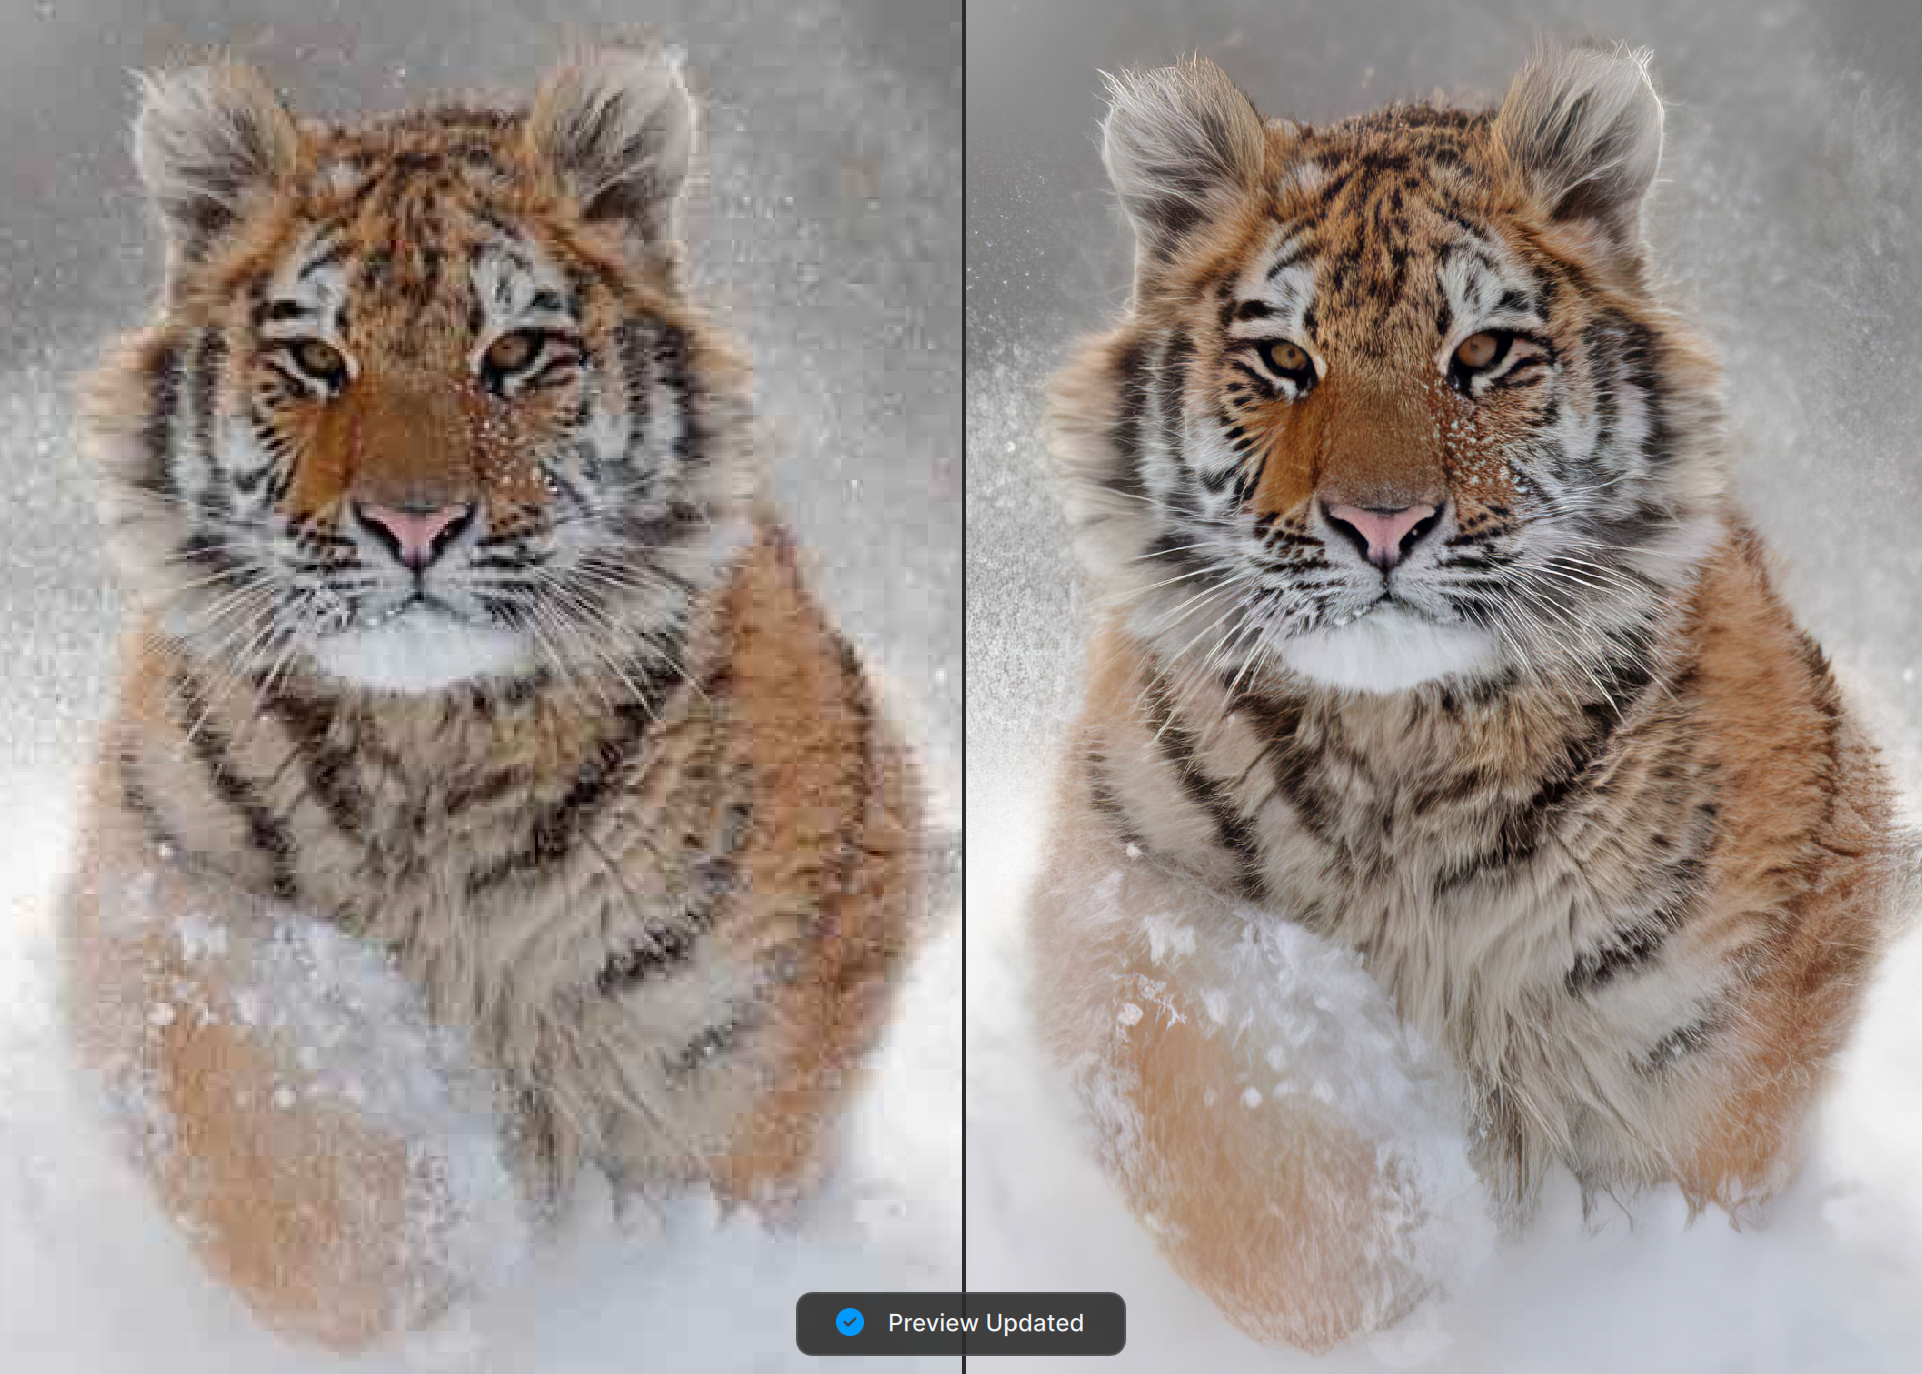
Autopilot selects the Strong model for the sample image because it is a noisy JPG. Choose the Normal model to prioritize detail preservation or the Extreme model to remove more noise.
Even if the correct model was selected, it is still possible that an inappropriate strength setting was chosen. Use the Strength slider to control the extent of your intended adjustments.
The dolphins might look smother than you want because some fine detail was removed. Decrease the value of the Strength slider. Also, turn up the Recover Original Detail slider.
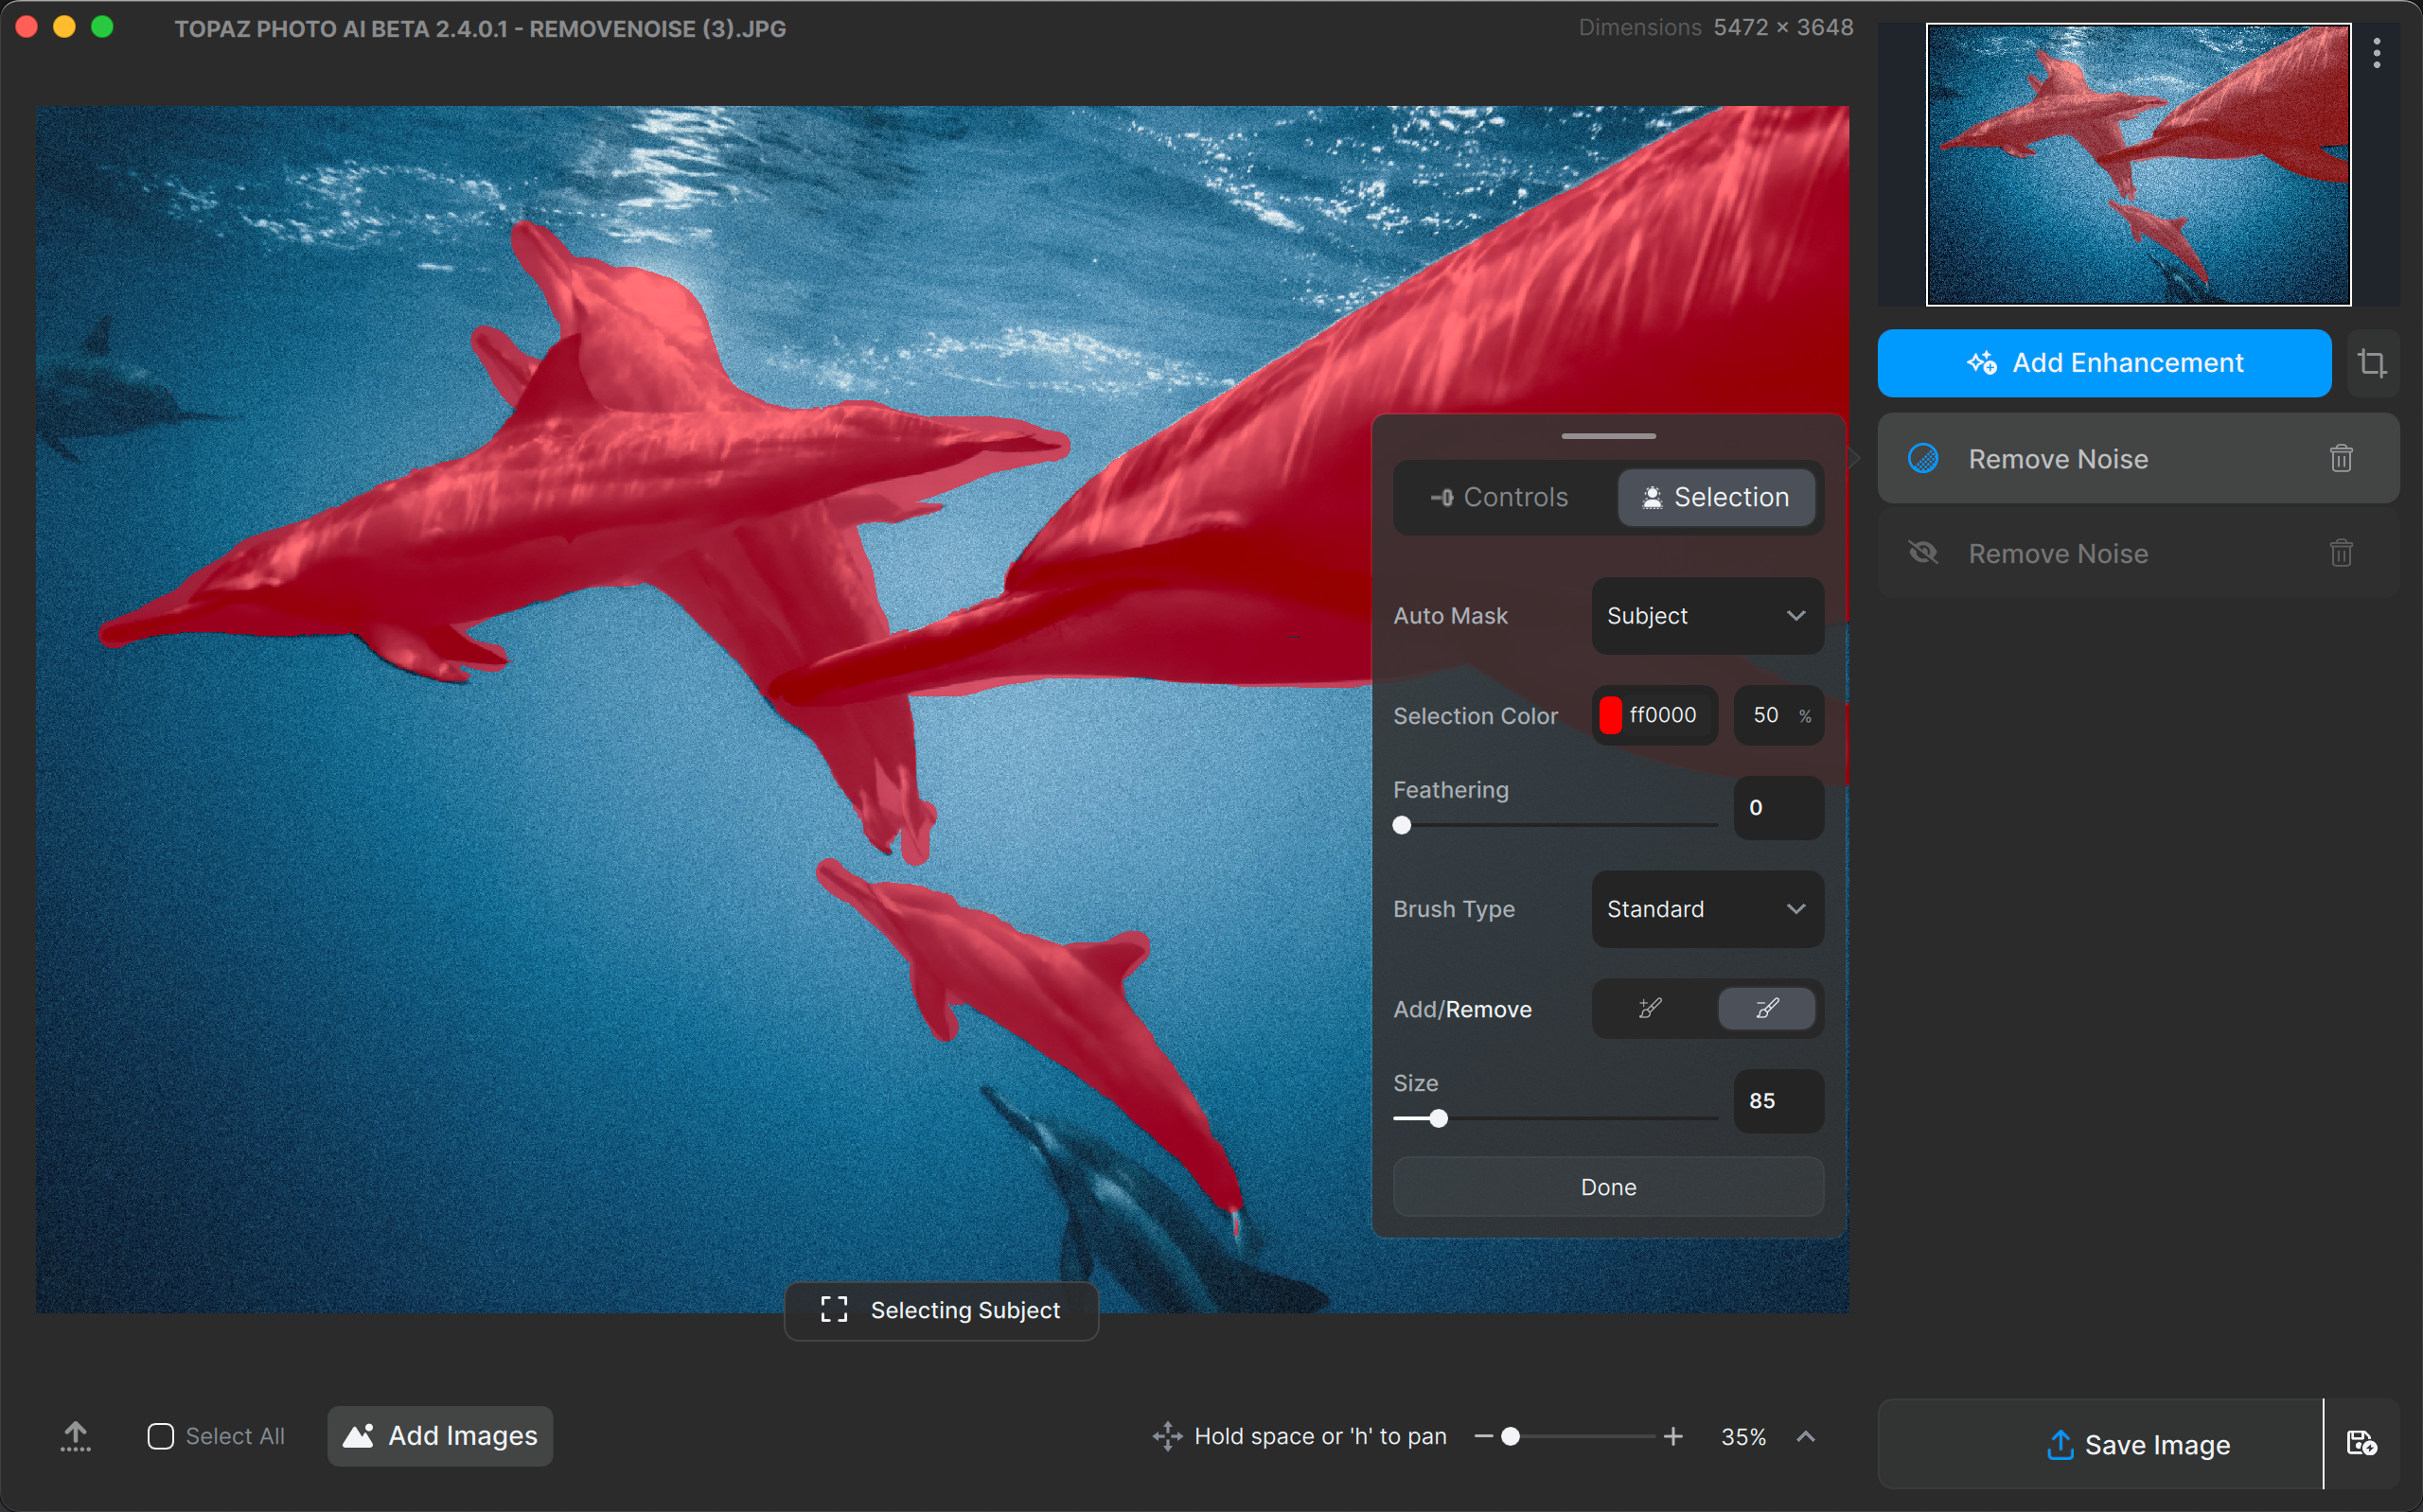
Step 2: Refine the Selection
To maintain a subtle amount of noise in the background while preserving the dolphins' clarity for depth and dimension, use two instances of the Remove Noise filter.
One instance should be applied to the dolphins, removing all the noise from them, while the other should target the background with a lesser degree of noise removal.
Step 3: Preview the Final Result
Decide whether you want to make further edits. Once you’re satisfied, you can export the image!
Download the image below, open it in Photo AI, and follow along. Sample image
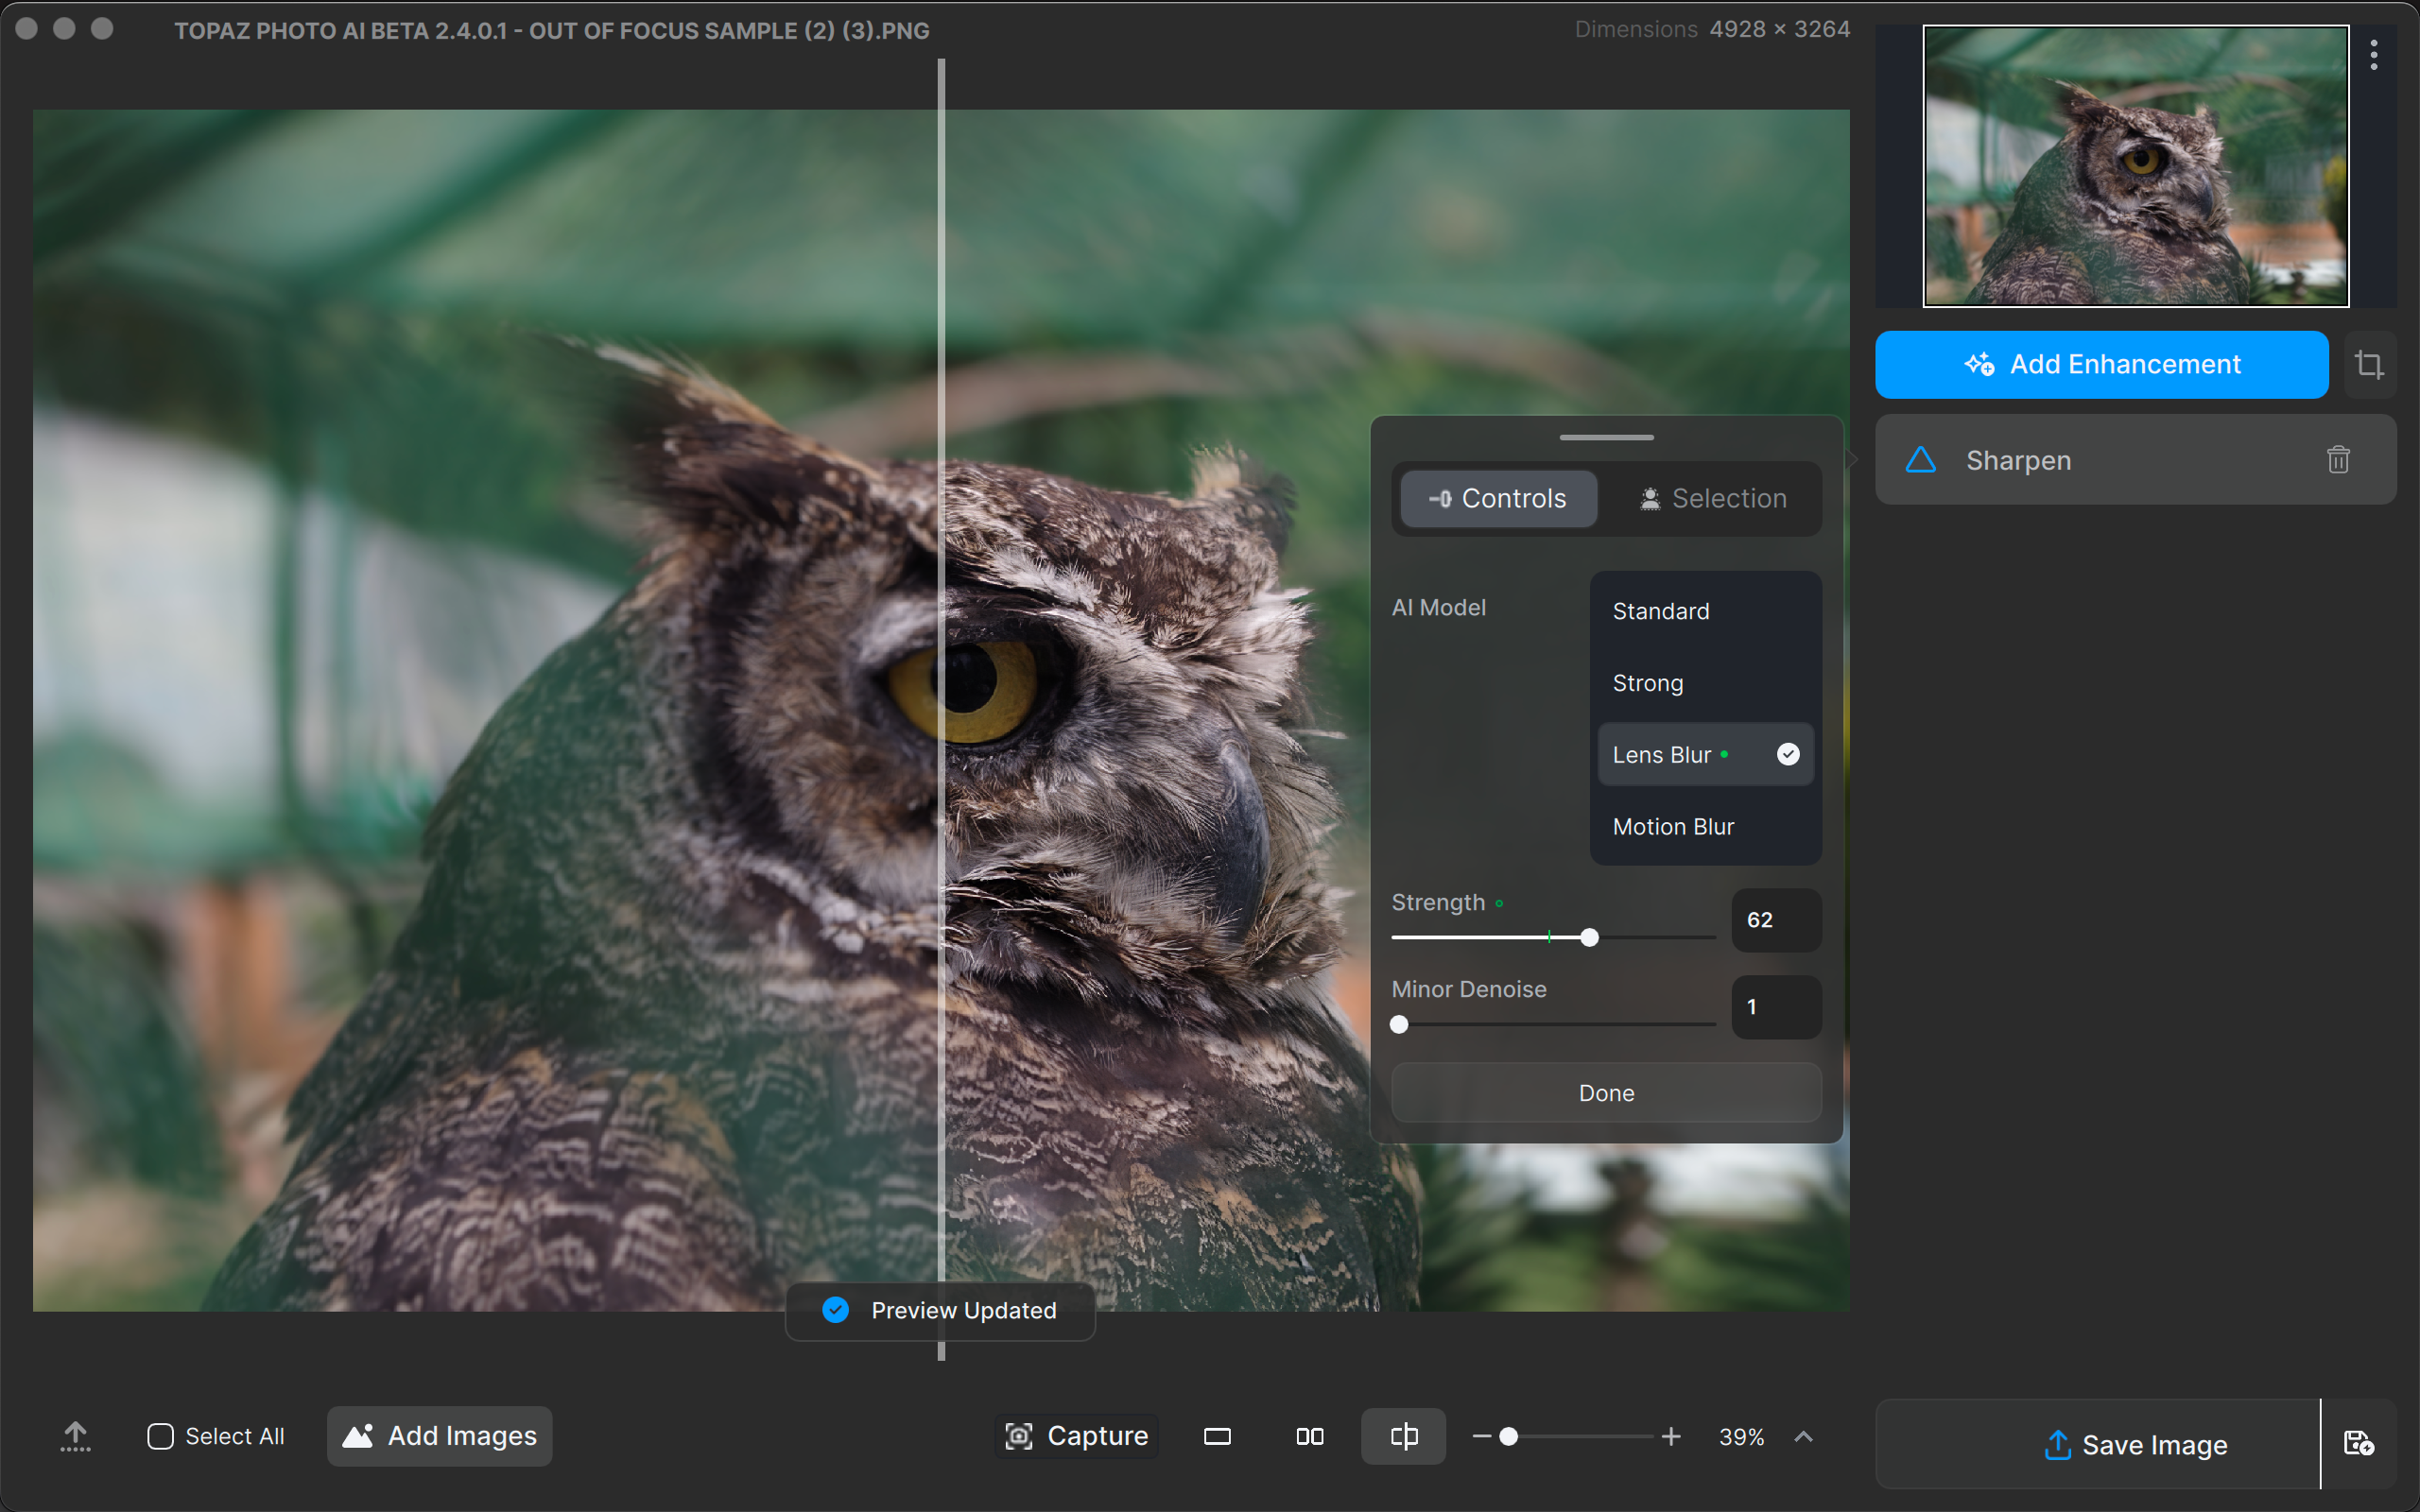
Step 1: Choose Model and Strength
Autopilot selects the Lens Blur model because the image is out of focus. The Standard and Motion Blur models do not sharpen the details as much, and the Strong model can cause an unnatural look.
Even if the correct model was selected, it is still possible that an inappropriate strength setting was chosen. Use the Strength slider to tweak the amount of processing based on your preferences.
There is no noise in the original image so the Minor Denoise slider does not need to be enabled.
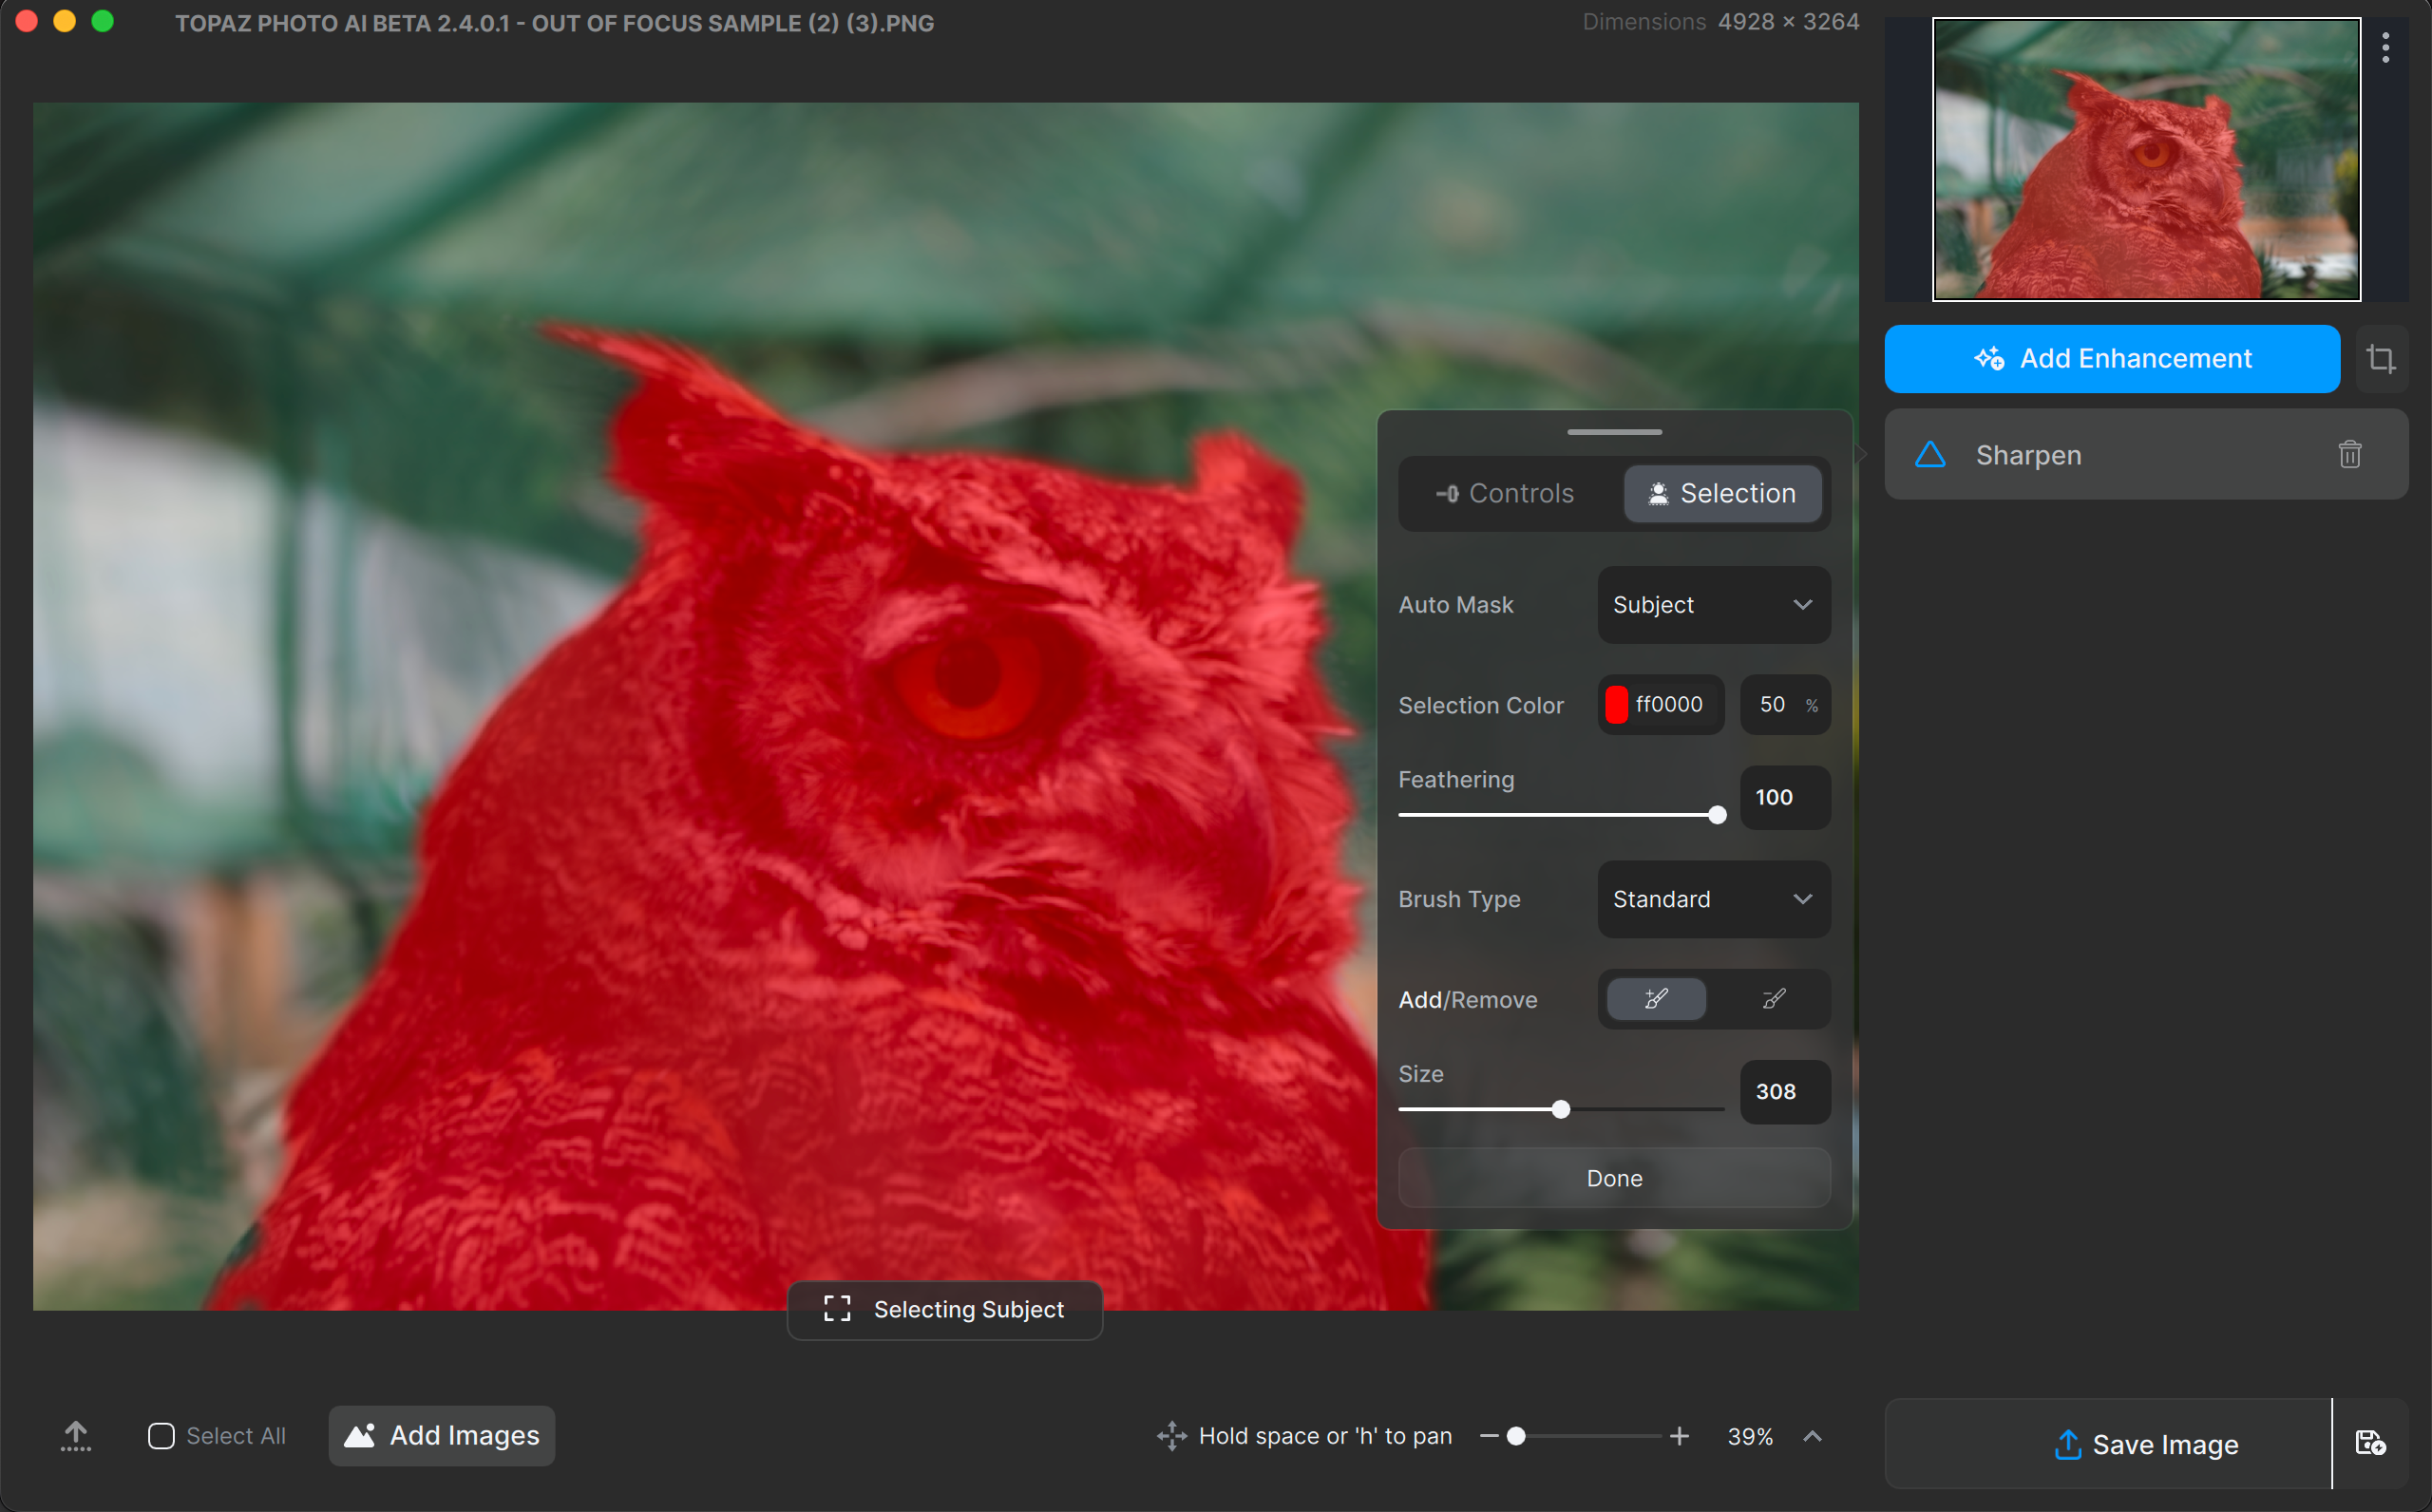
Step 2: Refine the Selection
Different areas of an image may require different levels of sharpening; in this image, only the owl needs to be sharpened. Select the Subject option in the Auto Mask settings in the Selection tab.
The perception of a "perfectly sharpened" image is subjective. Experiment with the different models and settings until you get your desired result.
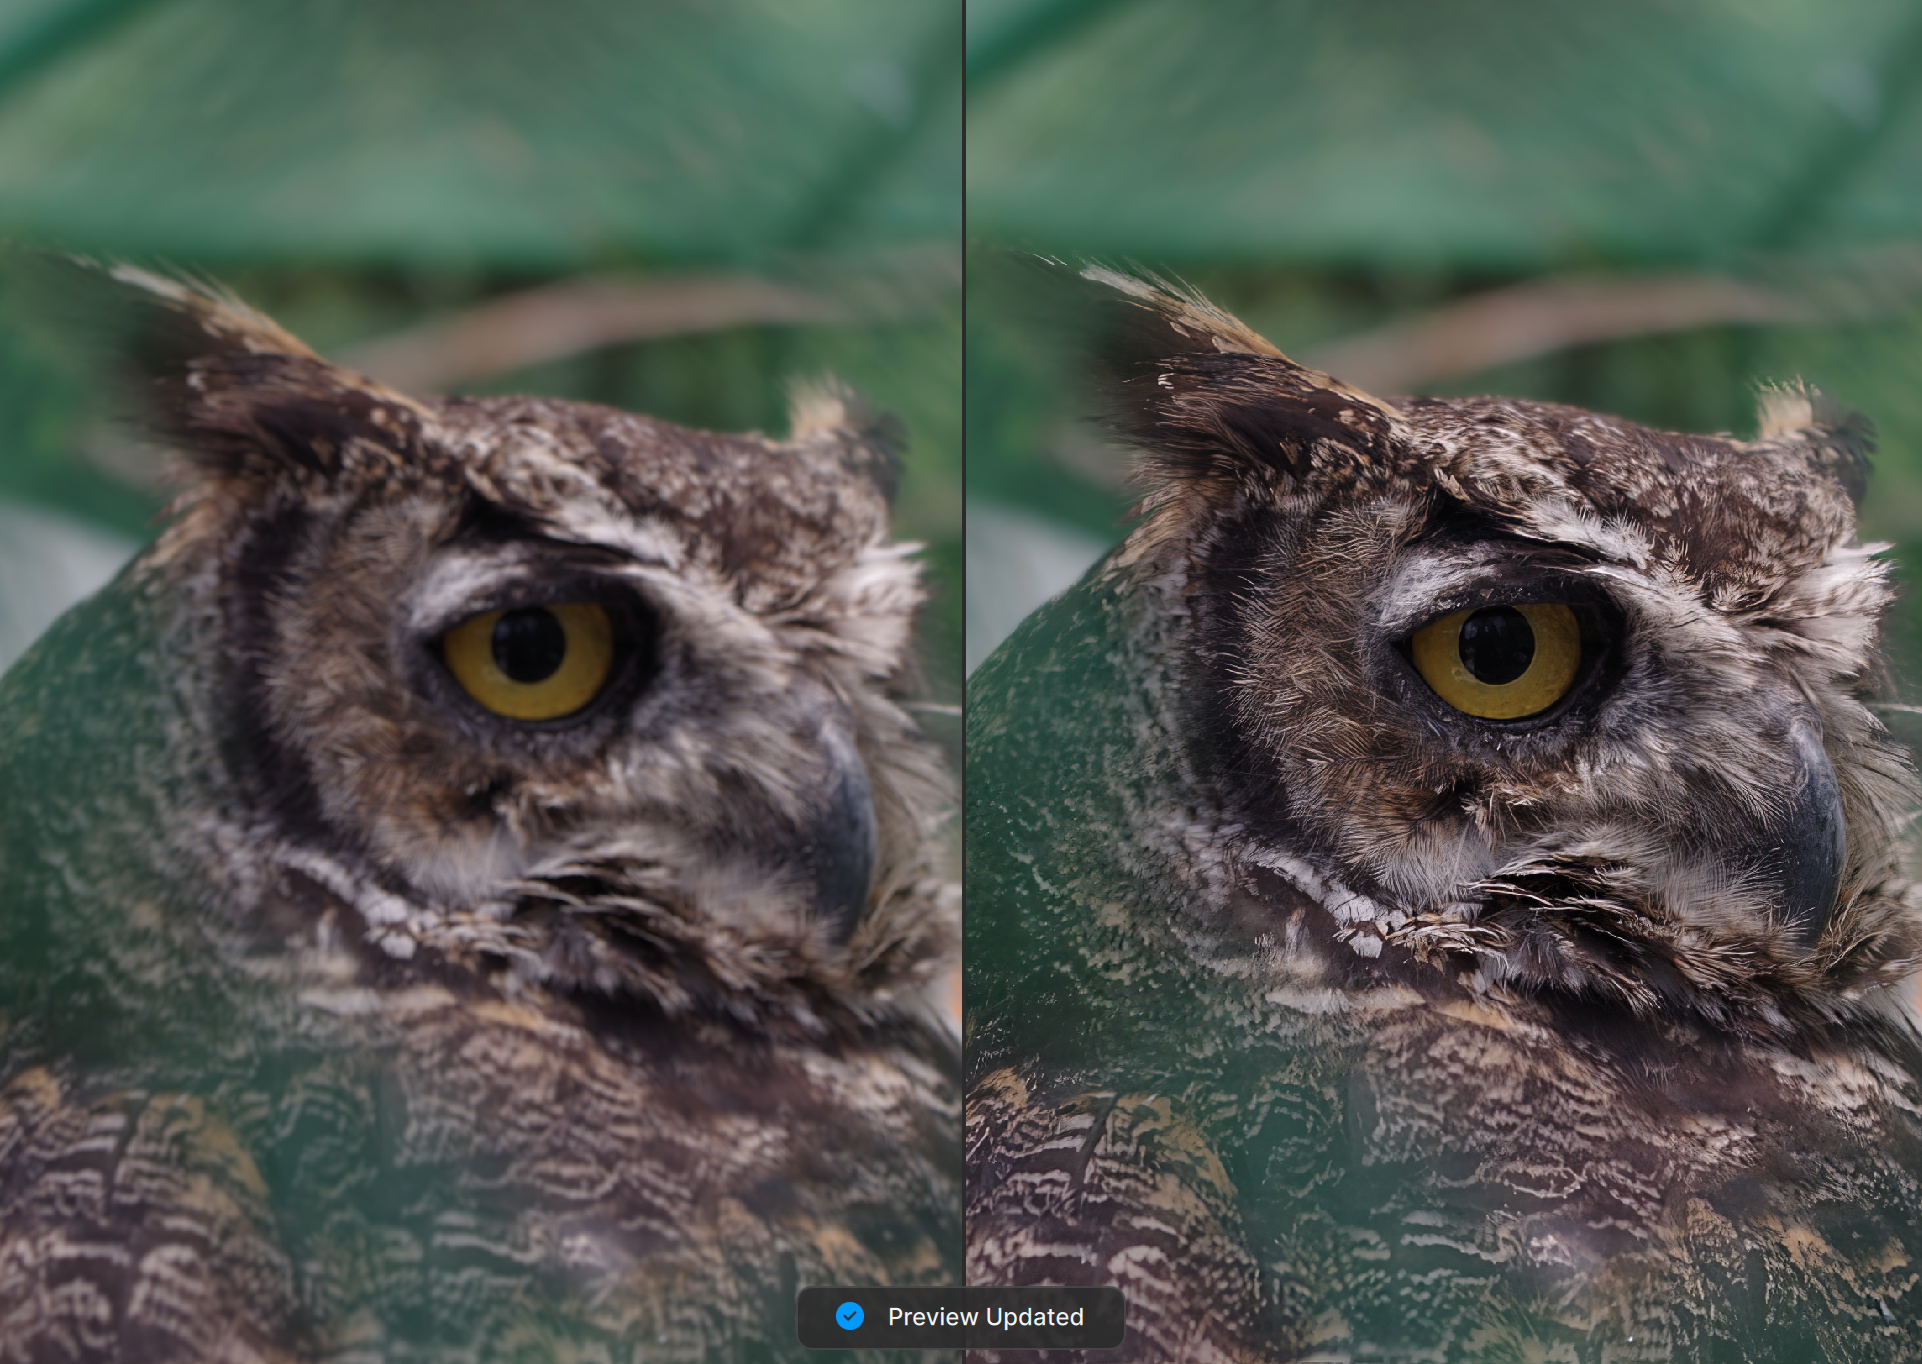
Step 3: Preview the Final Result
Decide whether you want to make further edits. Once you’re satisfied, you can export the image!
Download the image, open it in Photo AI, and follow along. Sample image
Step 1: Determine Direction & Degree
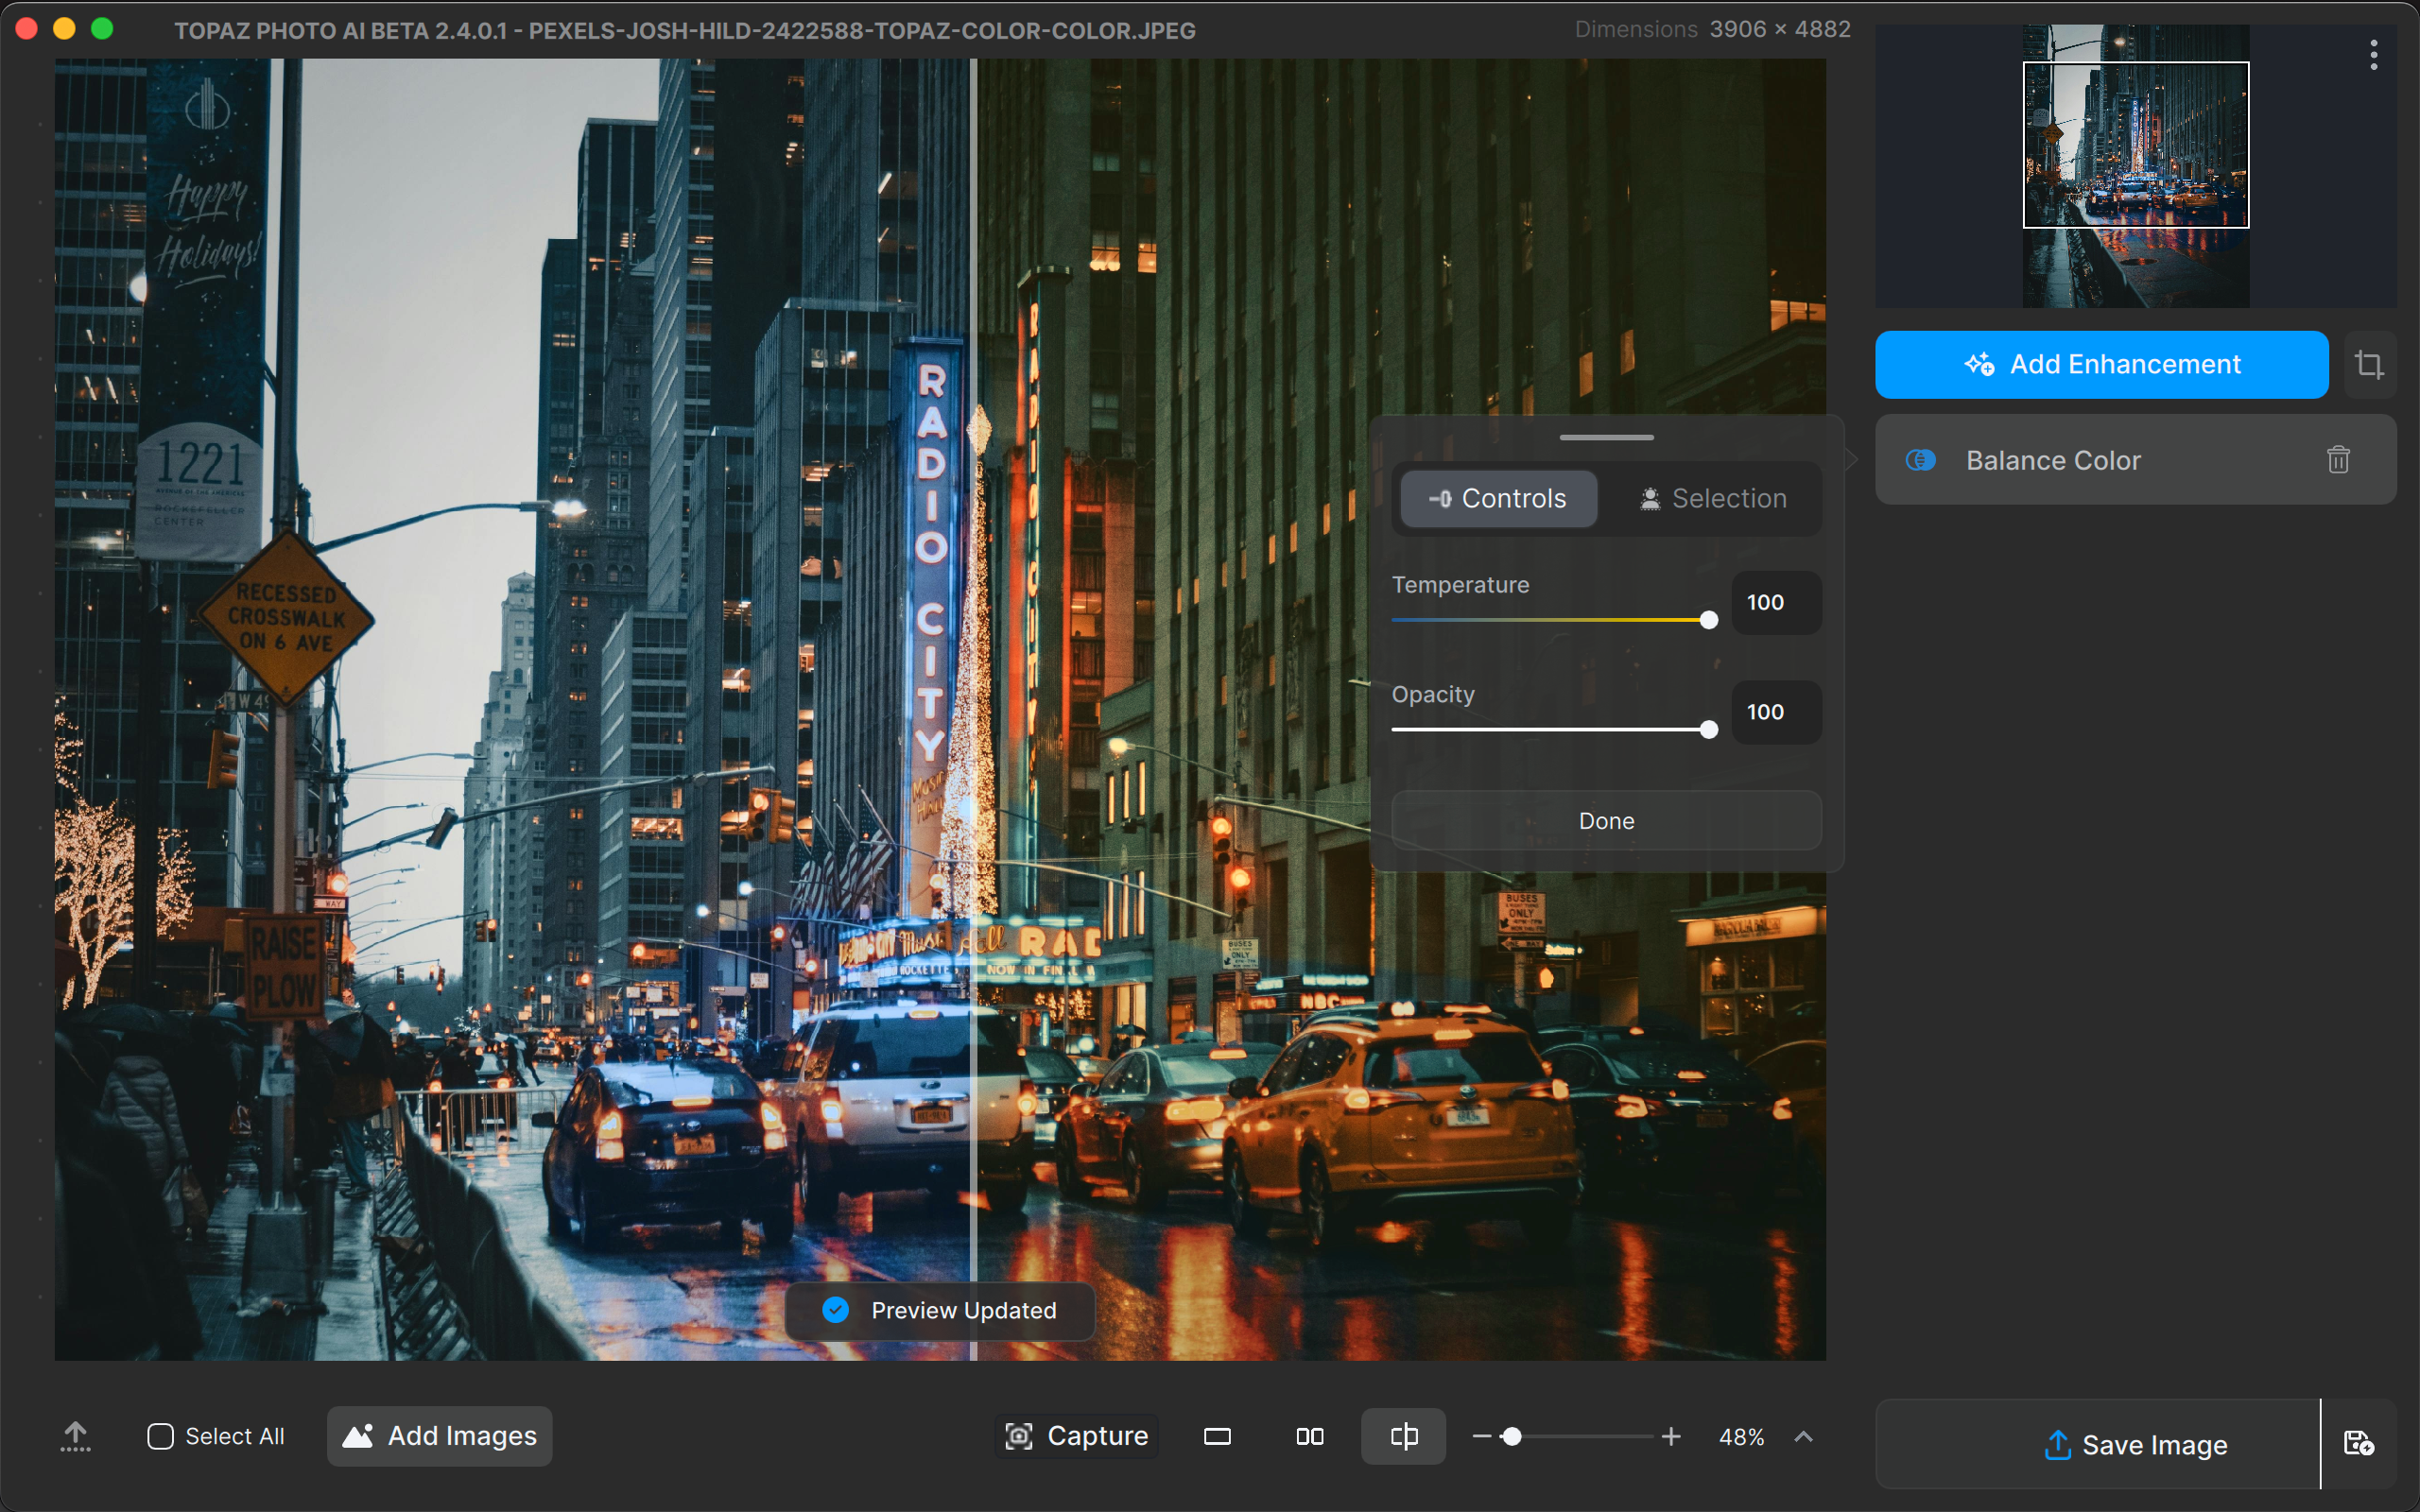
Autopilot does not recommend Balance Color. Add it by clicking the Add Enhancement button and selecting it from the list. The Temperature is 50 and the Opacity is 100 by default.
Use the default adjustments to correct colors by neutralizing color casts for a truer-to-life appearance. This provides the best foundation for creative edits afterward.
Use the Opacity slider to adjust the strength of the color adjustment and the Temperature slider for color grading.
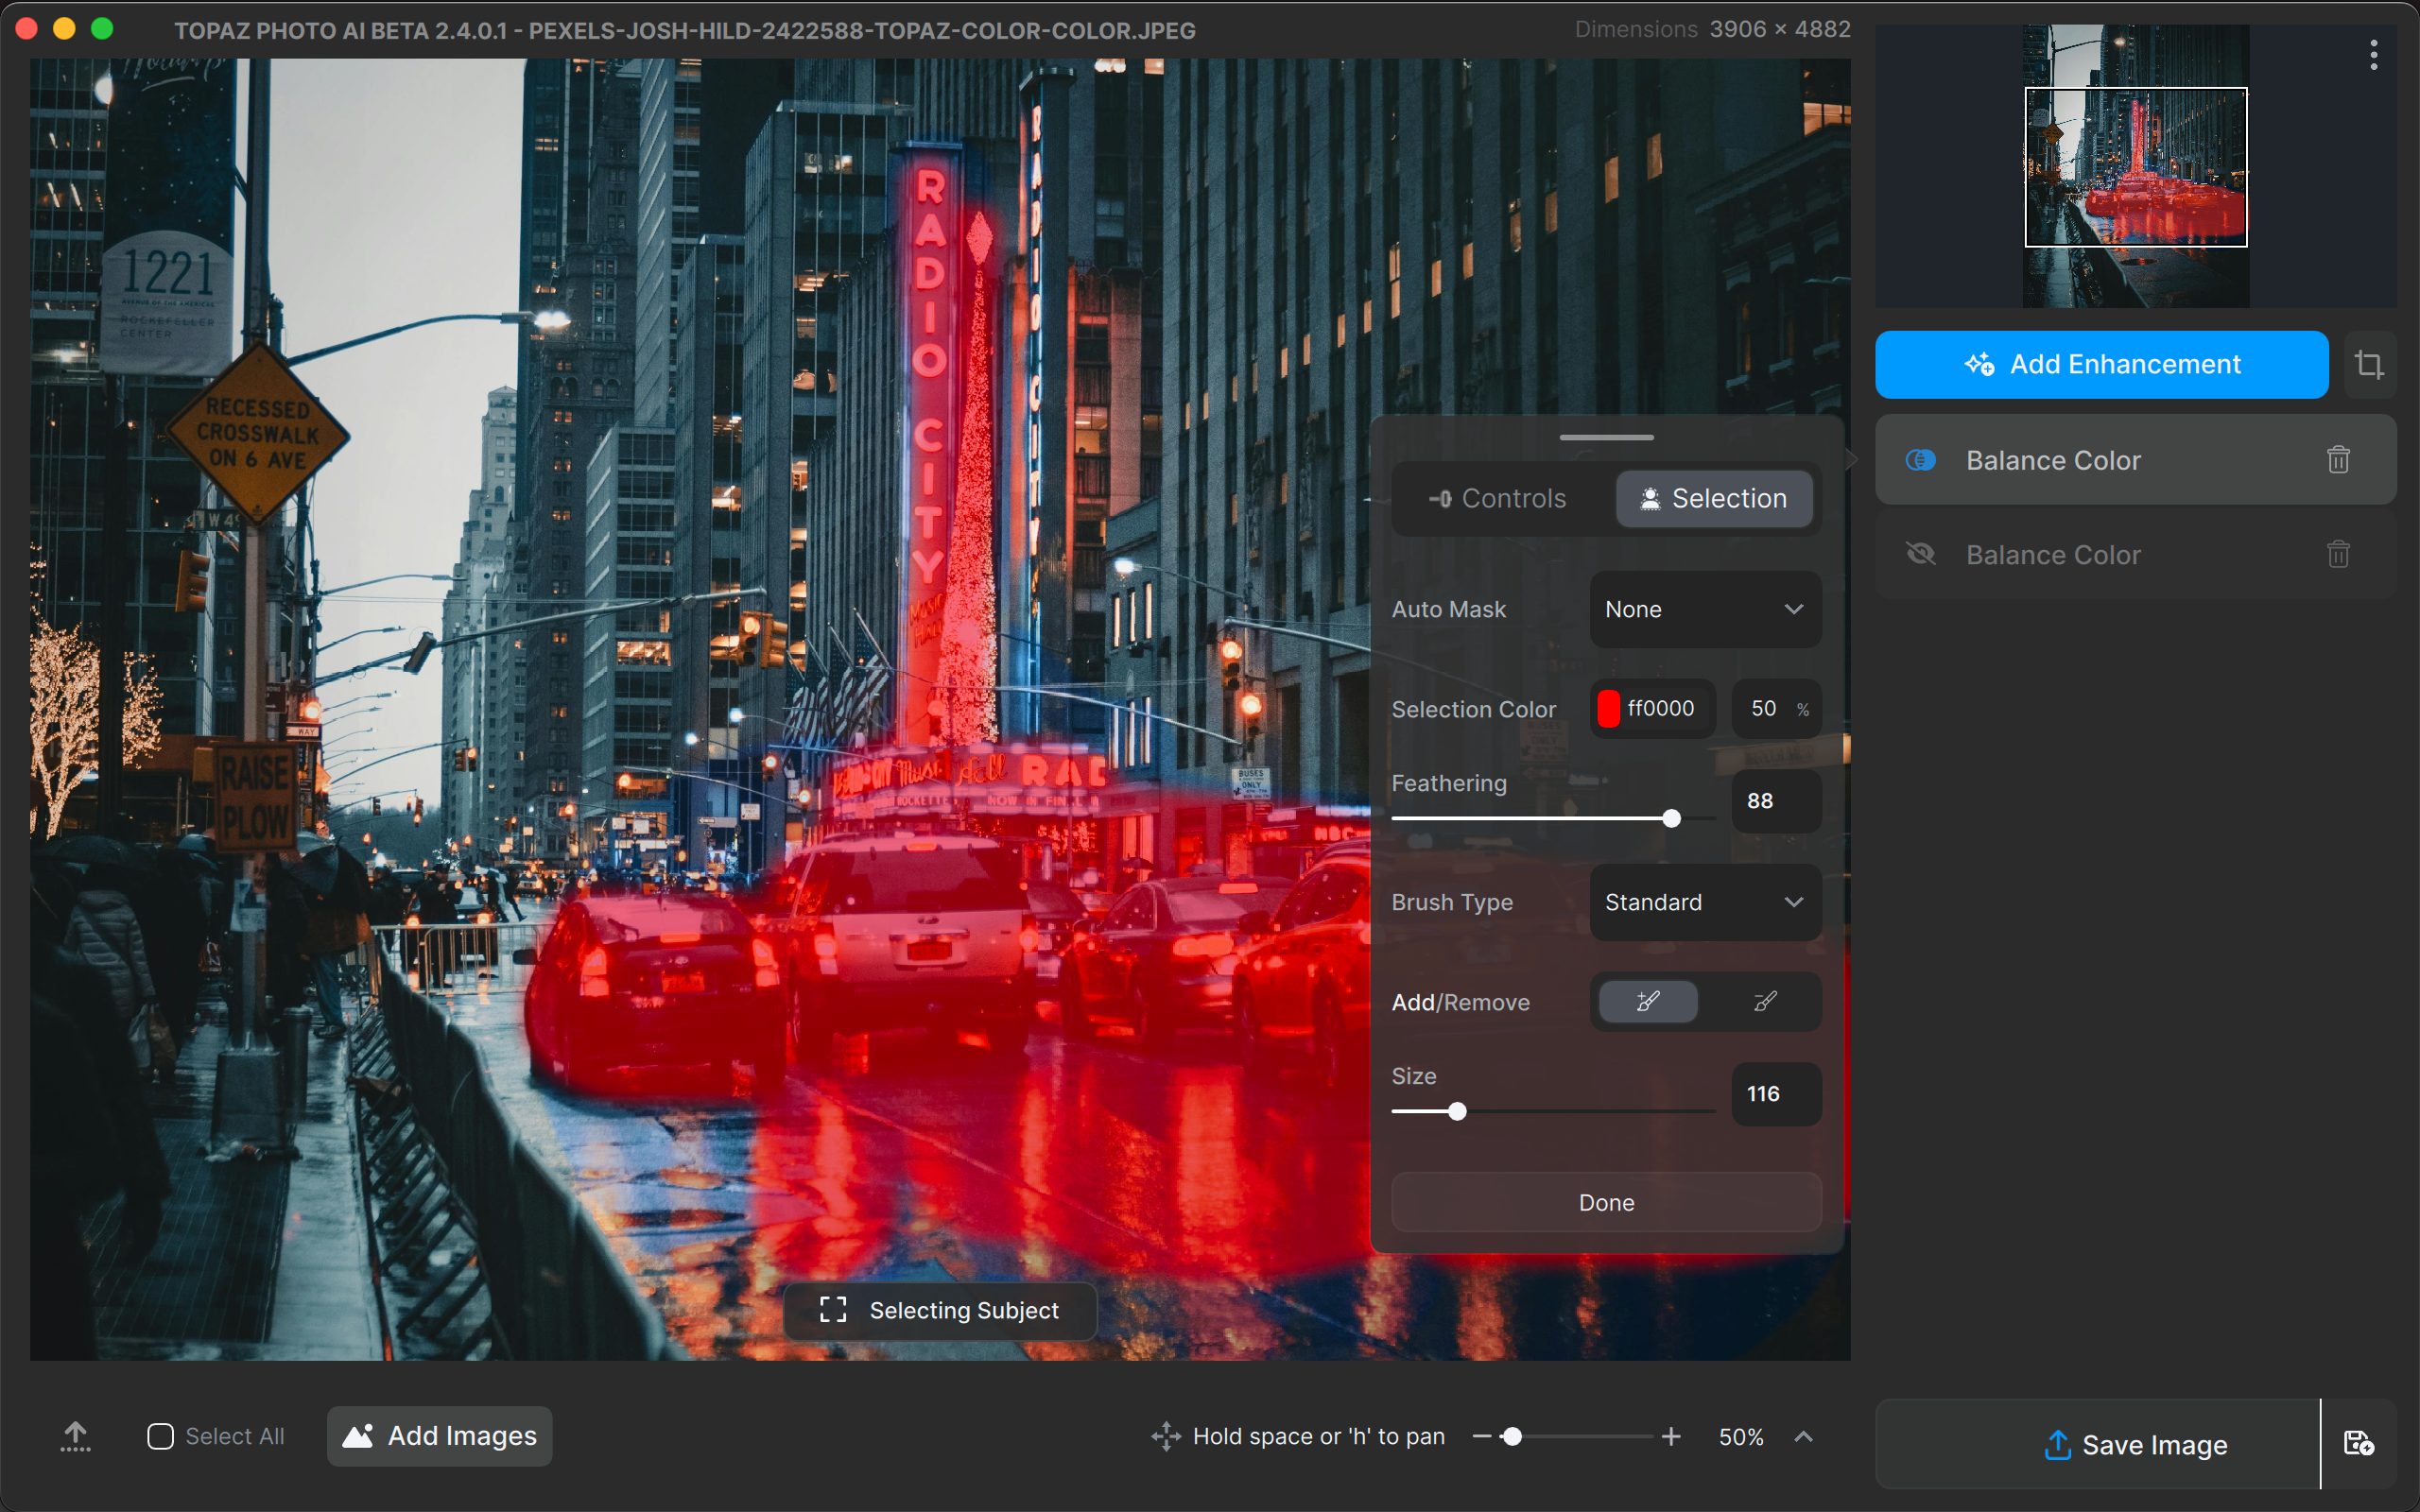
Step 2: Refine the Selection
Use different color temperatures between the cars in the foreground and the buildings in the background to create visual contrast and evoke specific moods or atmospheres. In this case, making the entire image warmer does not create the desired effect.
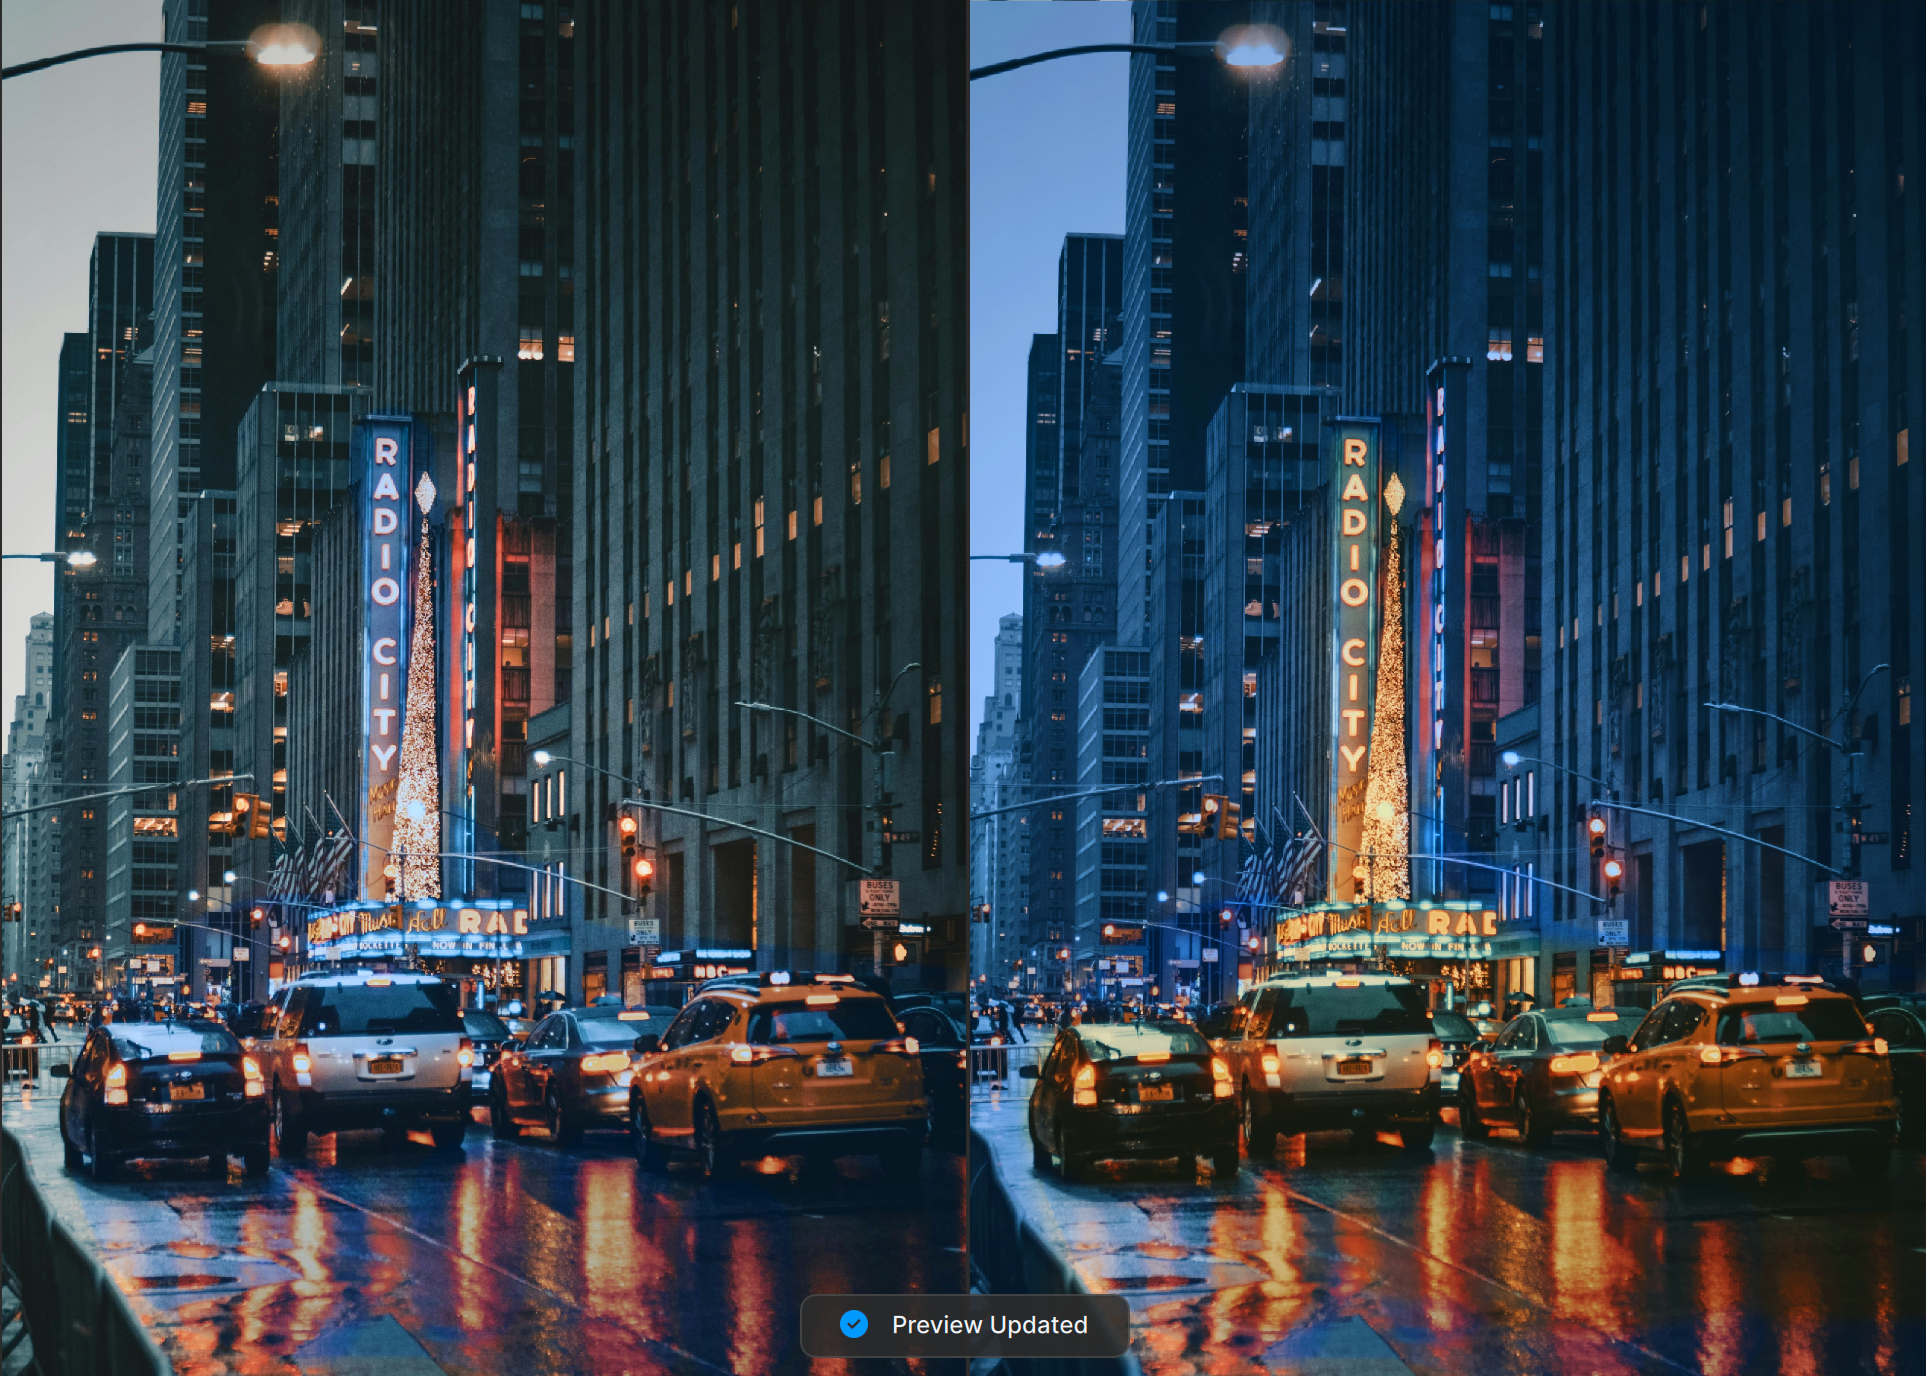
Step 3: Preview the Final Result
Decide whether you want to make further edits. Once you’re satisfied, you can export the image!
Download the image, open it in Photo AI, and follow along. Sample image
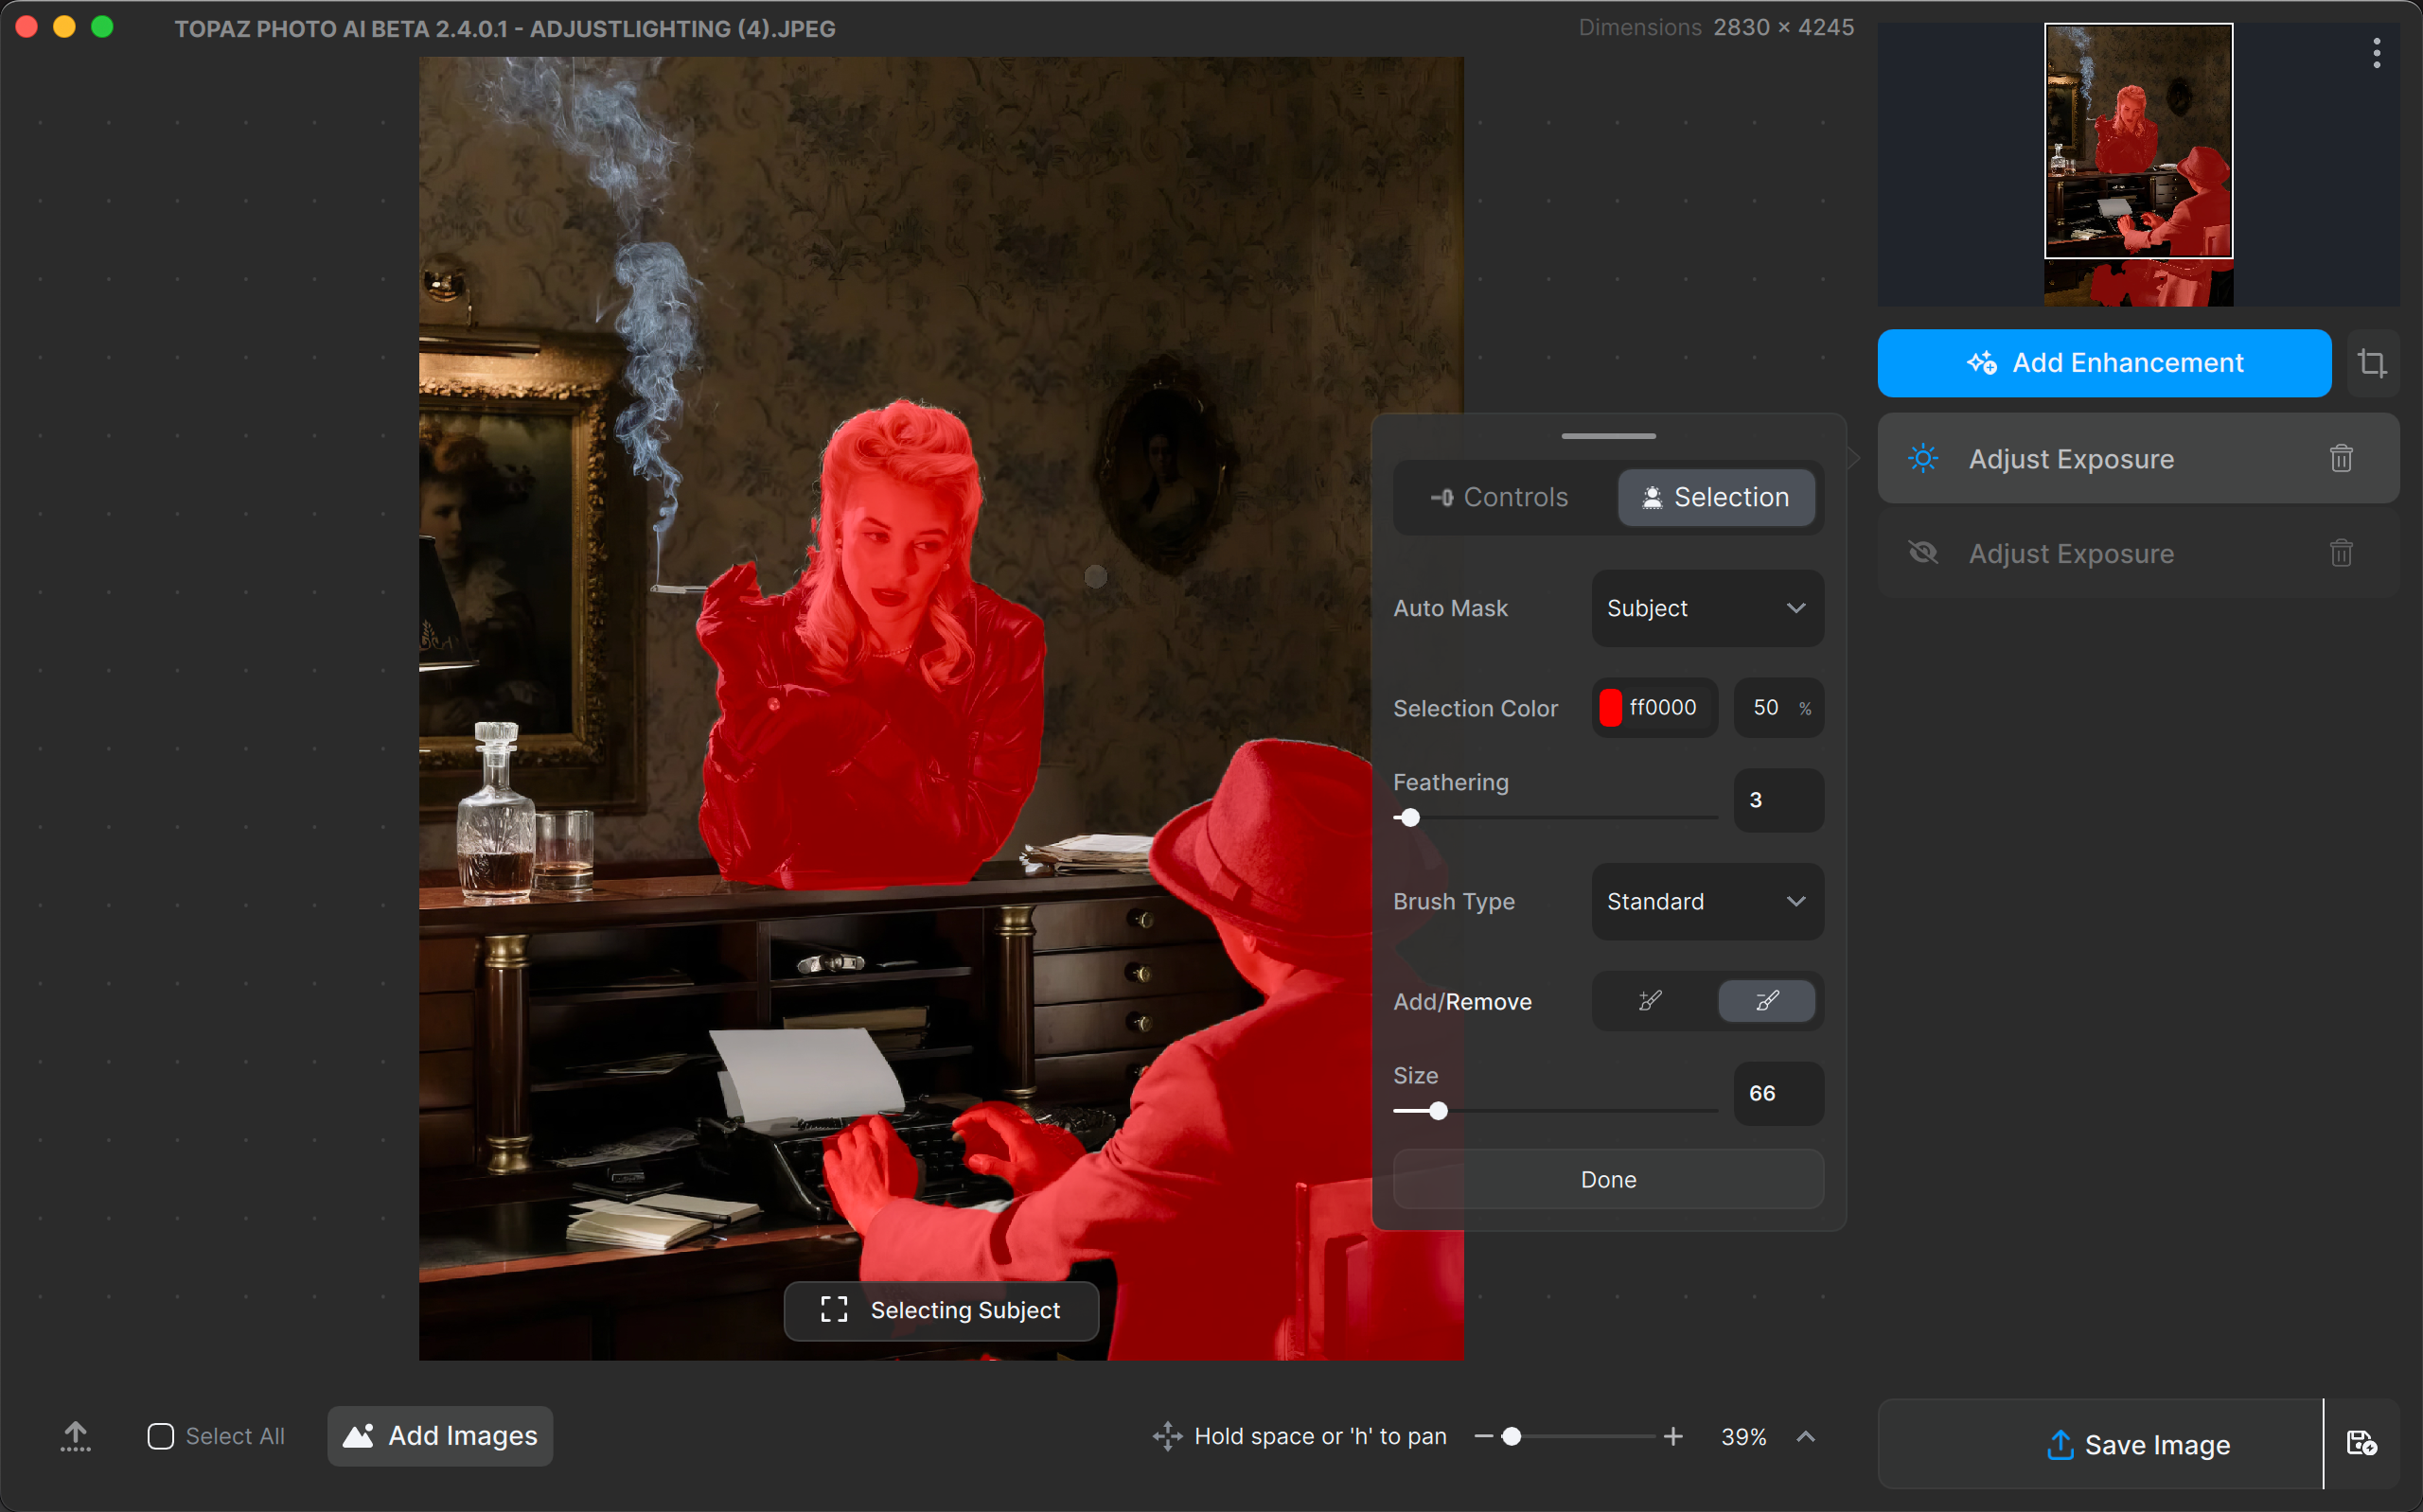
Step 1: Determine Direction & Degree
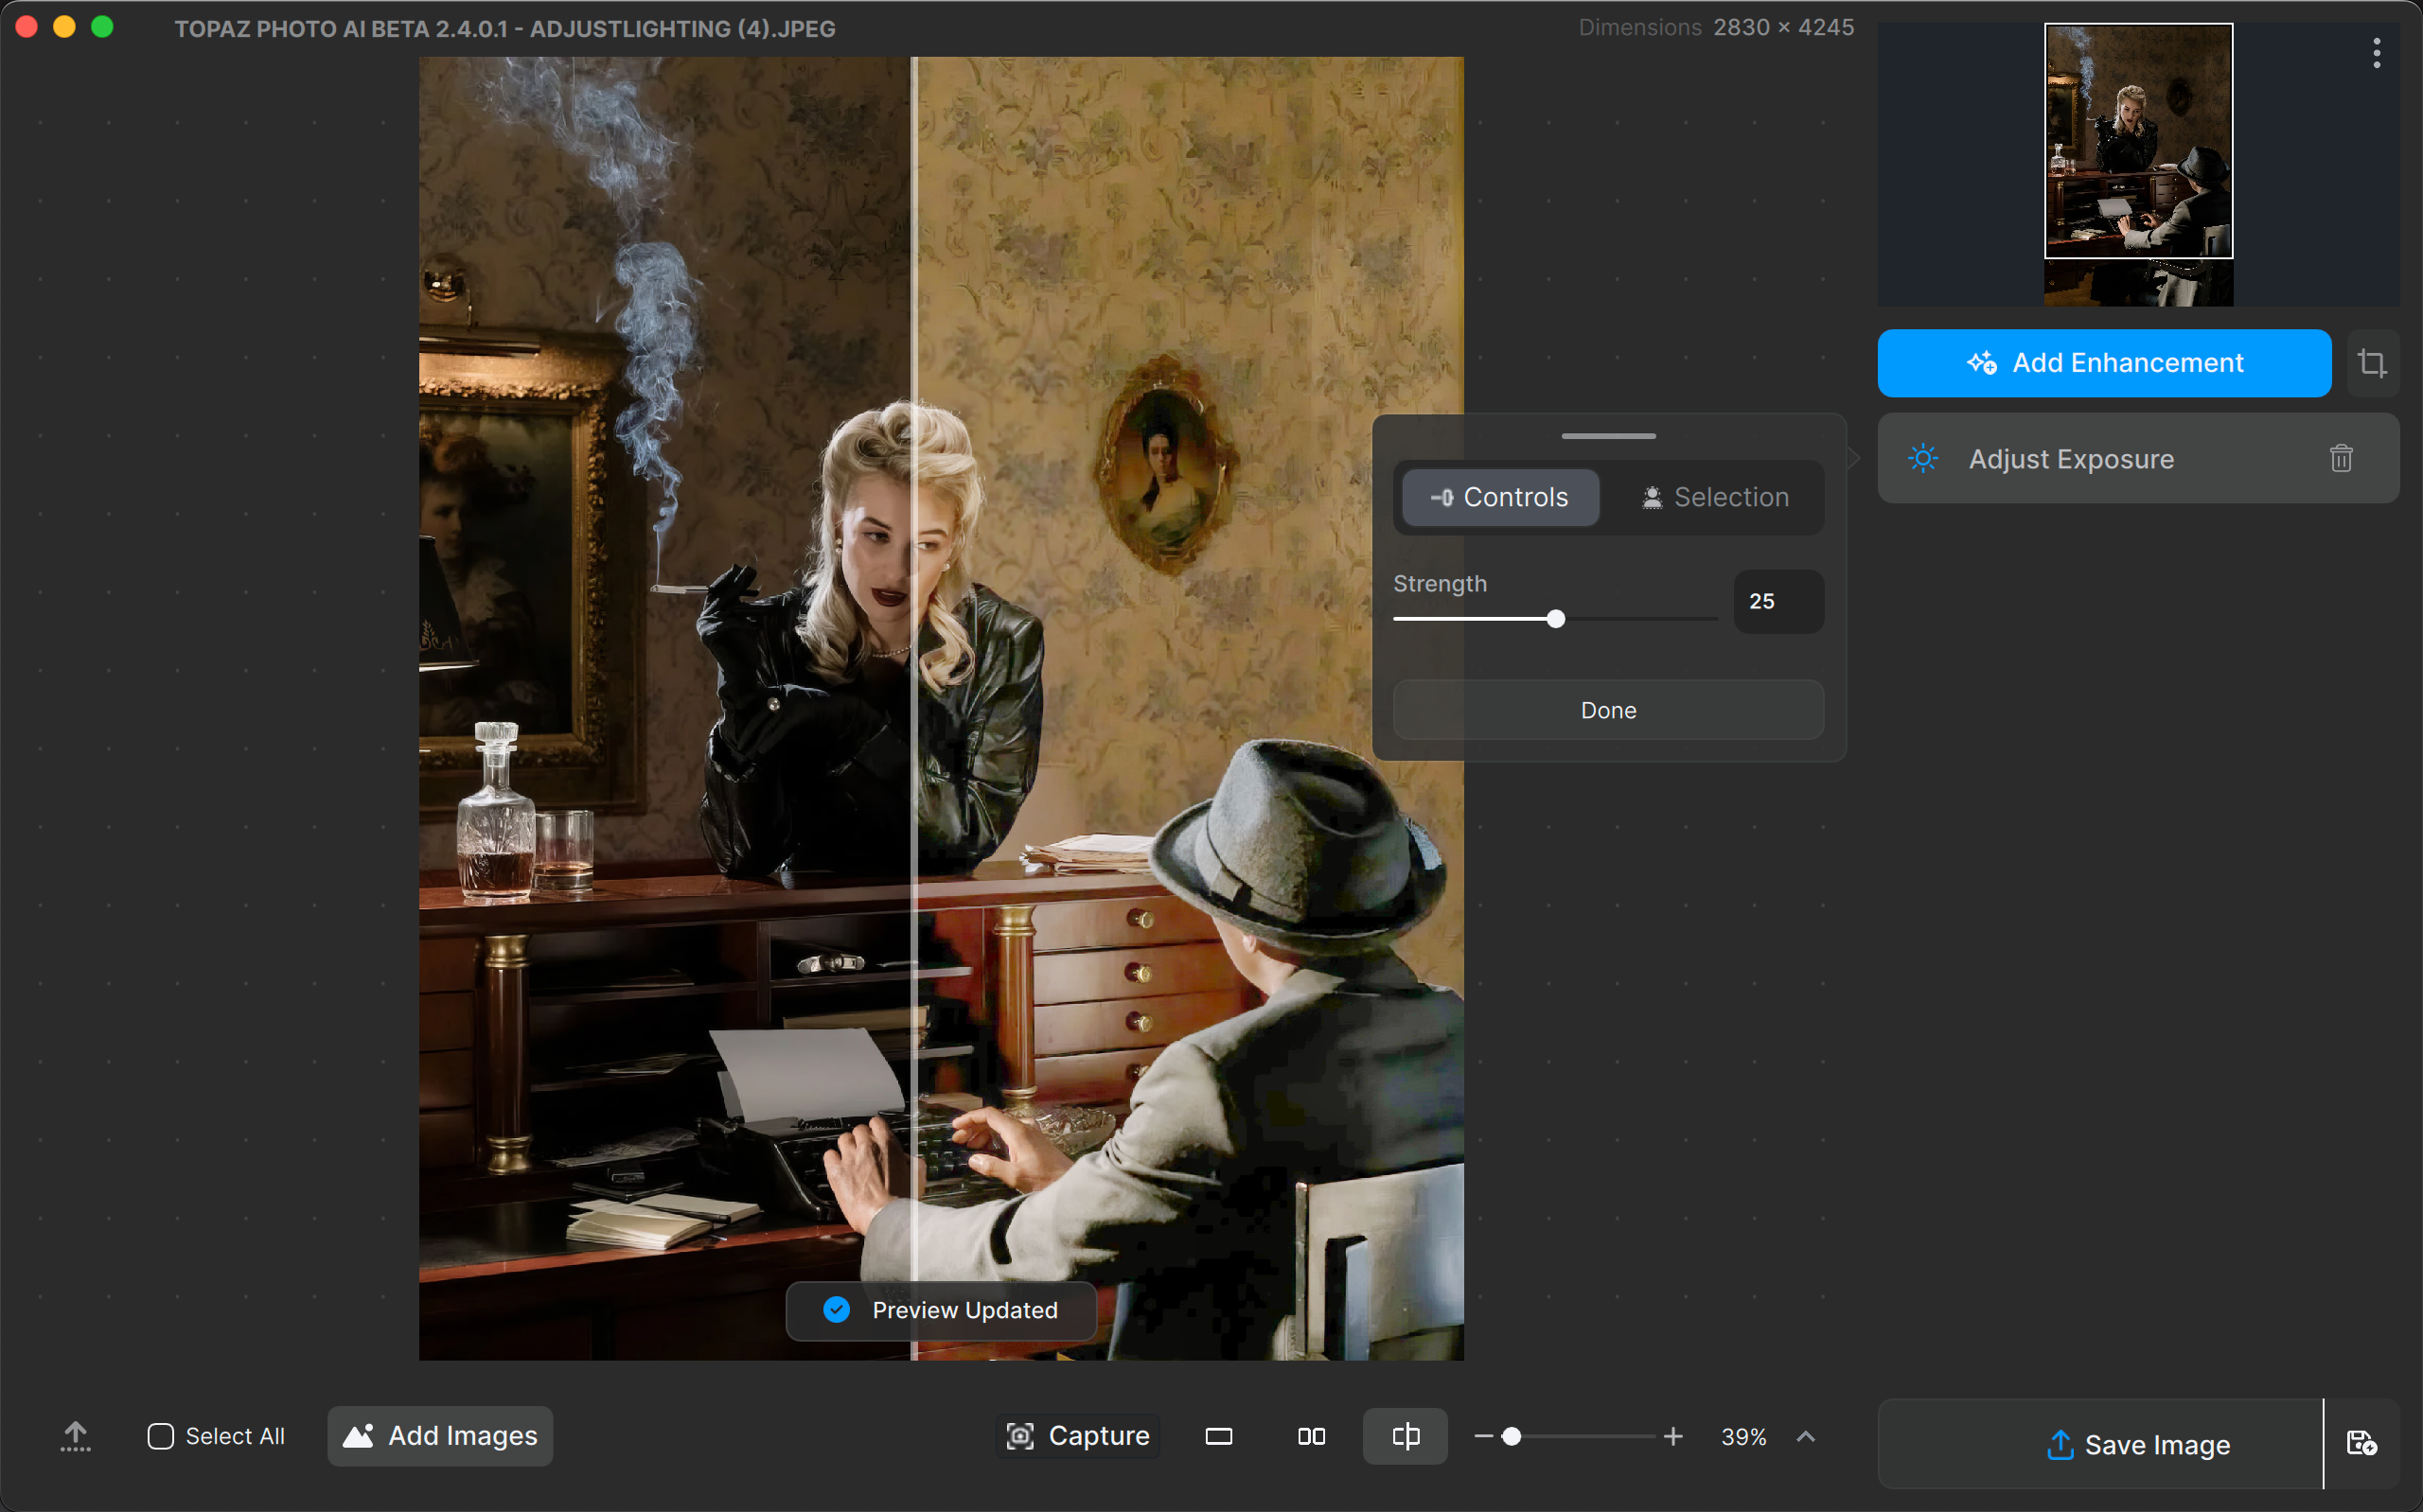
Autopilot does not recommend Adjust Lighting. Add it by clicking the Add Enhancement button and selecting it from the list. The Strength slider is 25 by default and the range is -25 to 75.
If the image is underexposed, the application will increase the exposure with positive Strength values and decrease the exposure with negative Strength values. The opposite is true for overexposed images.
Step 2: Refine the Selection
With lighting especially, the subject and background may require different adjustments and thus different instances of the enhancement.
The Autopilot setting is too bright and undoes the mysterious mood of the original. Adjust the exposure for the people to see the details better yet keep the background dark and moody.
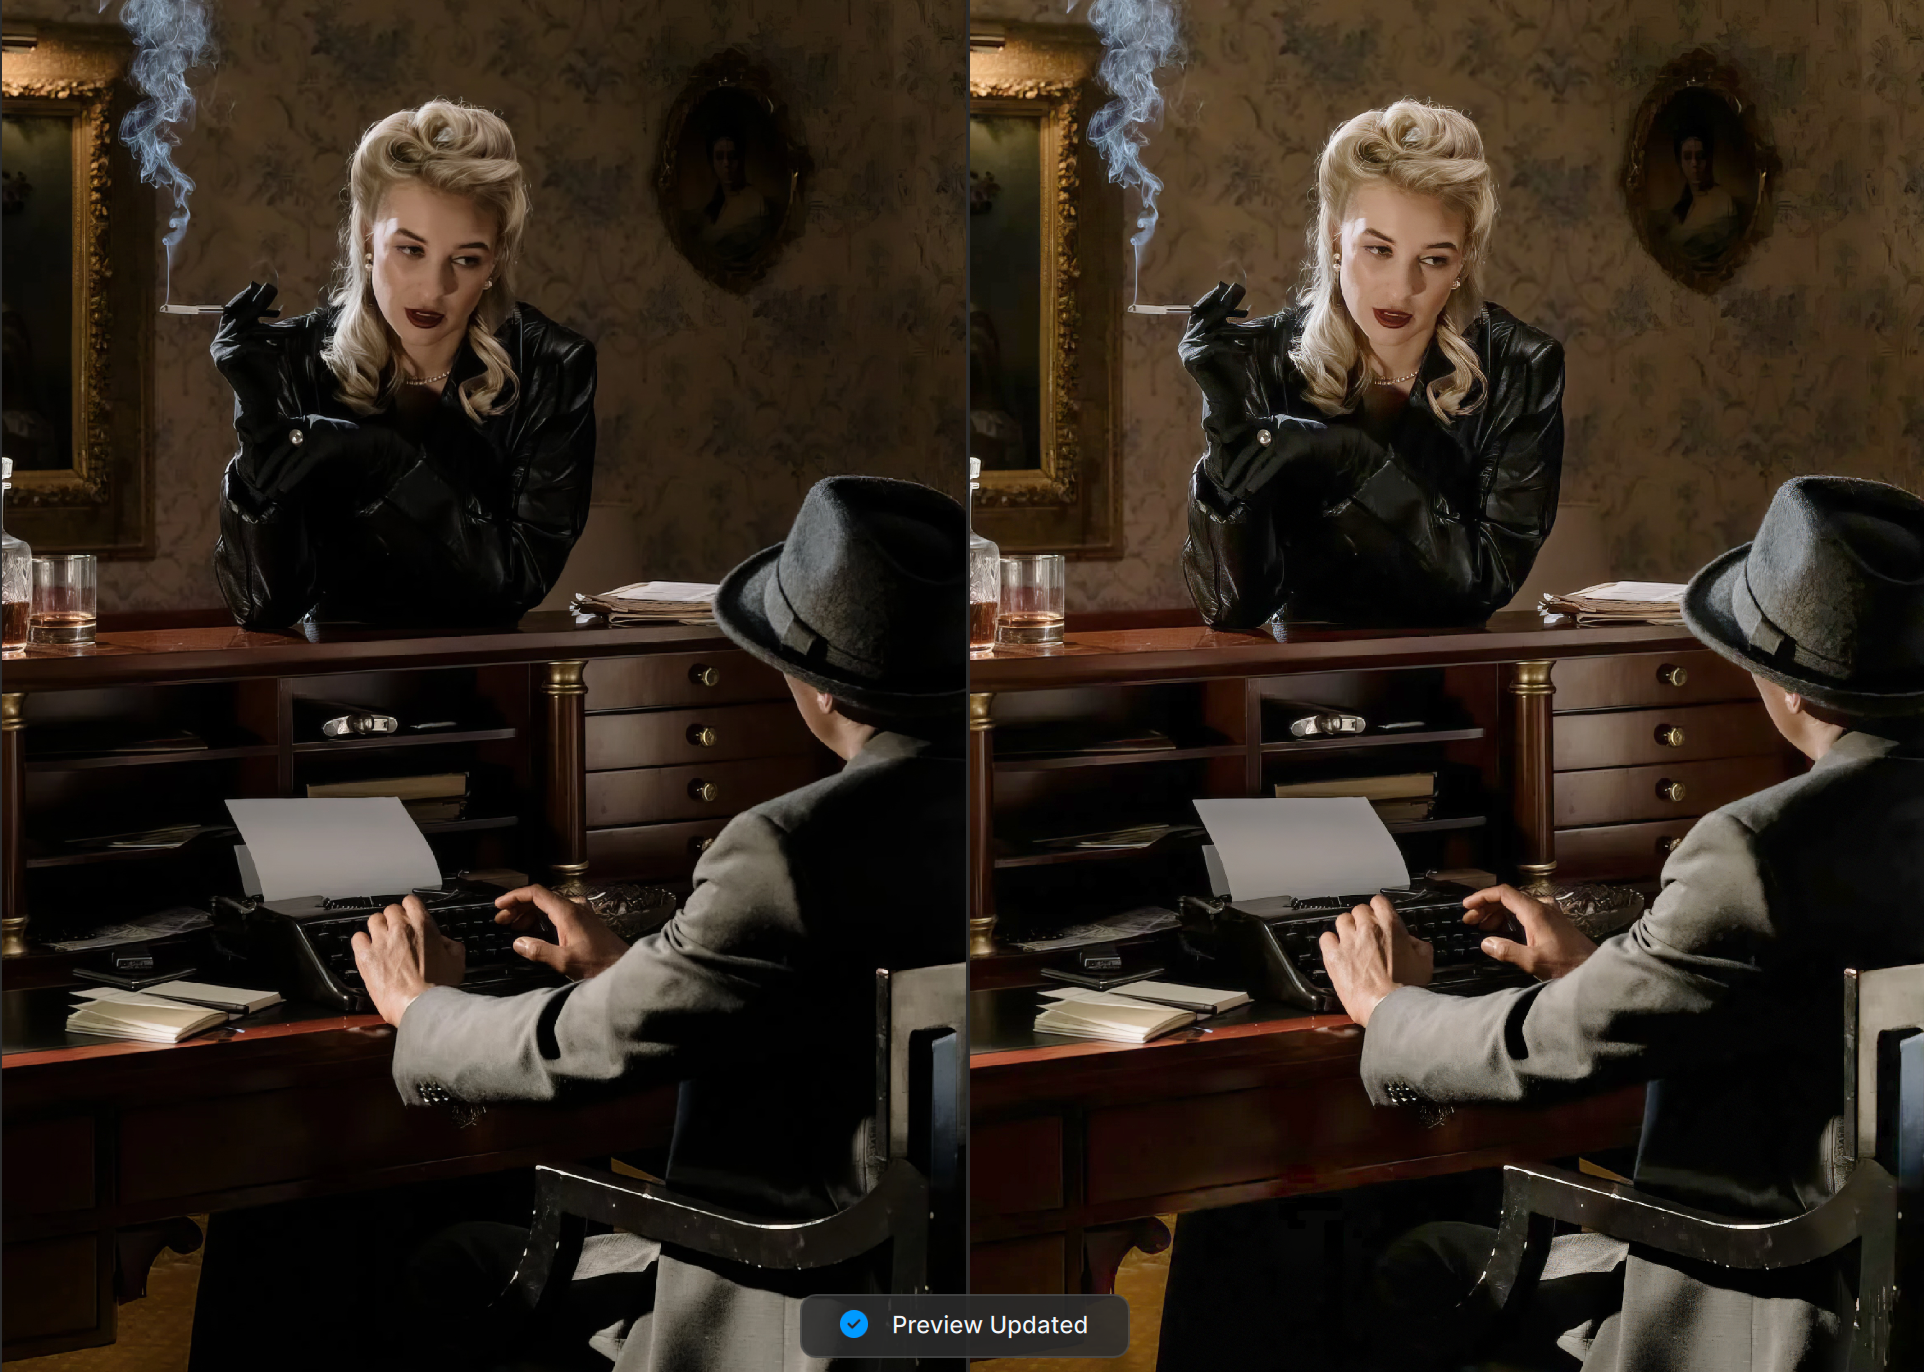
Step 3: Preview the Final Result
Decide whether you want to make further edits. Once you’re satisfied, you can export the image!
Download the image below, open it in Photo AI, and follow along. Sample image
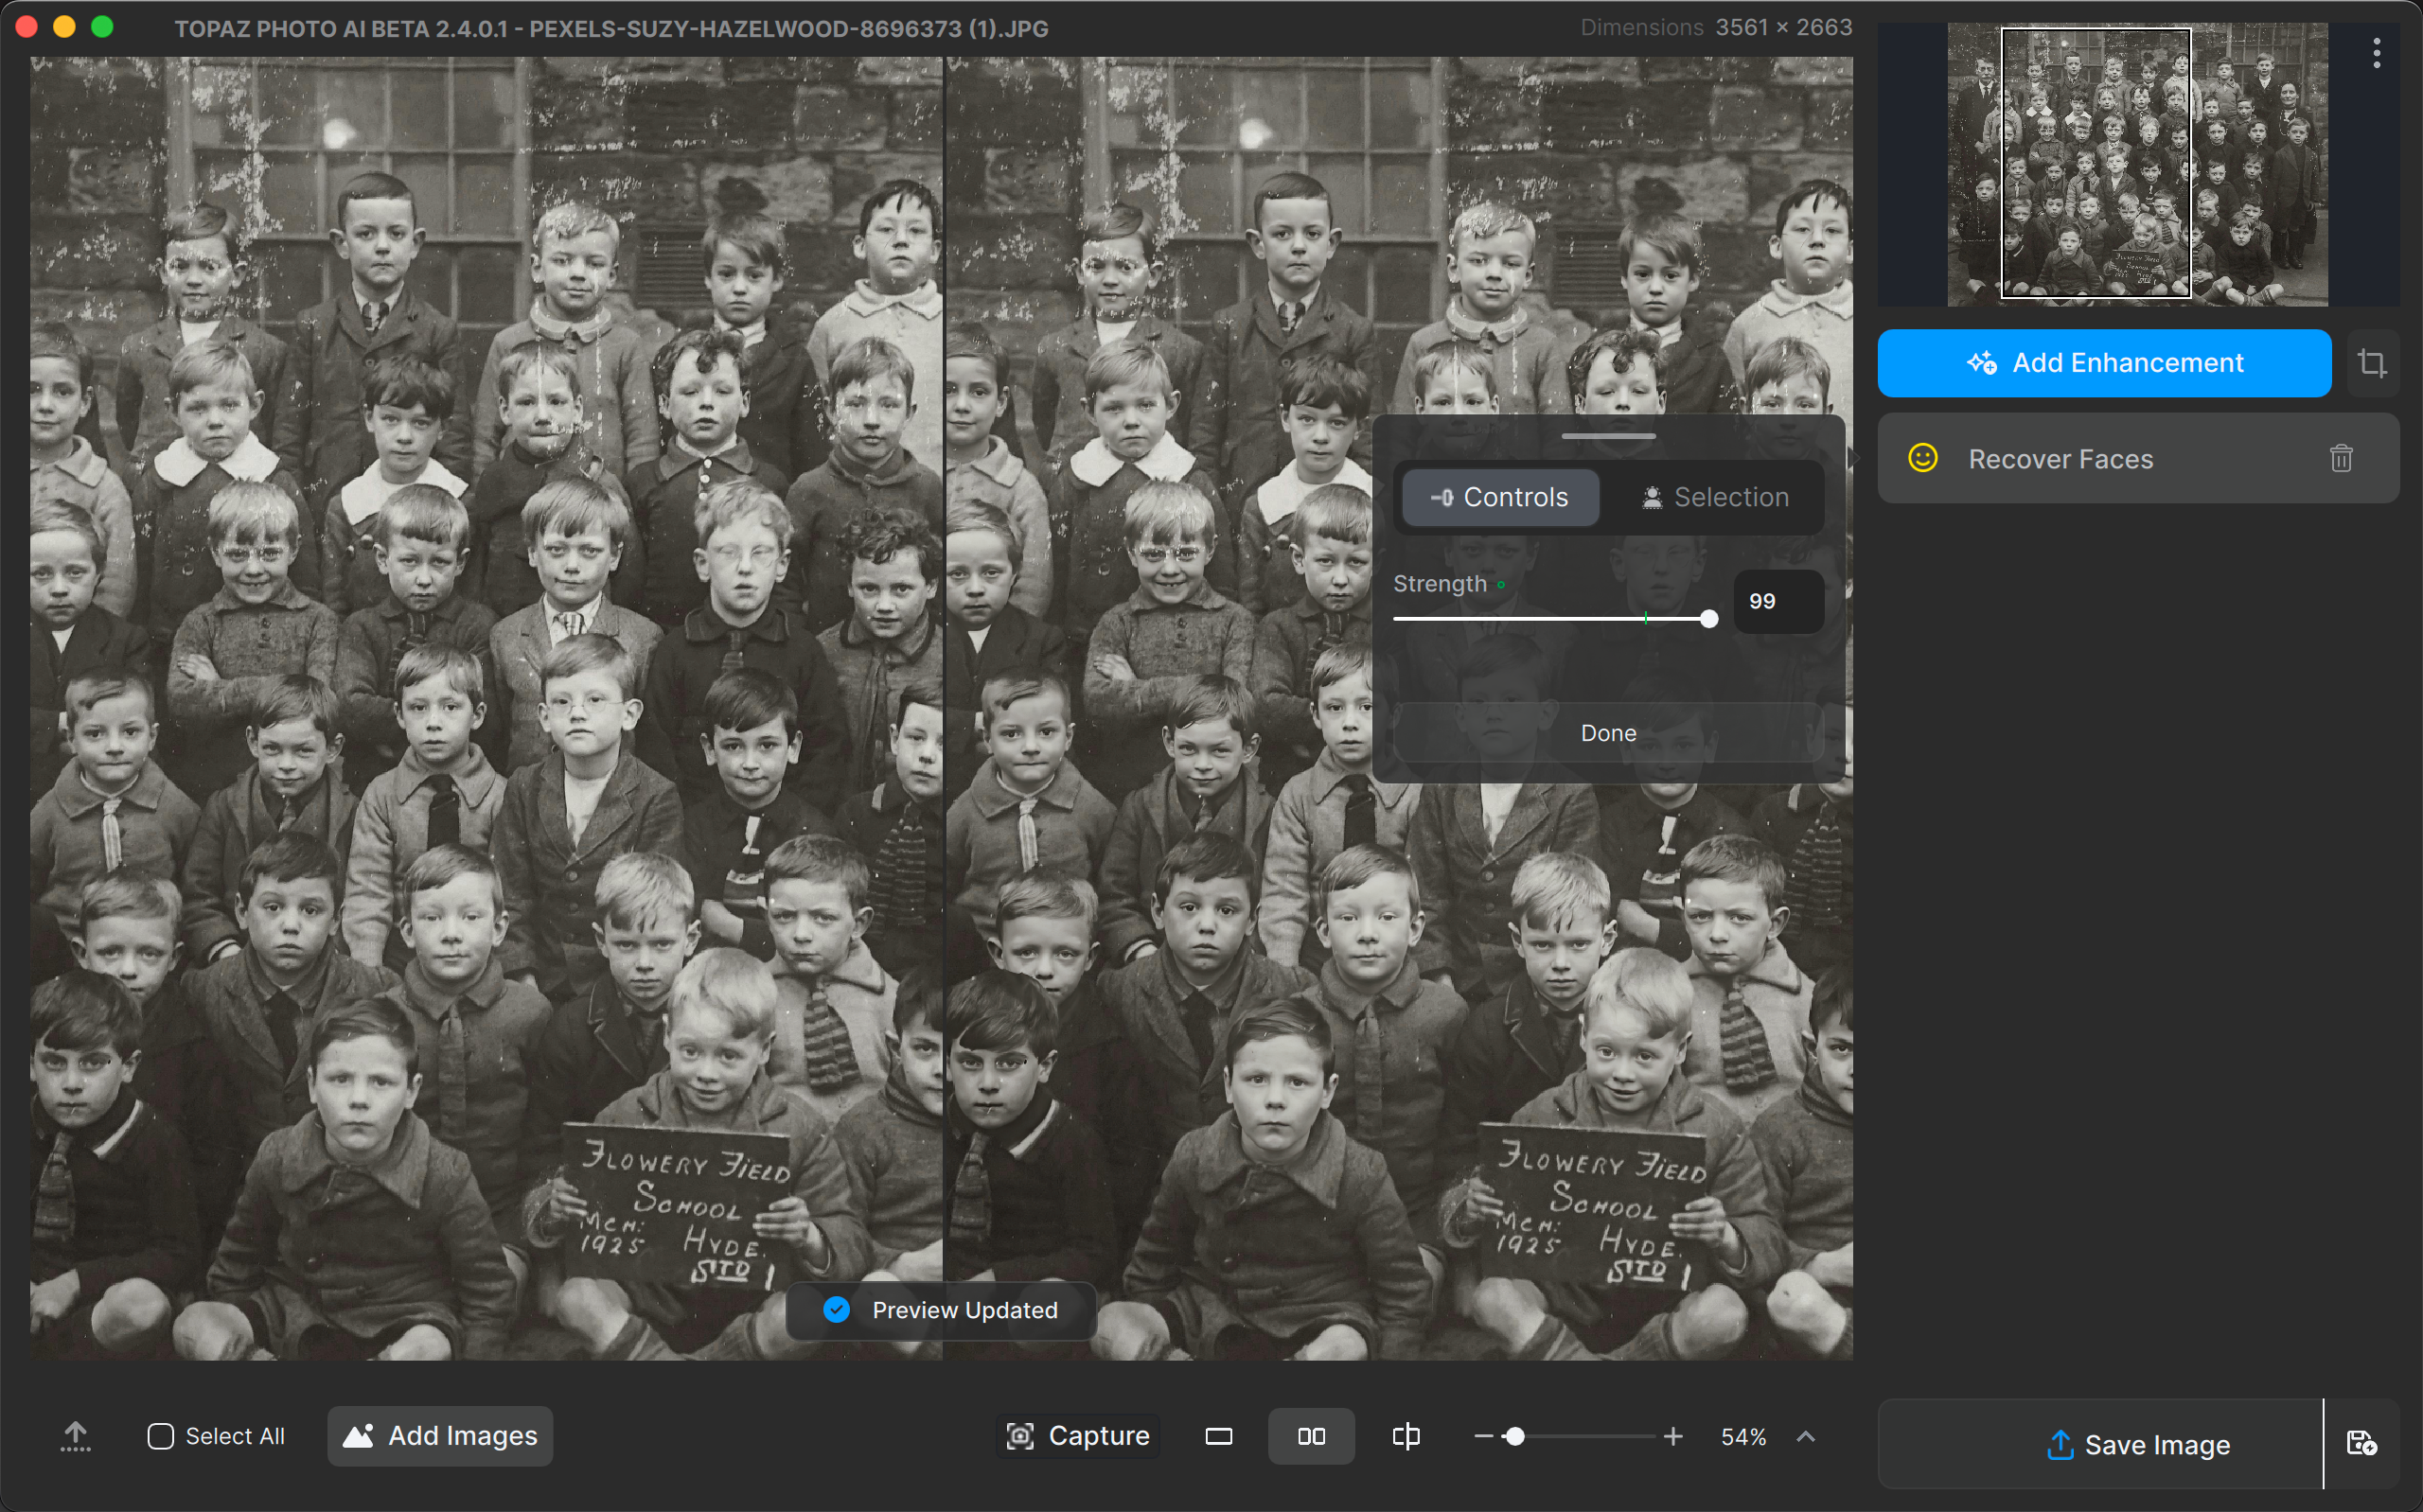
Step 1: Set Strength
The only setting for Face Recovery is the Strength slider. Use it to determine the extent to which the AI-generated face replaces the current one or how processed it appears.
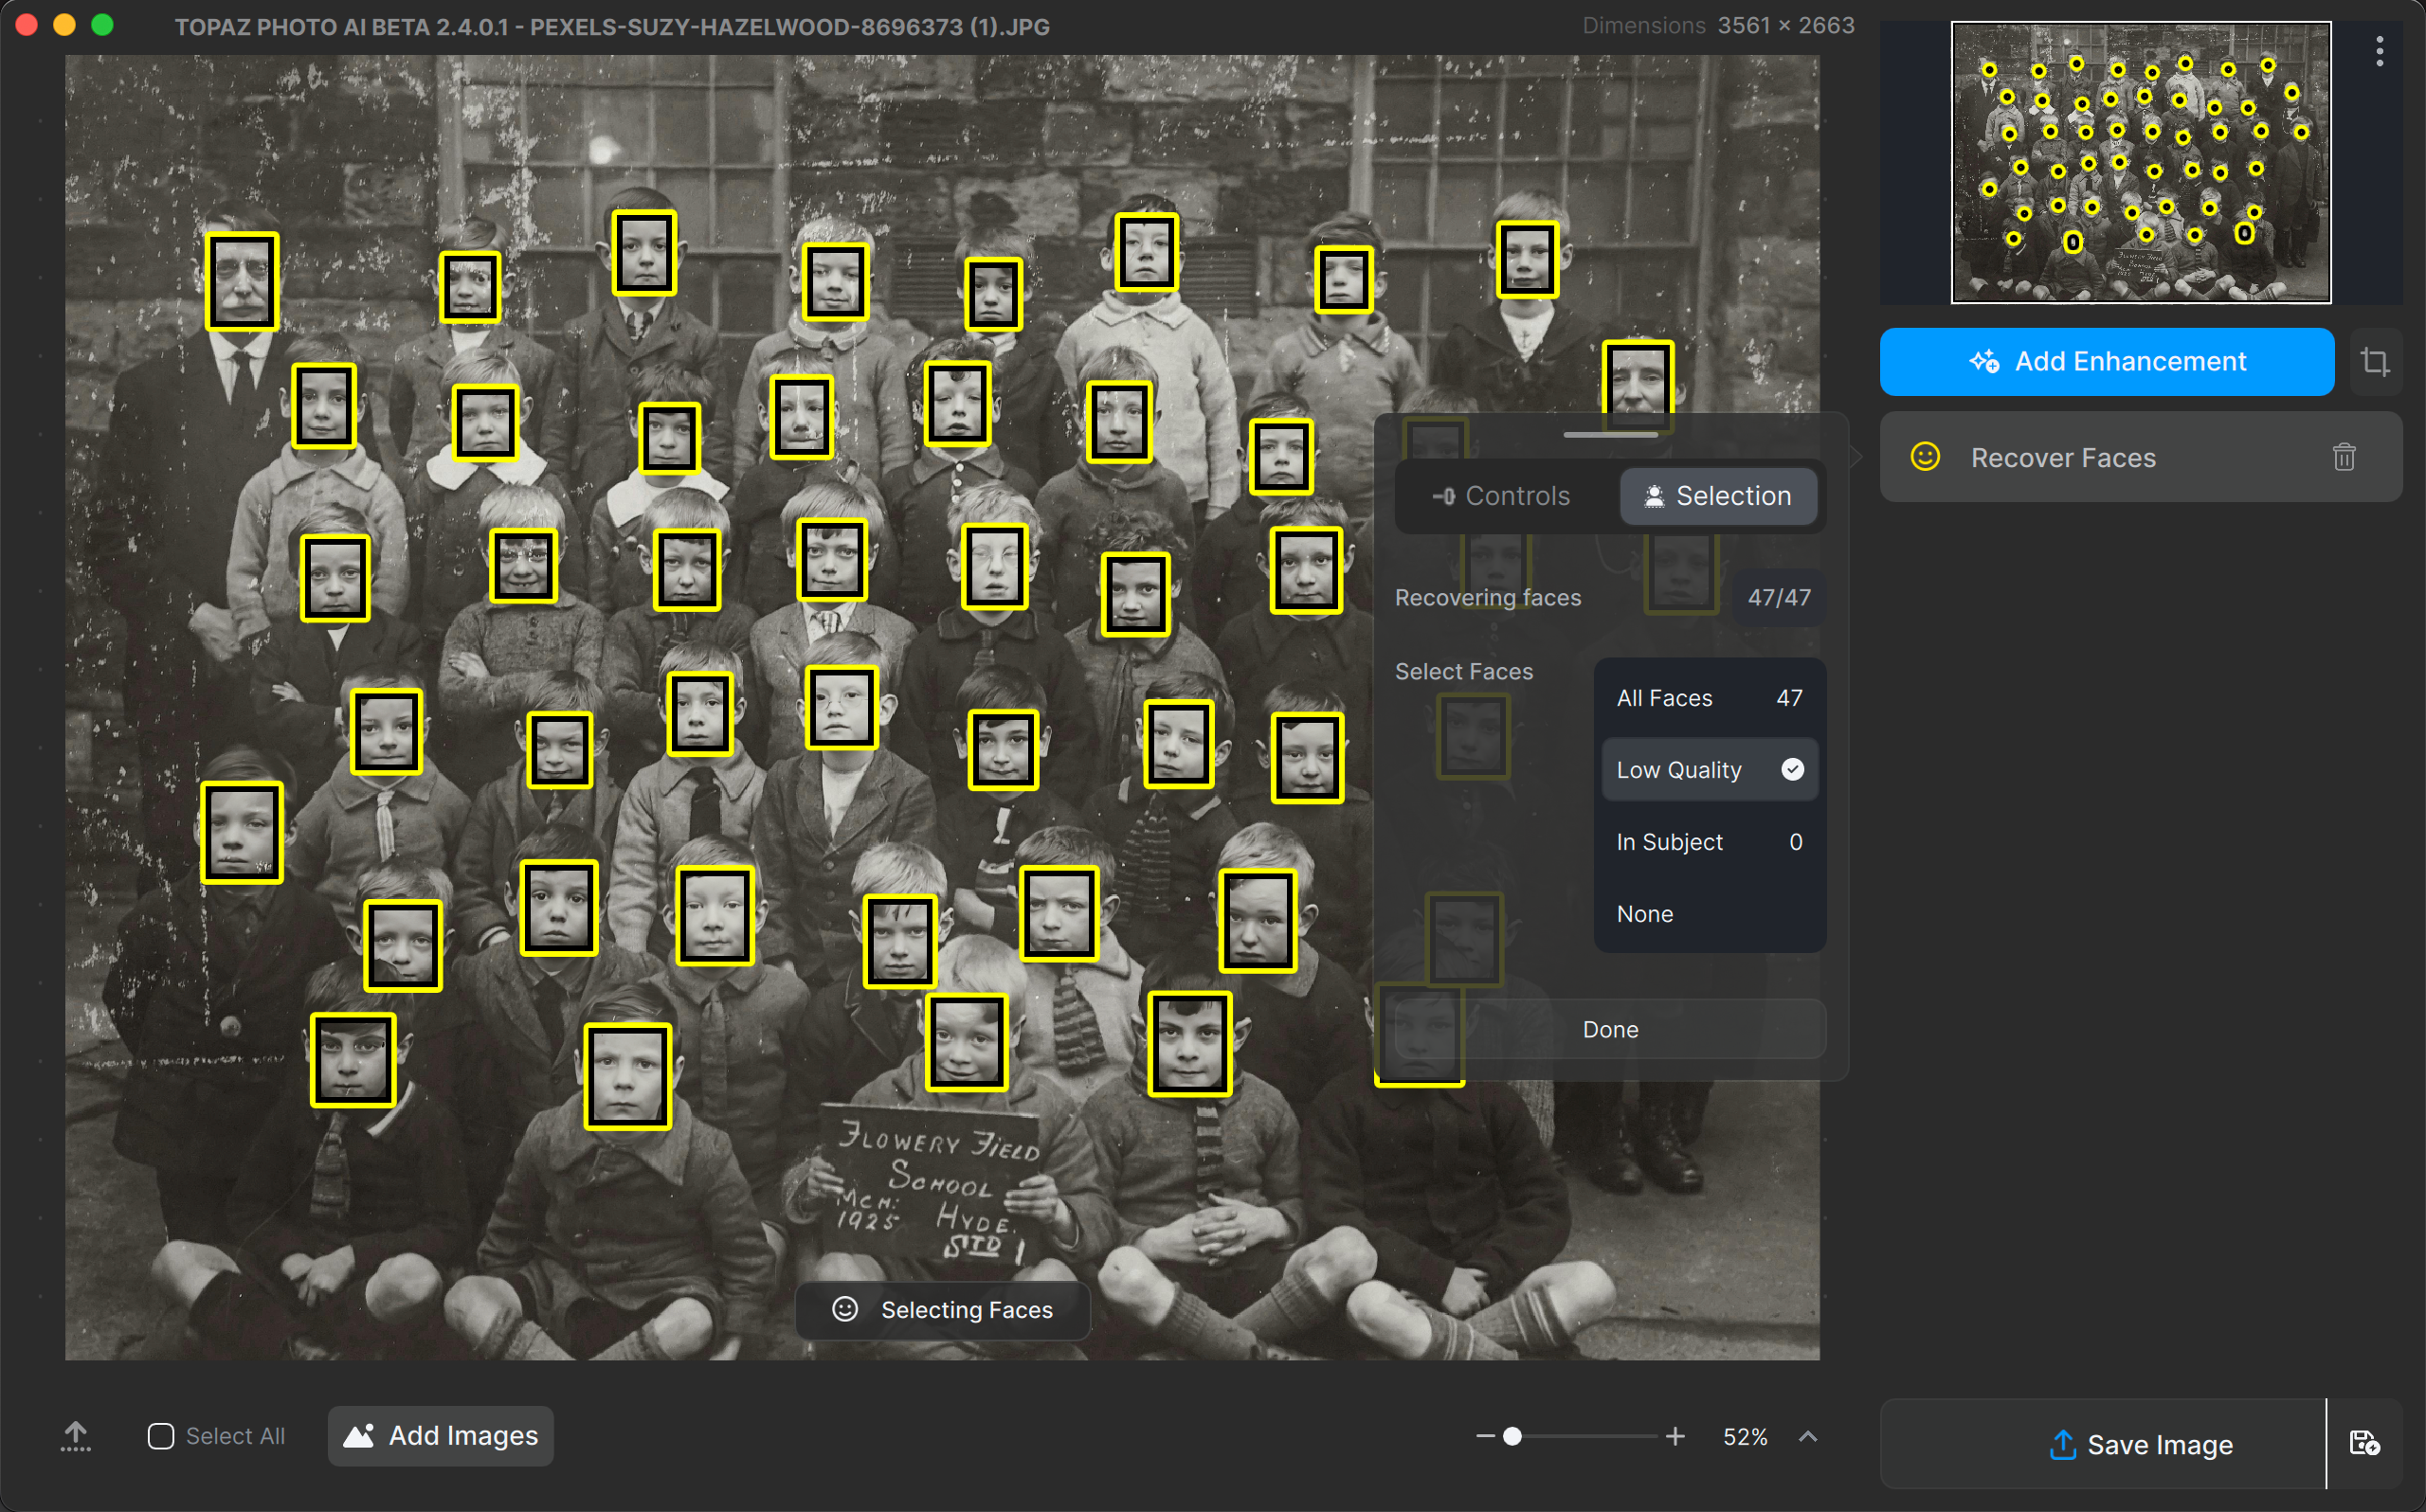
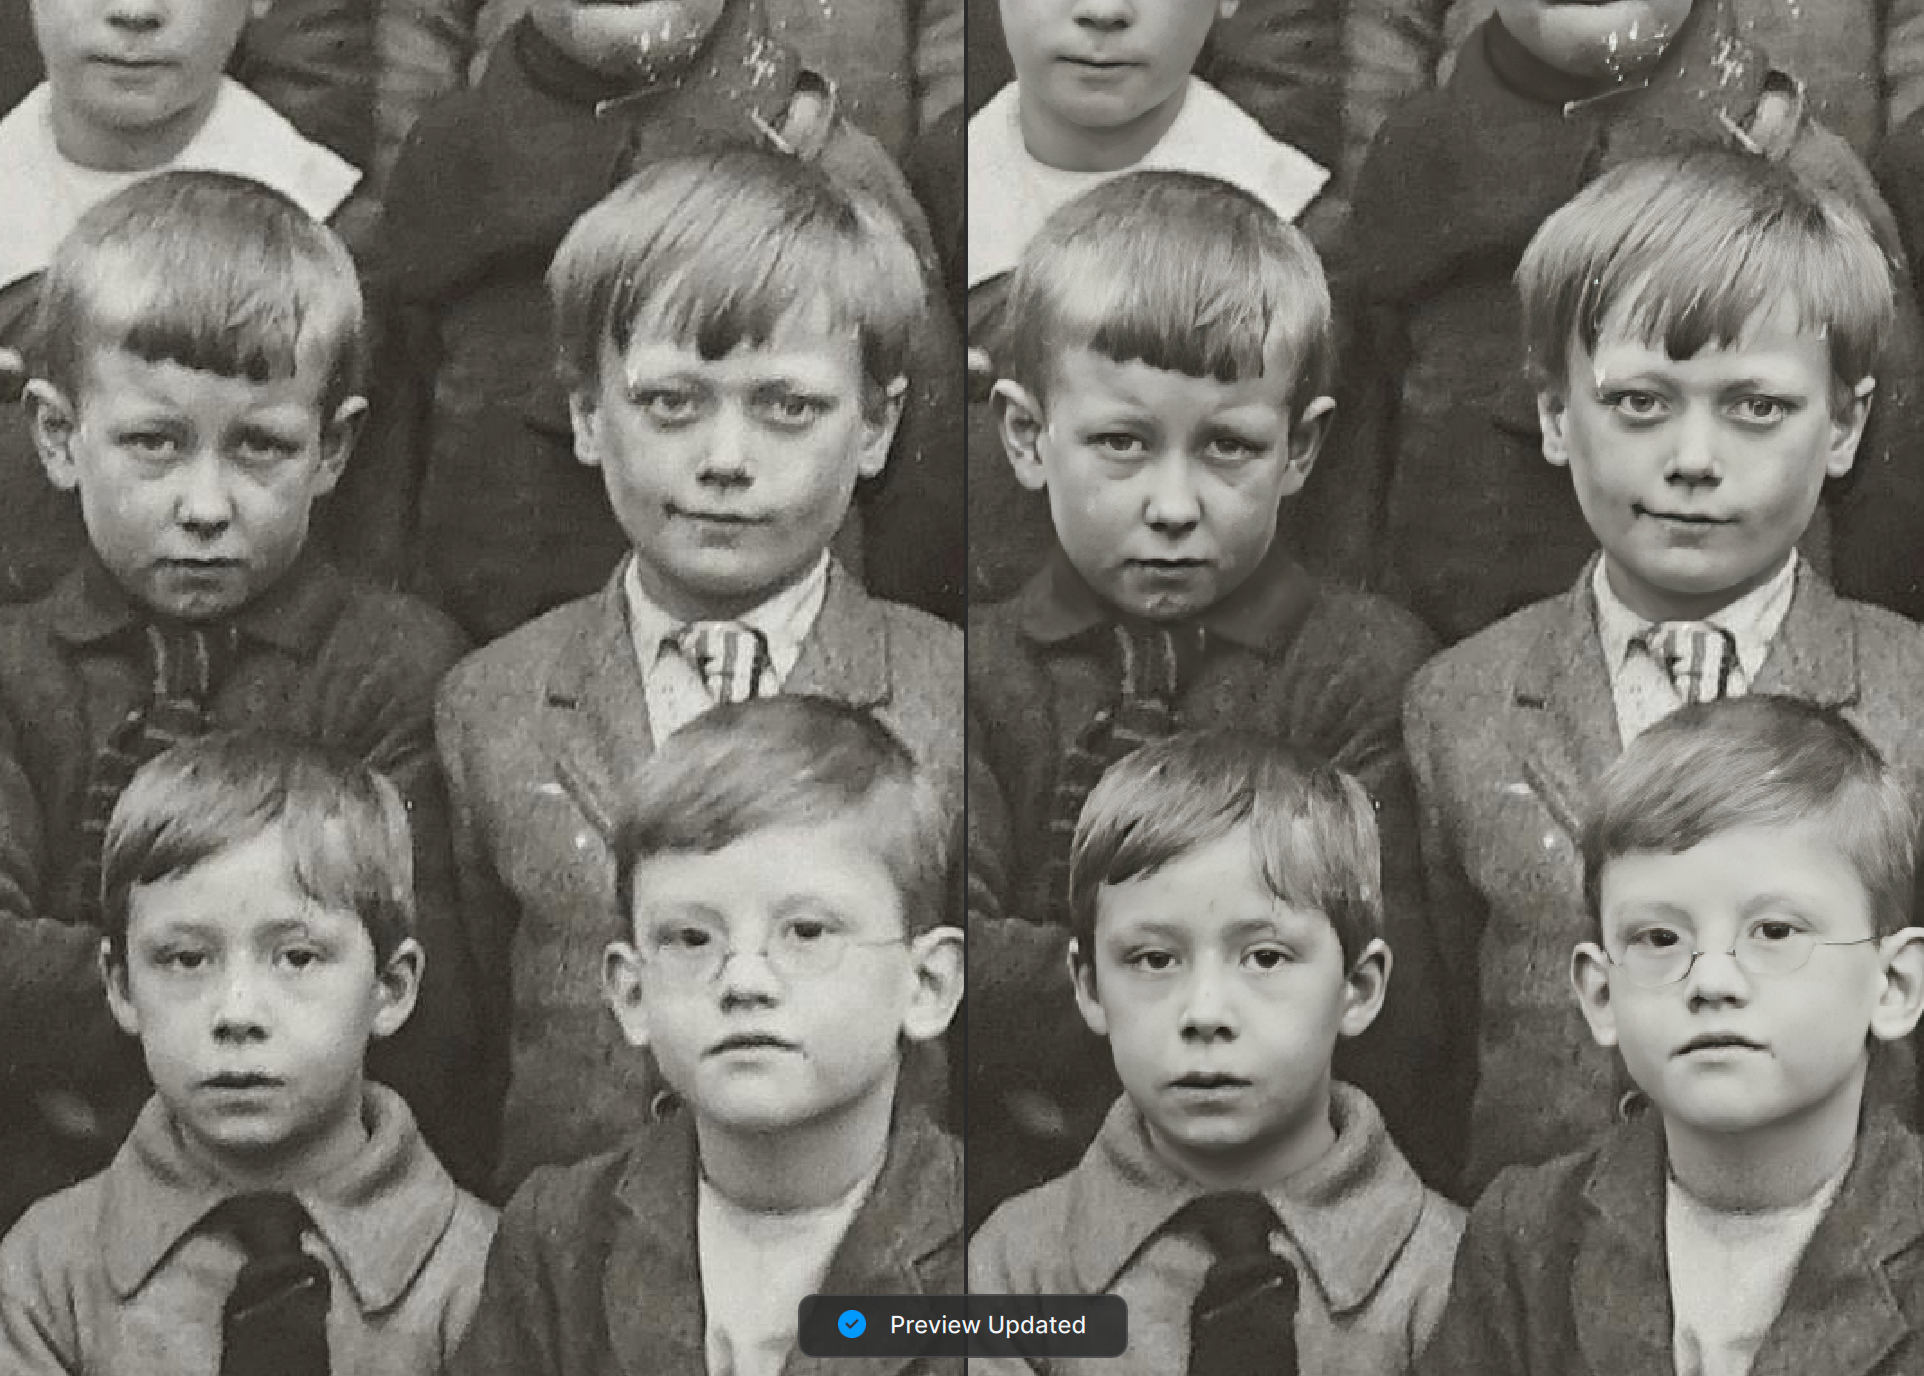
Step 2: Confirm Selection
Navigate to the Selection tab and choose faces for recovery by either clicking directly on them in the Preview or selecting the category within the Selection tab.
Step 3: Preview the Final Result
Decide whether you want to make further edits. Once you’re satisfied, you can export the image!
Download the image below, open it in Photo AI, and follow along. Sample image
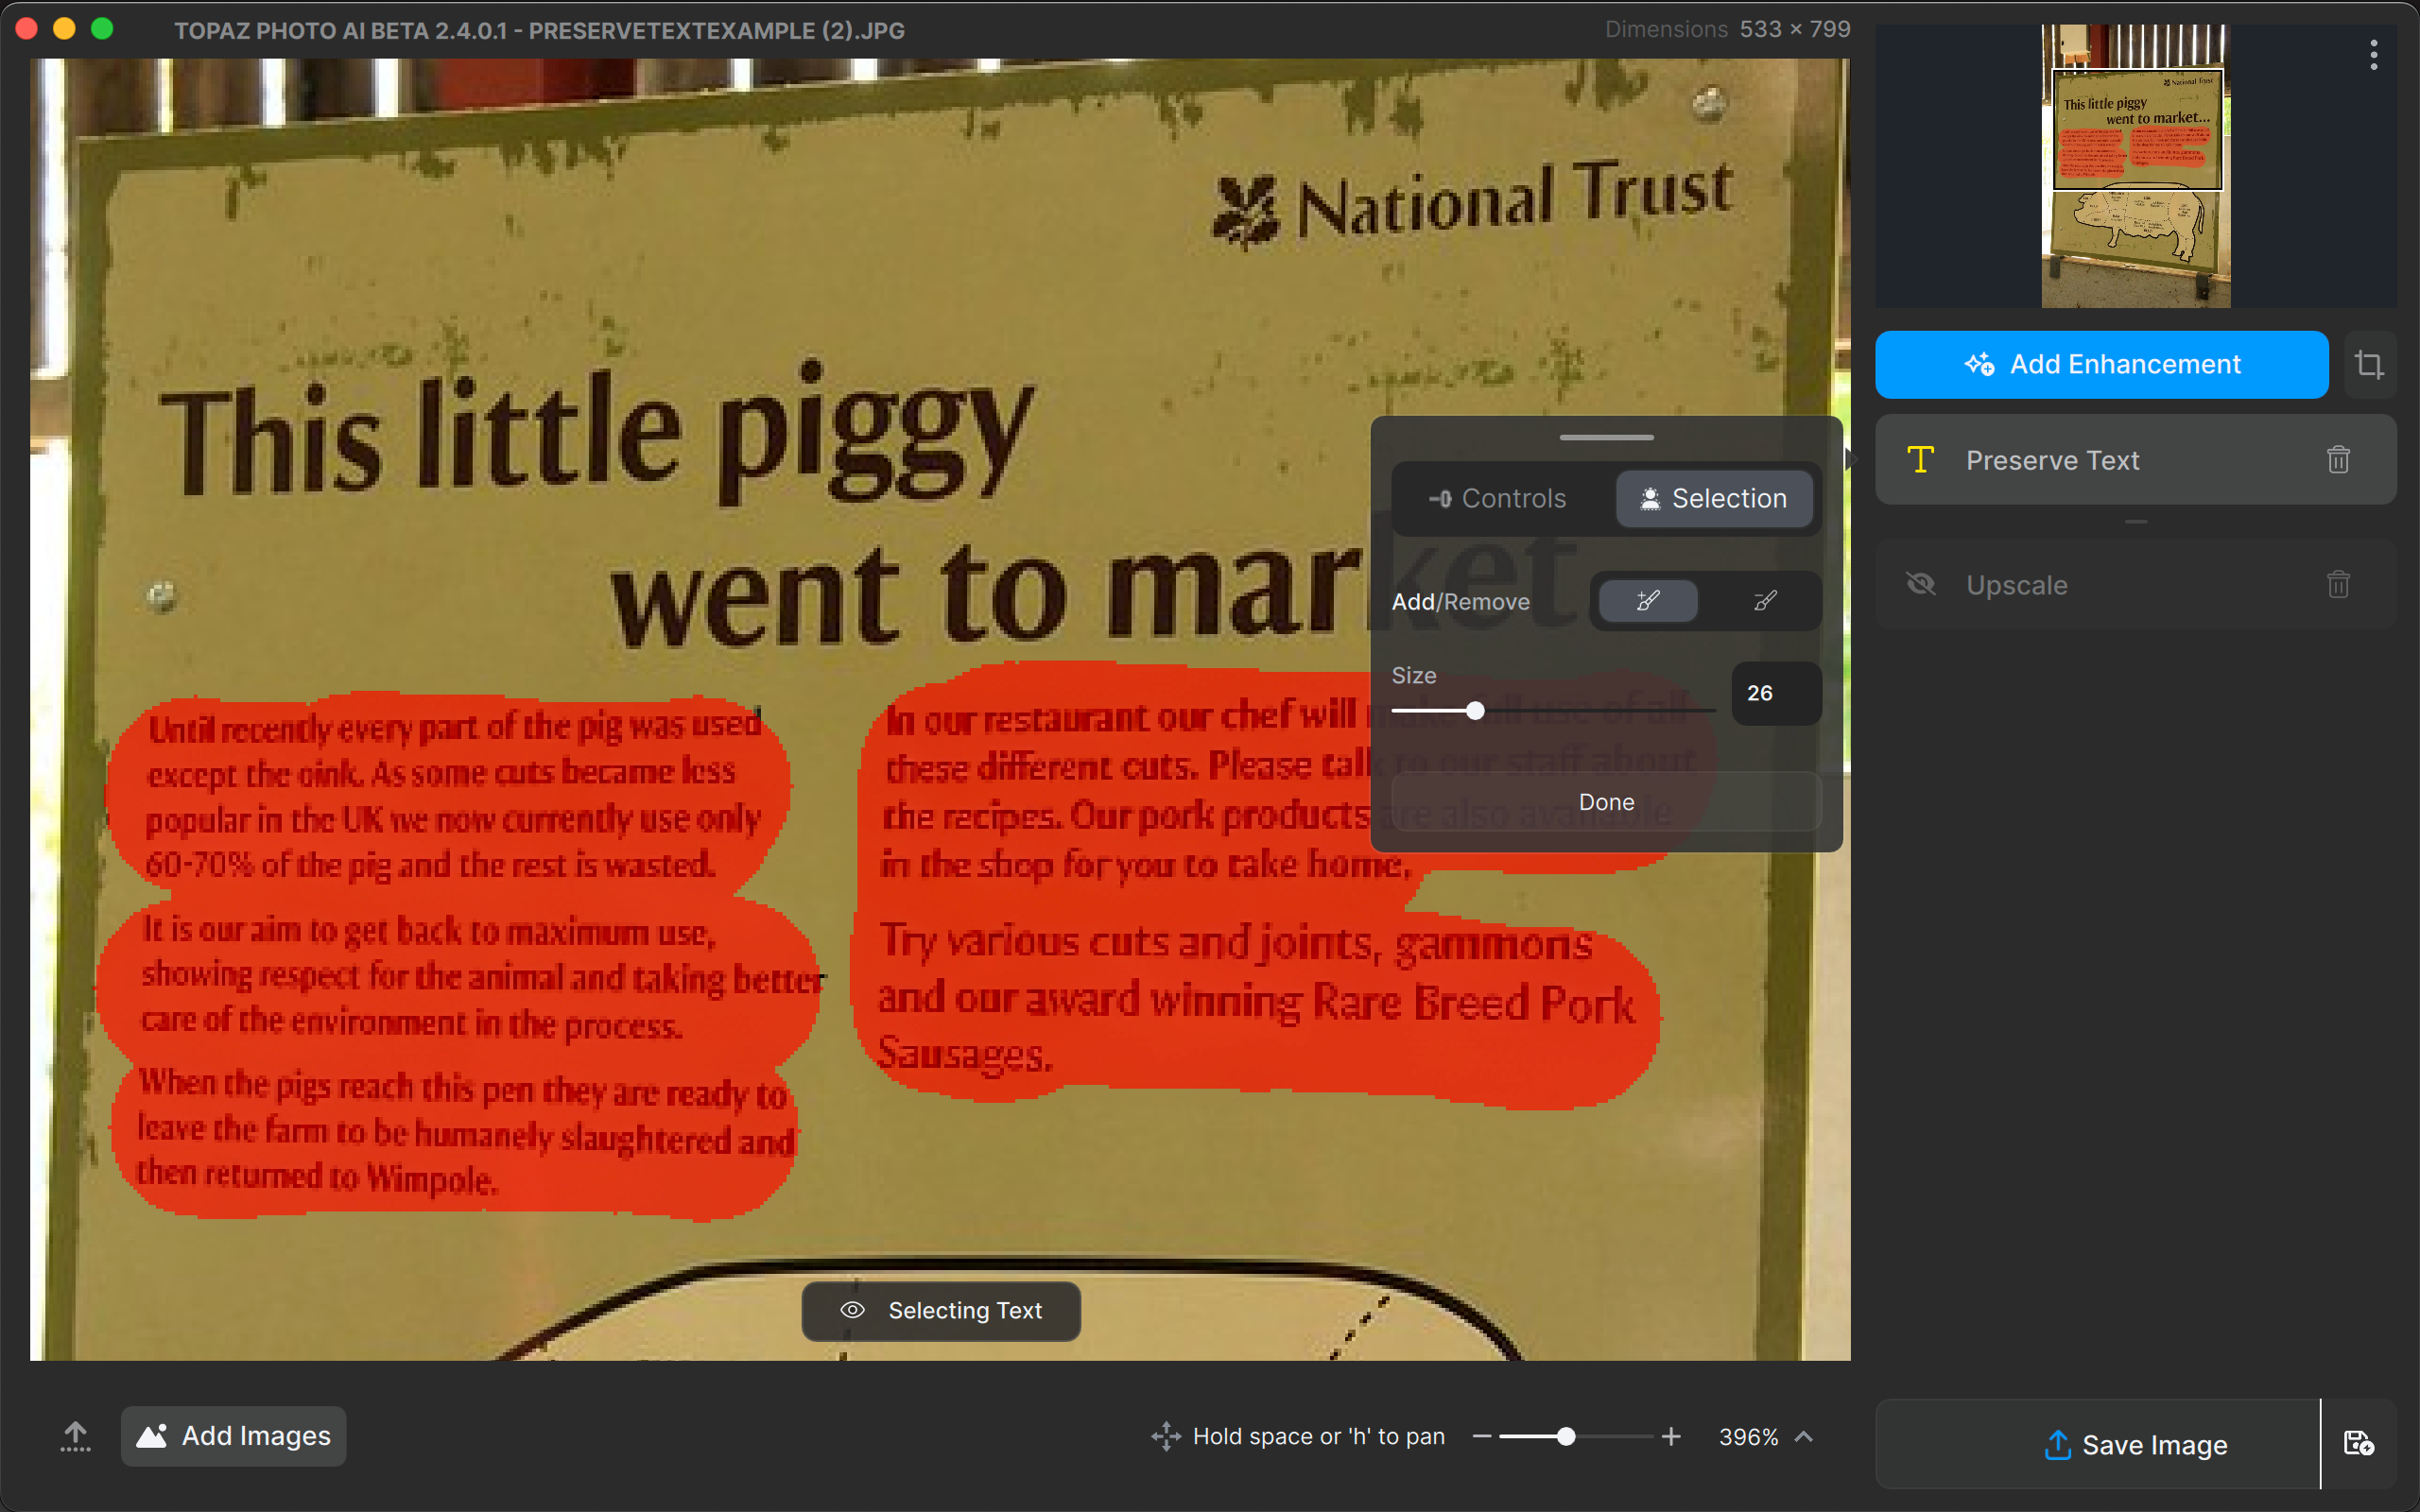
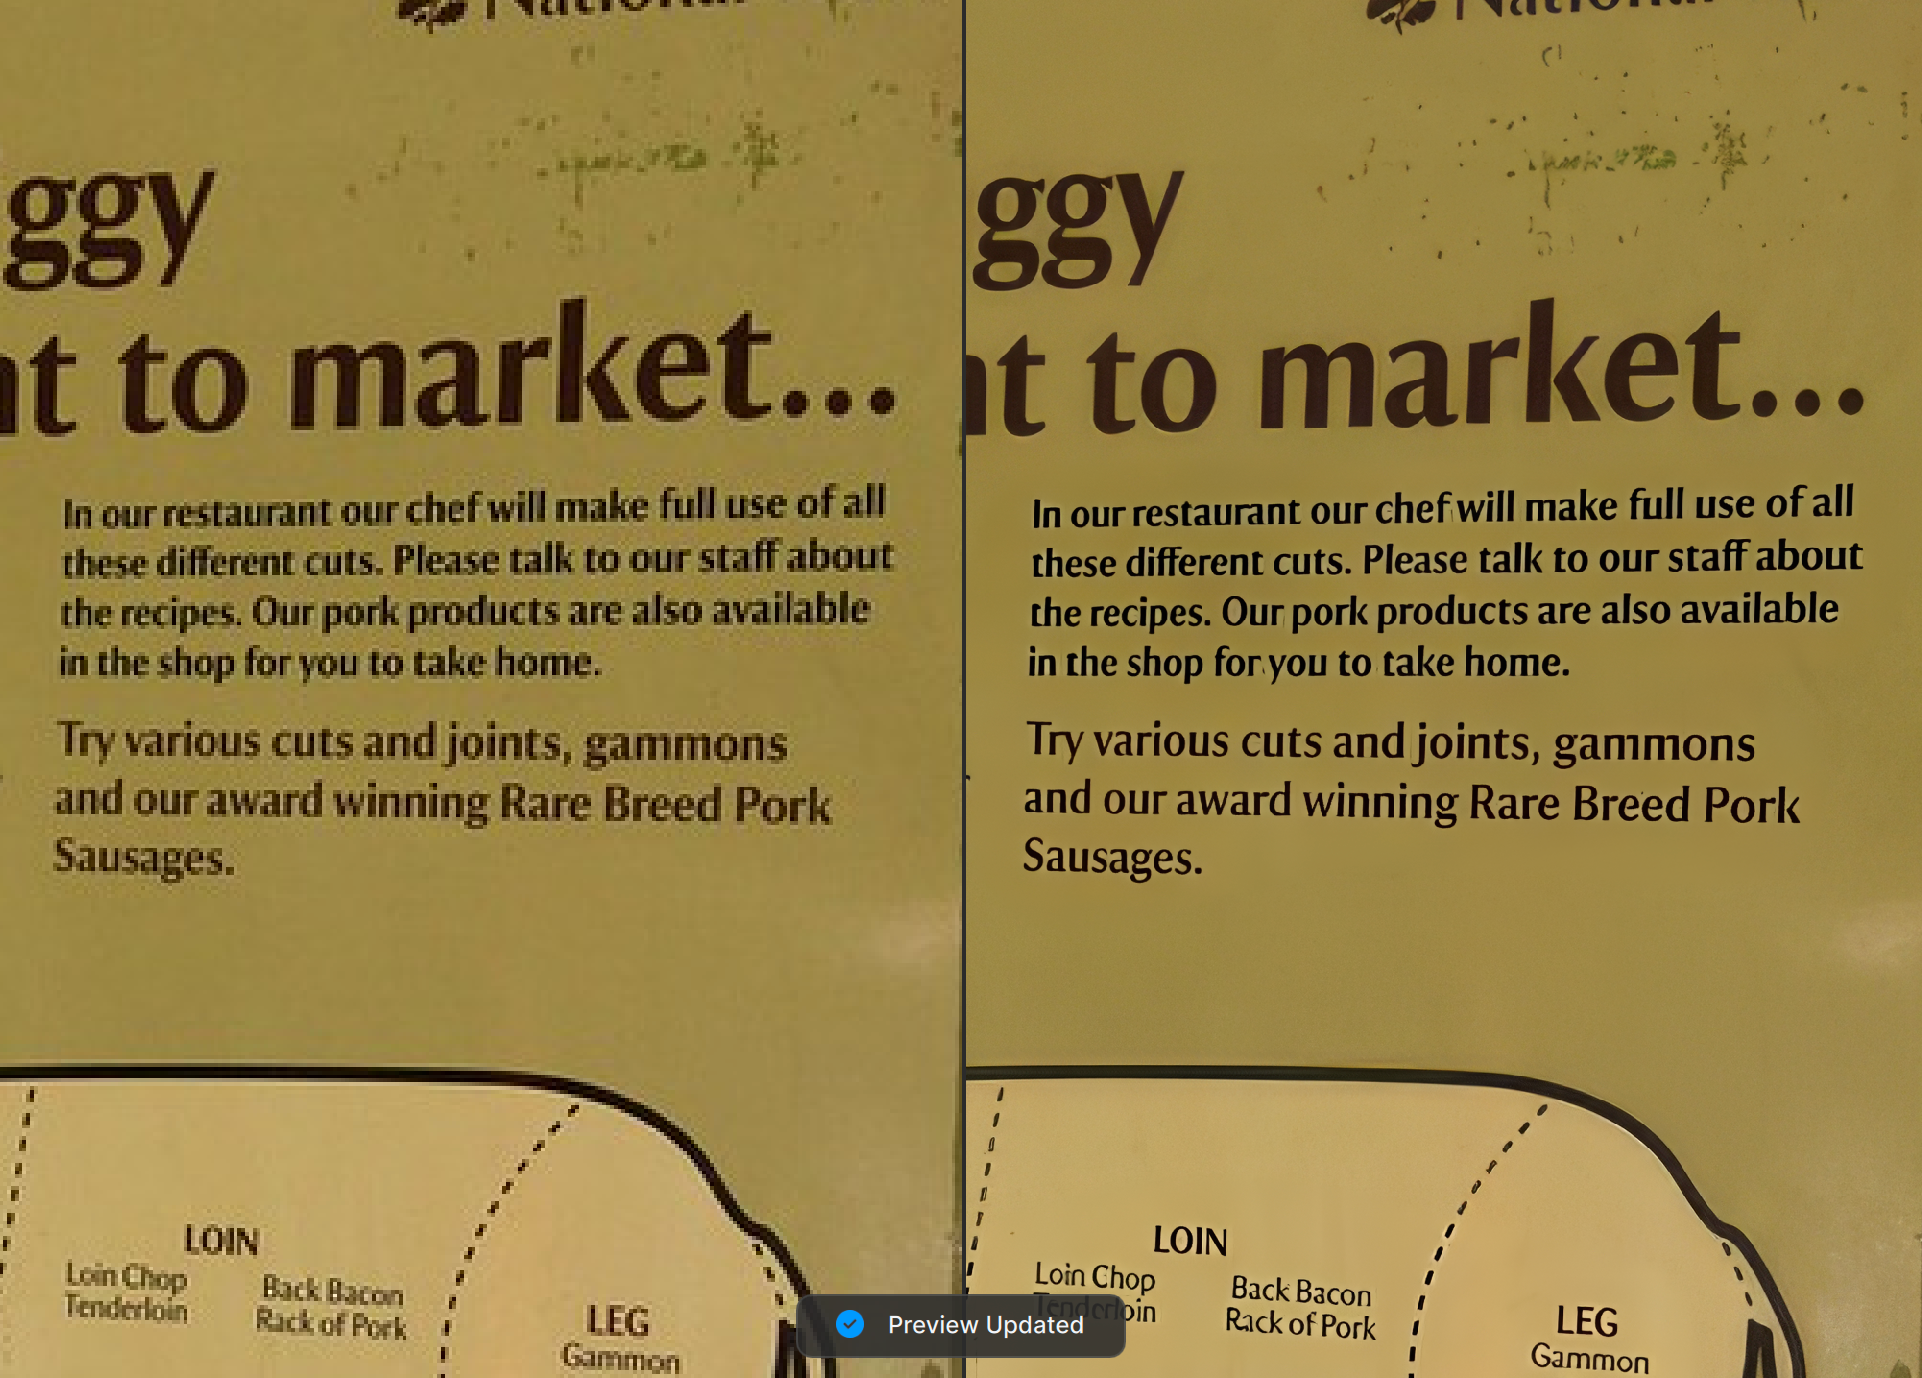
Step 1: Select Text
The Selection tab is the first thing that opens when the Preserve Text filter is enabled. No text is selected by default so you must mask it before adjusting controls.
Brush over the text you want to preserve. Click the Subtract button to unbrush portions of the mask and the Select None button to clear it entirely. Choose Select All for images predominantly consisting of text.
The mask is applied directly to the input image and overwrites the other layered filters.
Step 2: Choose Model and Strength
Autopilot selected the Low Resolution model. Use the Strength slider to fine-tune it to the desired level of preservation.
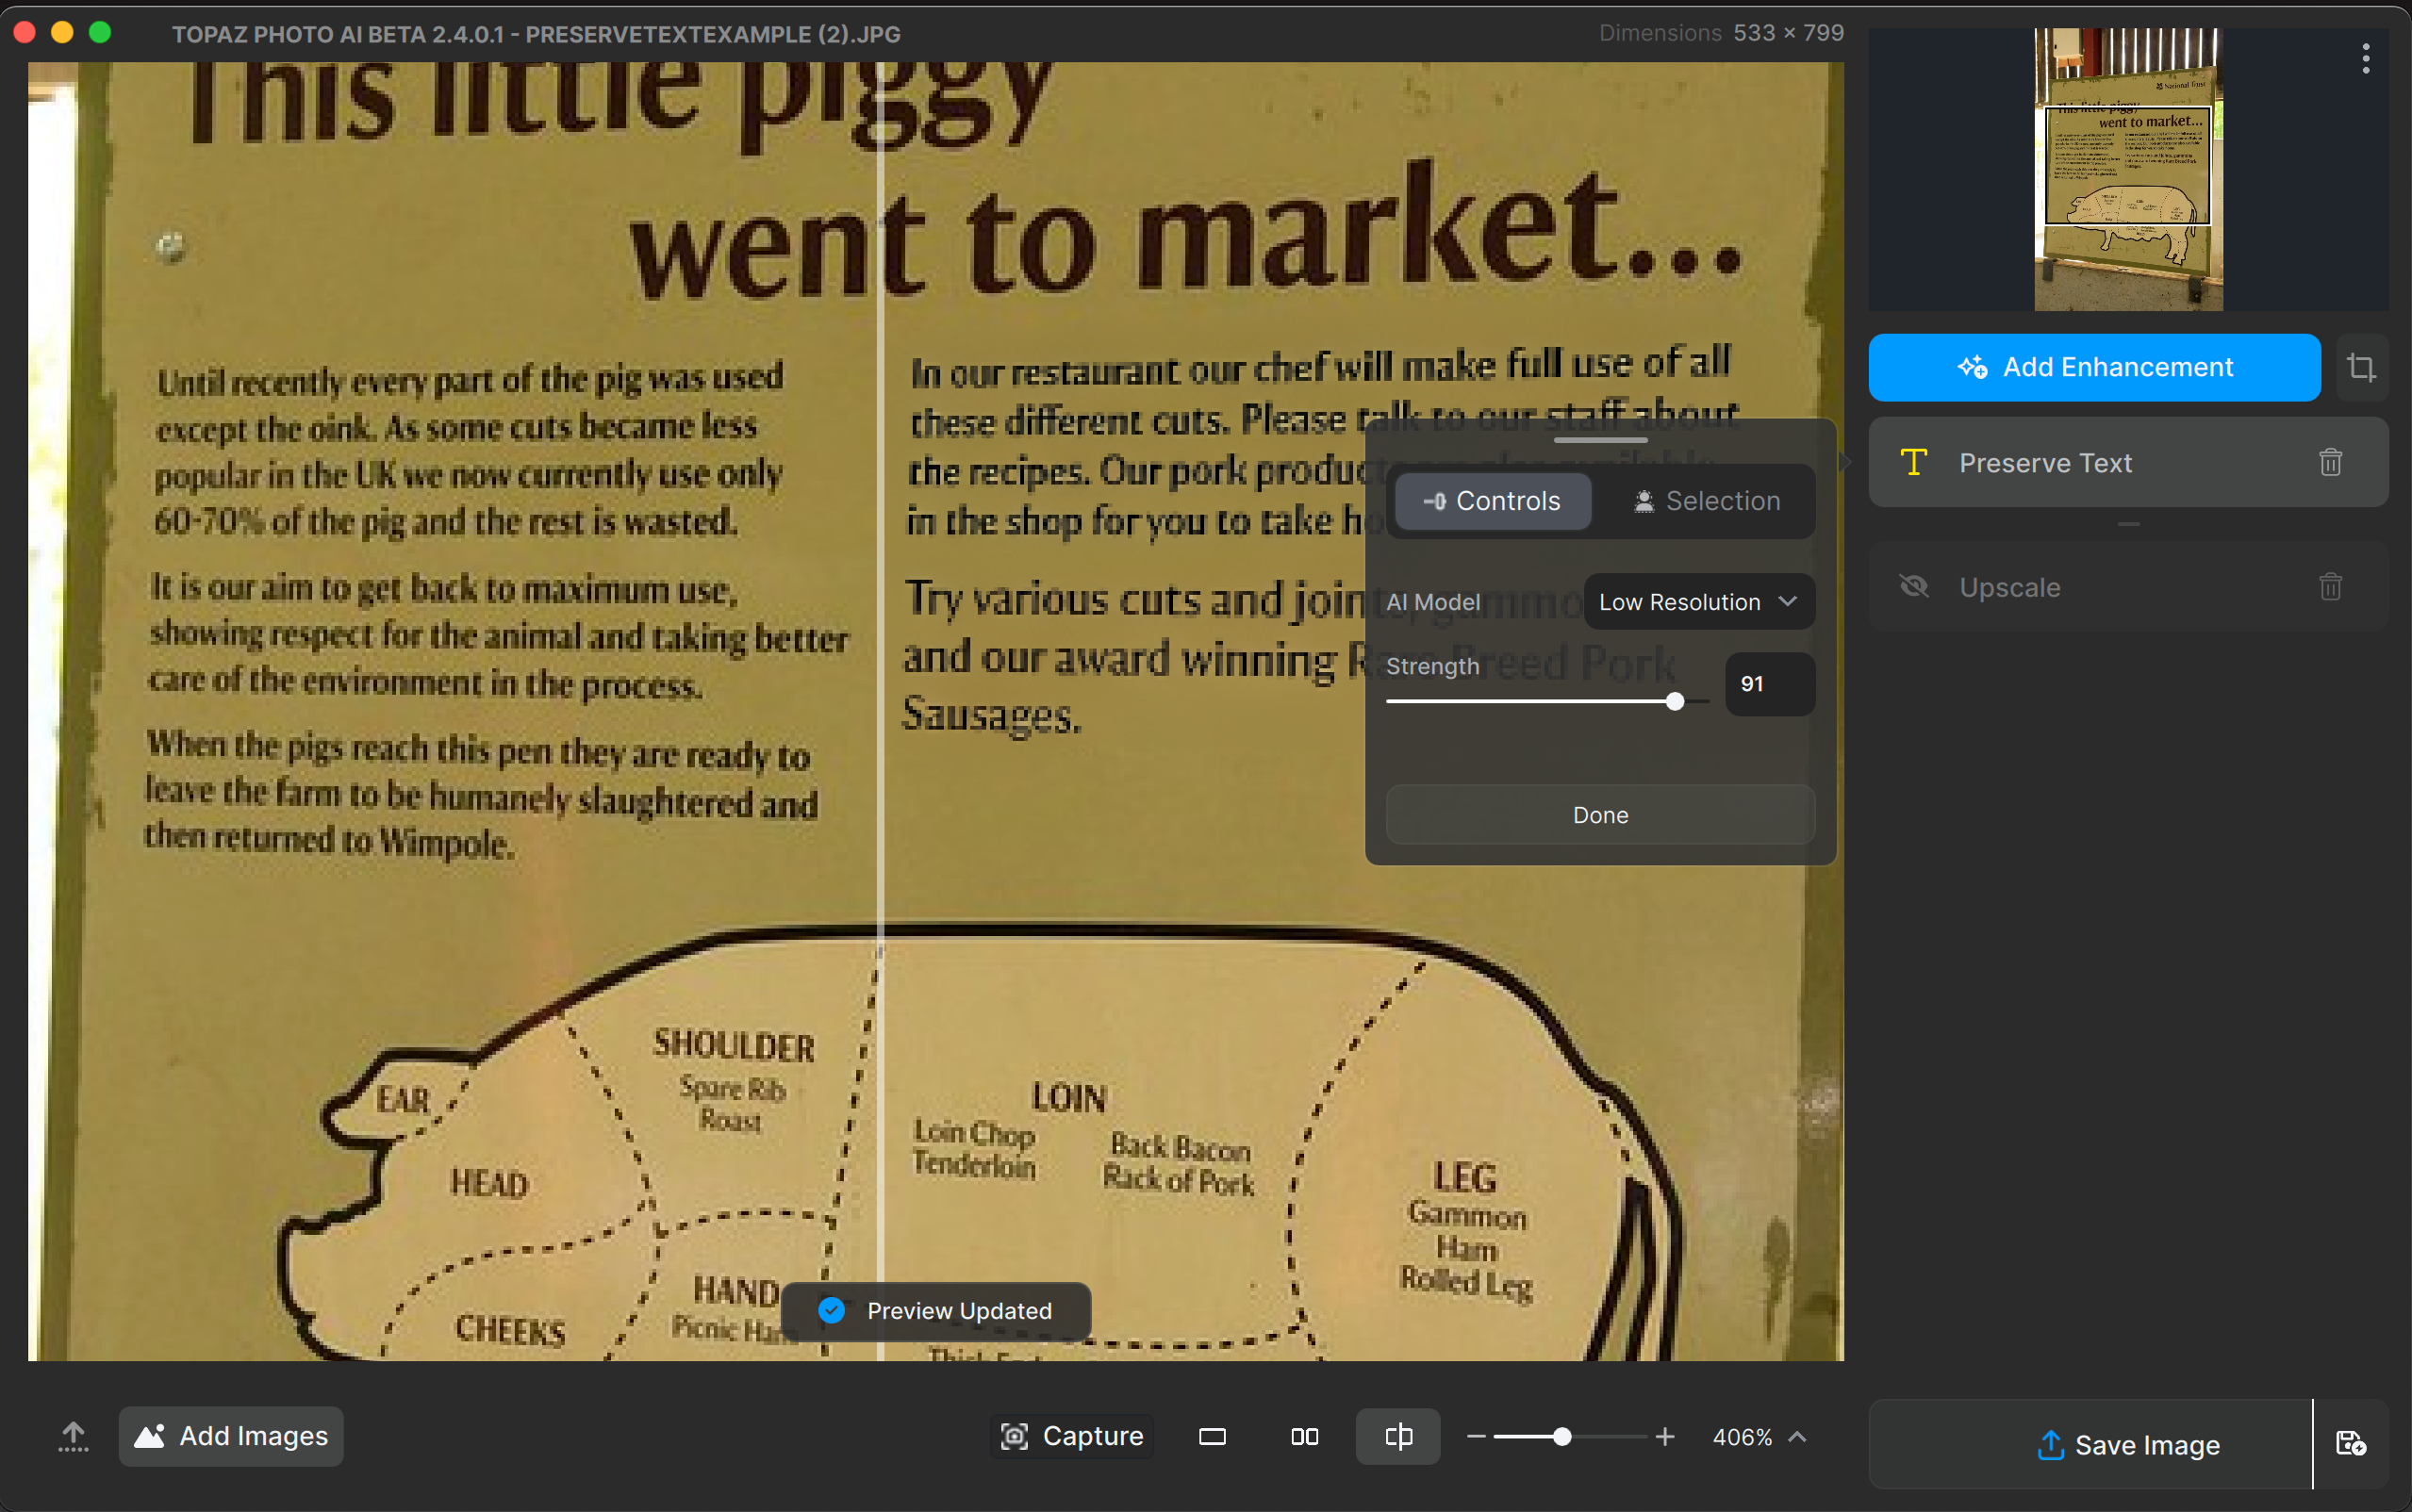
Selecting the Noisy/Compressed model will distort the text. The models treat different root causes of text deterioration.
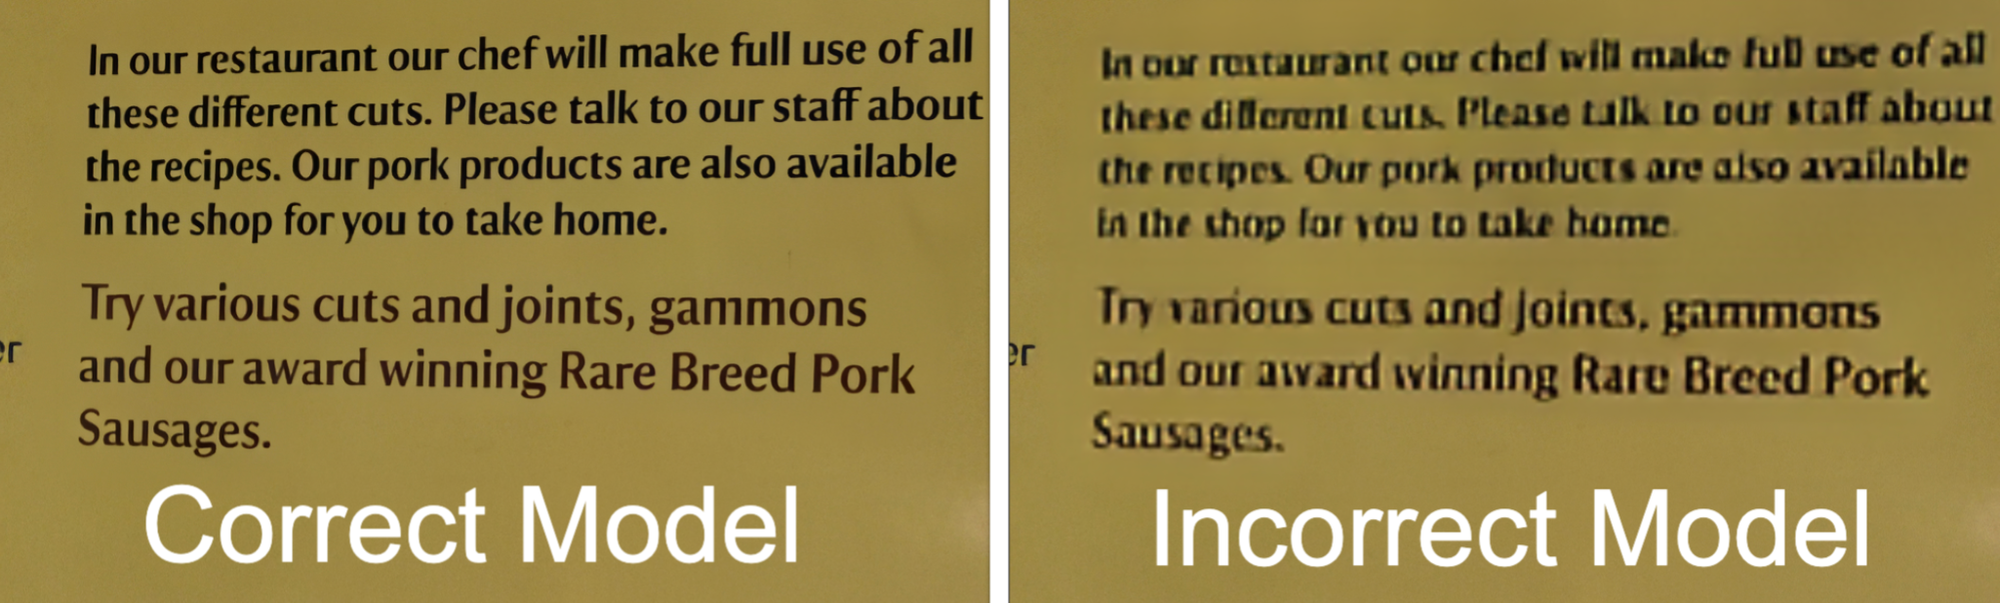
Step 3: Preview the Final Result
Decide whether you want to make further edits. Once you’re satisfied, you can export the image!
Download the image below, open it in Photo AI, and follow along. Sample image
Step 1: Set the Scale
Adjust the scale factor to determine how much you want to increase the image size. You can also use the text boxes to specify pixel dimensions or resolution instead.
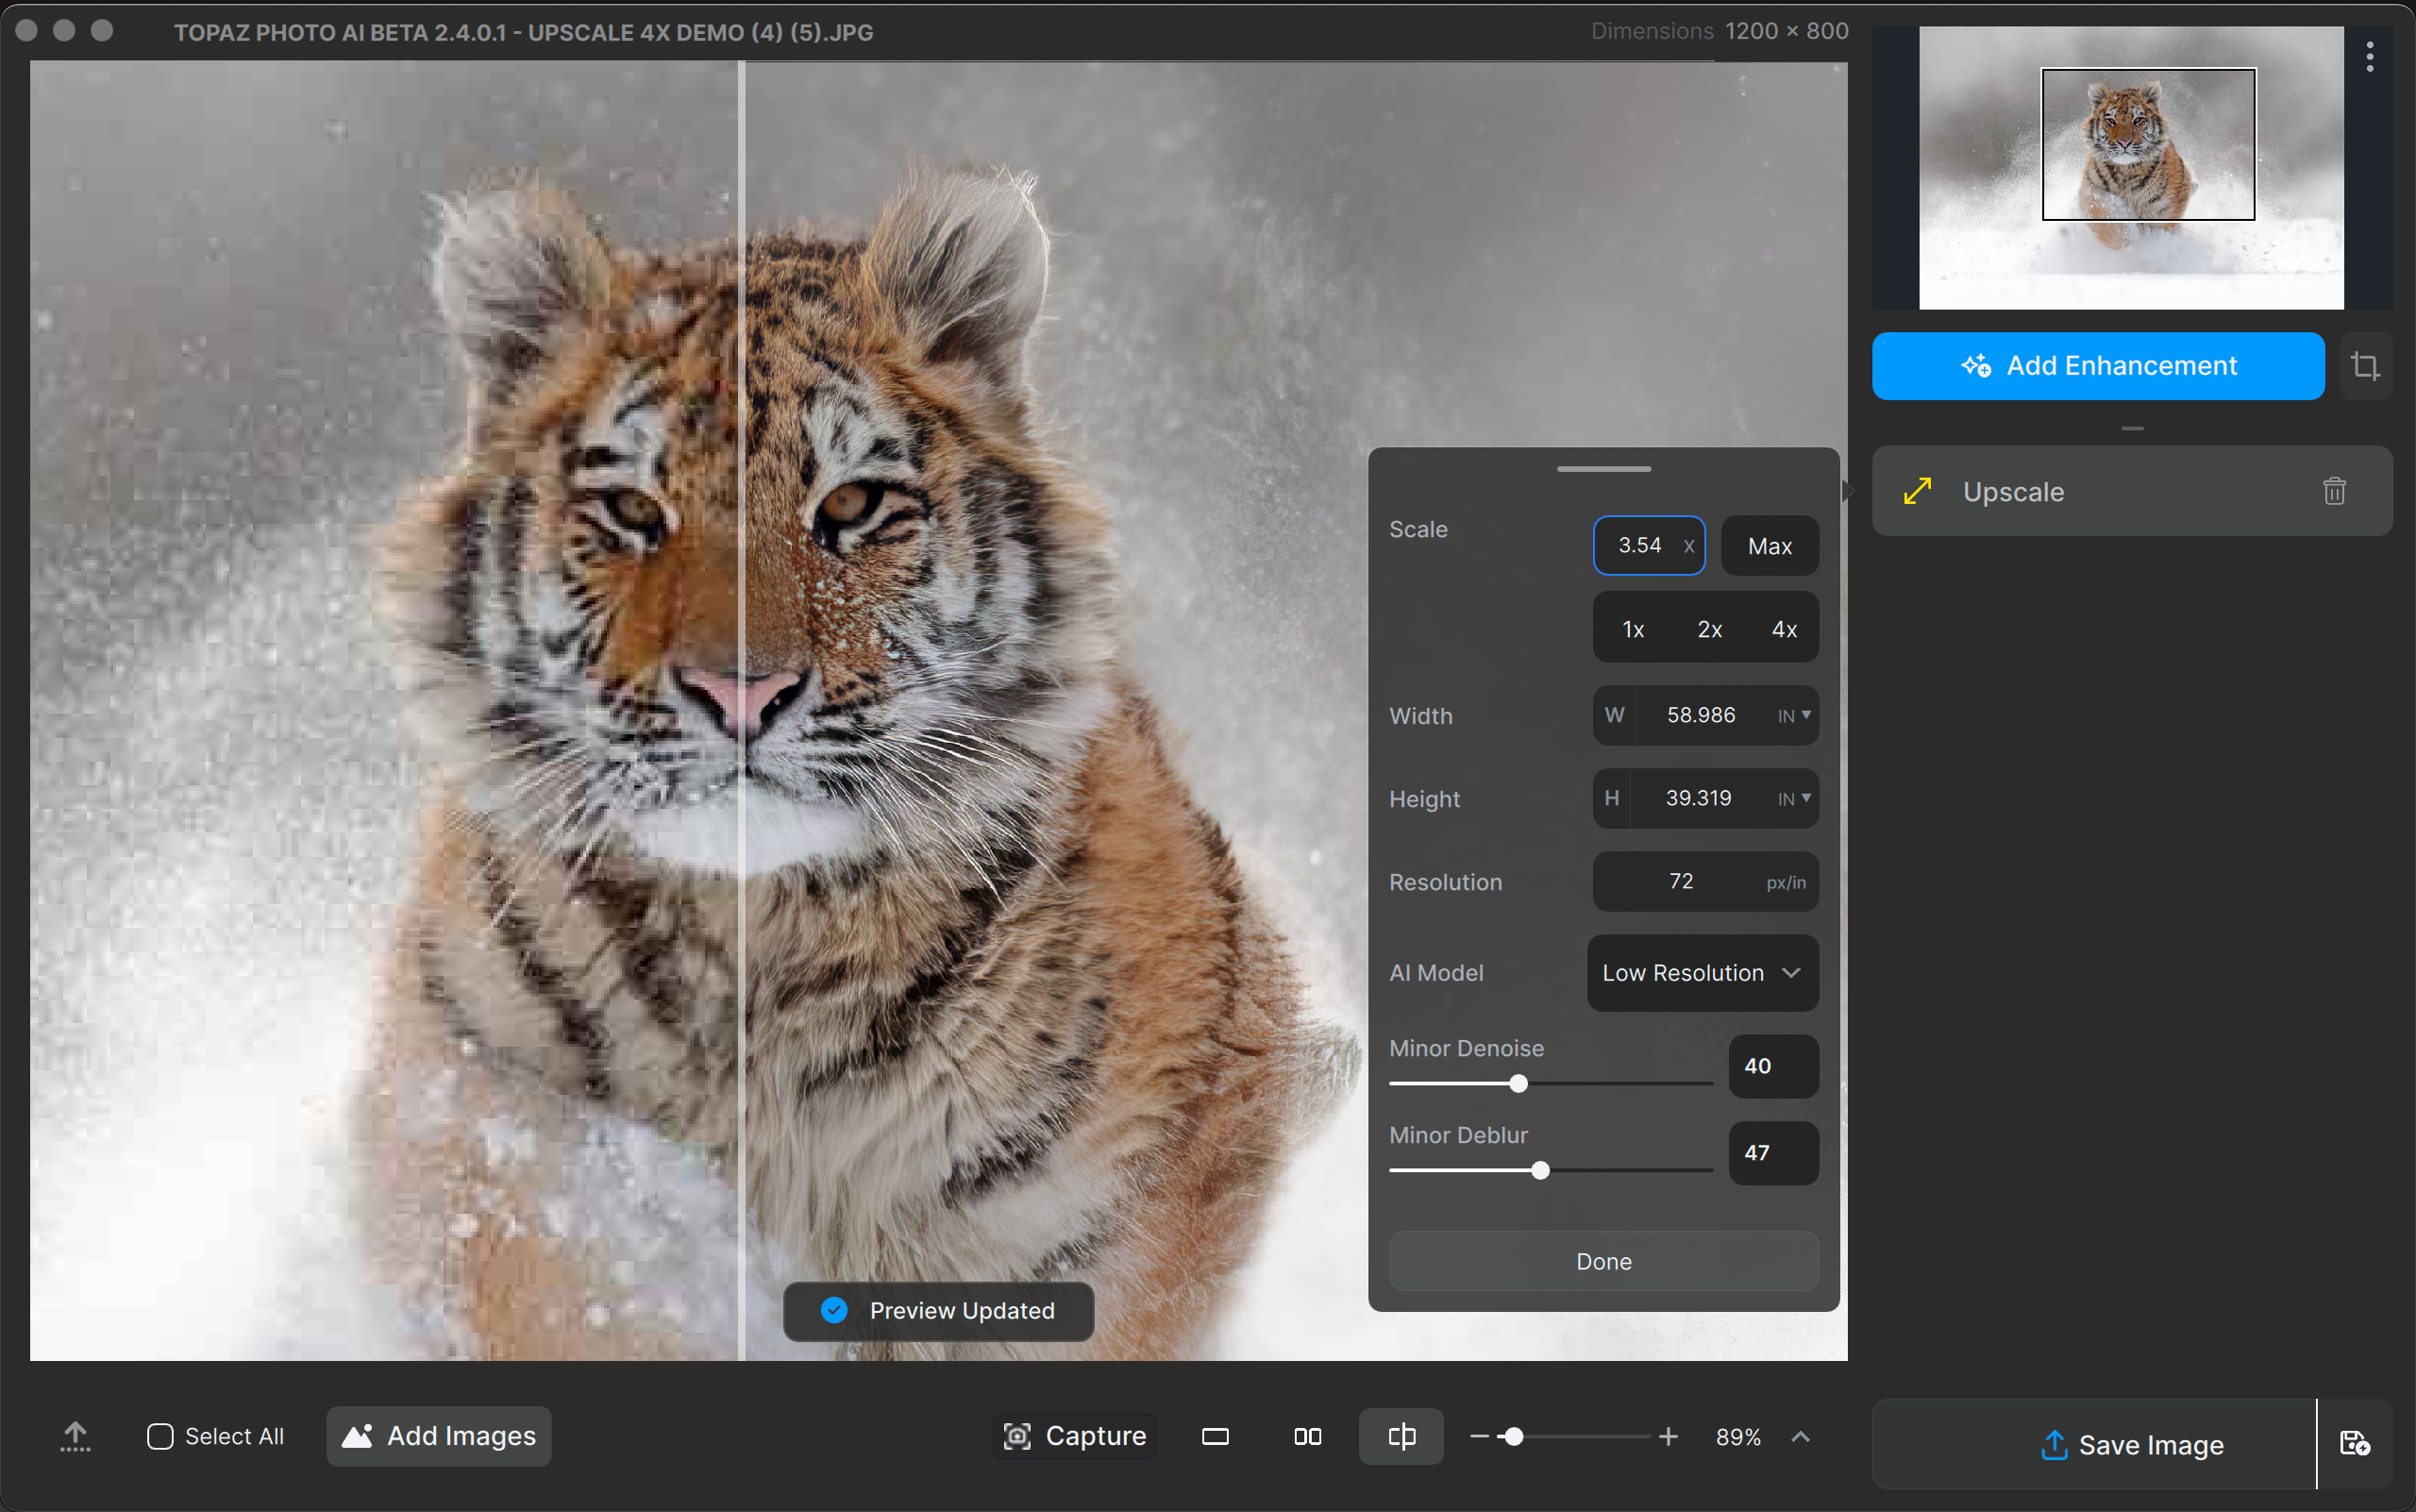
Step 2: Choose Model and Strength
Autopilot selects the Low Resolution model for the sample image because the input image is only 1200px by 800px.
Use the Minor Deblur and Minor Denoise sliders to remove slight noise and blur if necessary.
Step 3: Preview the Final Result
Decide whether you want to make further edits. Once you’re satisfied, you can export the image!