Presets (Legacy)
Streamline your workflow by saving specific edit combinations as presets and applying them quickly to new images. Presets not only save the enhancements but also the auto-selected settings.
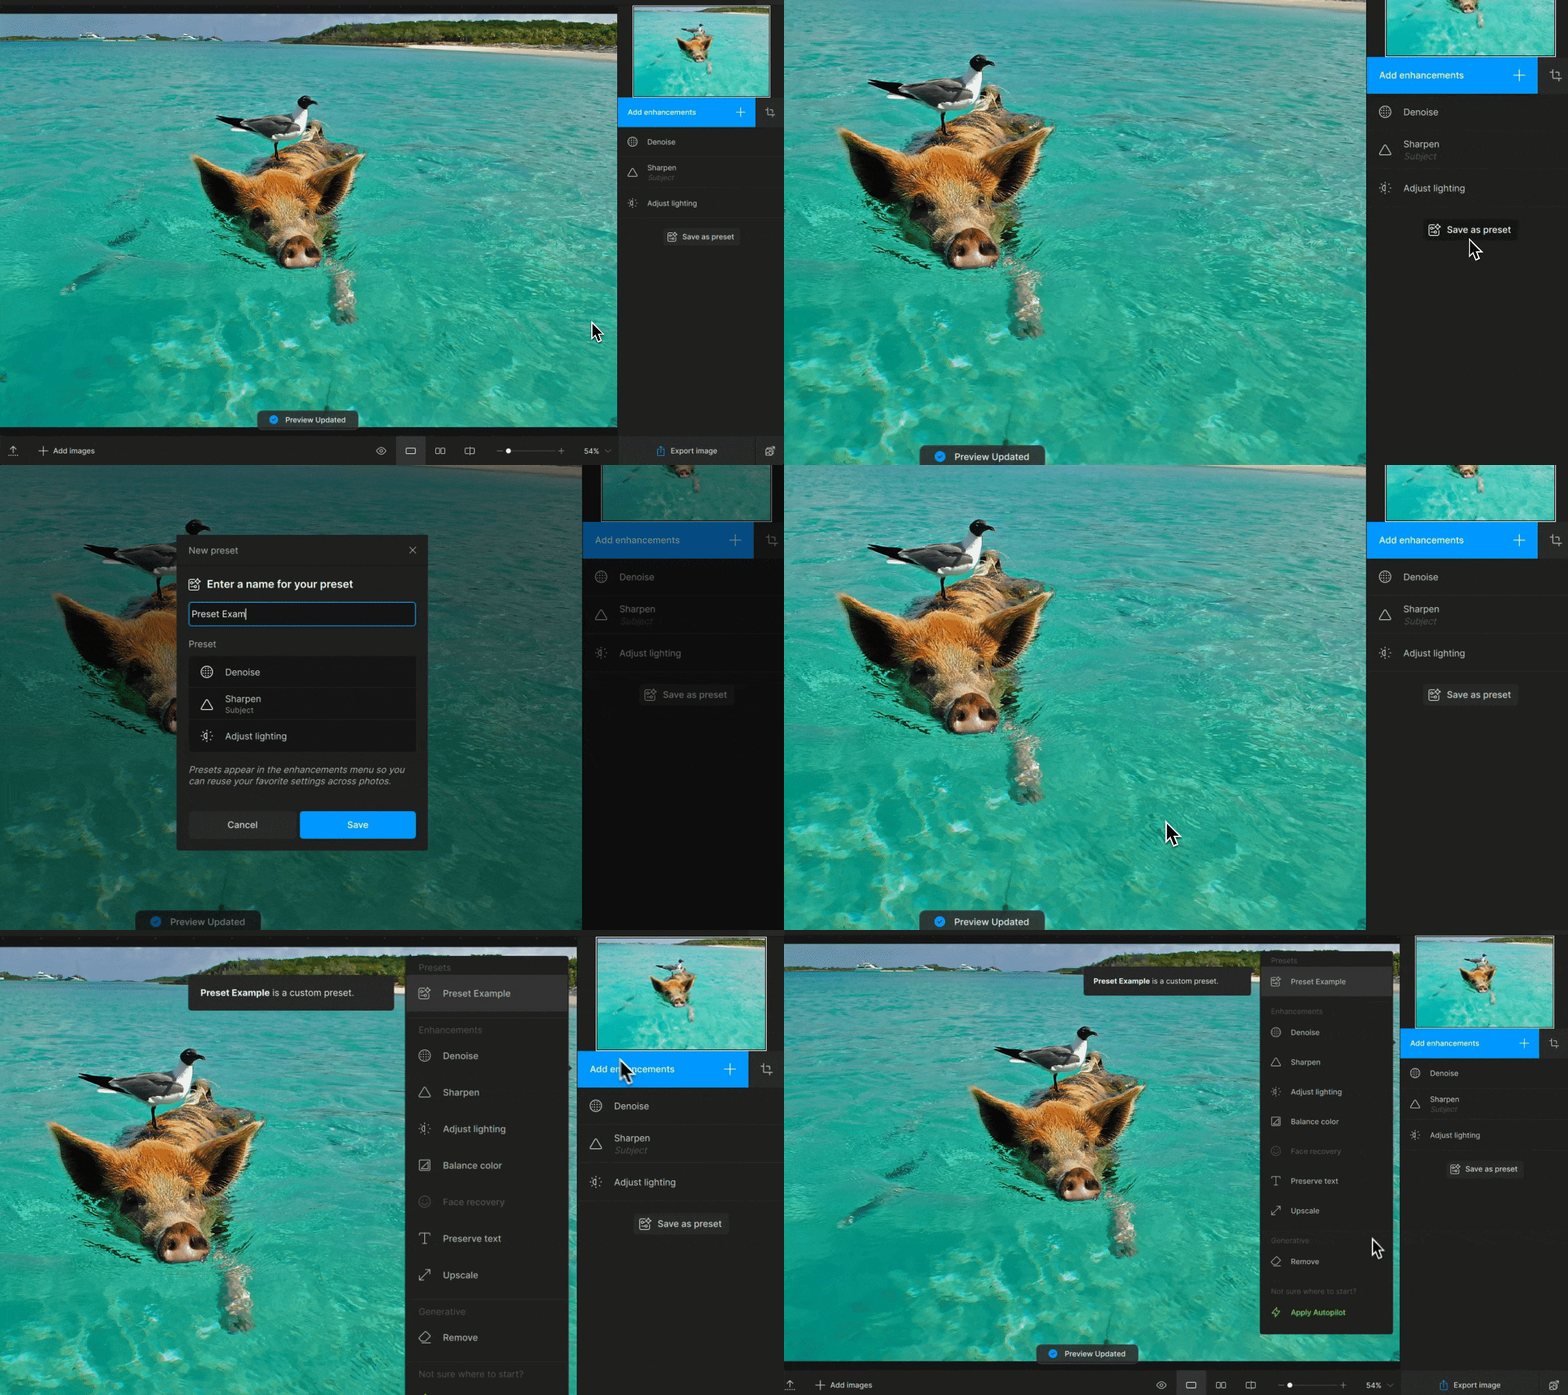
To save a preset, simply click the Save as Preset button in the sidebar, which will open the preset creation menu. Name your preset, review the edits and auto-selections, and click Save.
To use a preset, open the Add Enhancement menu and select your preset from the list. The edits and selections are added to the stack.
Previous edits are retained and not replaced. If you want to use the preset on its own, delete any unwanted edits.

Open the Add Enhancement menu and right-click on a preset to manage it, including renaming or deleting it.
We encourage sharing presets with other users. To view your preset files, go to the Help > Open Presets Folder. These files can be shared with other users who can place it in their own Preset folders.
The default folder location is:
- C:\ProgramData\Topaz Labs LLC\Topaz Photo AI\Presets (Windows)
- ~/Library/Application Support/Topaz Labs LLC/Topaz Photo AI/Presets (Mac)