Project Starlight (Legacy)

The Original and First-Ever Diffusion Model For Video Enhancement
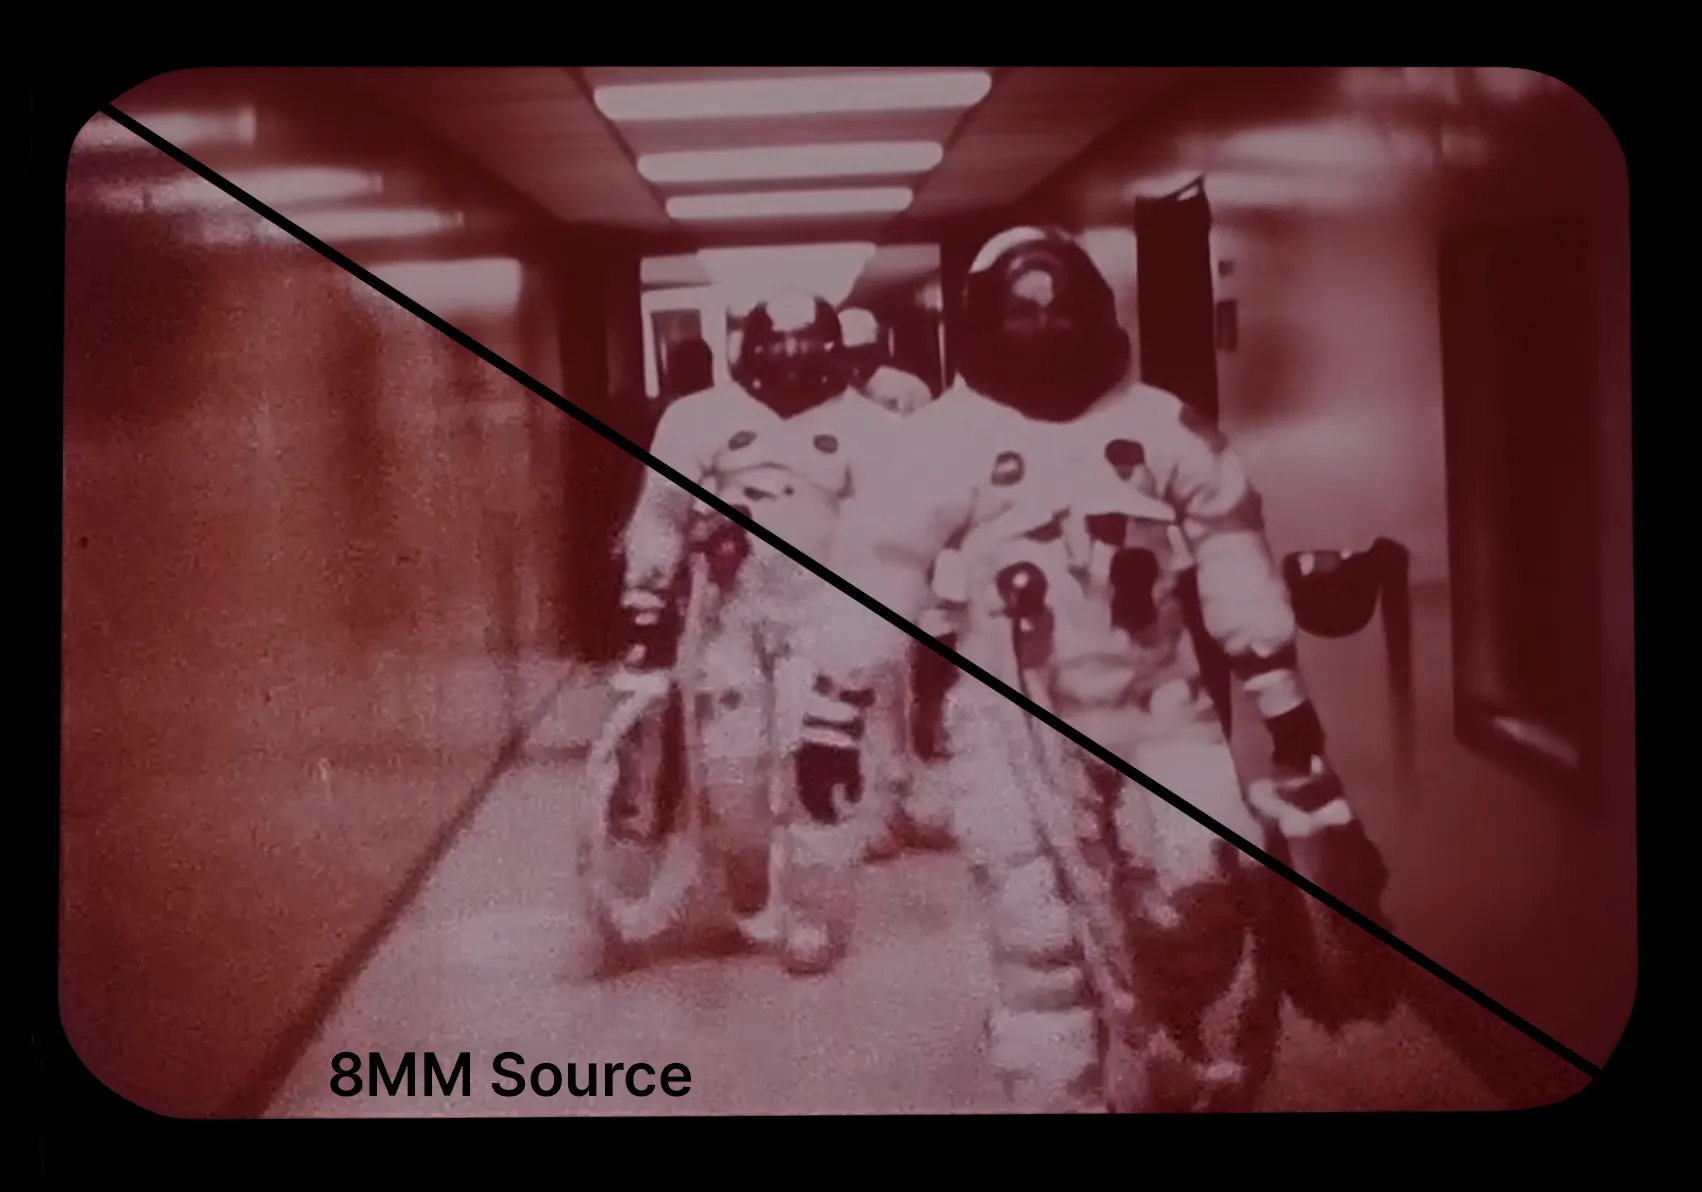
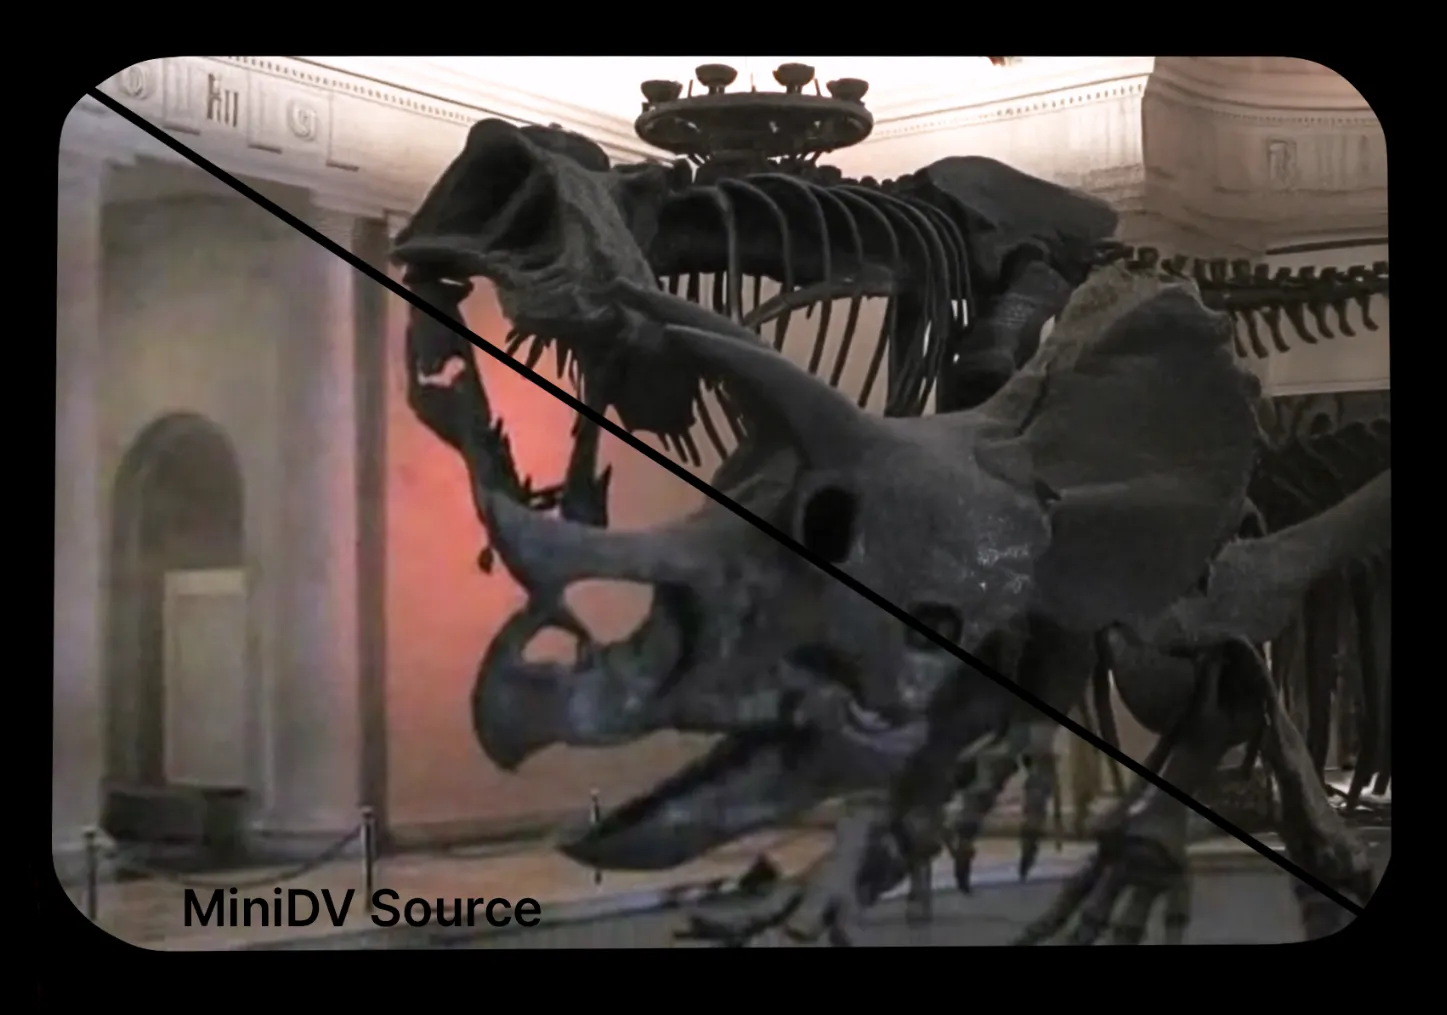
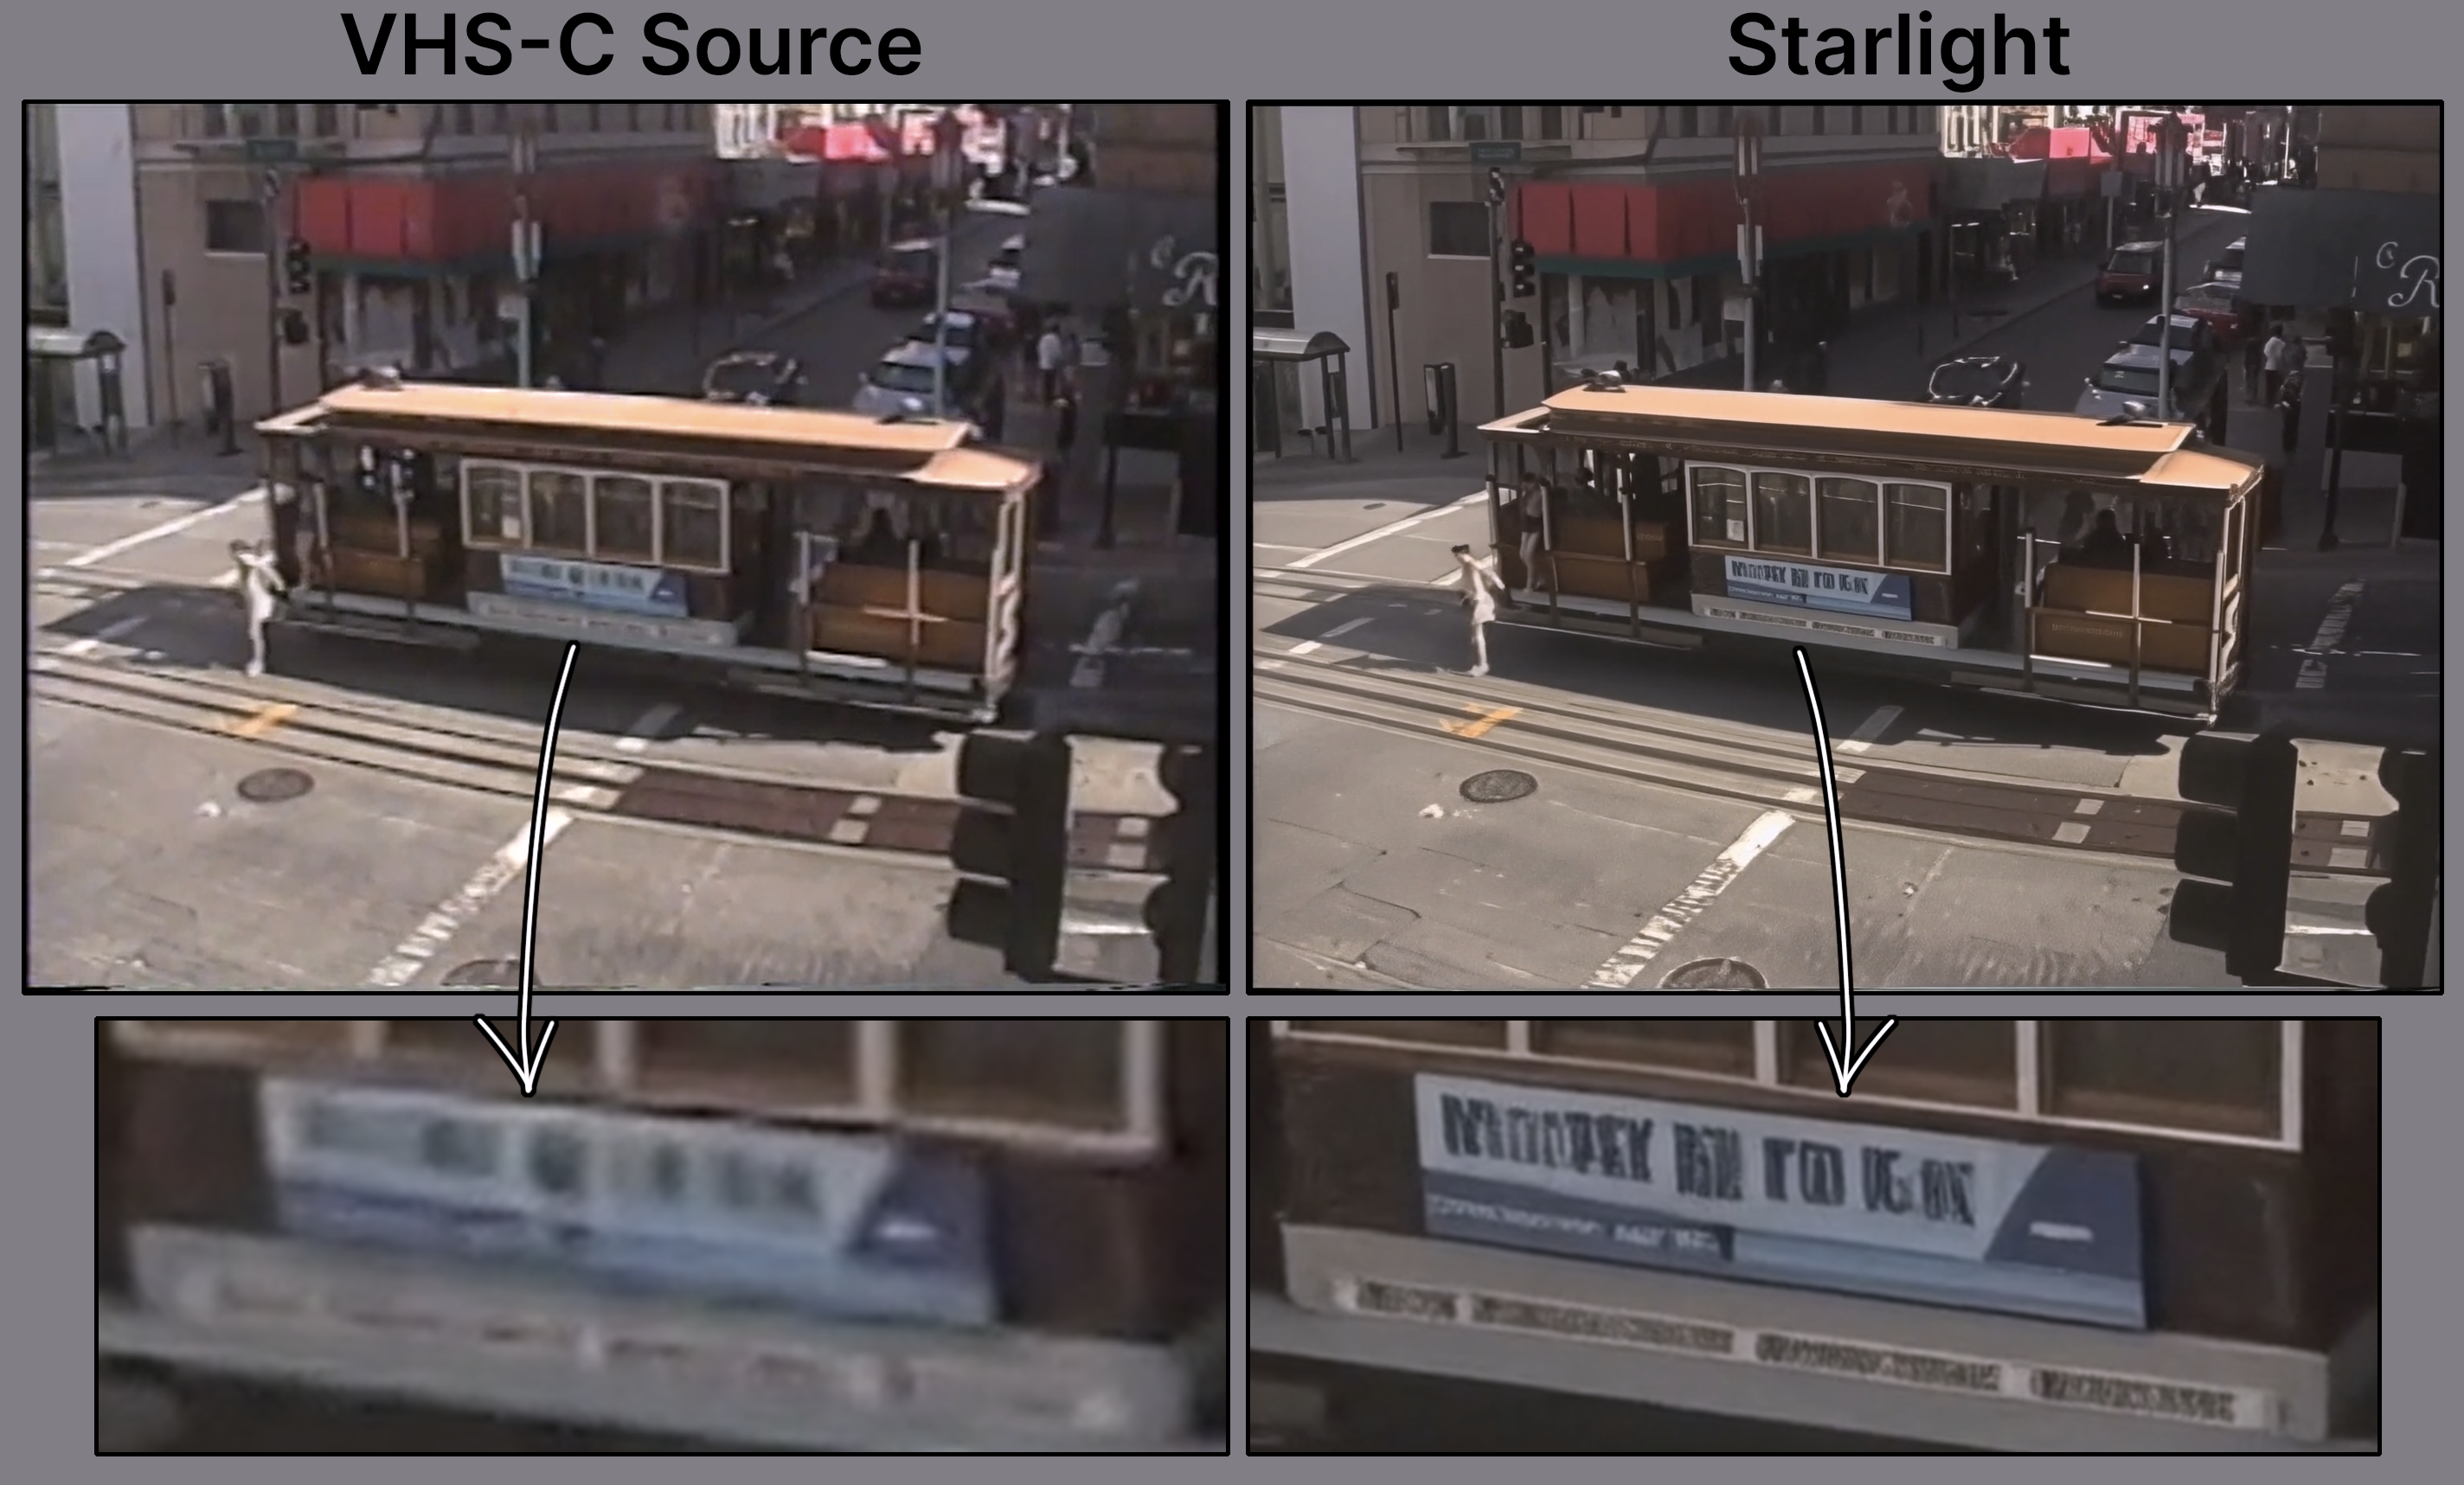
Project Starlight is the first video enhancement model that is capable of enhancing previously impossible footage. This can be anything from tricky 8/16mm film to VHS footage.

Because of the complexity and scope that this model requires to process, this model is significantly slower and more expensive than previous models. For that reason, it currently requires cloud processing on server-grade graphics hardware.
We recommend testing standard definition videos that have less than ideal results with our previous models, though it’s not limited to that resolution. Project Starlight will currently output 1080p and 4K results.
Starlight Quick Start
Here’s a quick start guide on how to use Starlight.
- To begin, have your clip already imported.
- The Starlight panel is accessible next to the Codec Settings in the upper screen right corner.
- This will open the Project Starlight menu.
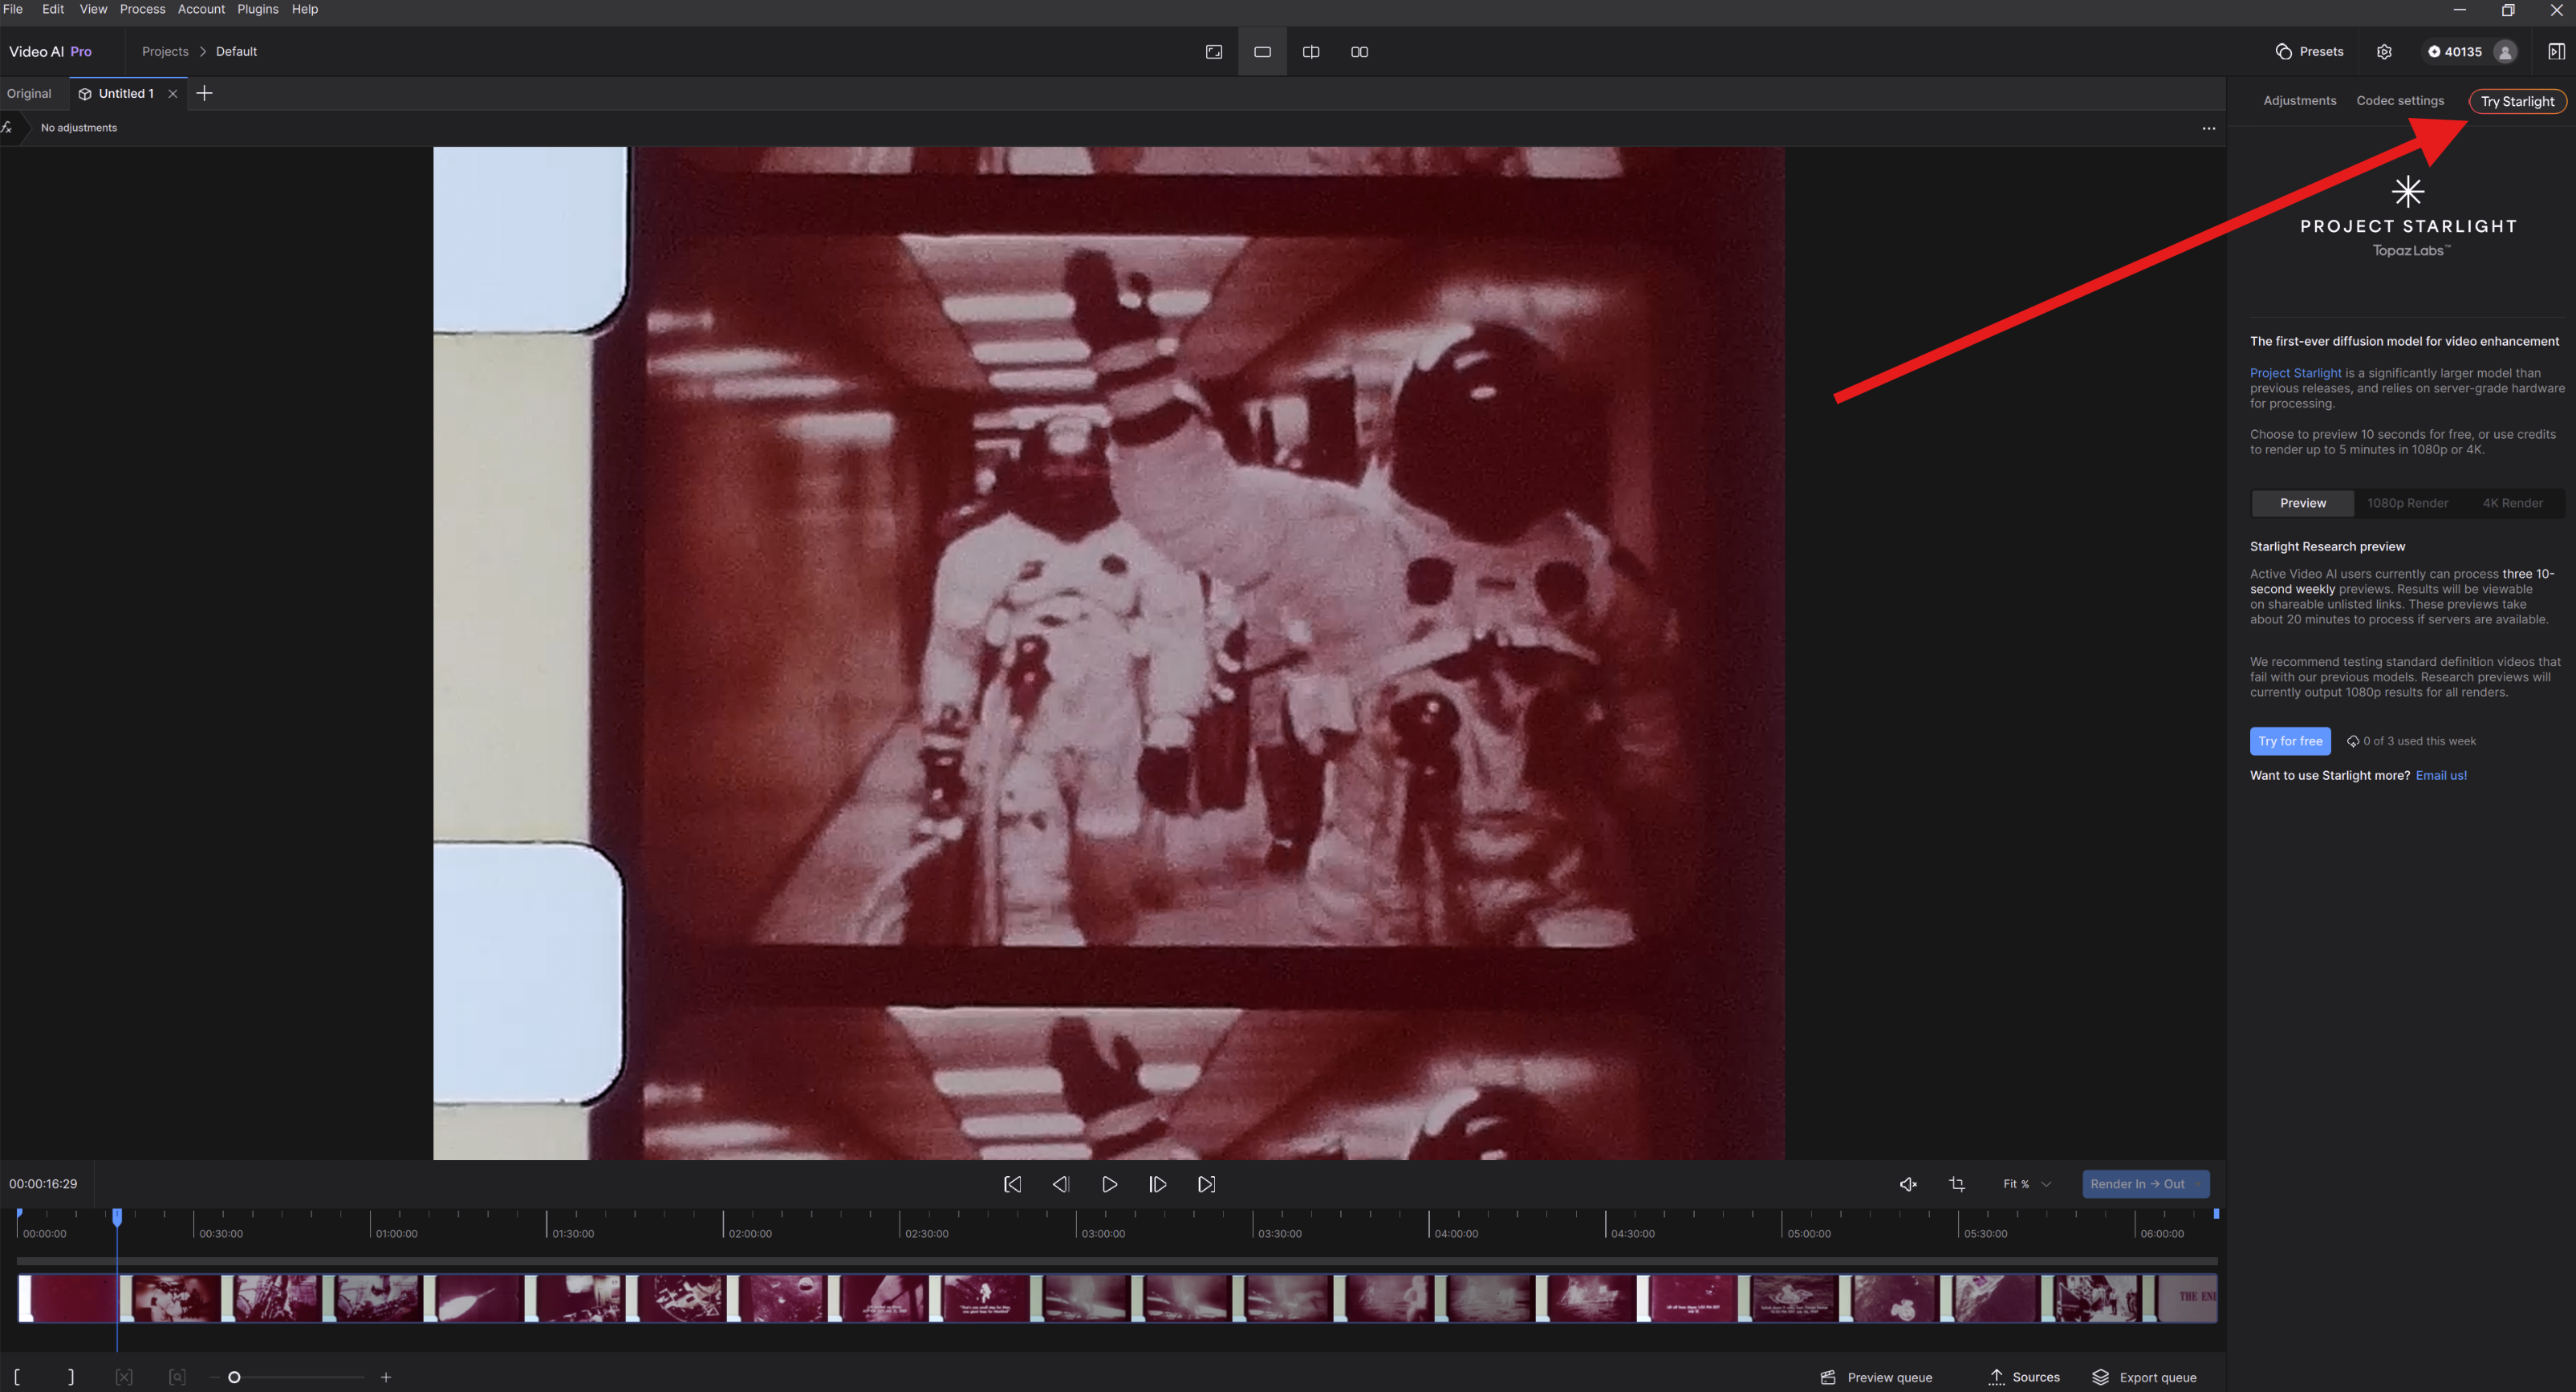
Here you will find three options: Preview, 1080p Render and 4K Render.
1080p Starlight Early Access
You can use Starlight to render up to 5 minutes (9000 frames at 30fps) of footage for 90 credits/minute. To make it more usable for Early Access, this is currently less than it costs us to run.
- Recommend using video at or under 1920x1080 resolution
- The resolution will be based on the height, so if you have a 16:9 aspect ratio video, your output may result in 1920x1080. If you have a 4:3 aspect ratio video, your video may result in 1620x1080.
4K Render Starlight Early Access
You can use Starlight to render up to 5 minutes (9000 frames at 30fps) of footage for 150 credits/minute. To make it more usable for Early Access, this is currently less than it costs us to run.
- Recommend using video at or under 1920x1080 resolution
- The resolution will be based on the height, so if you have a 16:9 aspect ratio video, your output may result in 3840x2160. If you have a 4:3 aspect ratio video, your output video may be 2880x2160.
1080p/4K Export Process
Clicking “Render 5 min” will allow you to trim to your desired length under 9000 frames.
- You can do this by sliding the vertical blue handles to trim the start or end points.
- Pressing the play button will play your selection and loop only what’s within the selected area.
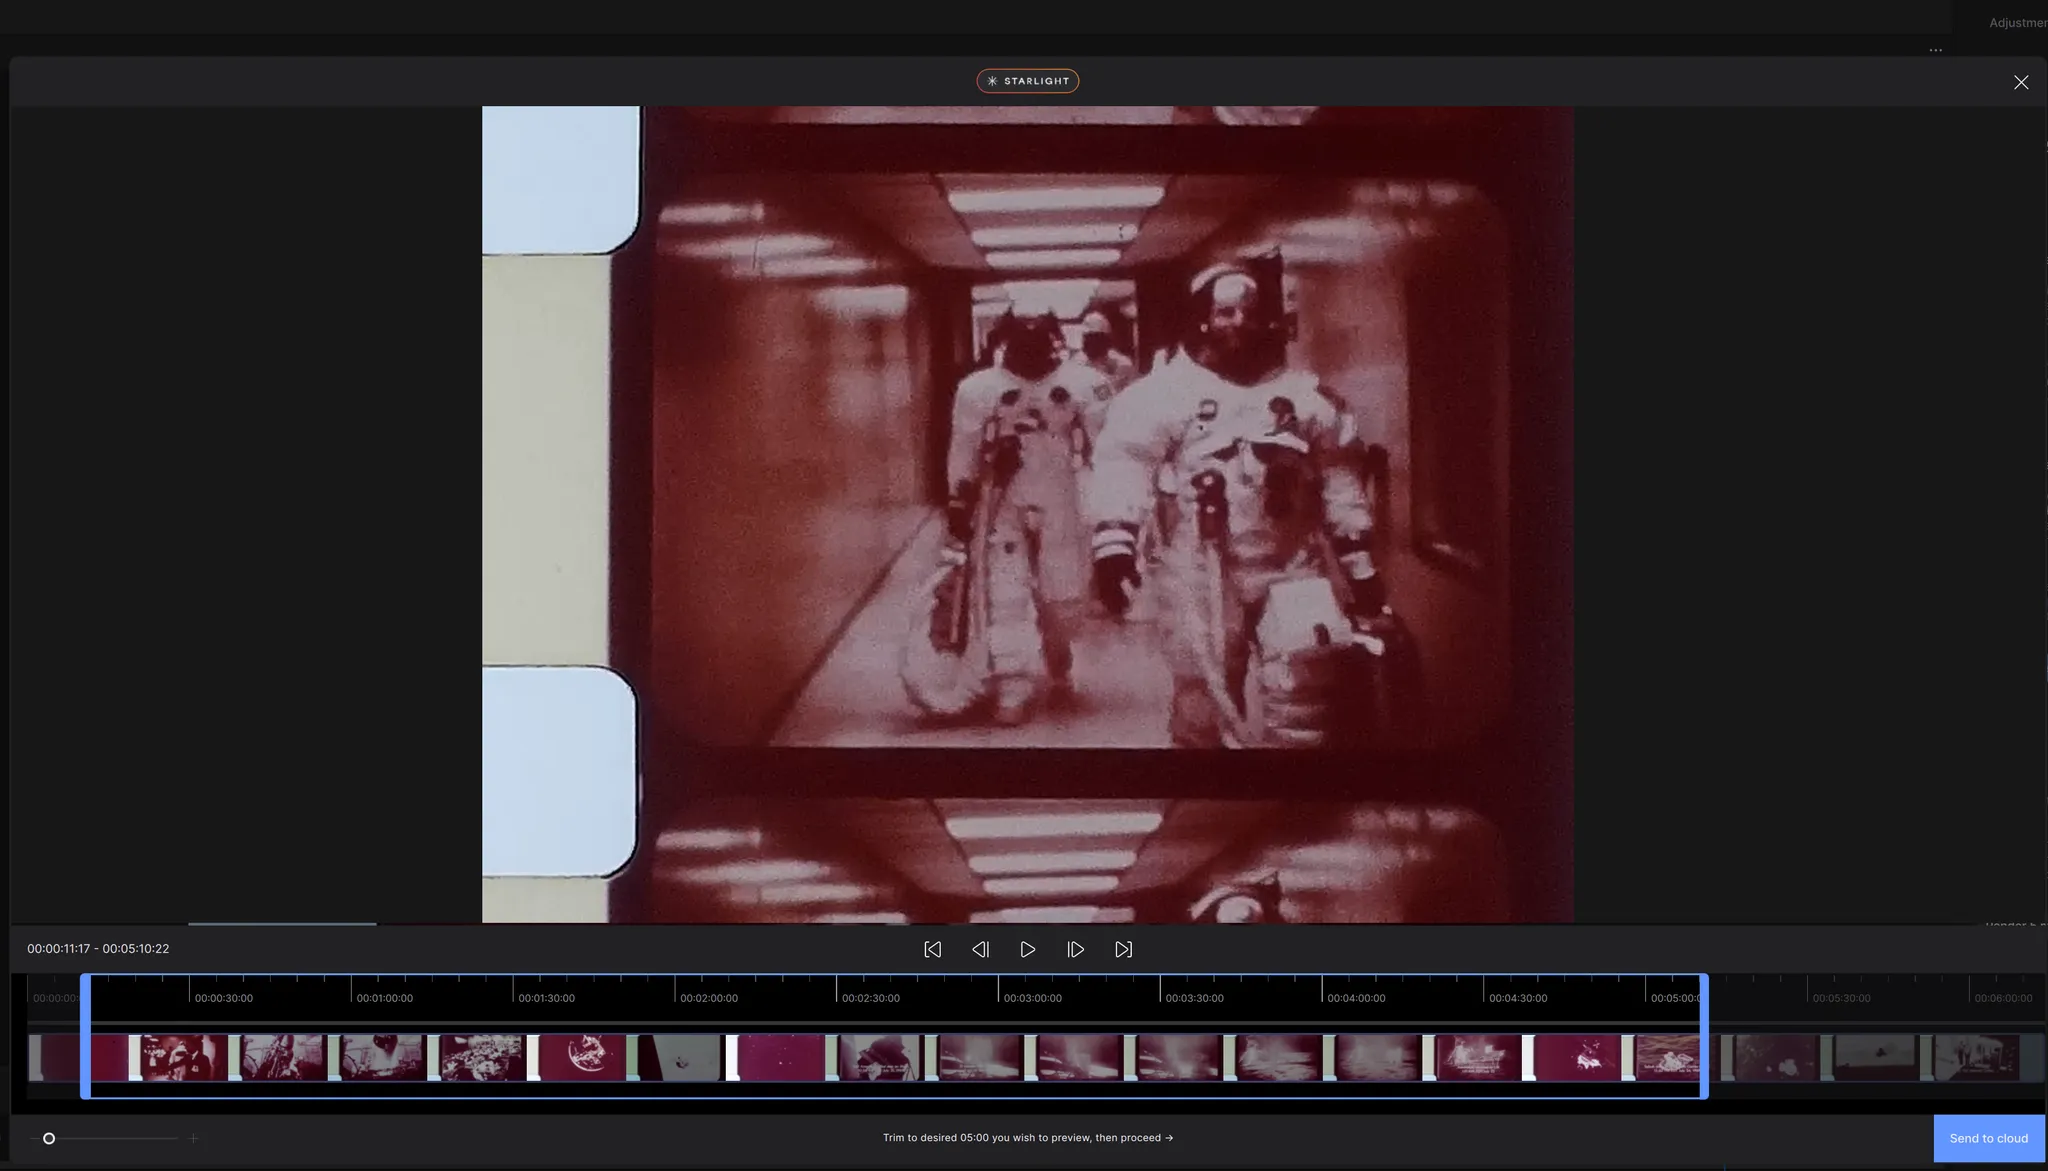
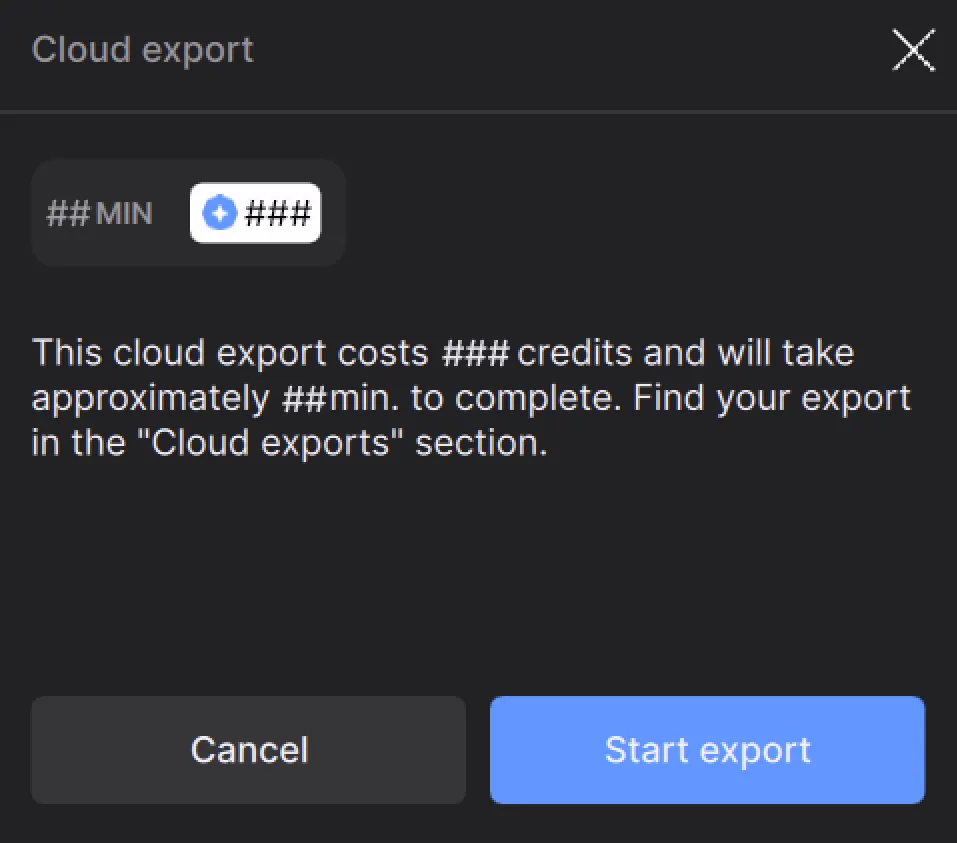
Once you’ve made your trims and selection, press the Send to Cloud button on the lower screen right corner. a Confirmation Pop Up menu will appear. Make sure you have the correct amount of credits for the render. Here you have the option to Cancel or Start the Export.
Cloud Export
Double click on the Export Queue to open the Cloud Export Queue.
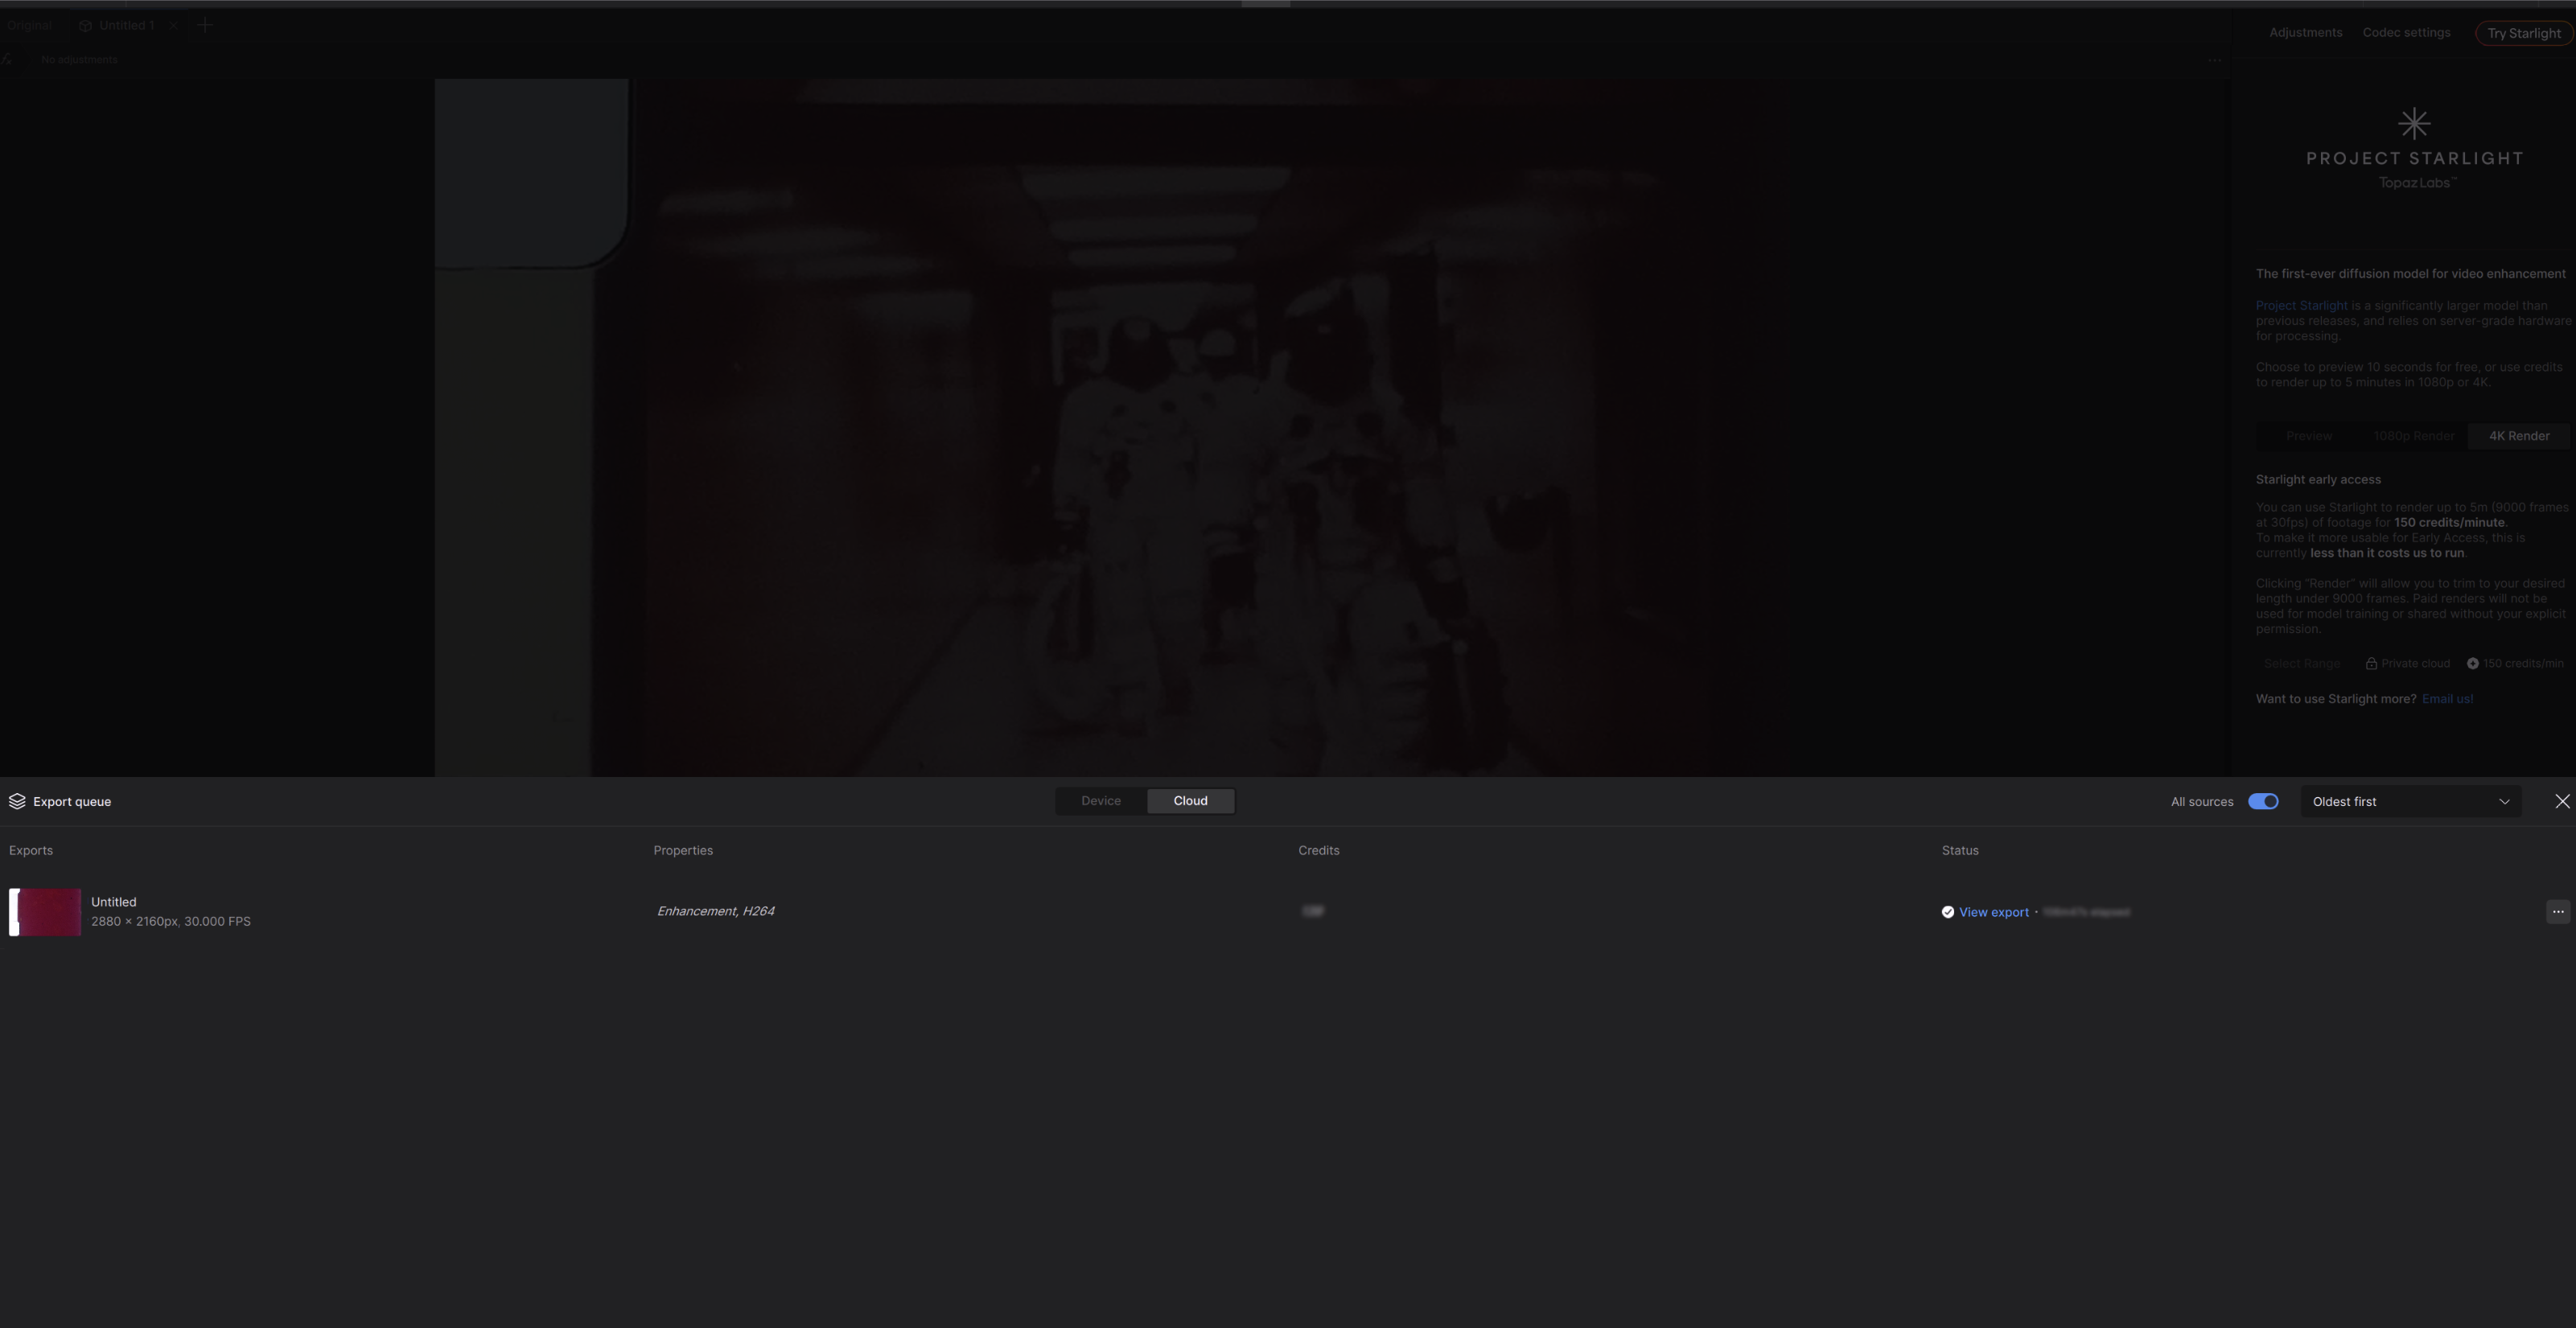
- Export: Shows the video clip that’s rendering on the cloud, the tab name, output resolution and FPS.
- Properties: Will show which enhancements and filters are used.
- Credits: Displays the total credits spent on the render.
- Status: This lets the user see overall render progress. There are several messages to let you know exactly what point of the process your video is undergoing.
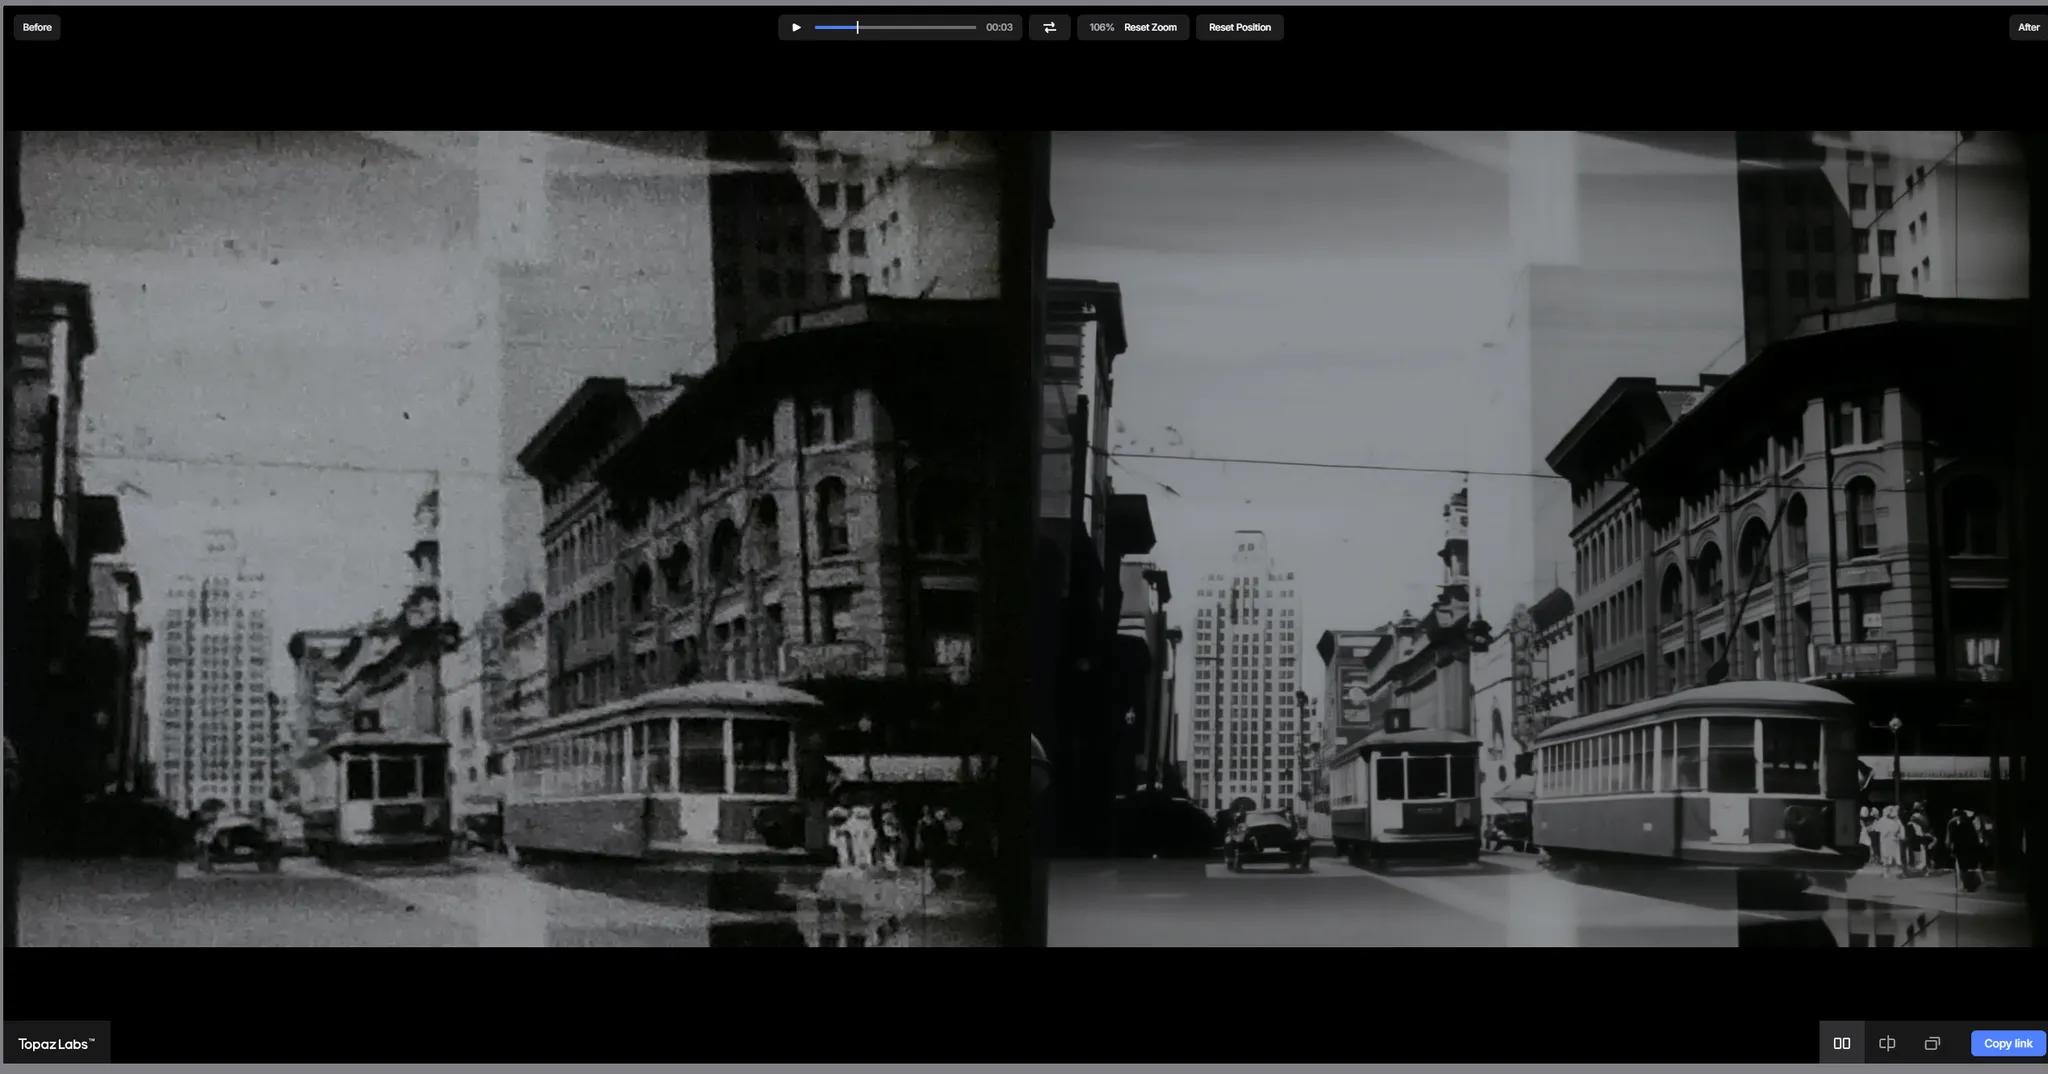
- Compare: Opens up a separate link where you are able to compare and view a before and after of your video. This includes a split, slide and peek views.

- Click to Download: Click on the text to download the video file.
- View Export: Click on the text to view your render in an external player.
Errors
If you come across any errors during renders, the View Logs folder icon will be highlighted. You can click this button to copy and export logs when reaching out to Support.

Additional Options
Next to View Logs, there are three dots with additional options. Clicking on this will open up a drop down menu.
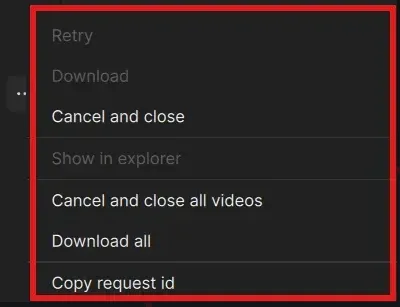
- Retry: If there is an error with your file, you can retry the render. Please copy any logs before restarting as you may need this for troubleshooting.
- Once retry is selected, the app will clear the existing logs. You will only get billed for a completed rendered process. So if your job fails halfway, you will be credited back.
- Download: If you haven’t downloaded your video from the Status Text, you can download from here.
- Cancel and Close: This clears the specific job from the Cloud Exports Queue and cancels the job.
- Show In Explorer: If you have downloaded your Cloud Render, this will open the folder where the job has been saved.
- Cancel and Close All Videos: This clears all the jobs from the Cloud Exports Queue and cancels them all.
- Download All: If you haven’t downloaded your multiple videos from the Status Text individually, you can download all of them from selecting this option.
- Copy Request ID: This is the Cloud Render ID. You may need this for personal record keeping or if you need additional support. When you click on the “Copy Request ID” it will appear as if nothing has happened, but if you paste in a text field you will see your unique Cloud ID. Save this as reference if you encounter any render errors and you need to reach out to the Support Team.
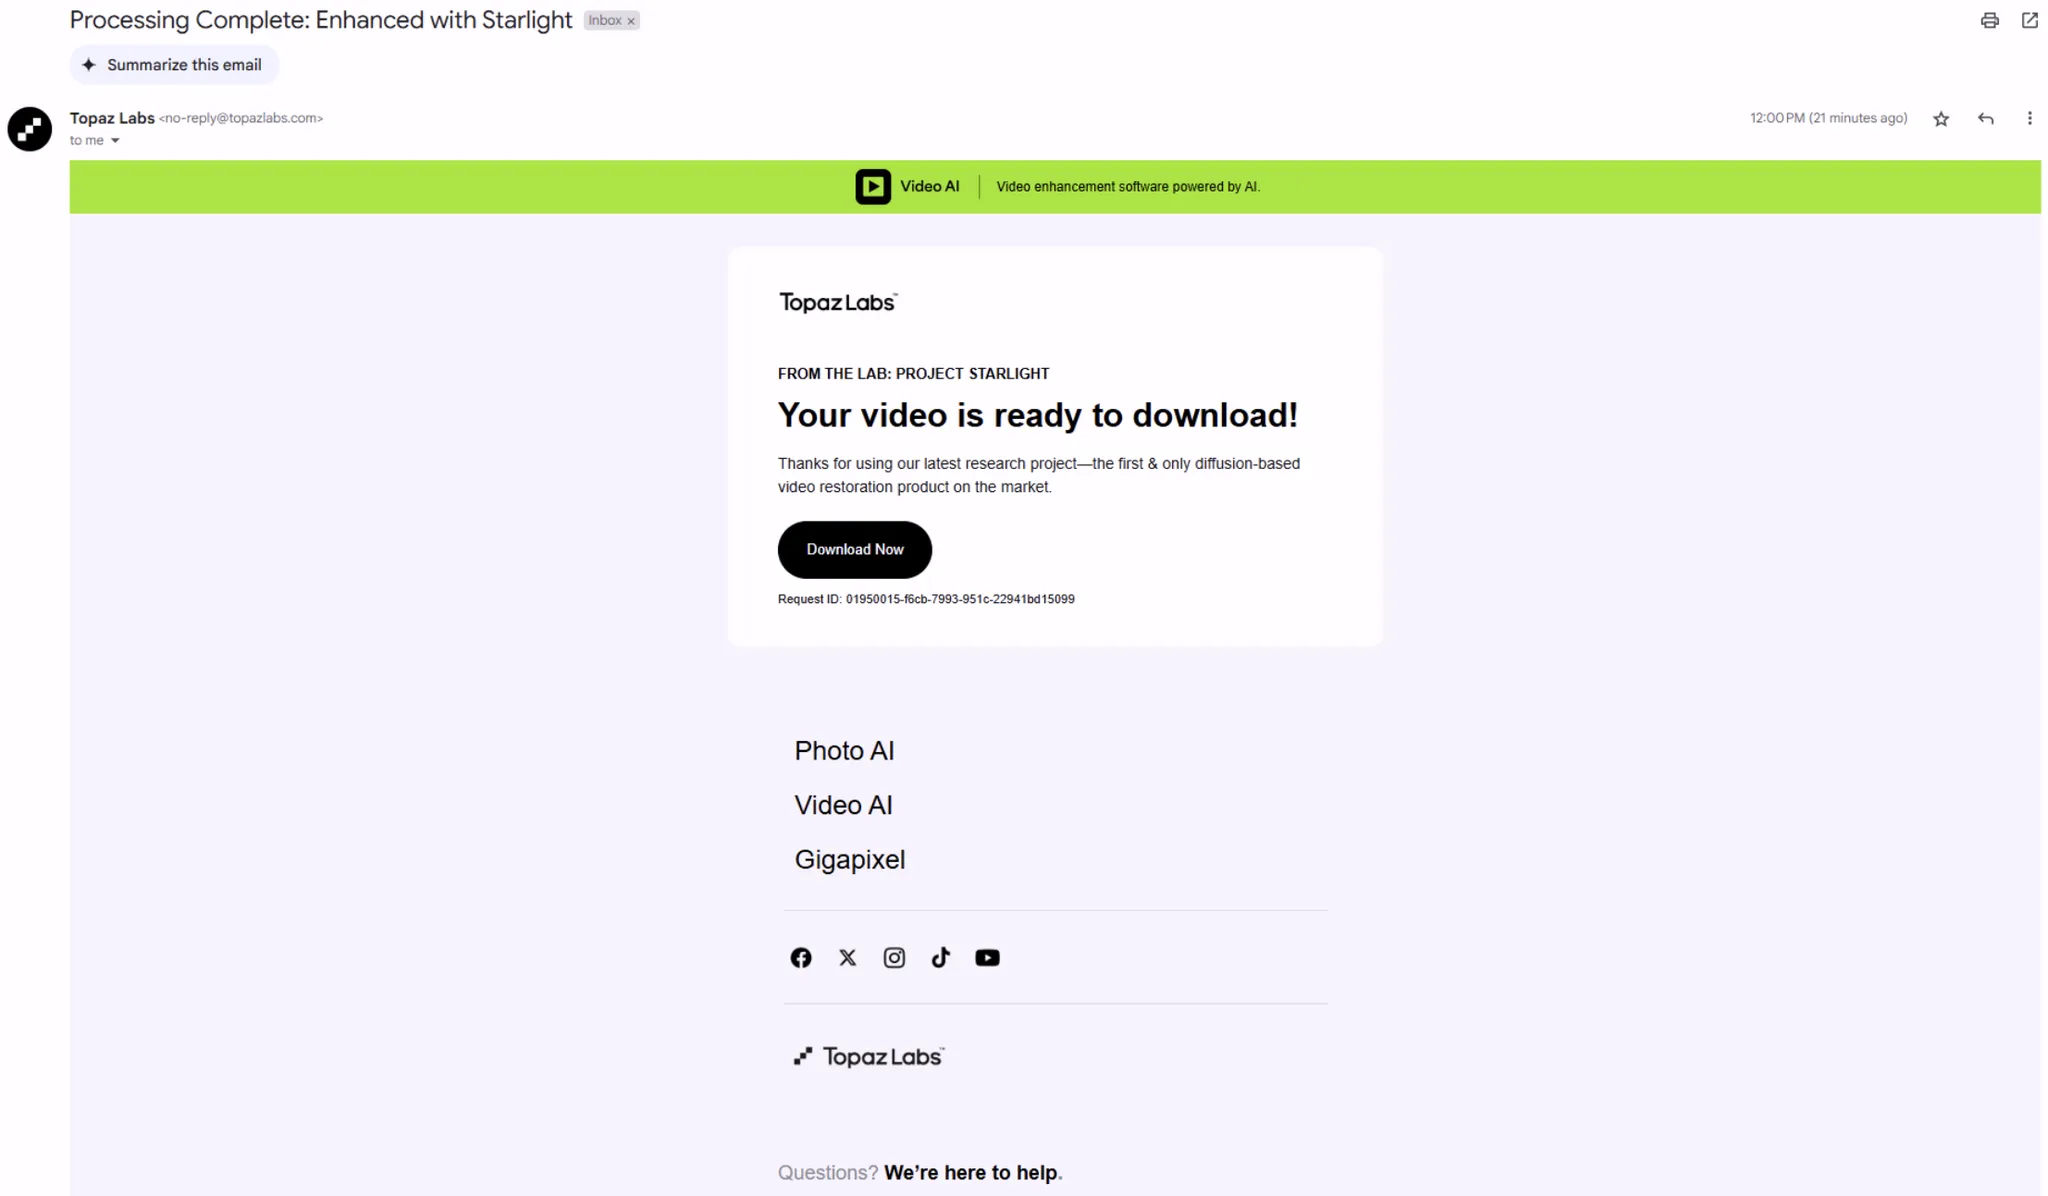
Email Notification
Starlight Rendering will take some time to process. Your time is valuable, so instead of having you wait for updates within the application, you will receive an email notification and download link when processing has completed.
Things to Consider
While this is new for all and we continue exploring and refining Project Starlight, there are a few things to consider when using this new tool:
- This is a new AI model that is both complex and resource heavy. Meaning, that it could take hours to process. This is why, Project Starlight is currently only available via cloud rendering.
- For now, you can only render 9000 frames, which comes out to about 5 minutes of 30 FPS. We are exploring options to allow longer renders in the future.
- Recommended to use videos at or under 1920x1080 resolution.
- From the desktop, Starlight/Cloud rendering supports AV1, VP9, H264, H265 video codecs.
- The web input, however, only accepts H264 MP4 files.
- Currently only exports 1080p and 4K, MP4 videos.
- Renders will only be available for a max of 7 days.
- Be sure to make a copy of your Cloud Render IDs. These may not always be recoverable.
- Please note that if you have text that is too small, blurry or inconsistent, the result may not be "sp3ll3d" correctly. If you can barely make it out, so will the AI model. It may assume that the text is a texture or pattern.
- Water may appear smooth when compared to source.
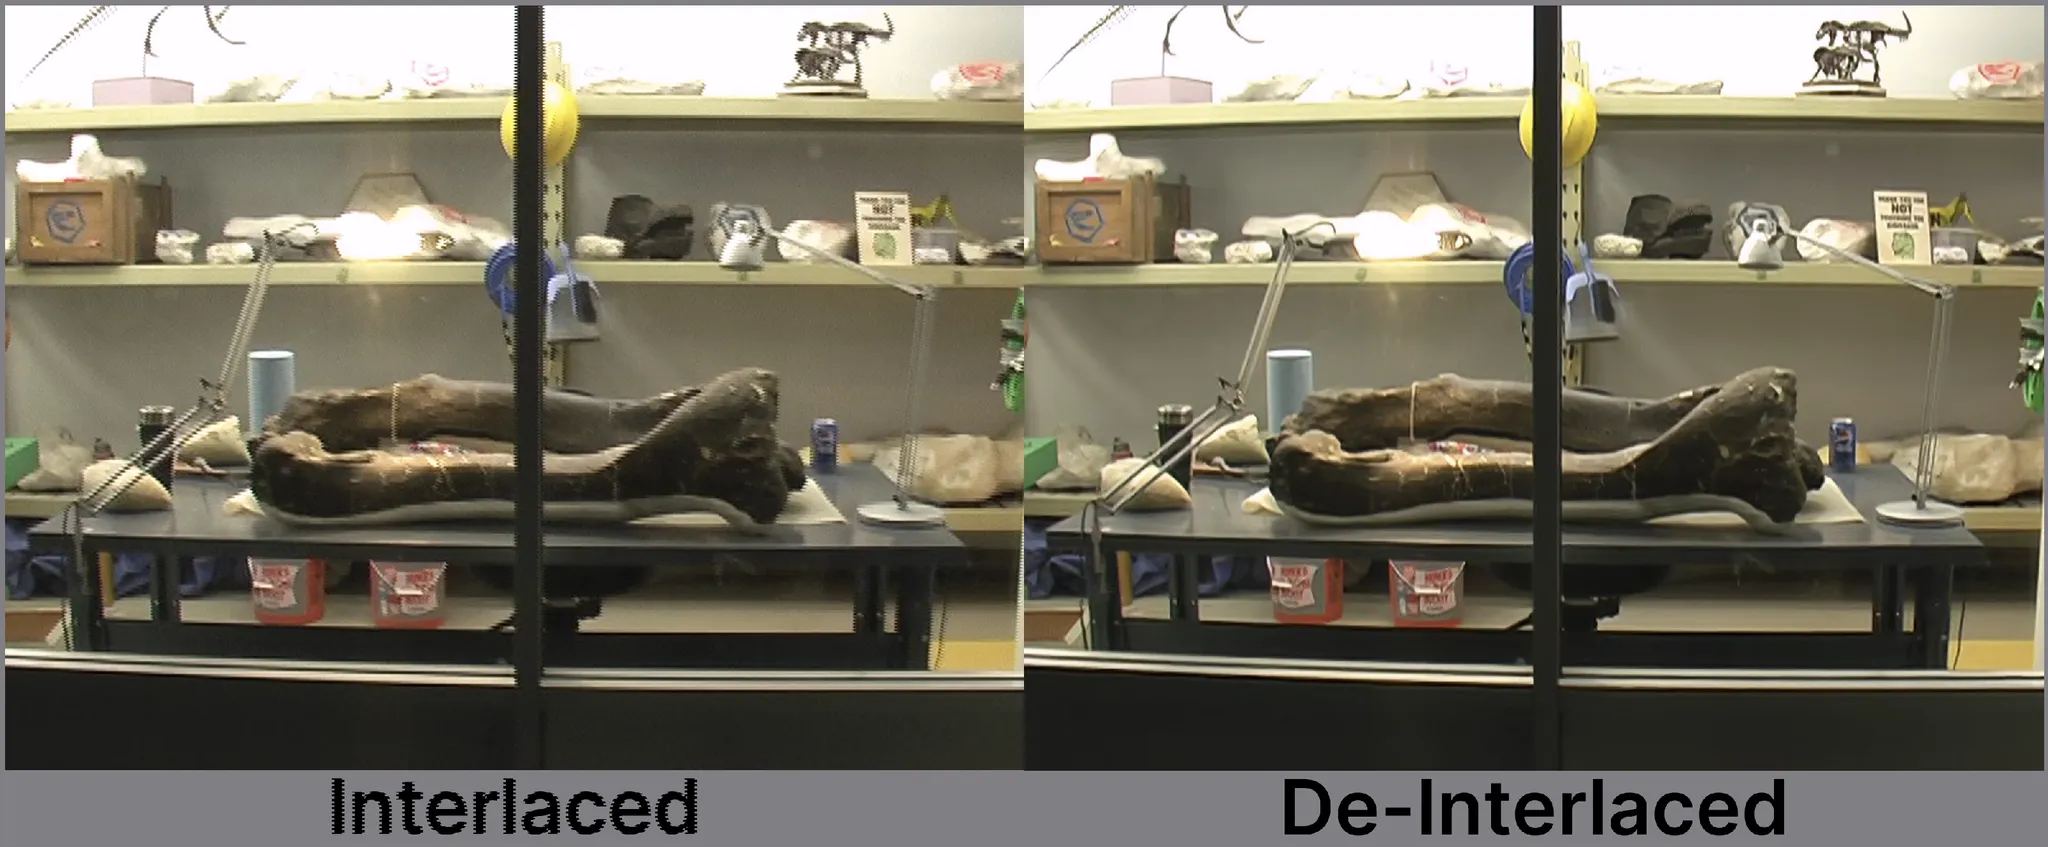
- If you have interlaced videos, it is recommended that you deinterlace first before enhancing with Project Starlight.
Ultimately, we want users to have fun testing Project Starlight! This is a new horizon for everyone, and another great leap to learn and create for today and tomorrow!