Dust & Scratch (Legacy)
This is the first AI model of its kind, built specifically to handle one of the most time-consuming tasks in photo restoration—removing dust, scratches, and surface damage.
System Requirements
The Dust & Scratch AI model has higher requirements for processing than other AI models. See the full System Requirements page here.
For Windows:
- 8GB VRAM is required for processing locally.
For Mac:
- Mac with Intel CPU/AMD Graphic cards: The stable diffusion technology used on this AI model is not supported on these Mac Intel/AMD setups.
- Mac M-Chip machines (Apple Silicon): Requires macOS 14 (Sonoma) or higher. The model also requires 16GB RAM minimum, more is recommended.
Overview
For anyone working with scanned film, archives, or damaged photo collections, manual cleanup can take hours or even days to do. There are few, if any, automated solutions on the market today—until now. This two-step workflow combines a smart Dust & Scratch model with a fast and intuitive Healing Brush, offering a complete, time-saving solution right inside Photo AI.
The Dust & Scratch model has no controls—it’s designed to give great results right out of the box and should be used early in your editing workflow. The healing tool gives you added flexibility to fix trouble spots quickly and naturally after the initial render is finished.
How to use
- When running autopilot, select the “Choose Something Else” option to locate and select the Dust & Scratch model.
- When not running autopilot, choose "Add enhancement" to locate the Dust & Scratch model.
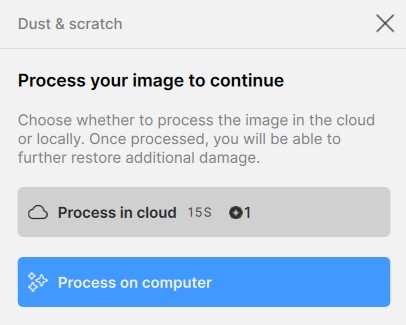
- You can choose from "Process in cloud" for quicker processing or if your machine does not meet the system requirements for this model or "Process on computer" for local processing.
- Choose from "Process in cloud" and "Process on computer" options.
- Once the Dust & Scratch removal is complete, you’ll move on to Healing. Use the Healing brush to select areas with larger scratches or damage. As soon as you let go of the mouse or pen, the app will process the selected area immediately—no extra clicks required.
- Once you’ve cleaned up the damaged areas, simply click Done to finish the enhancement.
Best Practices
- Use the tool as the first step before Denoise and other enhancements.
- It's best to use the Healing brush on smaller areas when possible
- It's possible to reopen the Healing brush tool by clicking on it in the enhancement stack to do more fine-tuning if necessary.
What if I don't get good results?
Our Phd researchers are working incredibly hard to improve this model EVEN MORE, but sometimes your images may be slightly too soft, over-processed, or details from the background may be removed.
Pro Tips
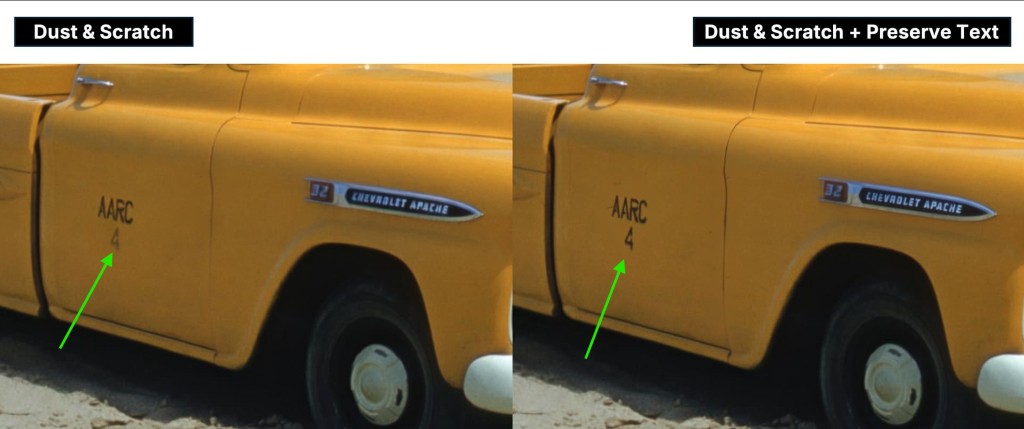
If your file has text in some areas - you can resurrect some of these details using the Preserve Text enhancement. Here’s an example:
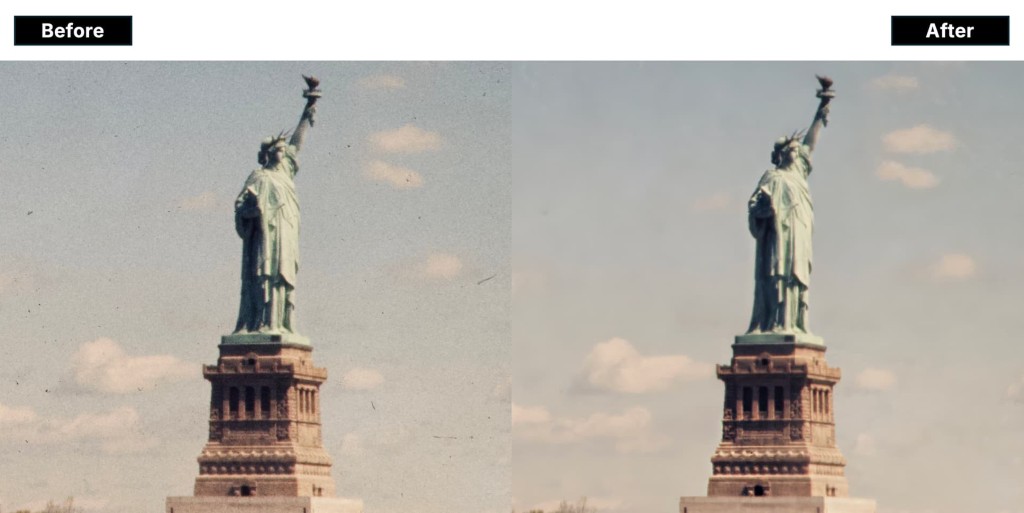
Super Focus is also excellent when combined with Dust & Scratch for old photos, which are also soft. Check out this example: