Generative Models
Introduced in v7.1.0, Gigapixel now has generative AI models that produce outstanding results for more powerful enhancements.
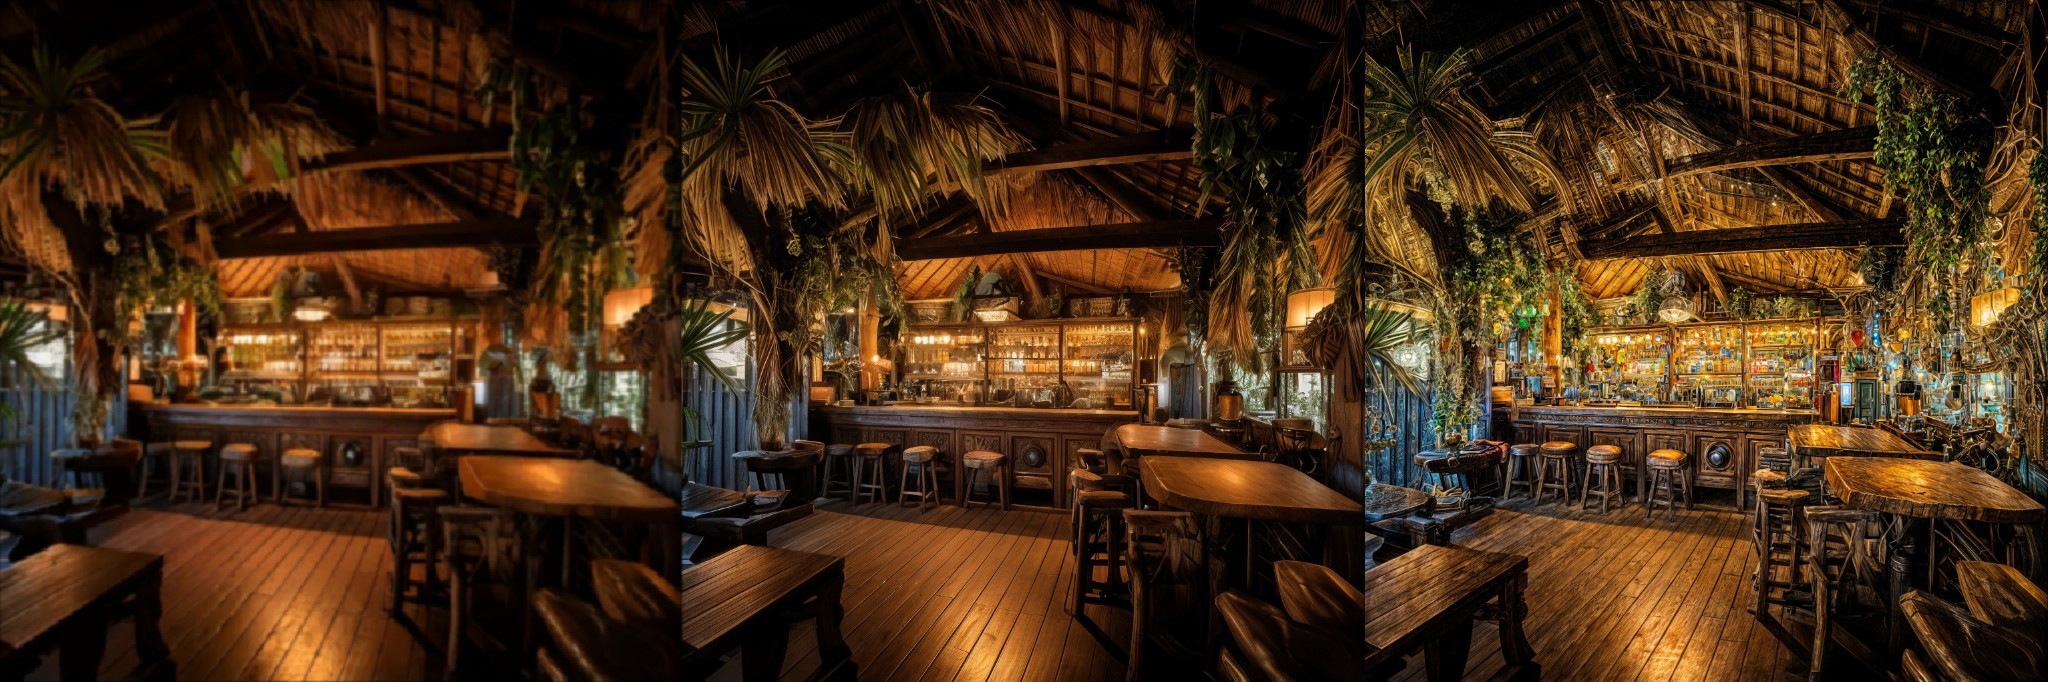
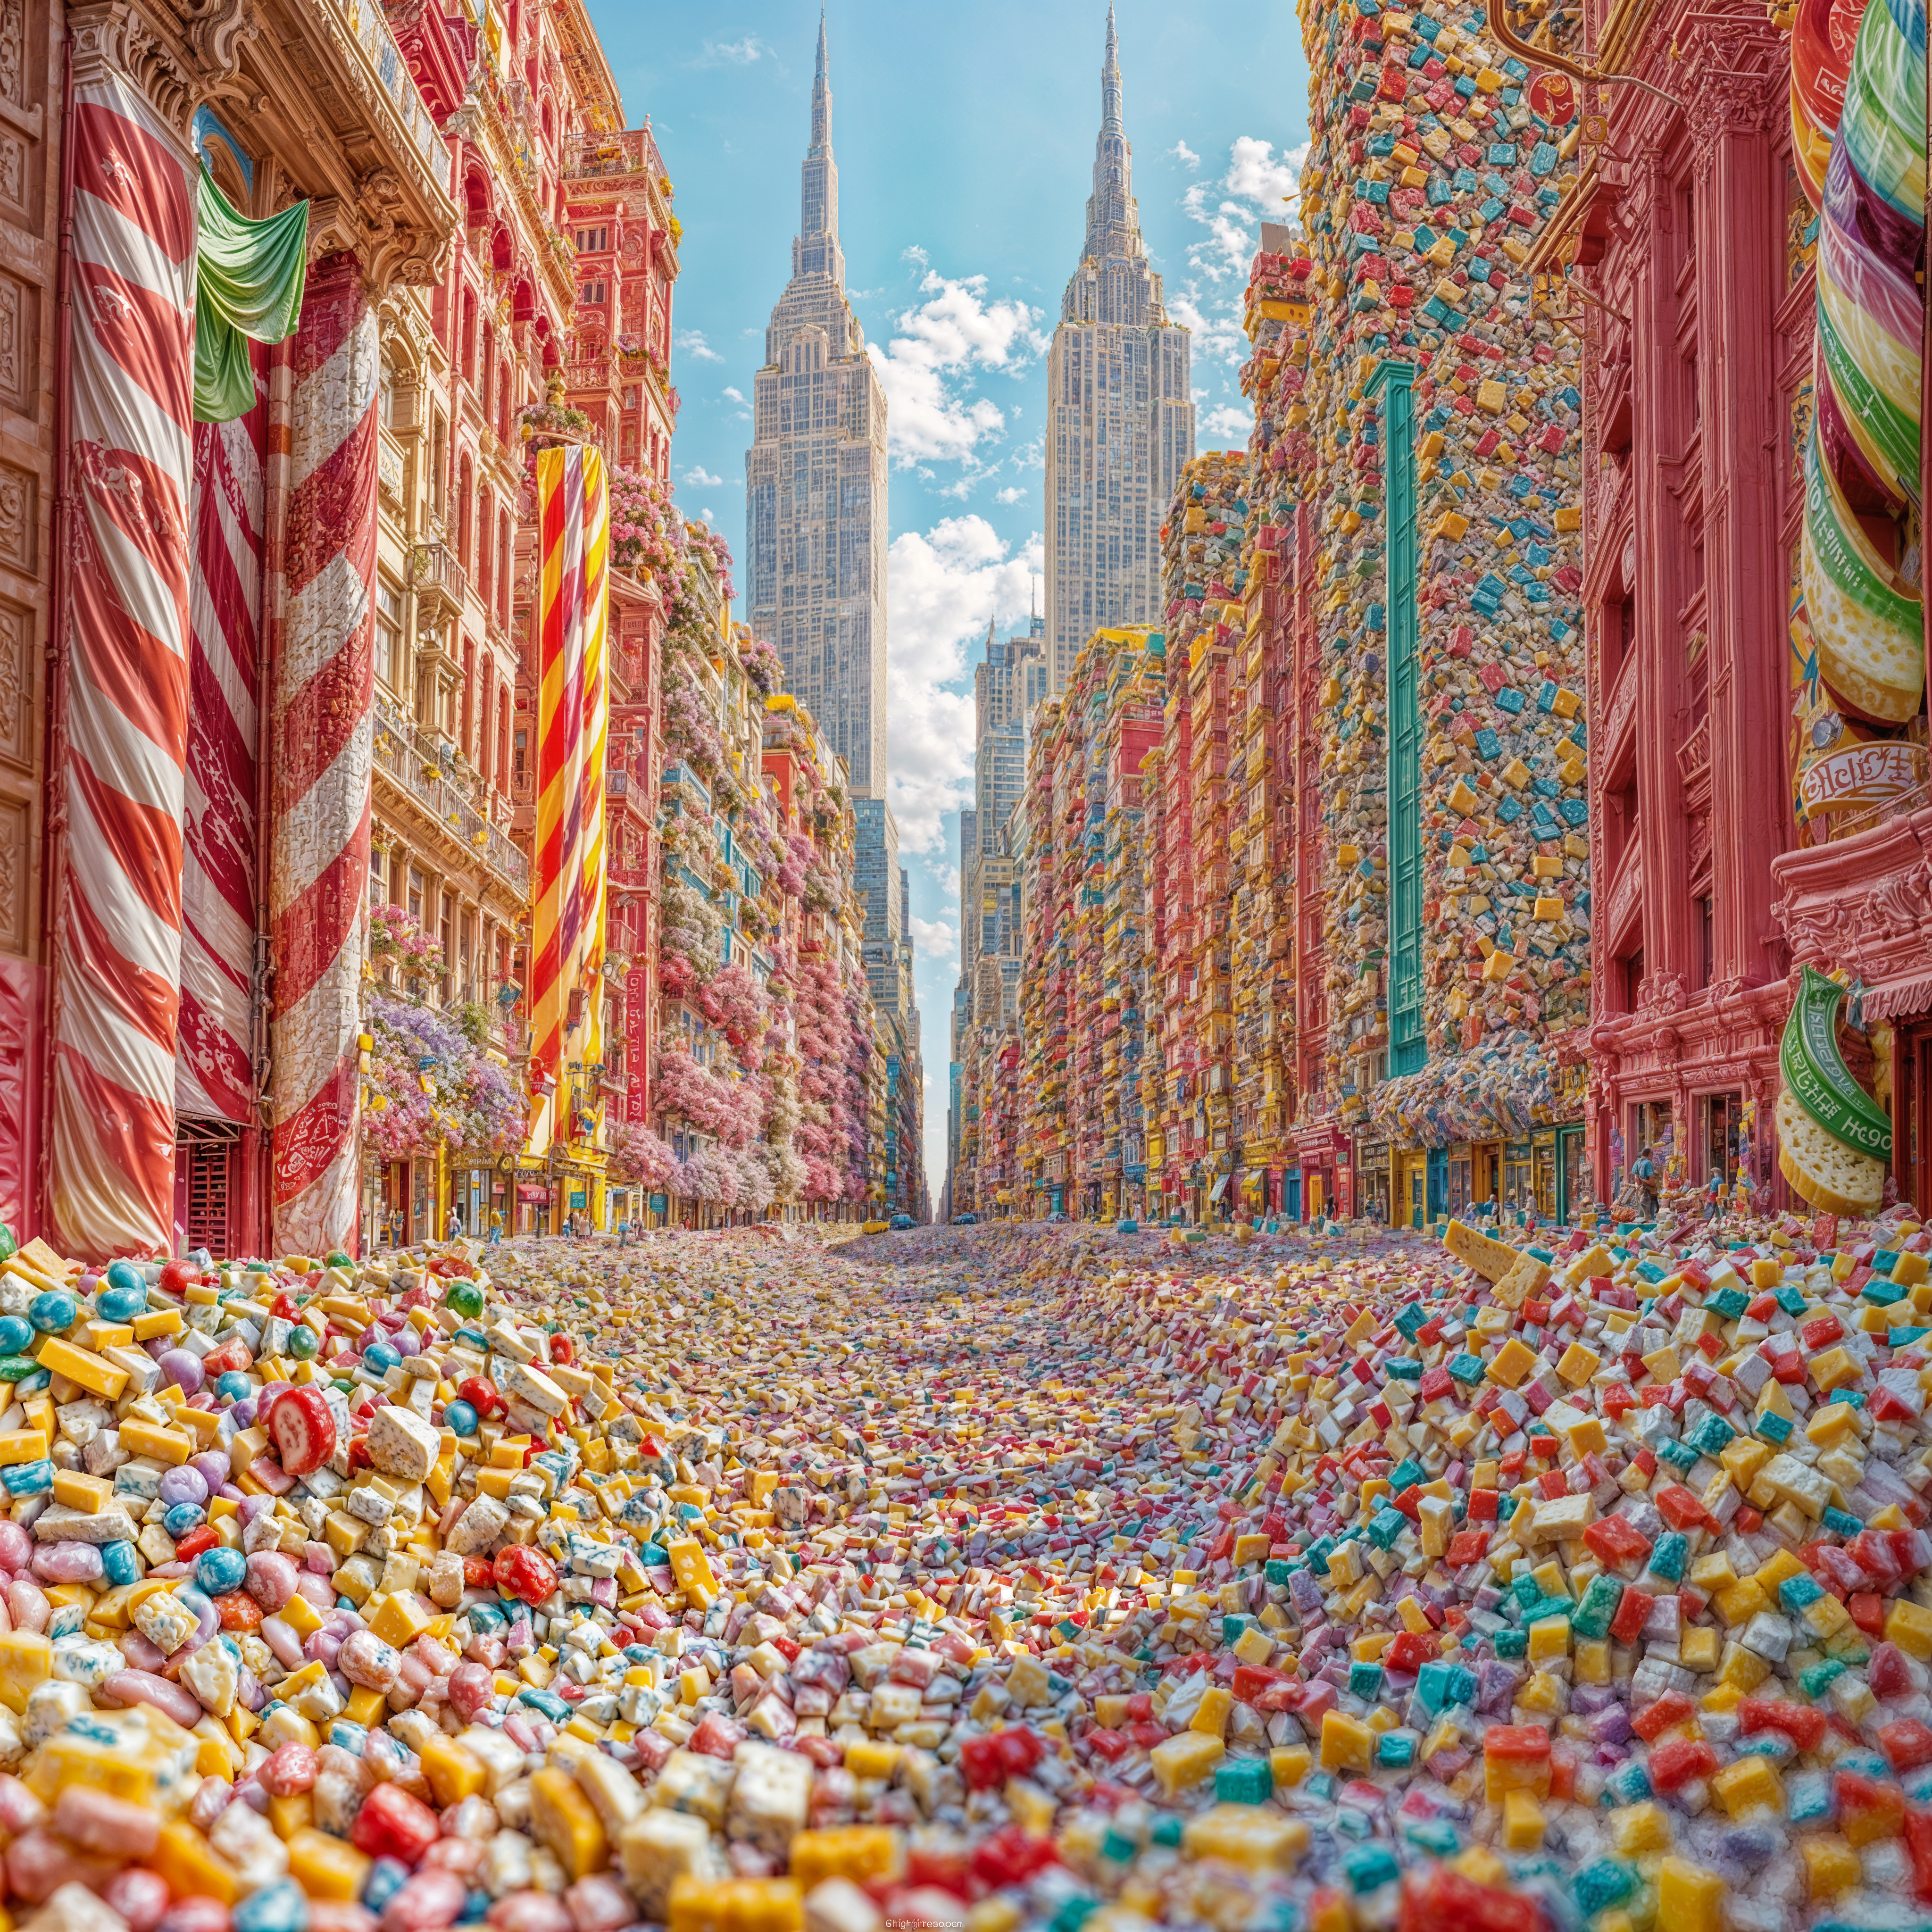
Below shows an example of an AI generated image compared with results from Redefine creative Low & Max.
System Requirements
Recover and Redefine have higher requirements for processing than the core models.
- Dedicated graphics with 8GB+ of VRAM is required for processing locally
- 24GB+ of system RAM is required for ARM-based systems
Verification pending for dedicated Intel Arc, A-series graphics cards
- macOS 14+ is required for all generative models
- Recover v1 is compatible with Intel-based Macs that have AMD Radeon graphics and 8GB+ of VRAM
- Recover v2 & Redefine require Apple Silicon with 16GB+ of RAM
Cloud rendering currently supports output size up to 256MP. Output file size is measured by megapixels (MP). For example, a 4000 × 6000 px image is 24MP.
Recover v2
Optimized for speed, Recover v2 is faster than Recover v1. This model brings the best upscaling fidelity for old and low quality photos.
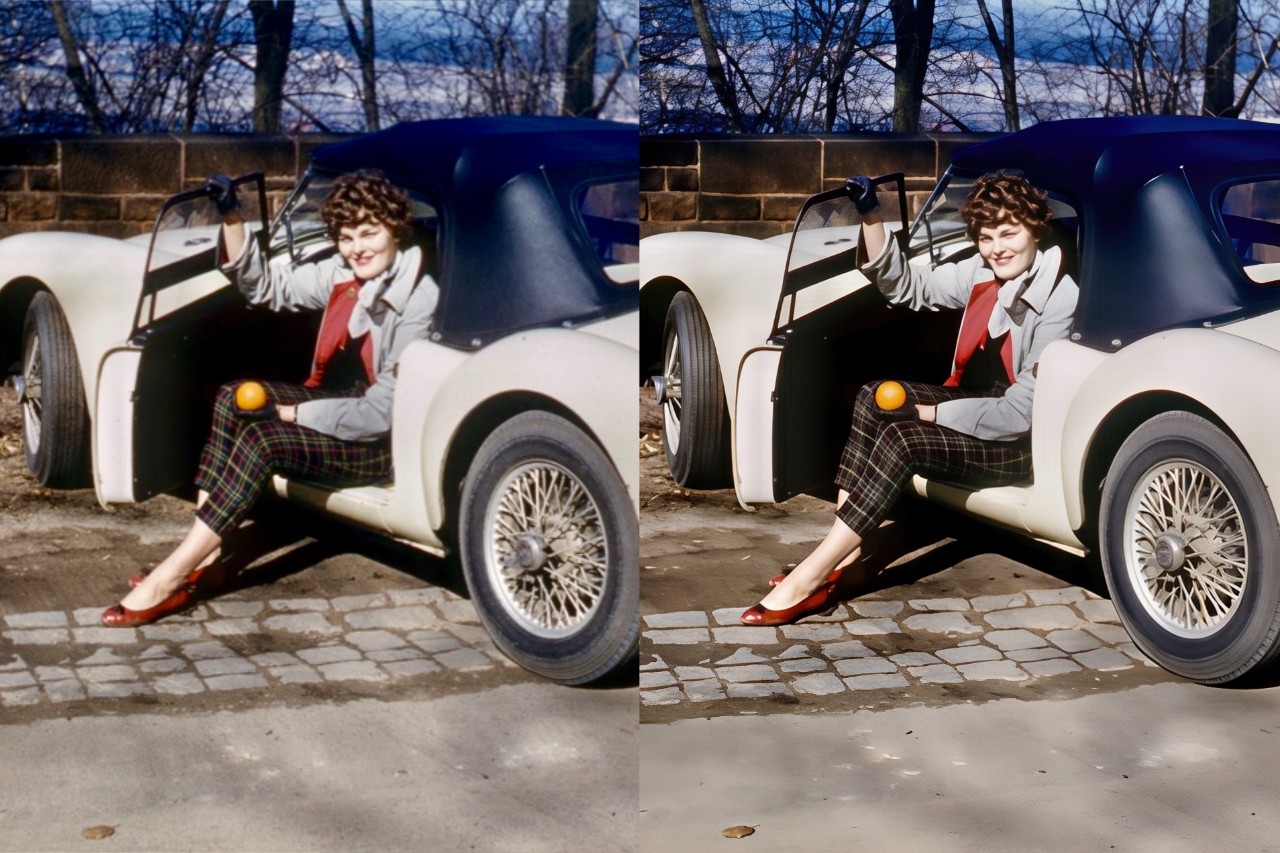
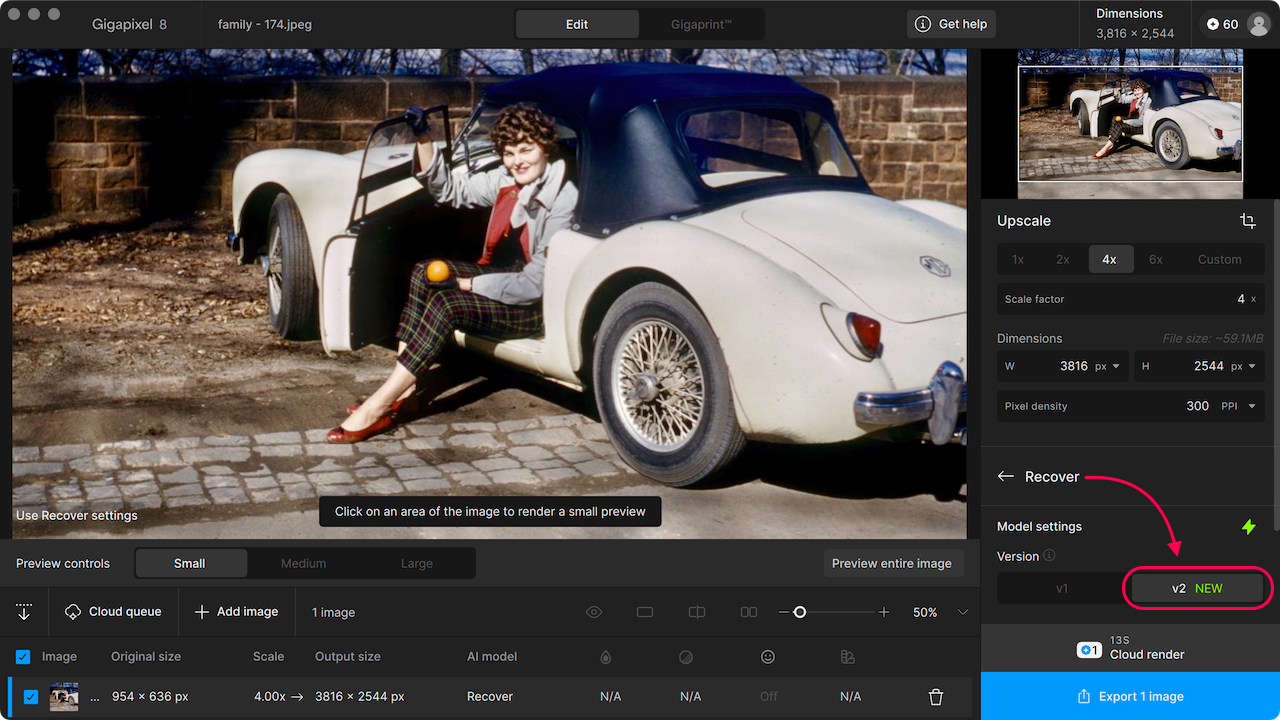
Using Recover v2
- Import your image
- Under the Generative header, select Recover
- Use the preview controls to adjust the size of the thumbnail
Click anywhere in the viewer to begin the preview process
Or, select the Preview entire image button - Use the Detail slider to adjust enhancement as desired
- Click Export to keep your enhanced image
Or, choose to upload for Cloud rendering
Pre-downscaling
Introduced in v8.4.0, an action for pre-downscaling has been added to improve working with larger images that suffer from false resolution. These images tend to be low information dense—where pixel dimensions have increased without a meaningful addition of detail. Pre-downscaling addresses this by intelligently optimizing image input before enhancement.
How it works:
- Pre-downscaling resamples the image to concentrate image density
- The result is then upscaled using AI to generate natural results
- Choose between three levels of downscale intensity
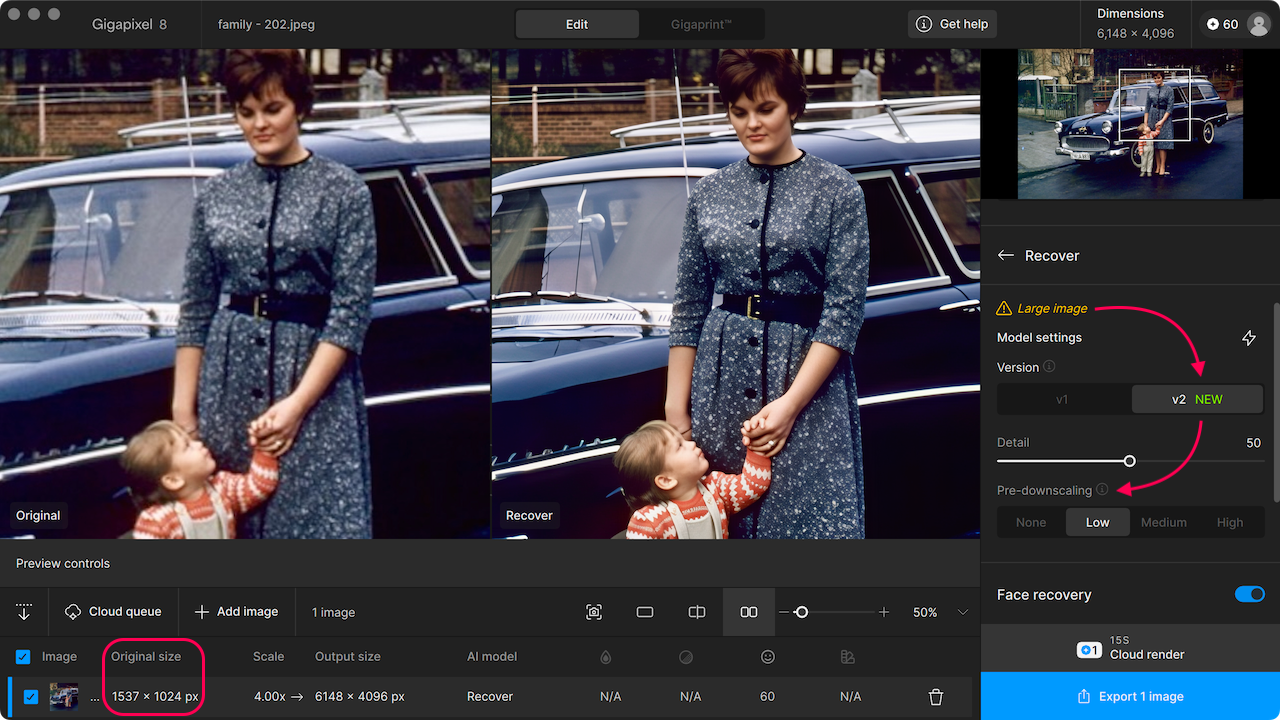
When to use Pre-downscaling:
- When images exceed 1000px on both sides
- Ideal for old JPEGs, scanned photos, or poorly upscaled content
- Select None if you prefer to skip pre-downscaling
Redefine BETA
For use with low quality or AI generated images, use Redefine to add definition and detail. You can prioritize upscaling for either realistic fidelity or creative distinction.
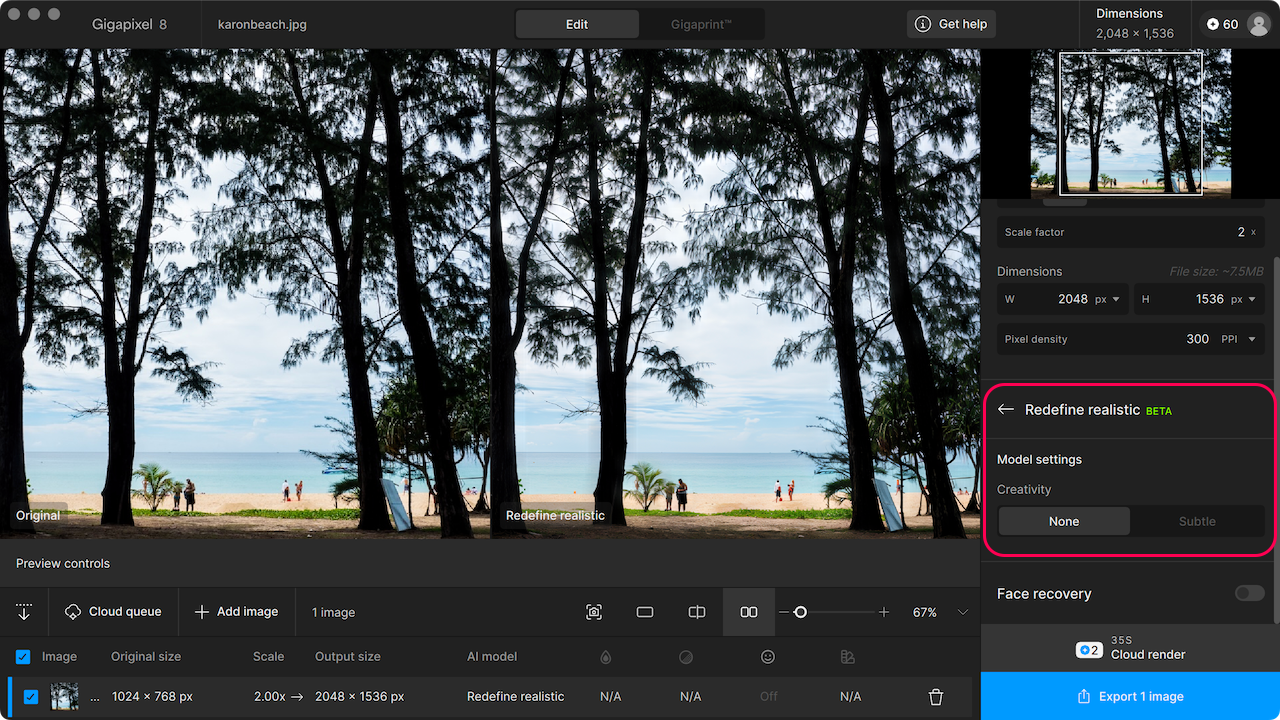
Using Redefine realistic
- Import your image
- Under the Generative header, select “Redefine realistic”
- Choose between None or Subtle to set the level of adjustment that will be applied
- Selecting Subtle will enable the option for directing the adjustment using the Image description
- Use the preview controls to adjust the size of the thumbnail
Click anywhere in the viewer to begin the preview process
Or, select the Preview entire image button - Click Export to keep your enhanced image
Or, choose to upload for Cloud rendering
Using Redefine creative
- Import your image
- Under the Generative header, select “Redefine creative”
- Choose between Low, Medium, High, or Max to set the level of adjustment that will be applied
- Use the Image description to direct the changes that will be applied to the image
- Adjust the Texture slider to refine the results
- Use the preview controls to adjust the size of the thumbnail
Click anywhere in the viewer to begin the preview process
Or, select the Preview entire image button - Click Export to keep your enhanced image
Or, choose to upload for Cloud rendering
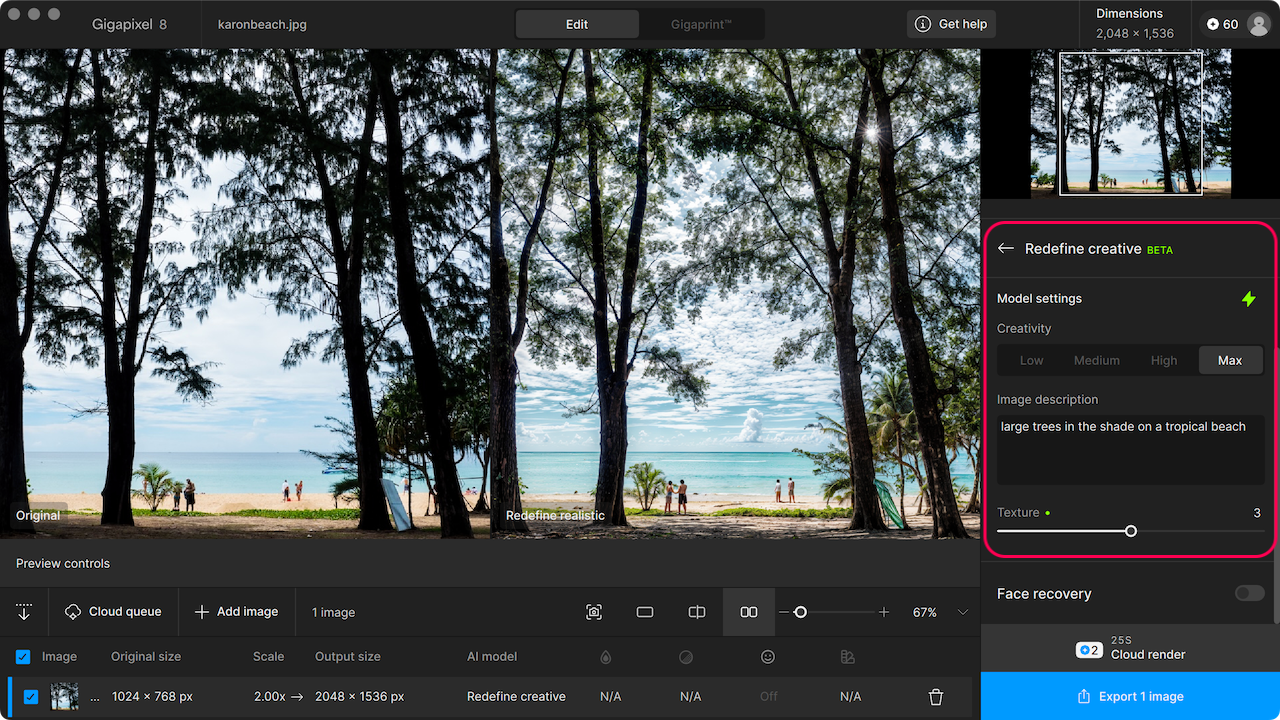
- Creativity - Low, Medium, High, Max
- Image description - Utilize this if you want to be specific about the details you're looking for. The model responds to a descriptive statement versus a directive one. For example, use the phrase "girl with red hair and blue eyes" instead of "change the girl's hair to red and make her eyes blue"
- Texture - adjust the level of detail that will be generated
Image Description
Samples show before and after using Max creativity.
Candyland (AI generated)
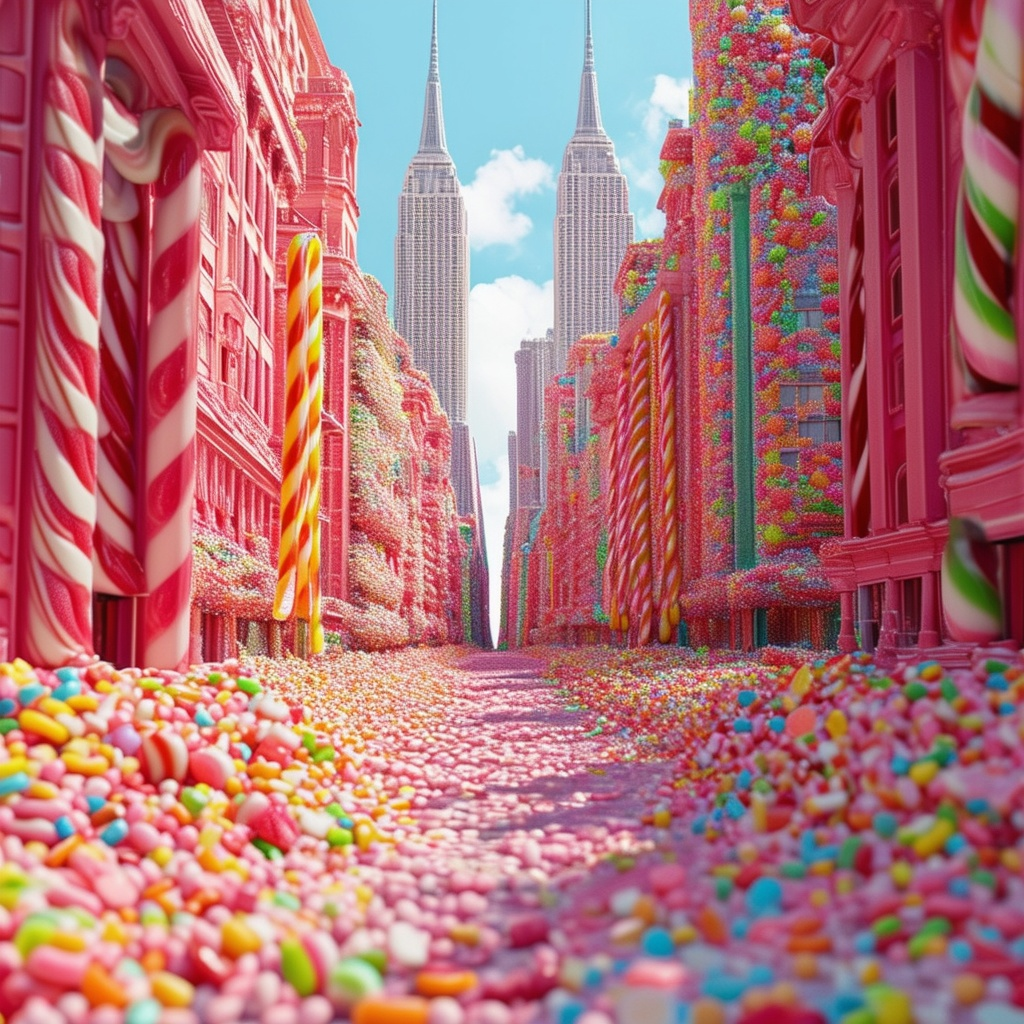
"A city made of colorful cheeses"
A park in the city (photograph)
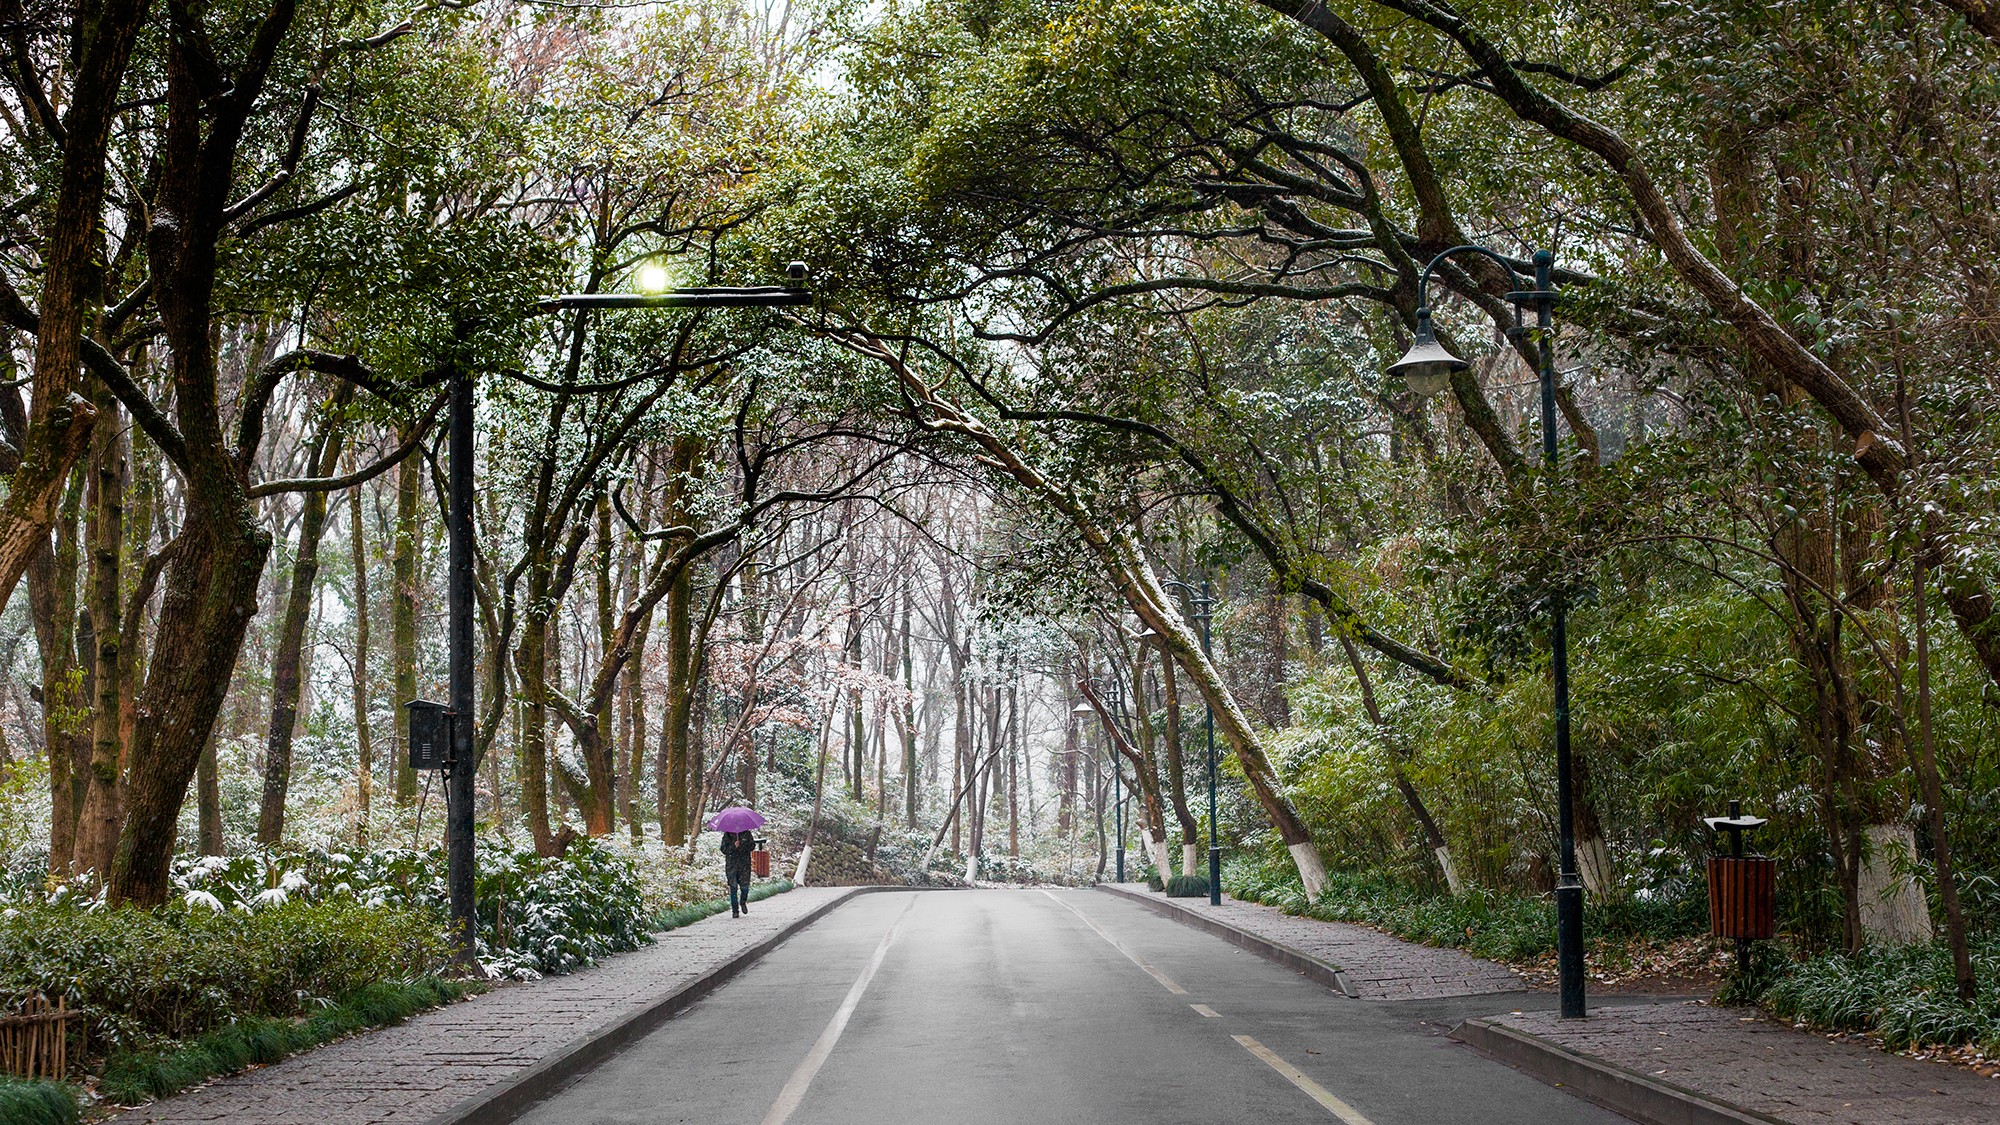
"A city at night with falling leaves"

Check out the Community pages for tips on writing image descriptions from other users.