Cloud Rendering
Topaz Video Cloud Rendering
If you have a system with low GPU resources, or very long video files that overwhelm your machine when rendering, then this may be the solution you’re looking for!
This is an additional feature, so local rendering is not going anywhere. You can continue to render locally as you’ve always been able to.
Our users, from home users all the way to large enterprises, rely heavily on the privacy-focused offline rendering that Topaz Video is known for and we will continue to treat this option as a priority for our users.
Cloud Rendering provides high-performance processing for tasks that may exceed local hardware capabilities and is required when using Starlight models on a Personal license.
- Processing large batches of videos in parallel: There’s no limit to how many simultaneous jobs you can queue on the Cloud Rendering service, which can greatly improve your overall output of clips.
- Processing long videos on low-power machines: Cloud Rendering excels when working with videos that are 30 minutes or longer, which allows us to parallelize across more GPU instances. For users on laptops with less-capable GPUs, you can put your machine to sleep once the video is uploaded without worrying about renders being paused or cancelled.
Please note that Starlight models are limited to 9,000 frames per job when using Cloud Rendering.
Layout Update
With version 5.5, there are a few new updates on the layout to take note of.
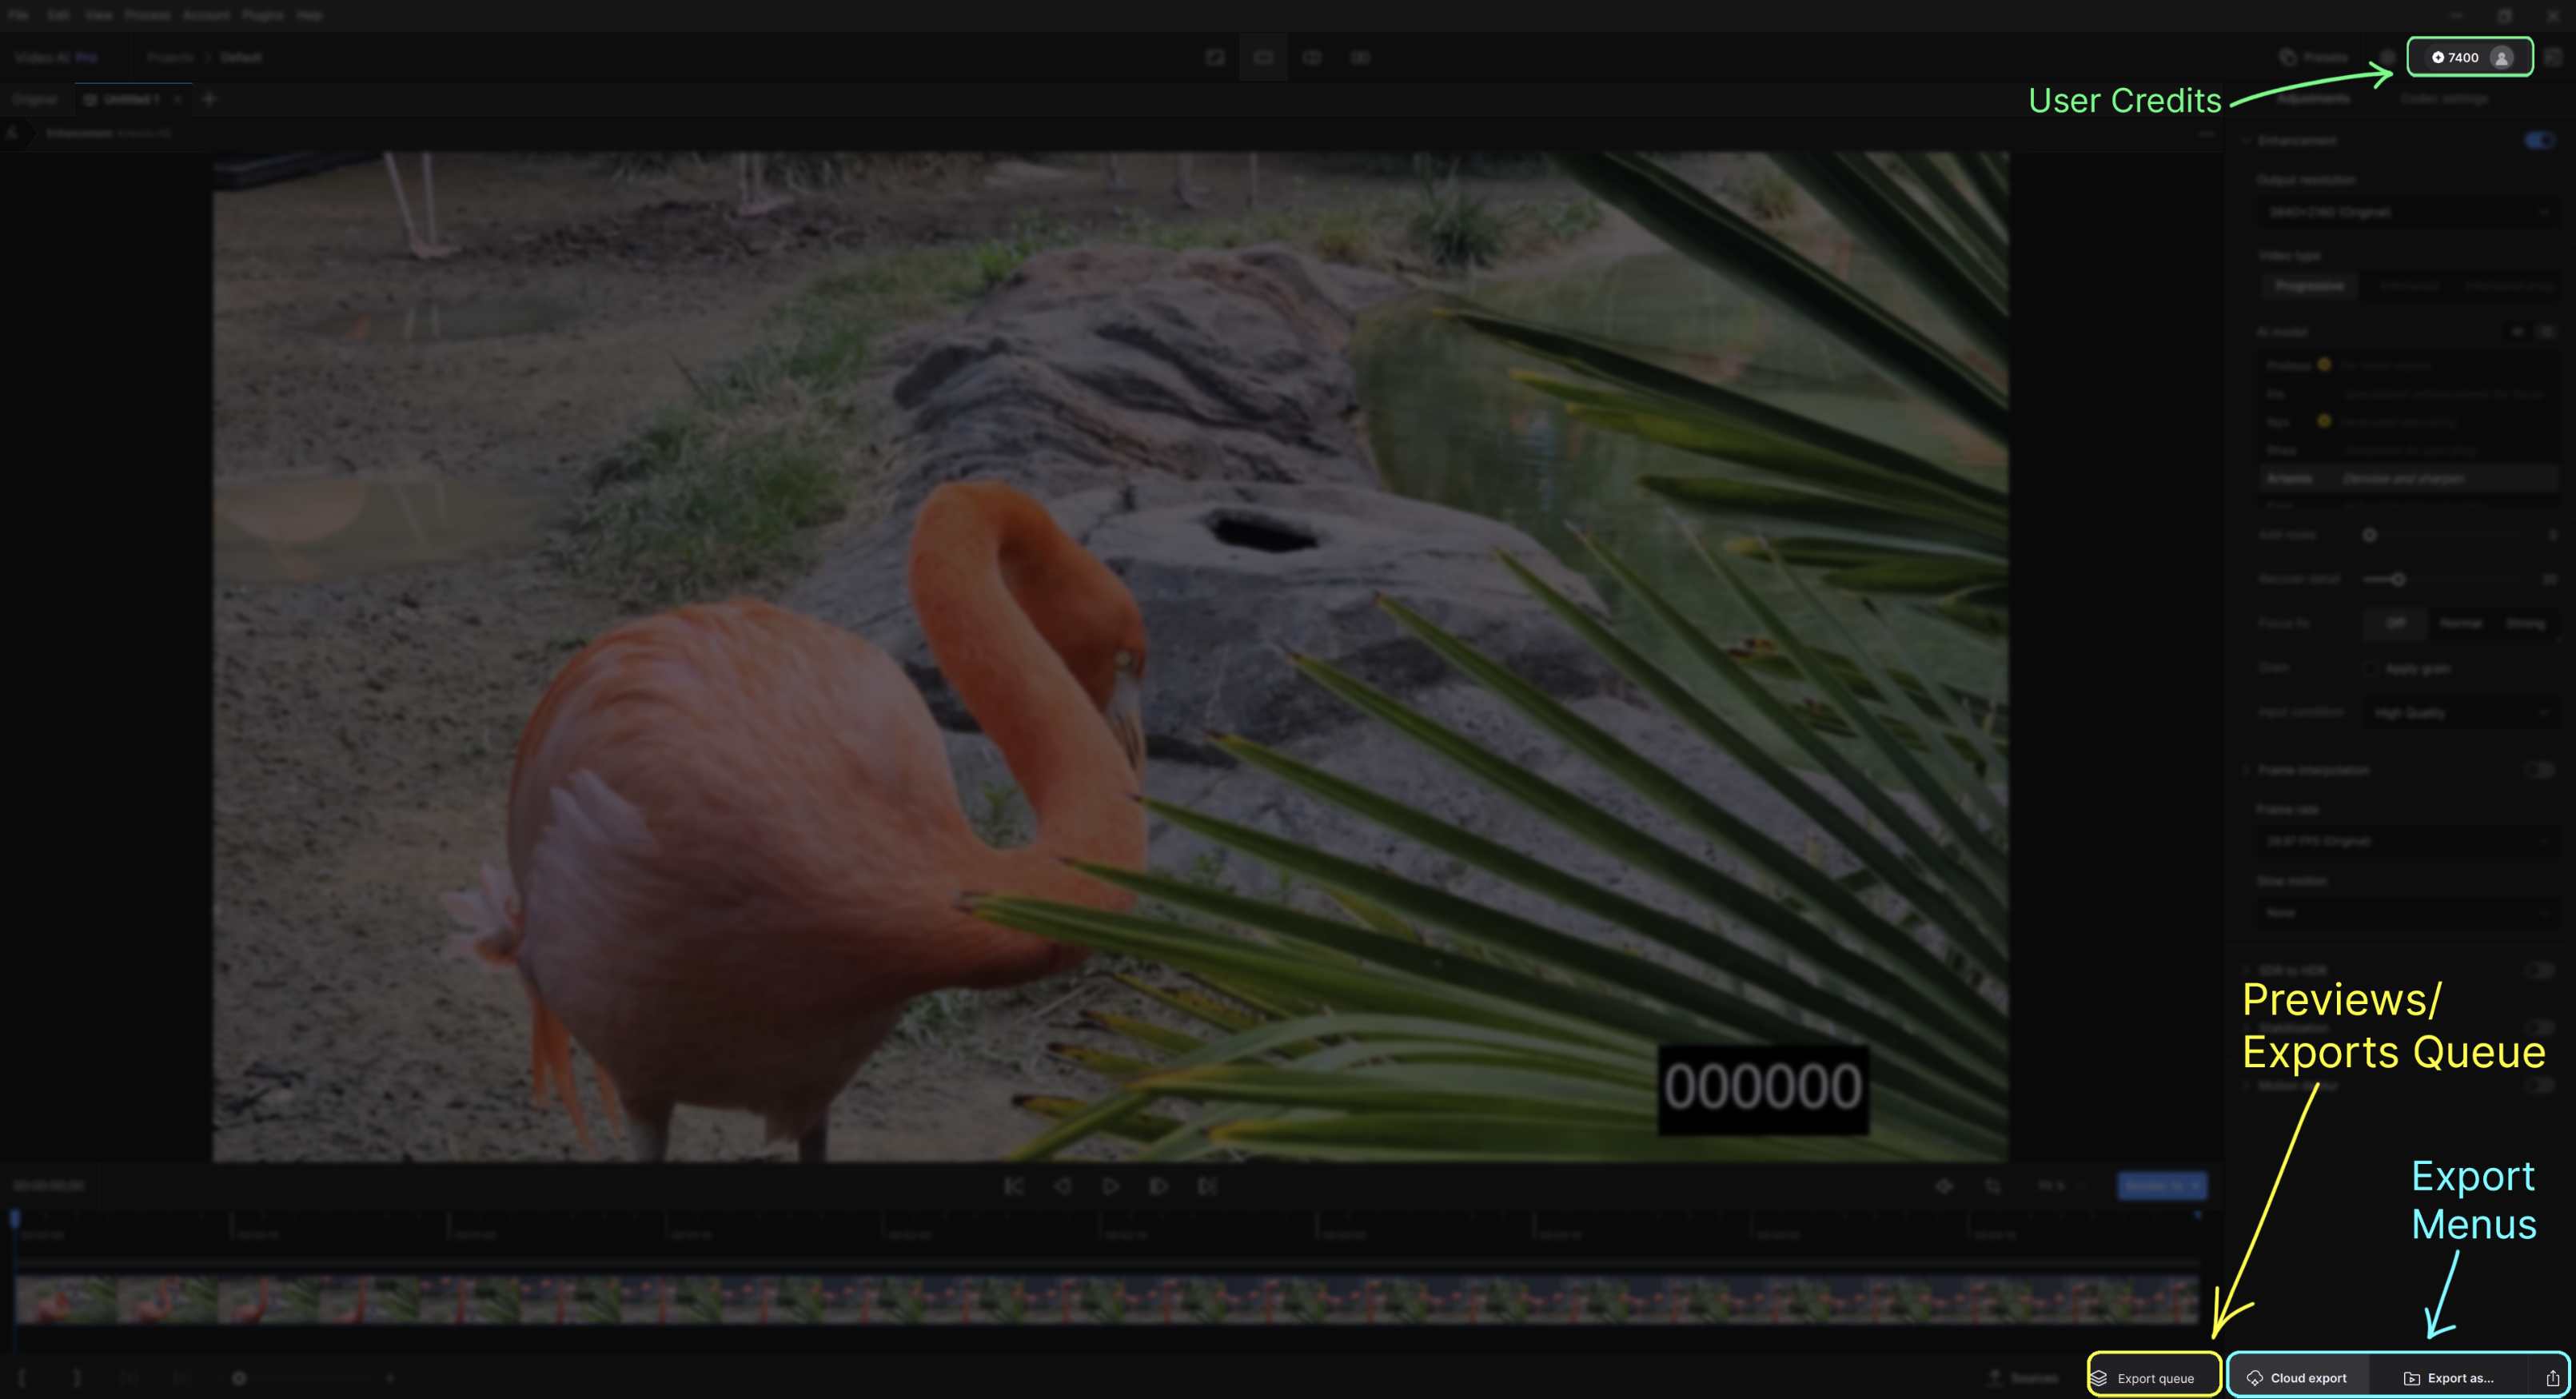
- User Credits can be found in the upper screen right corner of the “Controls Sidebar”.
- Quick Export is now represented as a share icon on the lower most screen right corner of the “Controls Sidebar”.
- Cloud Export is at the bottom of the “Controls Sidebar”, just left of the “Export as…” button. This optional service can be disabled via the Preferences menu.
- Cloud Exports Queue just below the timeline, shows all current Cloud Rendering tasks. This follows the same logic as the standard Previews and Exports Queues.
Getting Started with Cloud Rendering
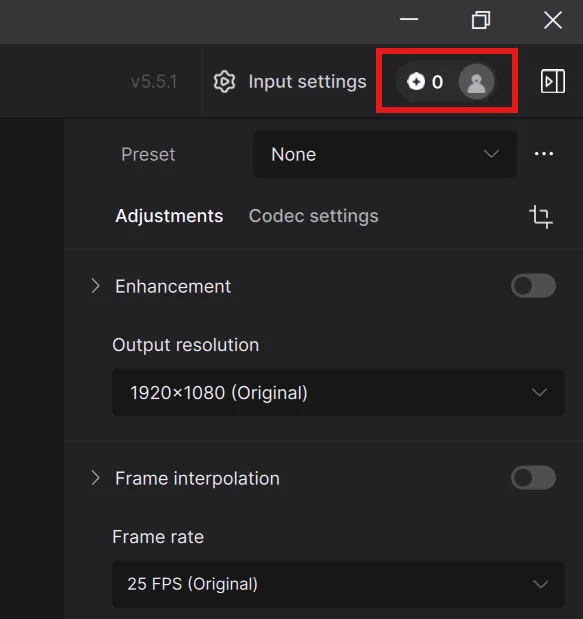
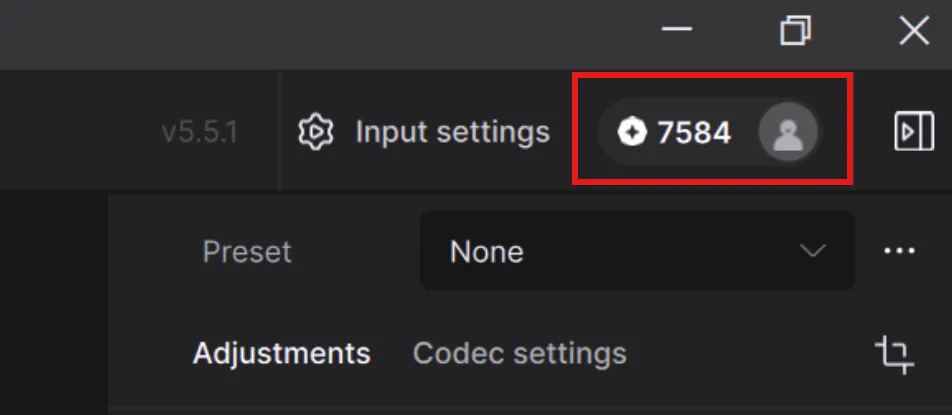
You will see a coin icon next to the Input settings in the upper screen right corner. The number represents how many credits you have. In the image below, this user has “0” credits.
In order to use Cloud Rendering, you will need to purchase Cloud Credits. Cloud Credits can be purchased here. This will take you to a webpage where you can purchase specific amounts of credits or sign up for a monthly credit plan.
Once you make your credit purchase, you will need to close and reopen the Topaz Video application if it was open during the transaction.
Enhancements for Cloud Rendering and Current Limitations
At this point you can enhance your videos as you would normally.
Please note, that at this time there are certain limitations for Cloud Rendering. The goal is to eventually remove these limitations as we determine system stability. The following list will be updated accordingly.
Current known Limitations:
- Cloud supports AV1, VP9, H264, H265
- 100GB max input file size
- Cloud renders can support up to 8K.
- The following AI model is not currently supported for Cloud Rendering:
- Rhea XL
- The following filters are not supported for Cloud Rendering:
- Stabilization
- SDR to HDR
- Rotation, crop, Telecine, etc. are not currently supported for Cloud Rendering.
- At the moment, Credits are not updating in real time, so be aware of a delay. Restarting will always refresh the correct credit balance.
It is recommended that you preview a few frames locally to get a general idea of the results you’ll see when exporting.
Exporting to the Cloud
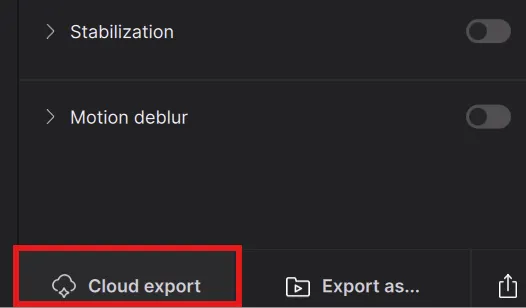
Once you are content with your video enhancement settings and preview(s), you can click on the Cloud Export button.
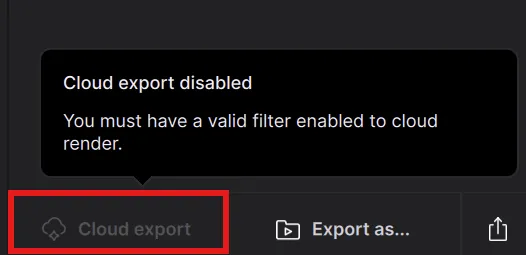
If you attempt to export to the Cloud without a filter enabled, you will notice that the button is greyed out and you will get the following message if you rest your mouse pointer over the button.
Upon pressing the Cloud Export button:
With Starlight models you will get a Starlight pop up trim window where you can trim the clip up to 9000 frames.
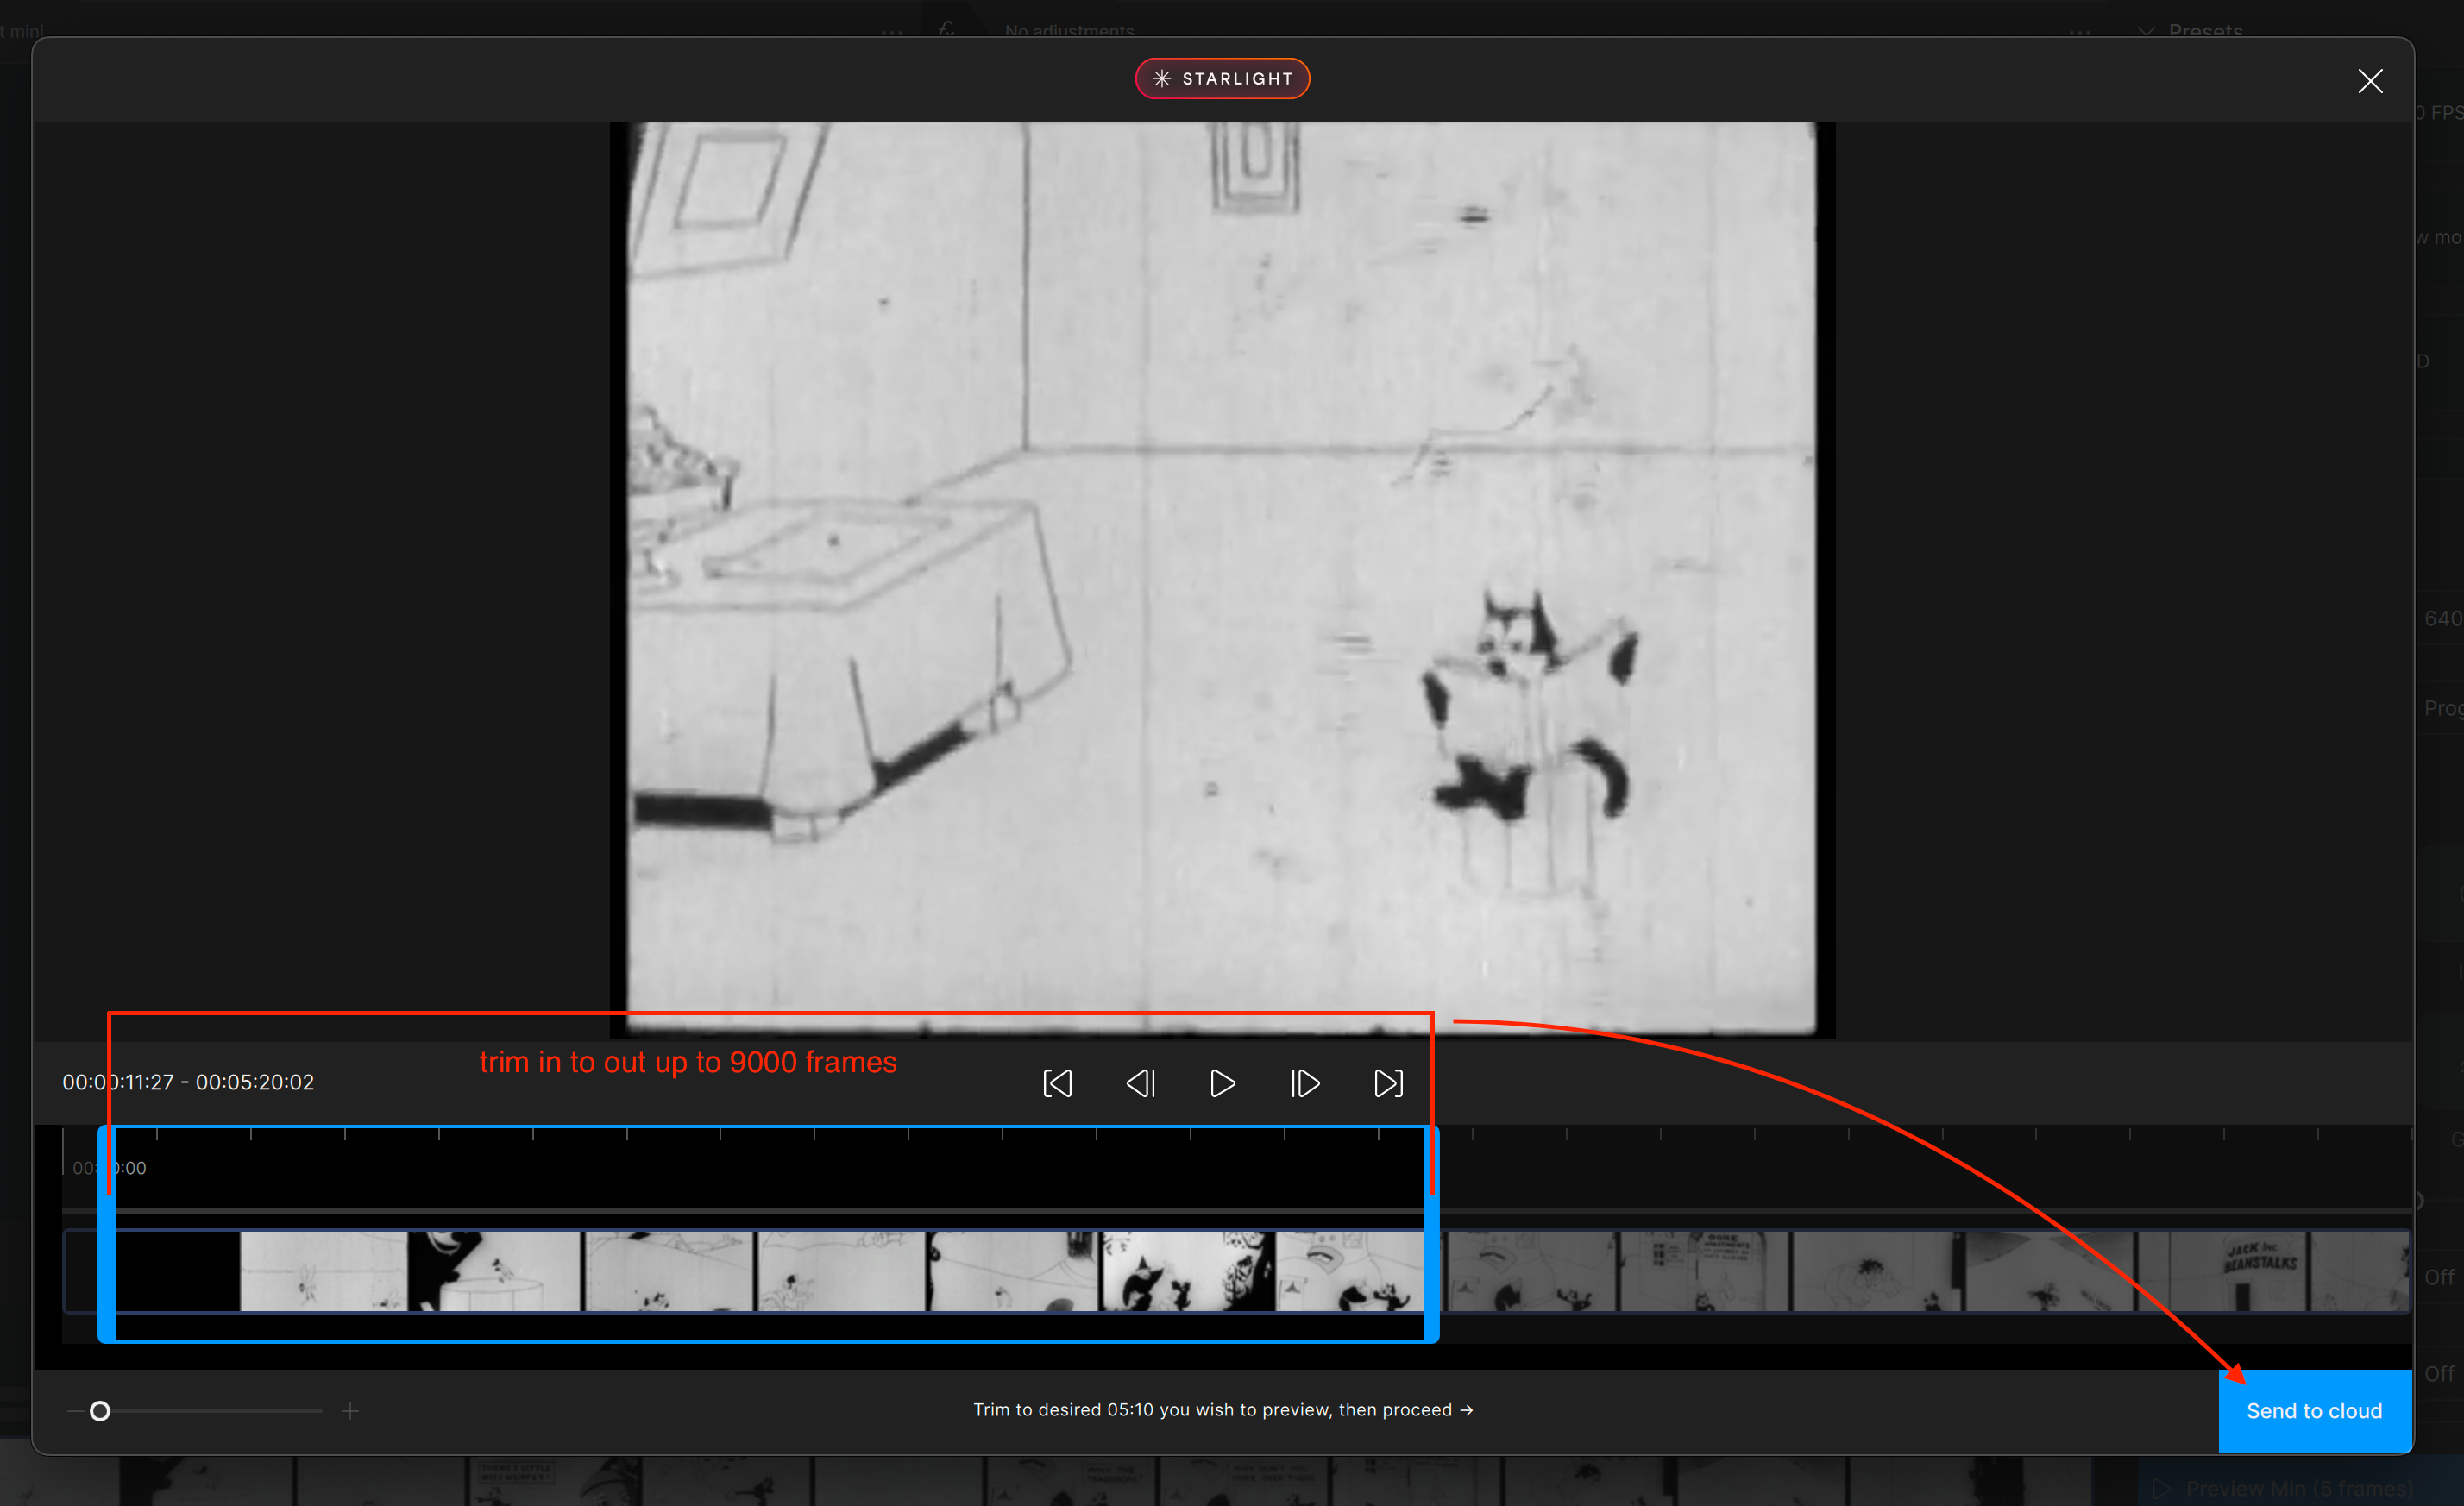
Then click send to cloud where you will then see the same window as the Core models which will get a pop up "Confirmation" text menu.
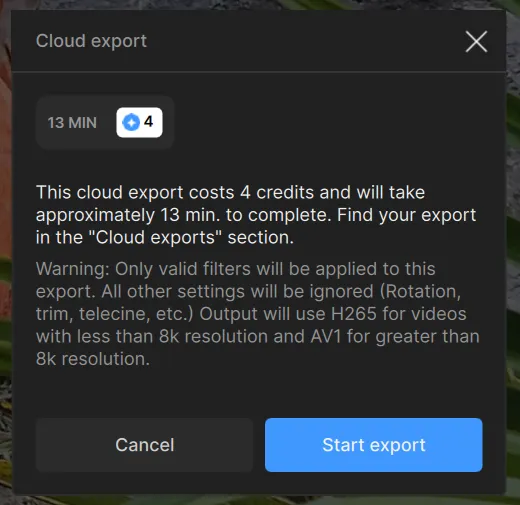
This “Confirmation” menu provides the following:
- Estimated render time upon actual processing. Please note that this is an estimate and should not be assumed to be 100% accurate.
- Display the cost twice. Once next to a blue coin and again on the highlighted text.
- Warning Note, this gives a basic description on the current conditions for Cloud Rendering.
- Cancel button, allows you to prevent sending anything to Cloud Rendering. No credits will be charged as nothing was submitted.
- Start Export button, confirms your understanding of the Credit cost and the noted warning.
Cloud Export Queue
Once Start Export is selected, there will be a small indicator over the Export Queue.
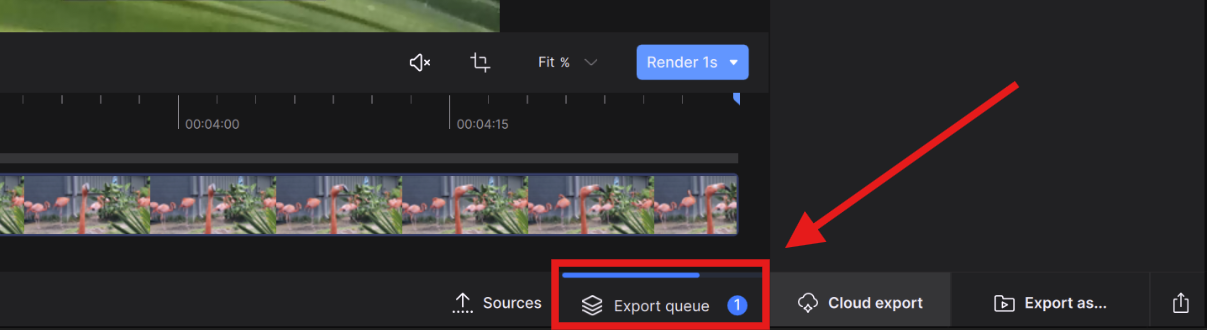
Double click on the Export Queue to open the Cloud Export Queue.
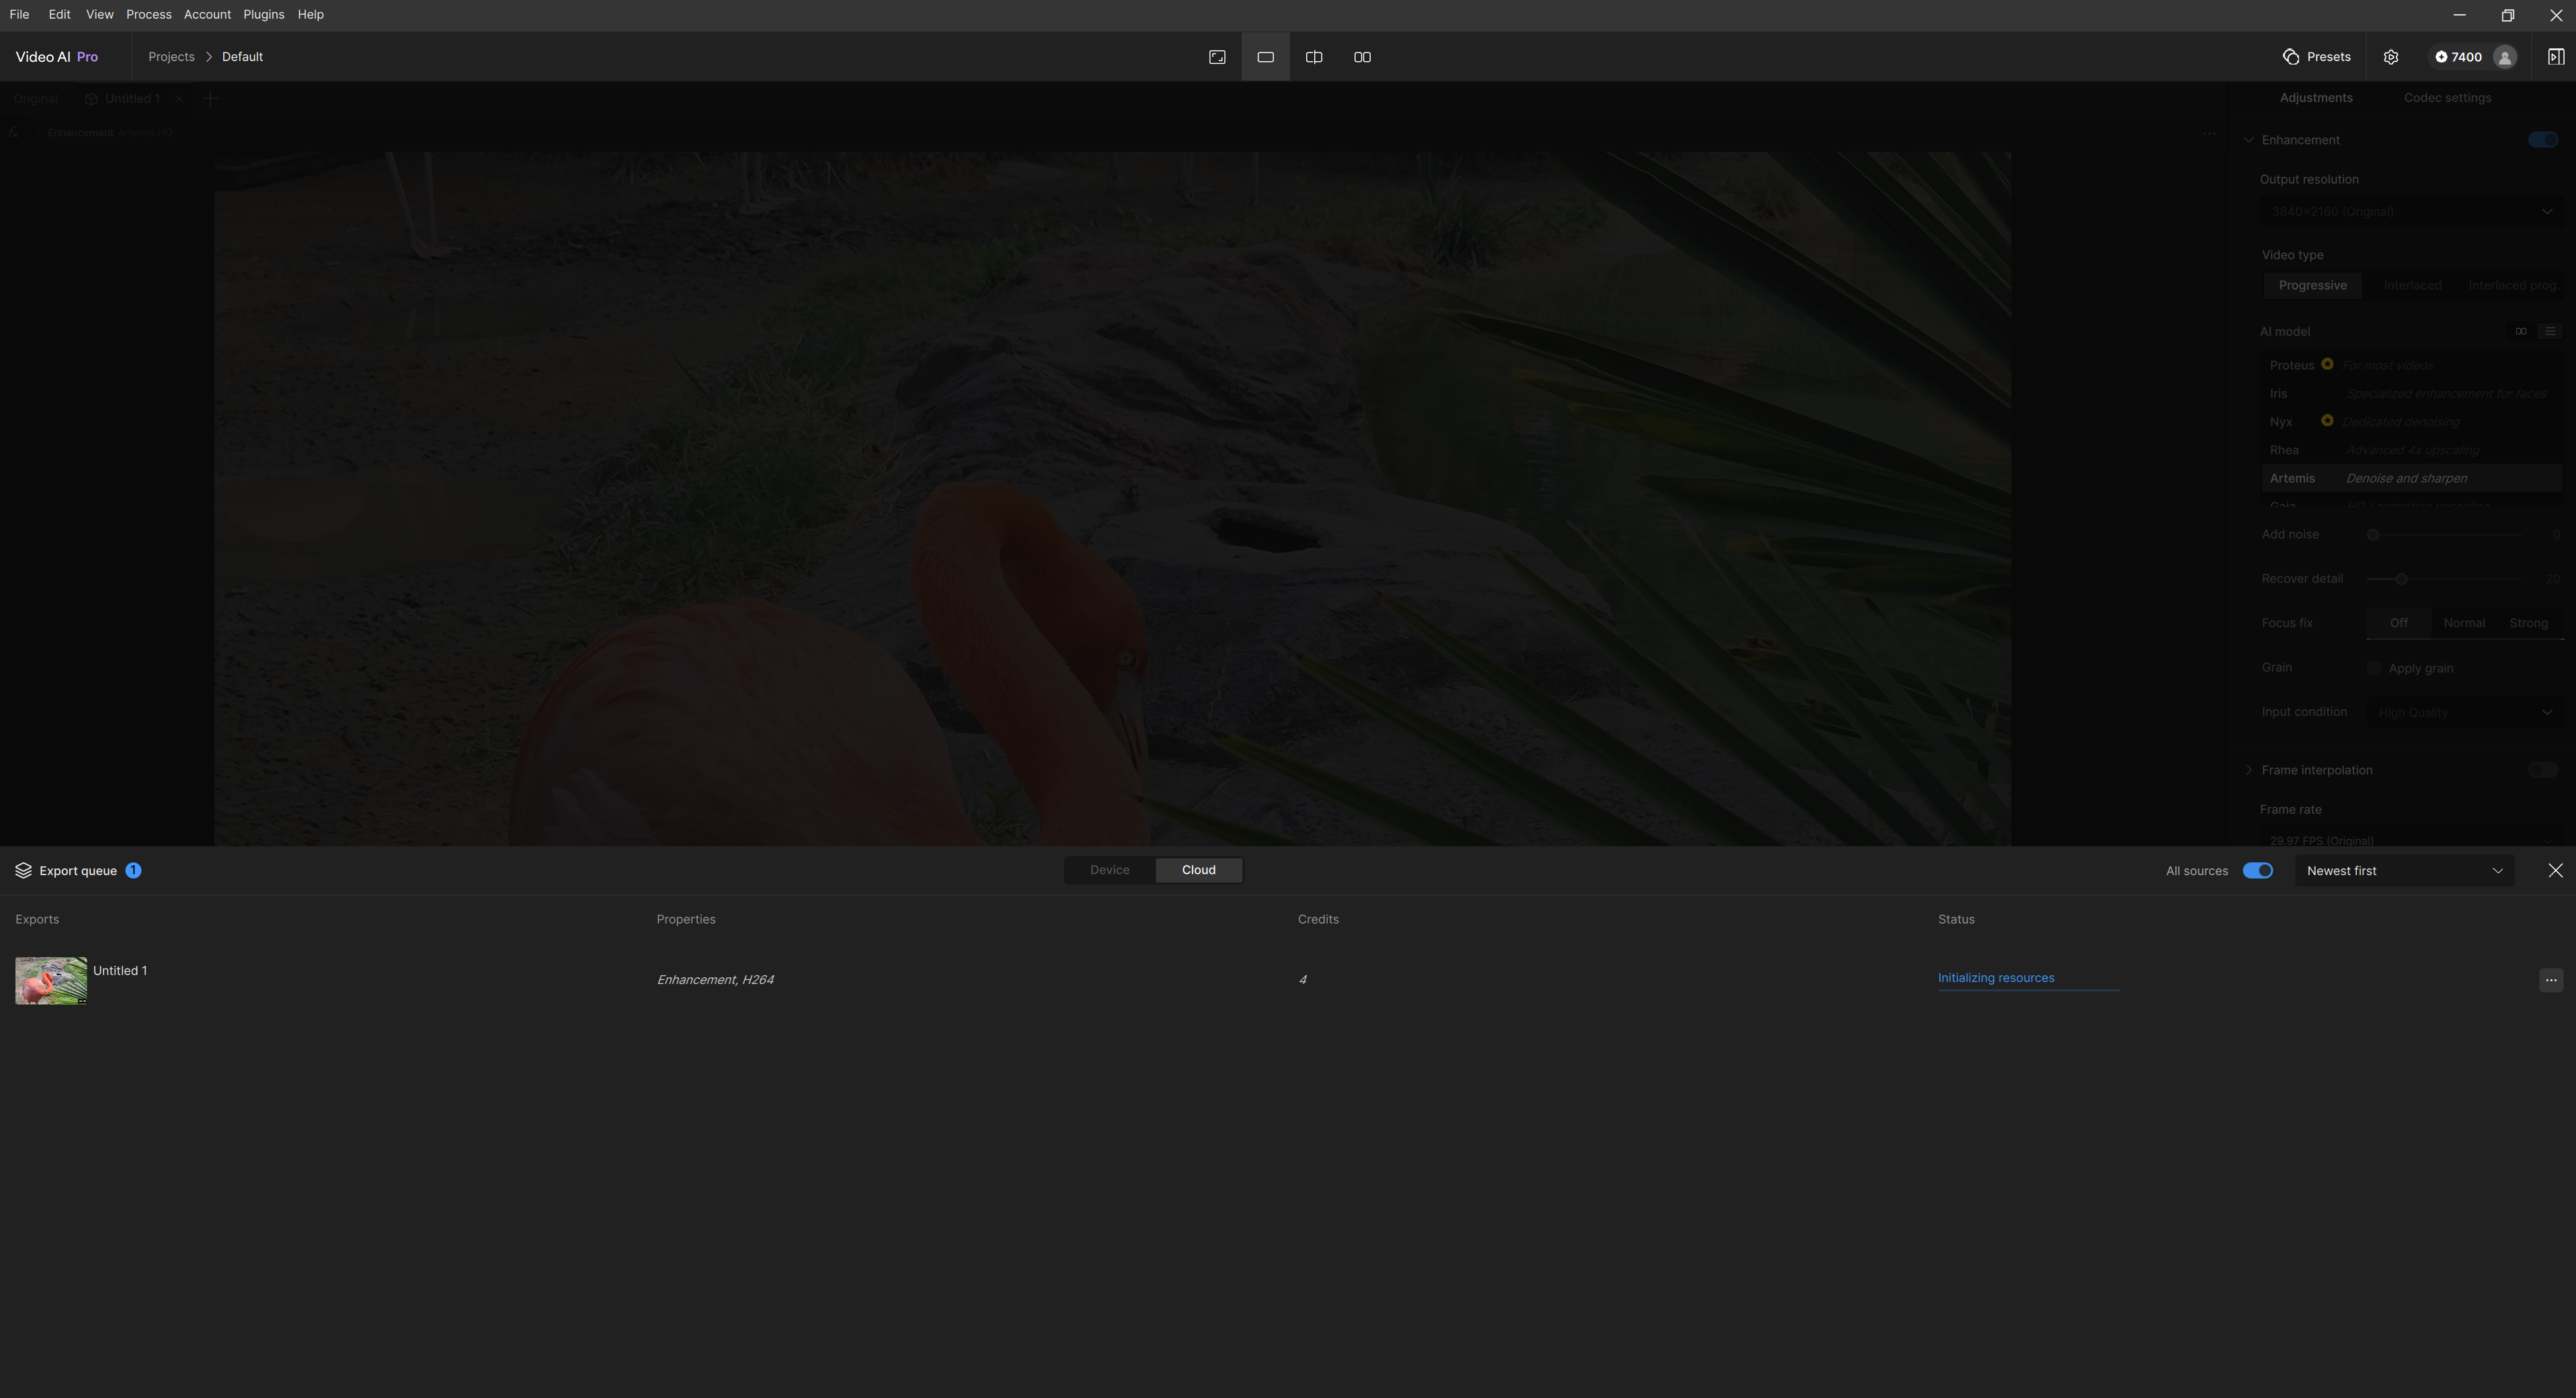
- Output: Shows the video clip that’s rendering on the cloud.
- Credits: Displays the total credits spent on the render.
- Output Size: Shows final output resolution.
- Time Elapsed: Displays the time from the moment the Start Export button is selected. This does not represent the actual rendering time, but the entire process including upload time.
- Progress: This will show the progress of the render once the job is done uploading.
- Status: This lets the user know at what stage the video is moving through or display any failures and completion.
- Uploaded Chunk: Uploading/mounting video to the cloud and to the rendering servers.
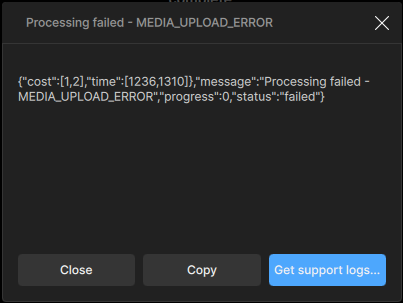
- Red Text: Anything in red text is a failure. A brief description can be found here.
- Download Available. Click to Download: Click on the text to download the video file.
- Downloading… : Process of retrieving your video from the cloud to your personal machine.
- Downloaded. Click to View: Click on the text to view your render in an external player.
To avoid losing access to your files, please download your exports as soon as they are complete. If you run into any issues, contact support within this 7-day window so we can assist.
If you come across any errors during renders, you can click the error to open the error window to access export logs when reaching out to Support.

Once open, clicking on Get support logs... this will open up the logs to attach the zip for support.
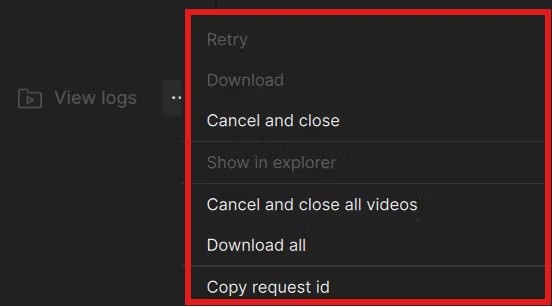
- Retry: If there is an error with your file, you can retry the render. Please copy any logs before restarting as you may need this for troubleshooting.
- Once retry is selected, the app will clear the existing logs. You will only get billed for a completed rendered process. So if your job fails halfway, you will be credited back.
- Download: If you haven’t downloaded your video from the Status Text, you can download from here.
- Cancel and Close: This clears the specific job from the Cloud Exports Queue and cancels the job.
- Show In Explorer: If you have downloaded your Cloud Render, this will open the folder where the job has been delivered.
- Cancel and Close All Videos: This clears all the jobs from the Cloud Exports Queue and cancels them all.
- Download All: If you haven’t downloaded your multiple videos from the Status Text individually, you can download all of them from selecting this option.
- Copy Request ID: This is the Cloud Render ID. You may need this for personal record keeping or if you need additional support.
Cloud Rendering Costs
Cloud rendering uses cloud credits to process video on the rendering servers.
The number of credits required depends on resolution, frame rate, video length, and the specific model used.
Because of this, there is no fixed cost per video.
What affects the cost?
Cloud credit usage is determined by:
- Input resolution
- Output resolution / upscale amount
- Frame rate (FPS)
- Video length
- Model used (for example, Proteus vs Starlight Mini)
How frame rate and length impact cost
Video length and frame rate work together to determine how many frames are processed.
- Higher FPS → more frames → higher cost
- Longer videos → more frames → higher cost
Example:
- 5 minutes at 30fps → 9,000 frames
- 5 minutes at 60fps → 18,000 frames
Model frame limits
- Starlight family of models are limited to 9,000 frames per job with cloud rendering.
- ≈ 5 minutes at 30fps
- ≈ 2.5 minutes at 60fps
- All other models do not have a frame limit.
Credits vs subscription
Cloud credits are separate from the app subscription price, but they can be included depending on your plan.
There are three ways to get cloud credits:
1. App subscriptions
These subscriptions give you access to the apps and include a monthly allotment of cloud credits:
| Subscription | Personal | Pro |
| Topaz Video | 25 credits/month | 100 credits/month |
| Topaz Studio | 300 credits/month | 600 credits/month |
| Desktop Collection | 50 credits/month | 200 credits/month |
Credits reset each month and do not roll over.
2. Cloud credit subscriptions
These are separate subscriptions that provide additional cloud credits each month.
They are designed for users who need more credits than what is included in their app subscription.
| Credits / Month | Cost / Month | Cost / Credit |
| 80 | $9.99 | $0.125 |
| 400 | $39.99 | $0.100 |
| 1400 | $99.99 | $0.071 |
| 3000 | $199.99 | $0.066 |
| 9000 | $499.99 | $0.055 |
Larger plans reduce the cost per credit
Credits are added monthly and billed on a recurring basis
Example: A 400 credit/month plan can hold up to 2,000 credits.
If you cancel your subscription, any unused credits will expire at the next renewal date.
3. One-time credit packs
You can purchase cloud credits as a one-time package.
Designed for one-off projects or occasional use, with no recurring billing and lower cost per credit when purchasing larger packs.
| Credits | Price | Cost / Credit |
| 20 | $5 | $0.250 |
| 400 | $78 | $0.195 |
| 1000 | $158 | $0.158 |
| 3000 | $399 | $0.133 |
| 9000 | $999 | $0.111 |
Example cost estimates
These examples are based on a 1 minute clip at 30fps. Costs will vary with different resolutions, frame rates, video lengths, and models used.
Enhancement models
SD input (480p / 576p)
| Output resolution | Tier 1 | Tier 2 | Tier 3 | Starlight Models |
| Original | ~2 | ~2 | ~2-4 | ~31 (1x) |
| 1080p | ~2 | ~22-26 | ~20-26 | ~31 (2x) |
| 4k | ~2 | ~22-26 | ~20-26 | ~31 (4x) |
1080p input
| Output Resolution | Tier 1 | Tier 2 | Tier 3 | Starlight Mini/HQ | Starlight Sharp | Starlight Fast 2 |
| Original | ~6 | ~10 | ~10 | ~31 (1x) | ~31 (1x) | ~31 (1x) |
| 4k | ~6 | ~34 | ~34 | ~70 (2x) | not supported | ~121 (2x) |
4k input
| Output Resolution | Tier 1 | Tier 2 | Tier 3 | Starlight Mini/HQ | Starlight Sharp | Starlight Fast 2 |
| Original | ~20 | ~34 | ~34 | ~70 (1x) | not supported | ~121 (1x) |
Core Model Tiers
- Tier 1: Nyx Fast
- Tier 2: Proteus, Iris, Nyx
- Tier 3: Rhea, Artemis, Gaia, Theia, Nyx XL
Starlight Sharp is limited to 1080p output and does not support 4K.
Frame interpolation models
| Input Resolution | 60fps | 120fps | 2x slow motion | 4x slow motion |
| SD input (480p / 576p) | ~2-4 | ~6-14 | ~4-12 | ~6-12 |
| 1080p | ~10 | ~34-62 | ~32-58 | ~34-62 |
| 4k | ~34 | ~130-148 | ~120-148 | ~130-148 |
Motion Deblur and Denoise Filters
| Input Resolution | Motion Deblur (Themis) | Denoise (Nyx High Fidelity) |
| SD (480p/576p) | ~2-4 | ~2-4 |
| 1080p | ~10 | ~10 |
| 4k | ~34 | ~34 |
Key takeaway
Cloud rendering cost depends on resolution, frame rate, video length, and the model used, not just how long the video is.
Enjoy your newfound freedom from those time-consuming large renders!