Quick Start
Use this guide to import, upscale, and enhance your first video.
Topaz Video is a desktop application that you install and run directly on your computer. It includes a variety of AI models for enhancing and upscaling footage, frame interpolation, stabilization, SDR to HDR conversion, motion deblur, and denoising.
Installation
Your computer must have an internet connection to install, activate, and update Topaz Video.
- Download the Topaz Video installer
Downloads | Account | Releases - Run the installer and follow the prompts during installation
For proper functionality using Topaz Video as a standalone app or plugin, the app needs to be installed on the startup disk, not an external drive.
If you own a legacy version of Video AI, download the latest version you own from your Legacy Section in your Topaz Labs account.
Activate Your Product
When you first open Topaz Video, you will be greeted with an Activation prompt.
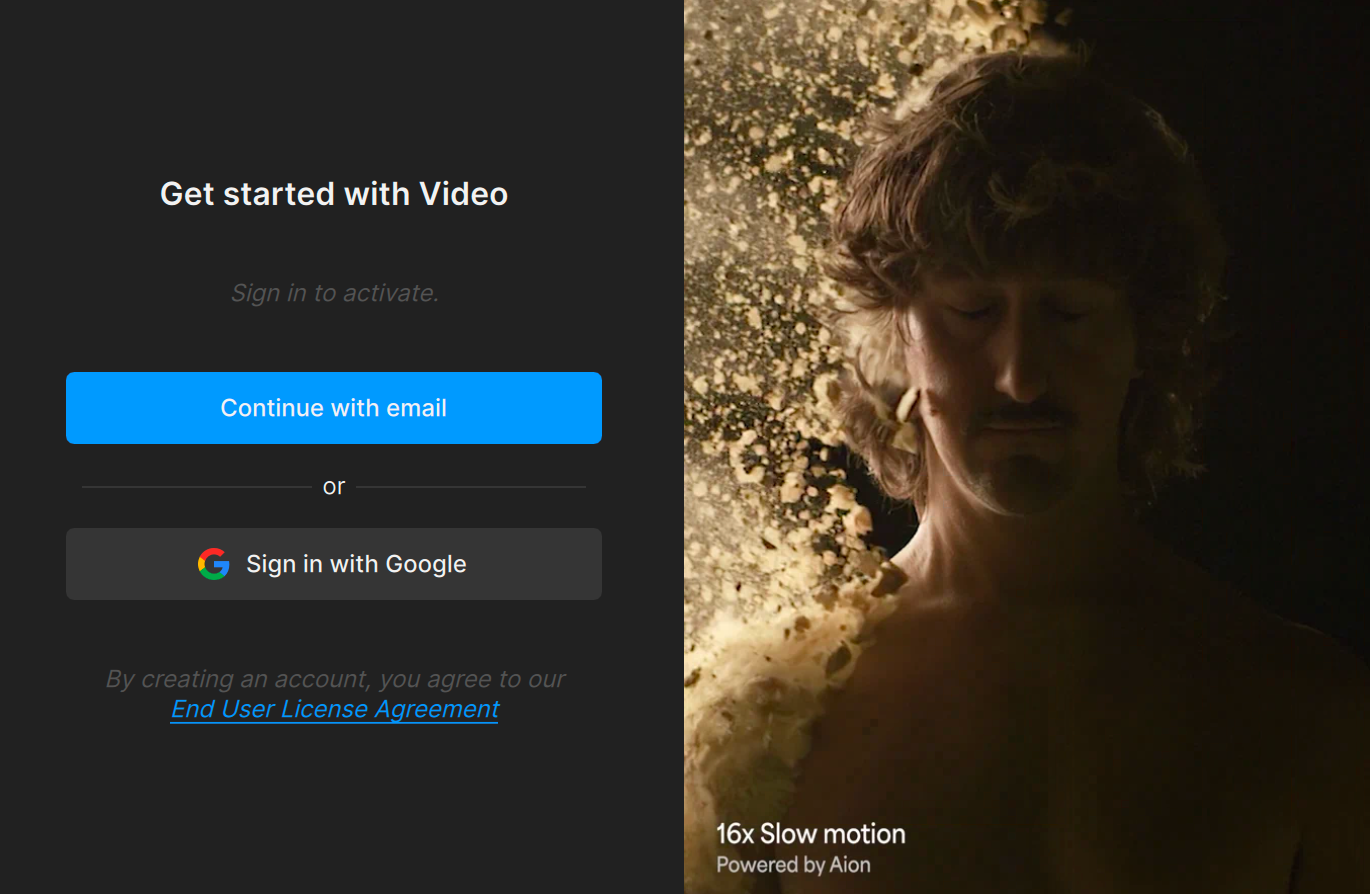
Here you will need to activate with the email account that you used to purchase the account.
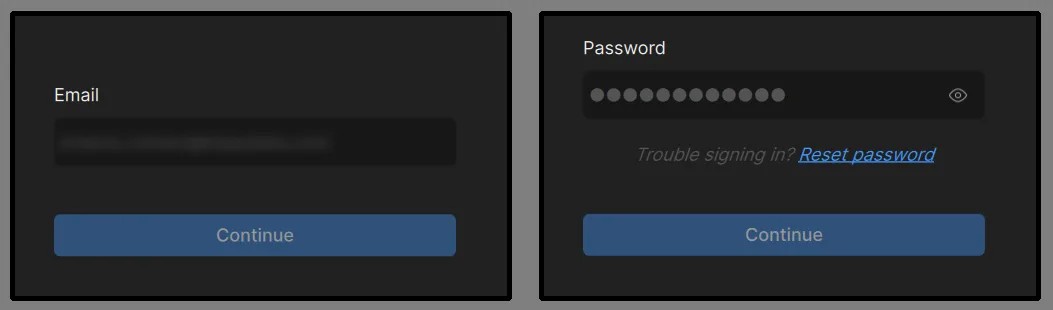
- When clicking the Continue with email button, you will need to enter your email followed by your password.
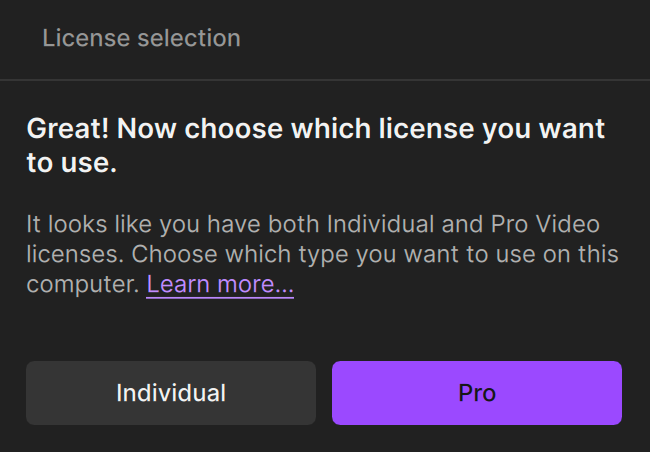
- If you have a pro license, you will need to chose which version you want to utilize. Once selected, there with be a quick license check to verify your selection and prepare your product.
- You’re now all set! Let’s get started!
Import Your File
There are five ways to bring files into Topaz Video.
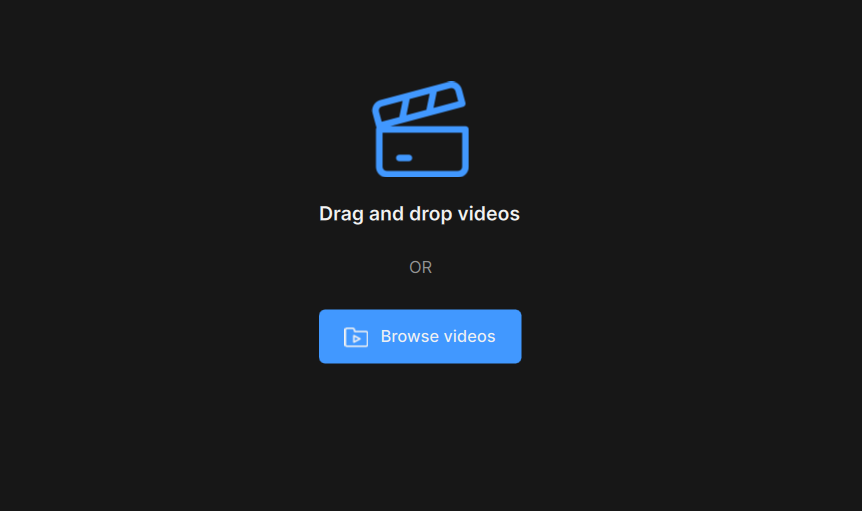
- Open the app and select "Browse Videos" to navigate to your file.
- Click anywhere on the screen to open a file browser window.
- Drag-and-drop files directly into the app.
- Use the “File” drop down menu and select “Import”
- Use a keyboard shortcut of Ctrl+i (Windows) or Cmd+i (macOS).
Import an Image Sequence
In the import folder, on the lower screen right side, make sure to change from “Video Files” to “Image Sequences”.
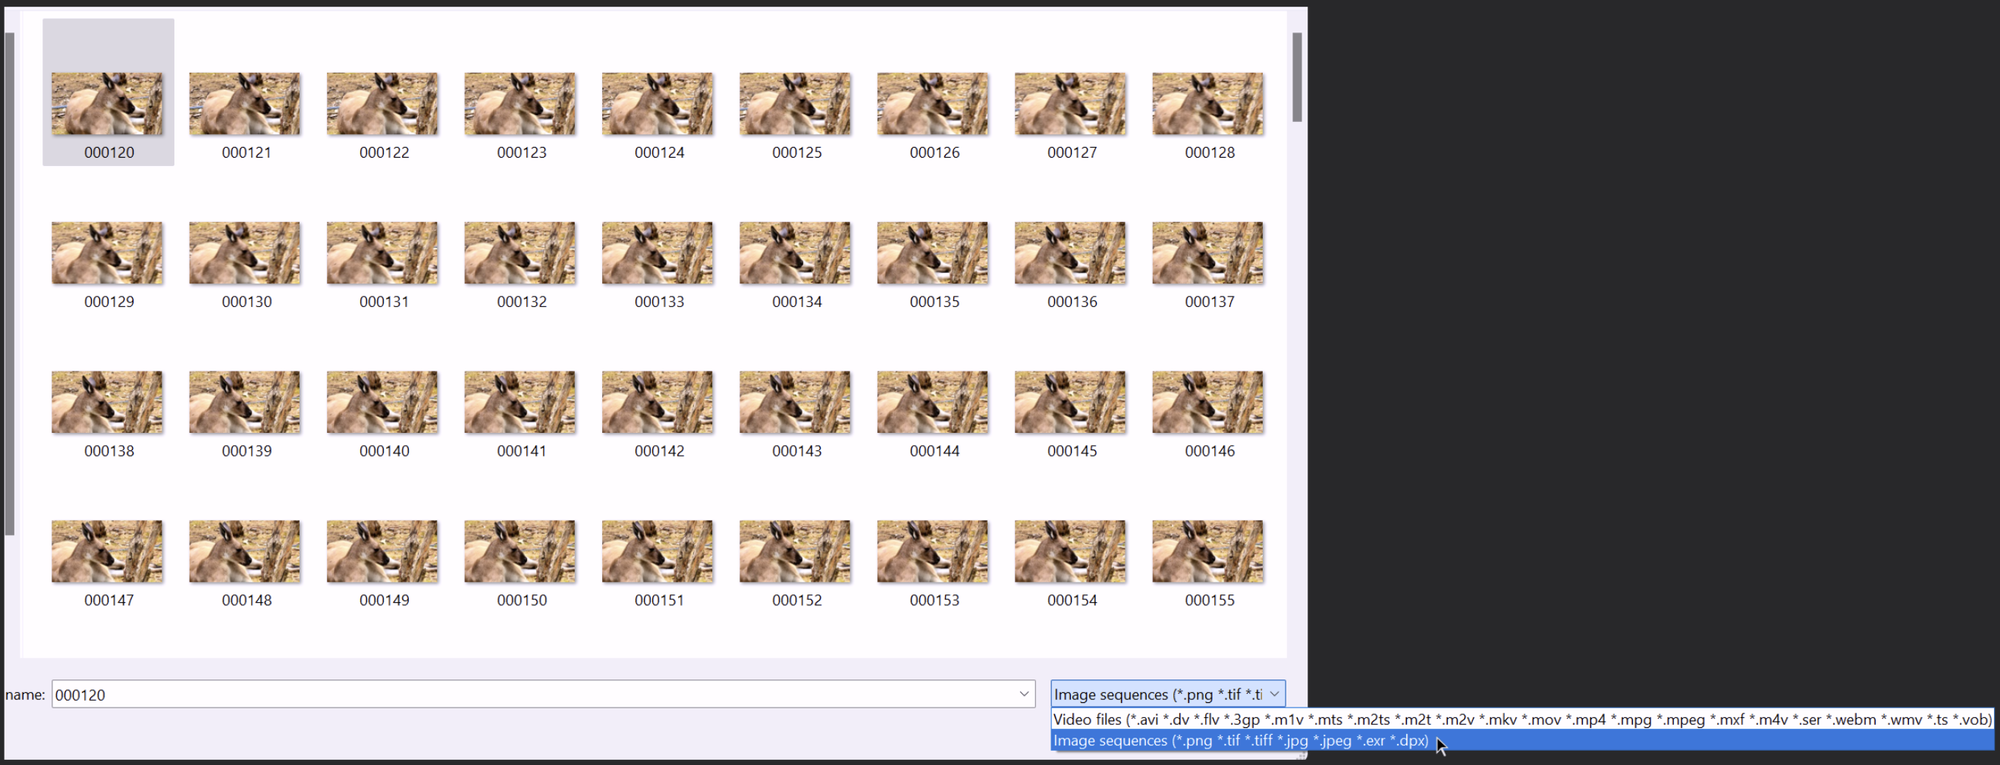
- Make sure all frames are in one folder.
- Check that all frames are in consecutive order.
- At least 5 frames must be in the sequence.
Start from Scratch or Preset
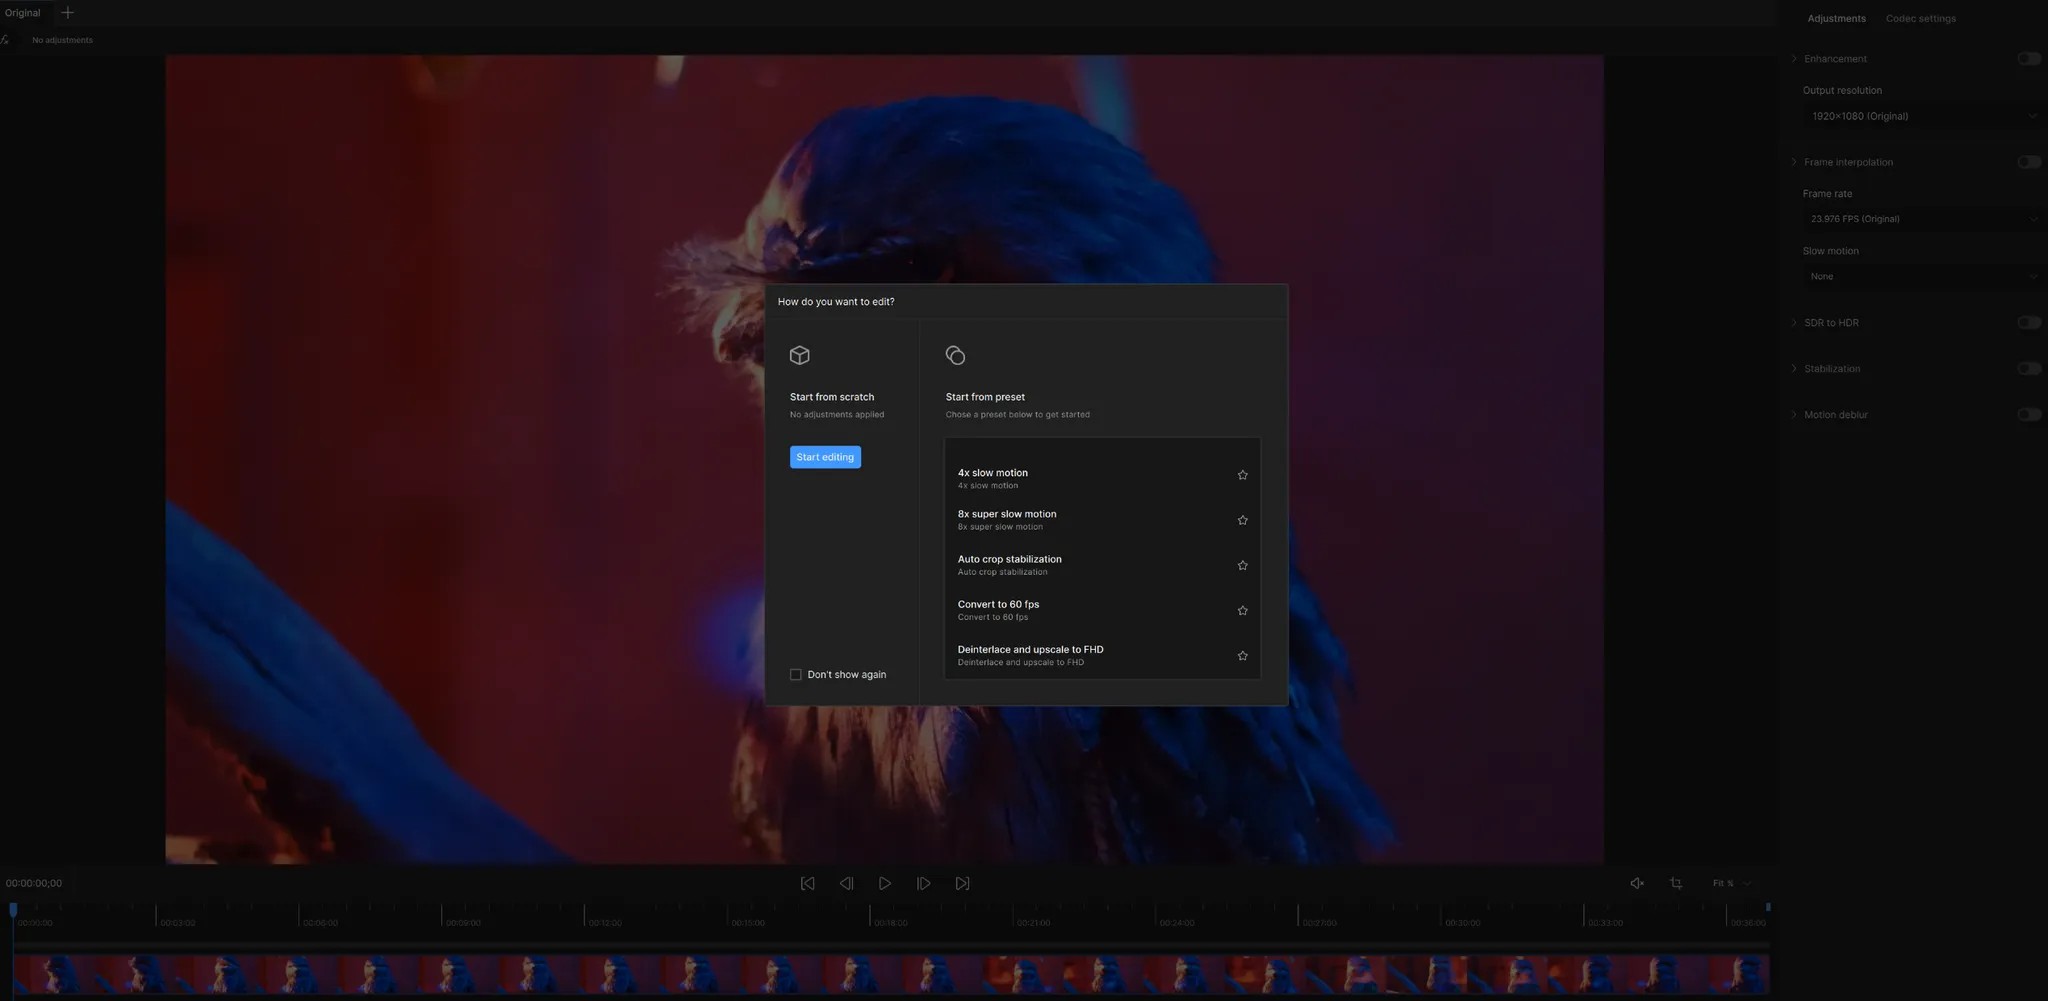
After importing your footage, you will see a pop-up menu where you can decide to either Start from scratch (without any established enhancements or filters) or Start from preset (begin from a set of established enhancements and/or filters).
Use the middle mouse button to scroll through all options. Note that you could always generate your own presets and favorite your "go to" presets.
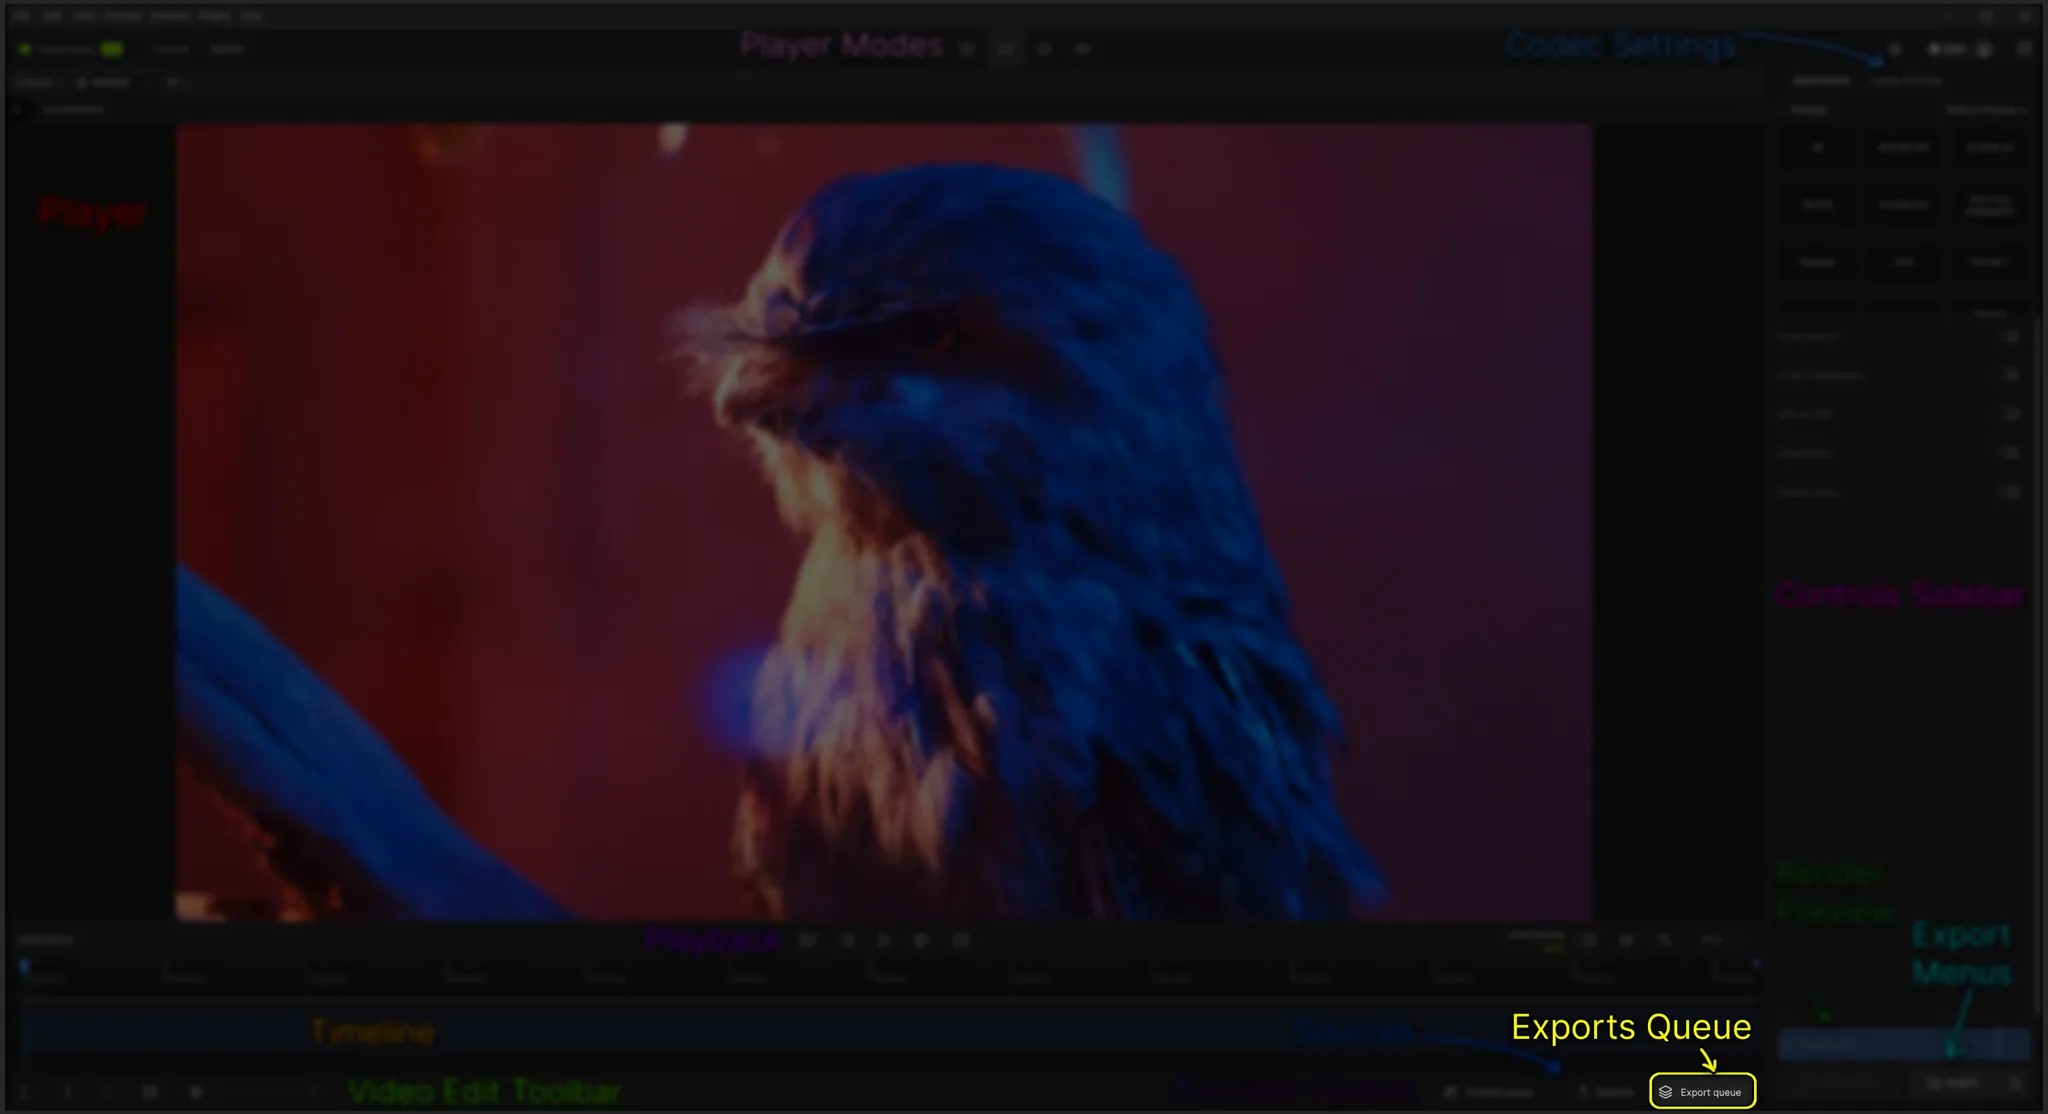
Workspace Layout
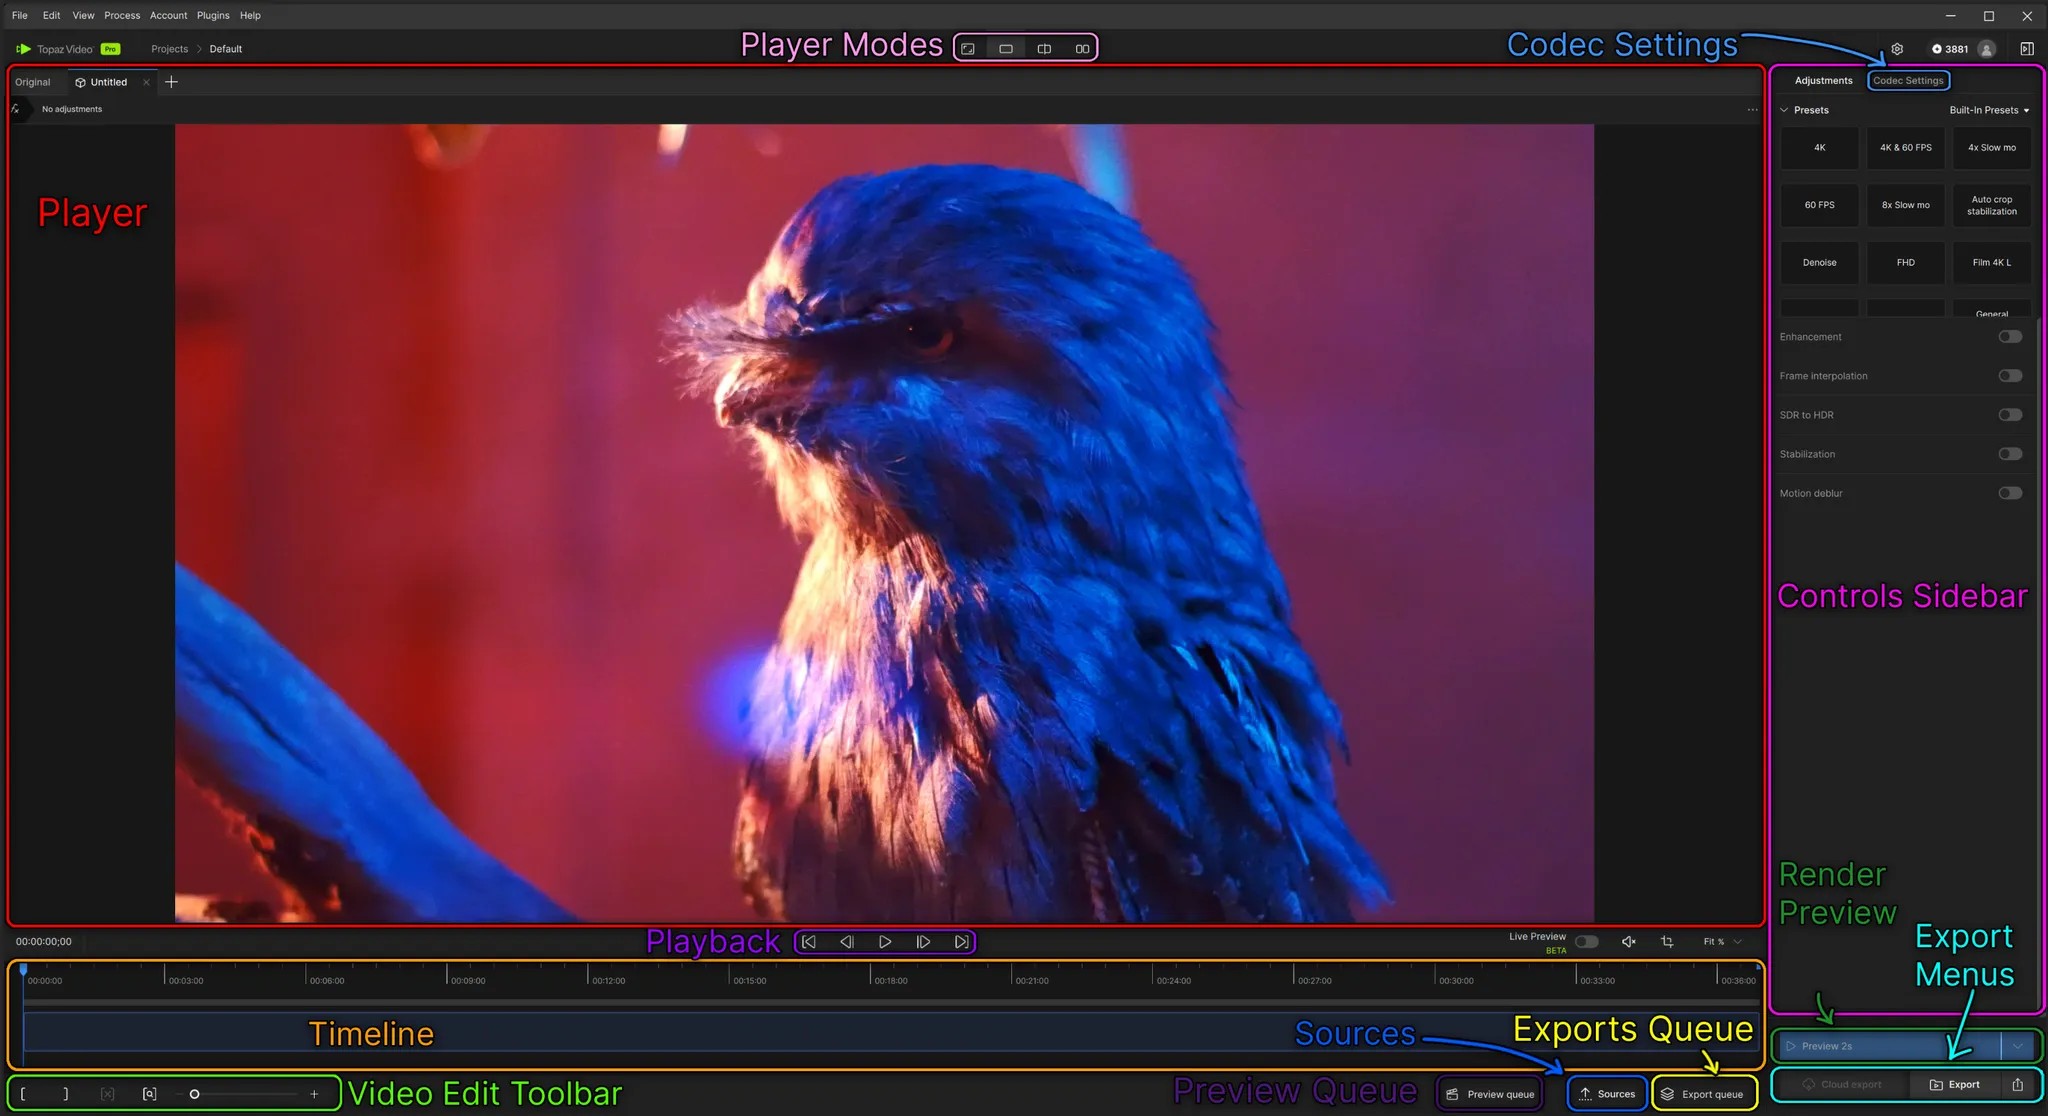
Importing a file will open the main Workspace.
There are few major sections that make up the workspace:
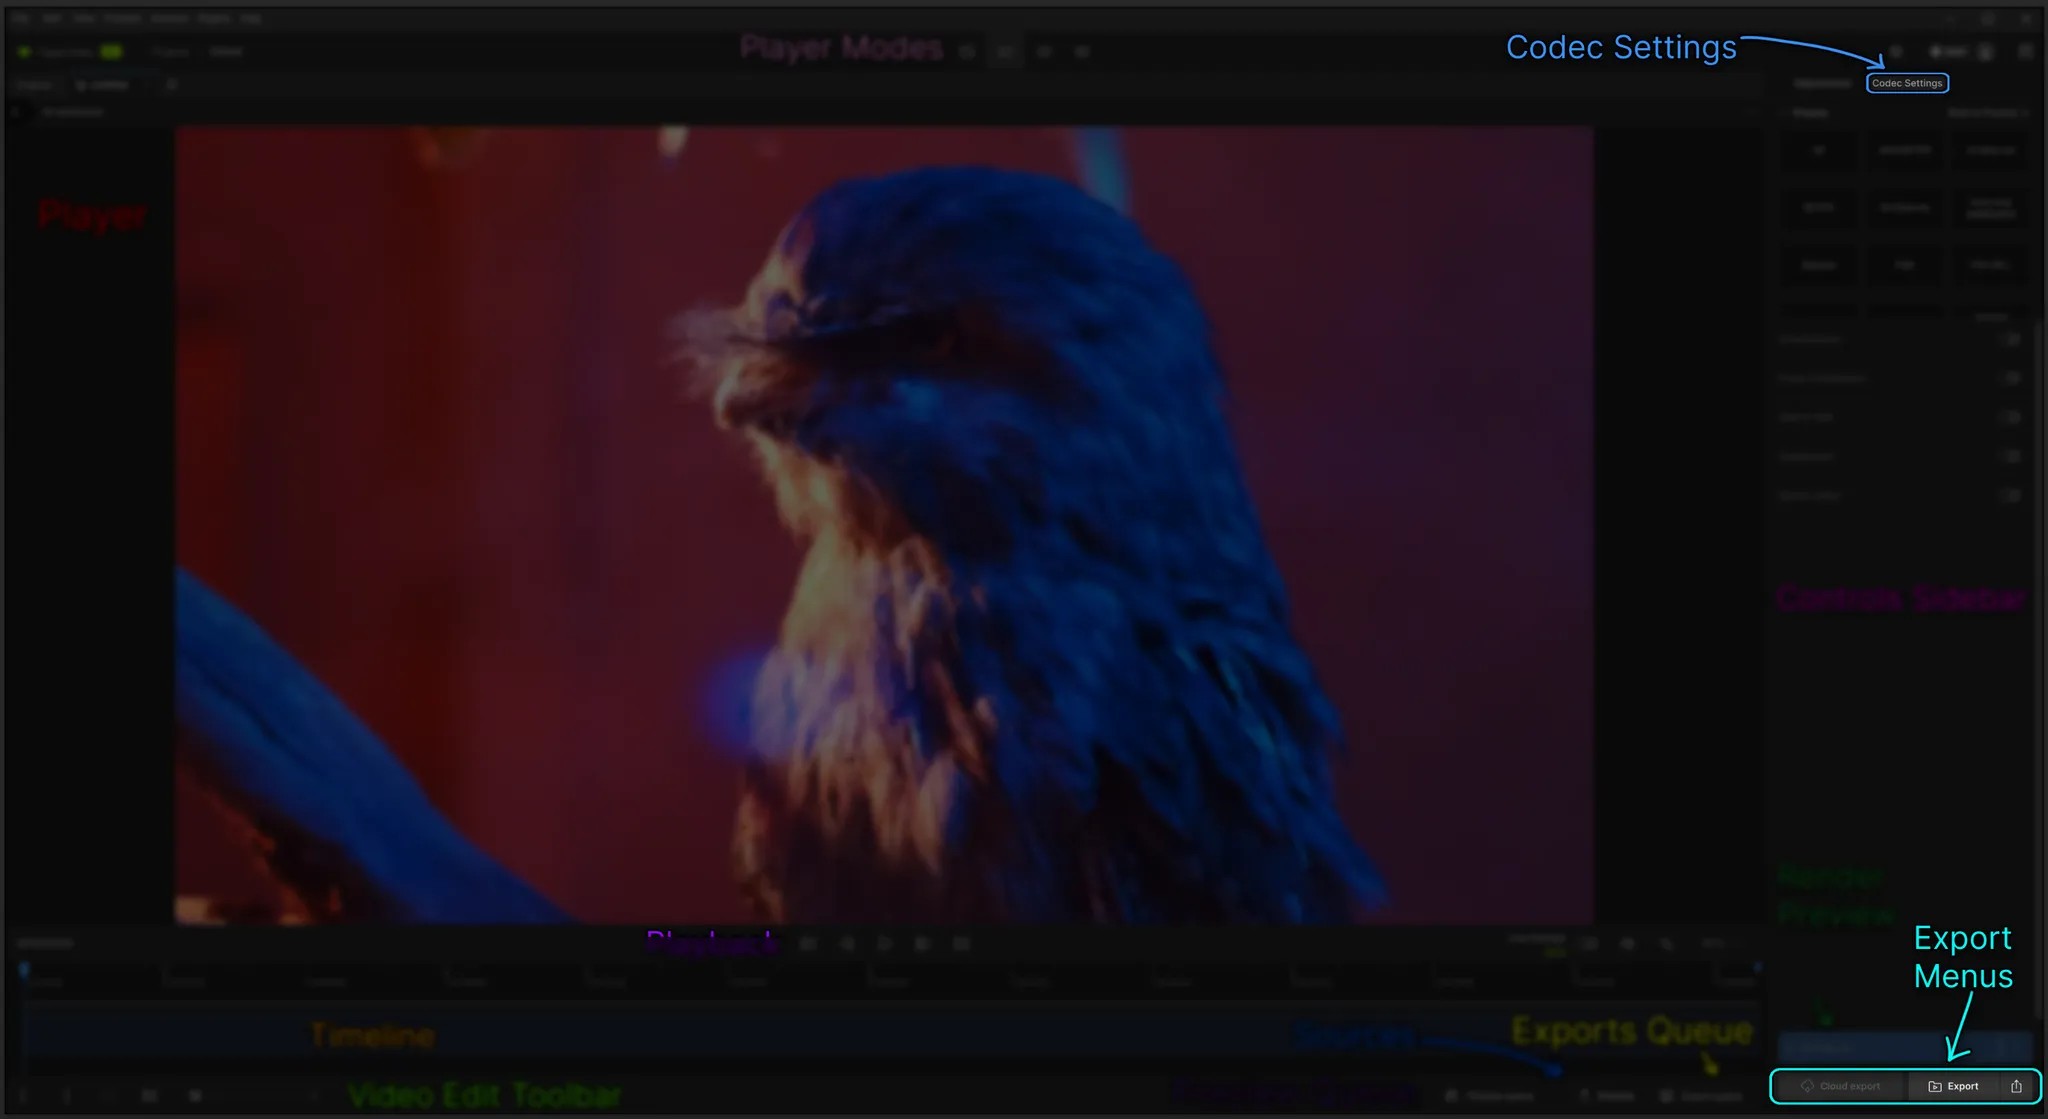
Player
Video Edit Toolbar
Sources
Preview Queue
Exports Queue
Playback
Player Modes
Render Preview
Controls Sidebar
Codec Settings
and the Export Menus.
Navigating the Controls Sidebar
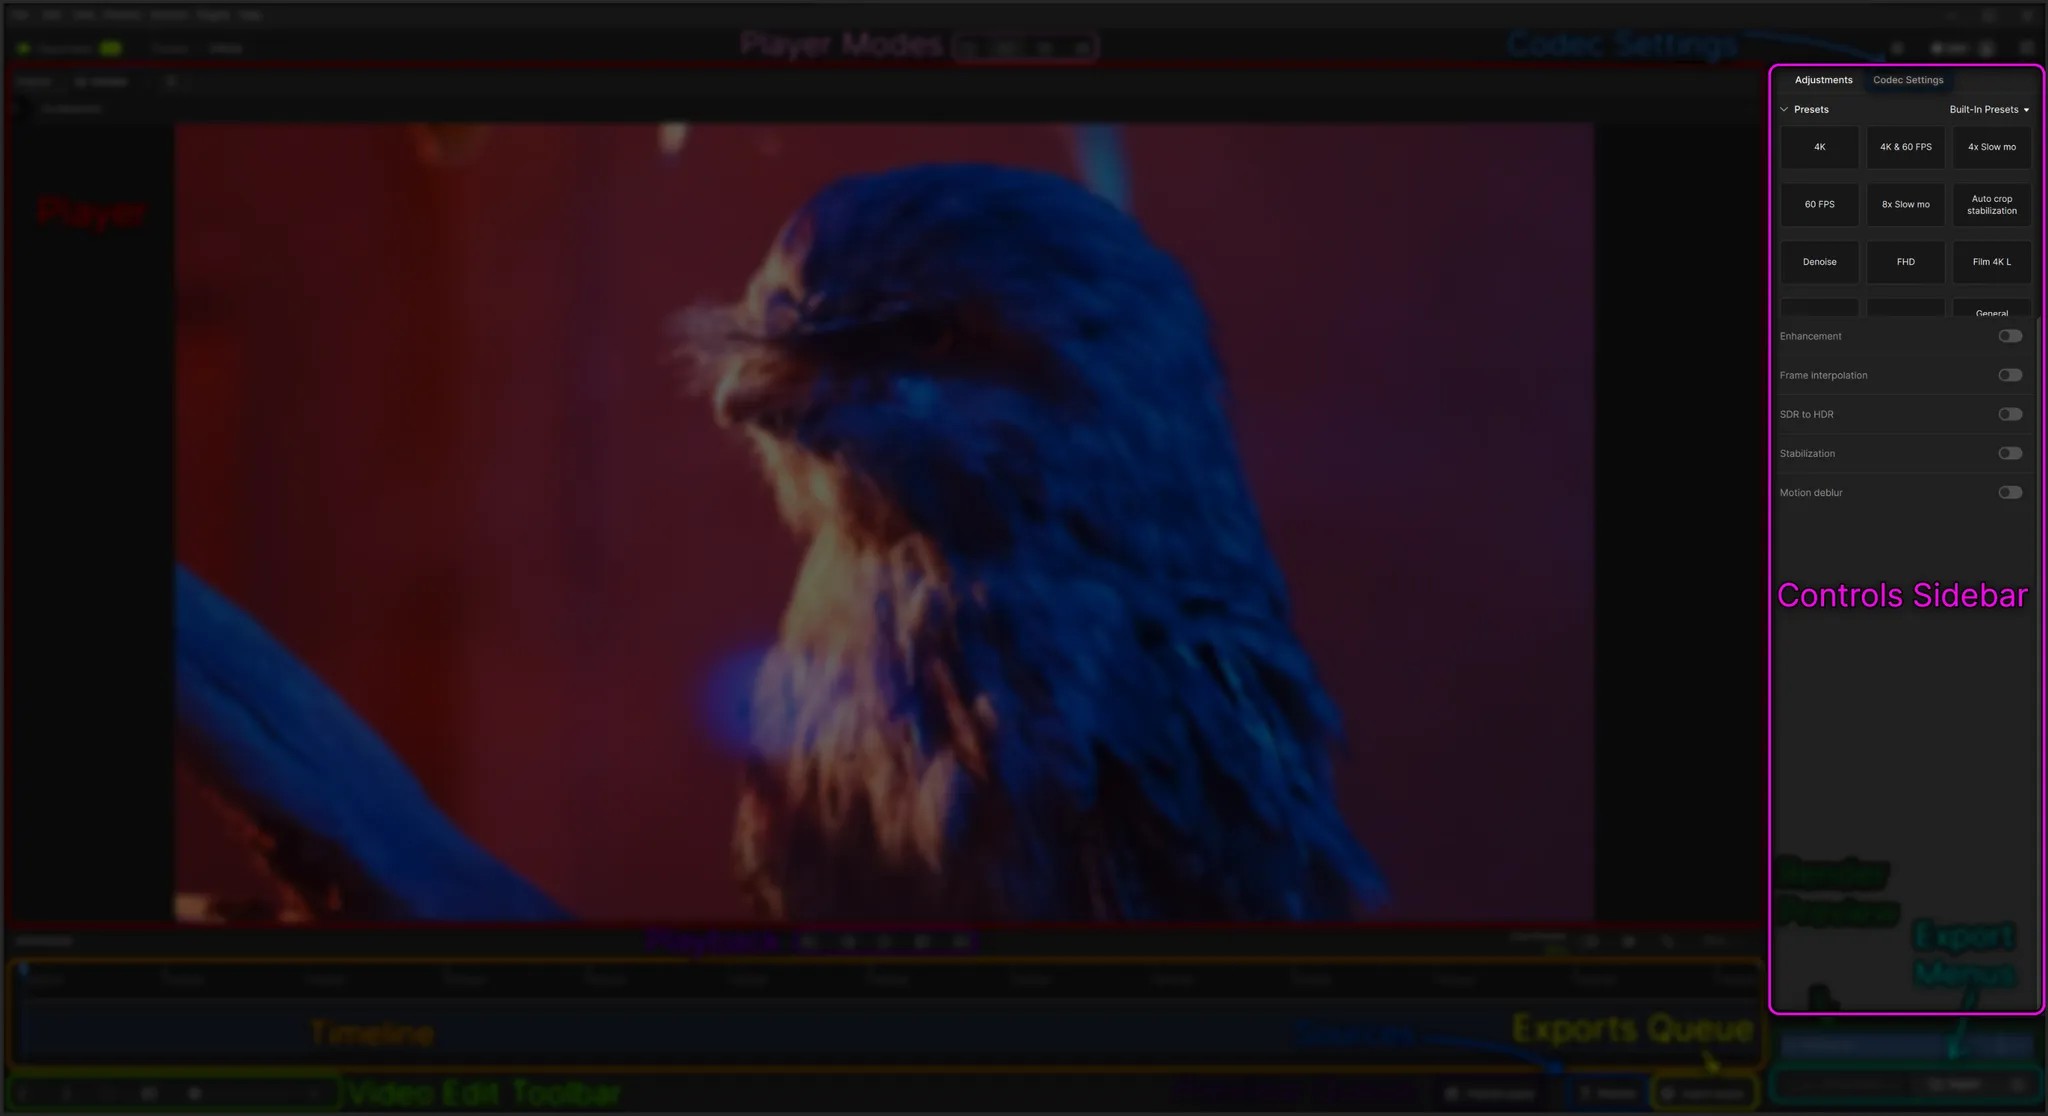
Adjustments & Codec Settings
At the top of the Controls Sidebar you will find Adjustments and Codec Settings.
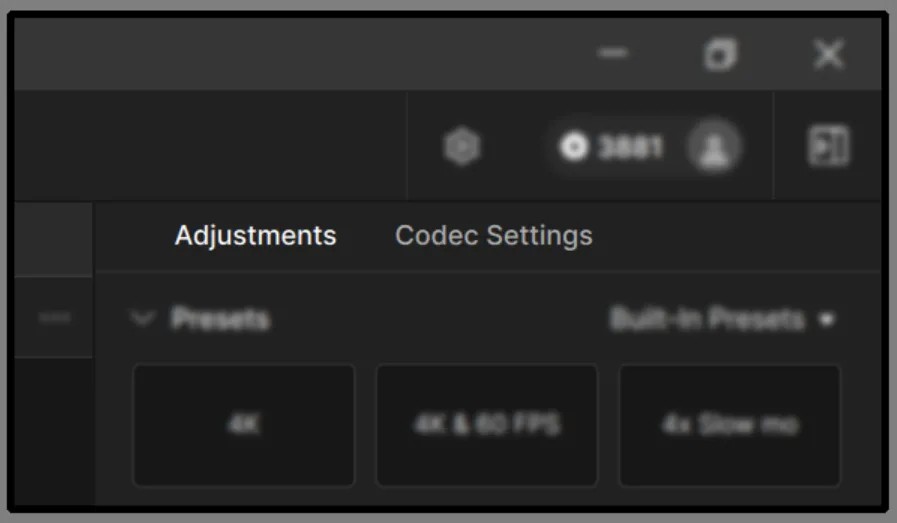
- Adjustments: is a selection of tools that allow you to refine, enhance and manipulate your videos.
- Codec Settings: provides a selection of output parameters and file types you intend to process your videos as.
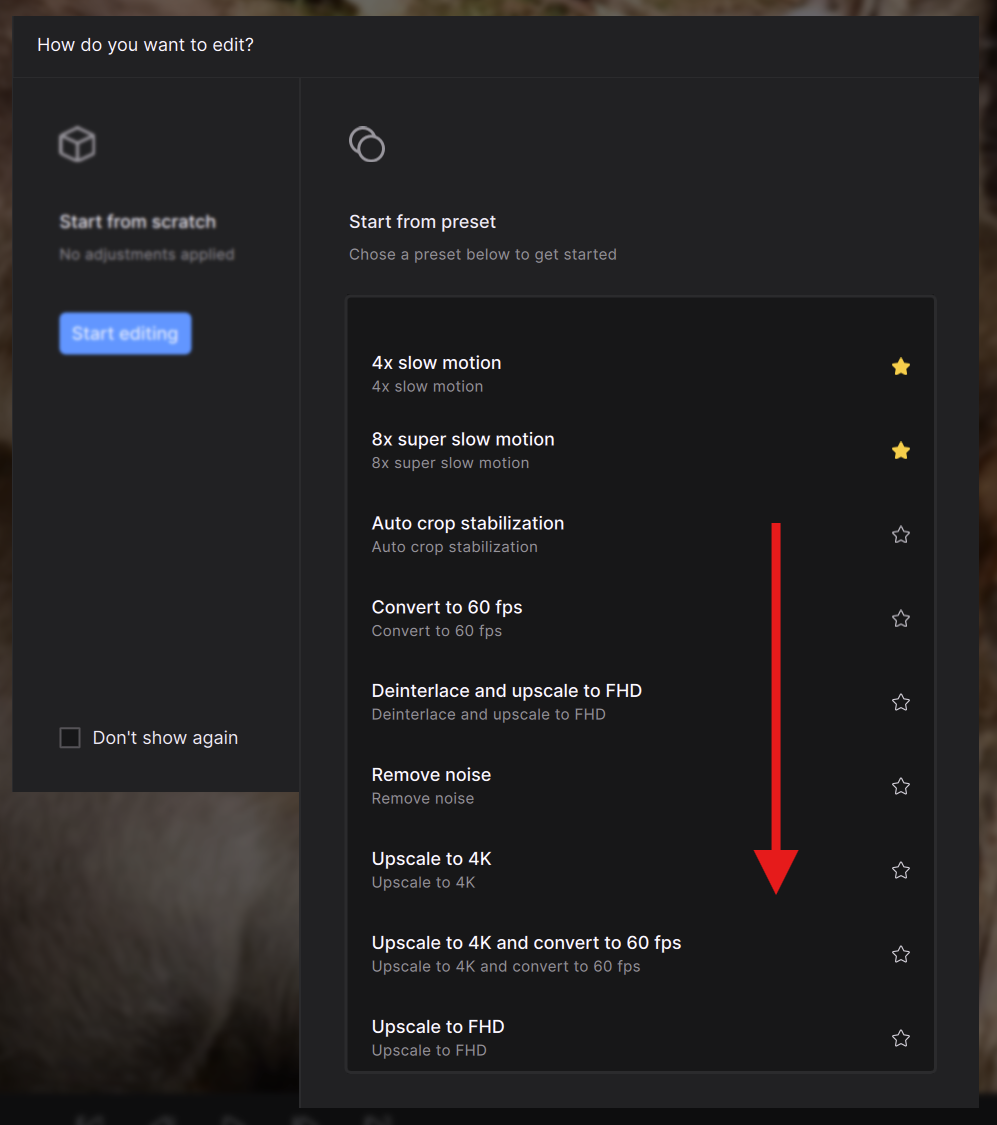
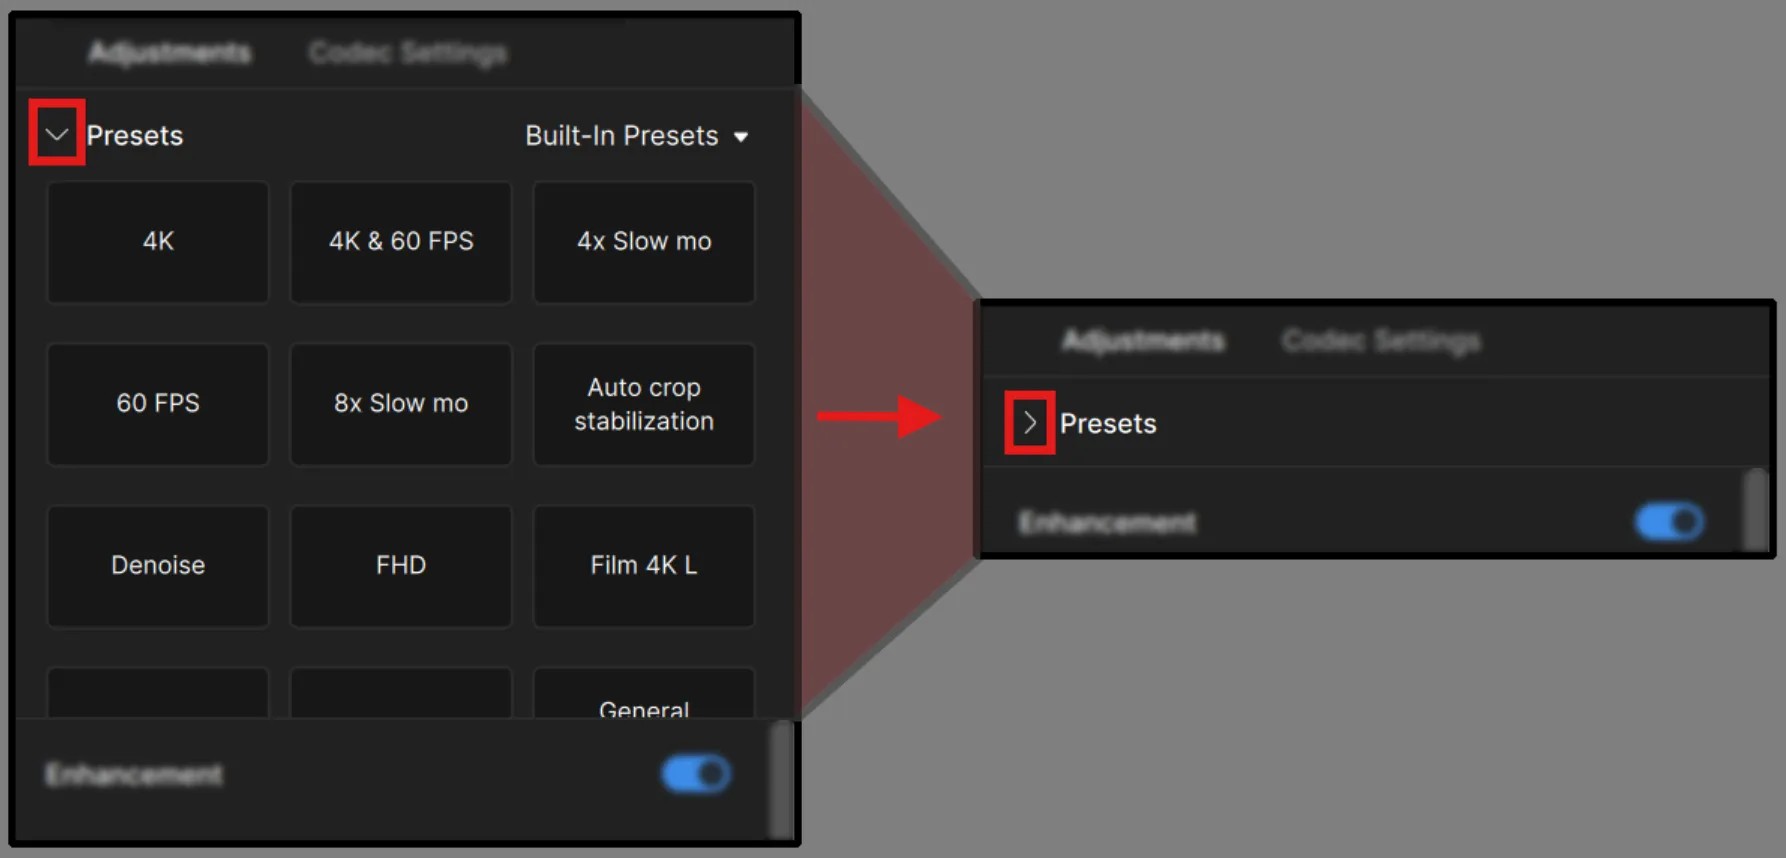
Presets
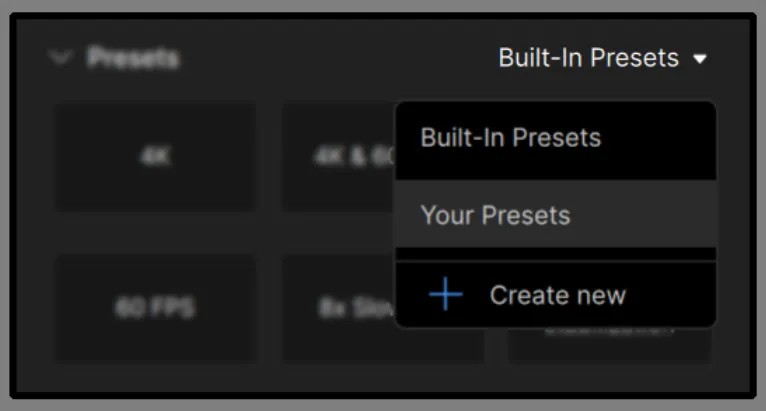
Presets is the first menu selection under Adjustments. This allows you to select built-in presets or custom ones you have built.
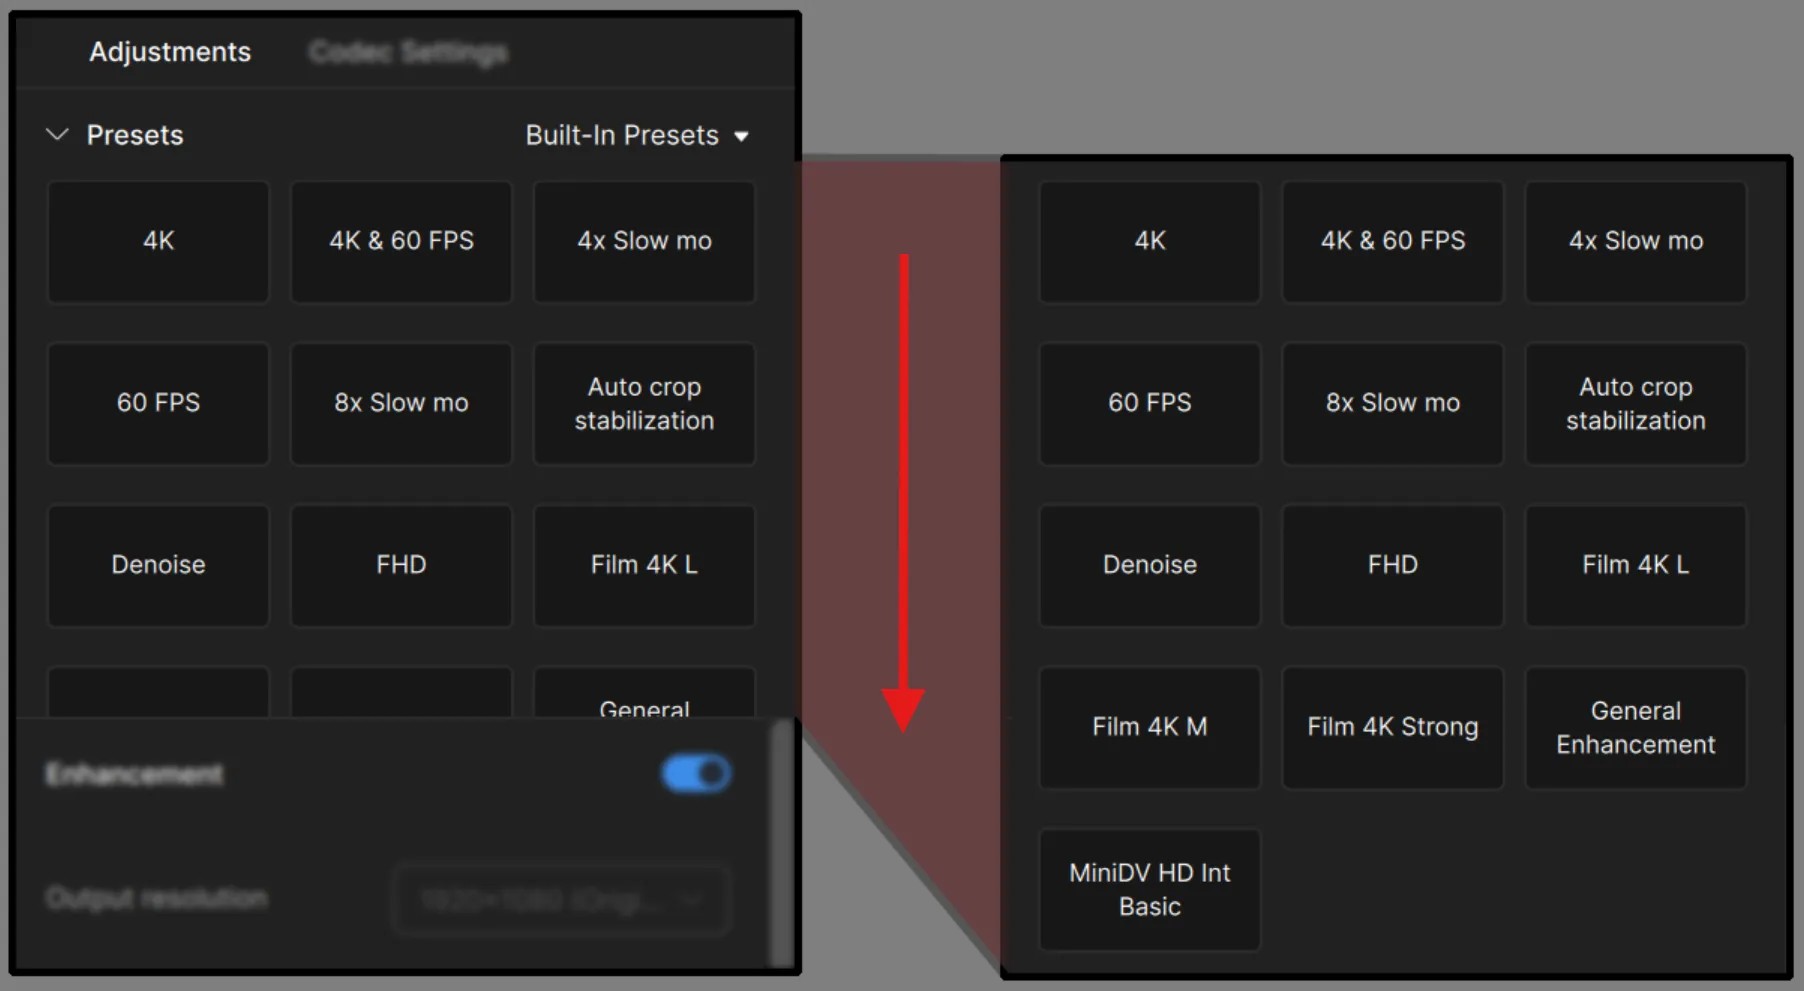
- Use the middle mouse button to reveal the rest of the built-in presets or if you have several custom ones.
- You can change the which set of Presets you wish to view (built-in or custom) by clicking the small arrow button on the upper screen right side of the this menu. Click outside of this menu to exit.
If you feel that the Presets menu is taking too much space, you can collapse the menu by pressing the caret next to the “Presets” word. You can always open this menu again by pressing the same caret button.
Filters
Each Topaz Video's filters have been trained for a specific task, such as de-interlacing, adjusting the frame rate, creating a slow-motion output and more.

Use the toggle switch to enable the filter(s) you wish to use. We recommend a maximum of two filters per file for faster performance.
Learn more about Topaz Video filters.
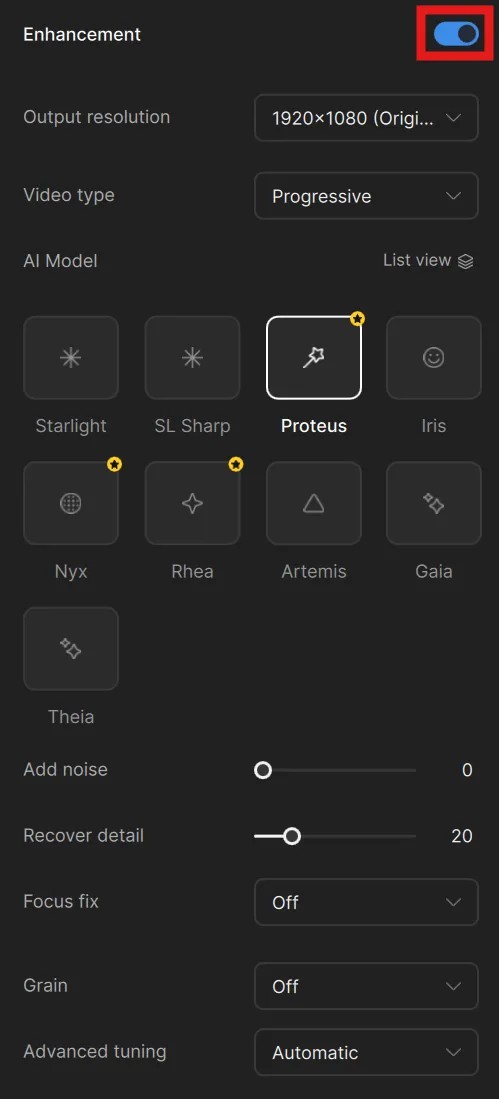
Enhancement
By default the Enhancement toggle will be enabled. This is indicated by the top right corner icon on this menu (outlined in red below). Additionally if the toggle was disabled the menu would be collapsed.
Video Setup
There are two major variables that we need to initiate for your “Video Setup" and that’s deciding on your Output Resolution and Video Type.
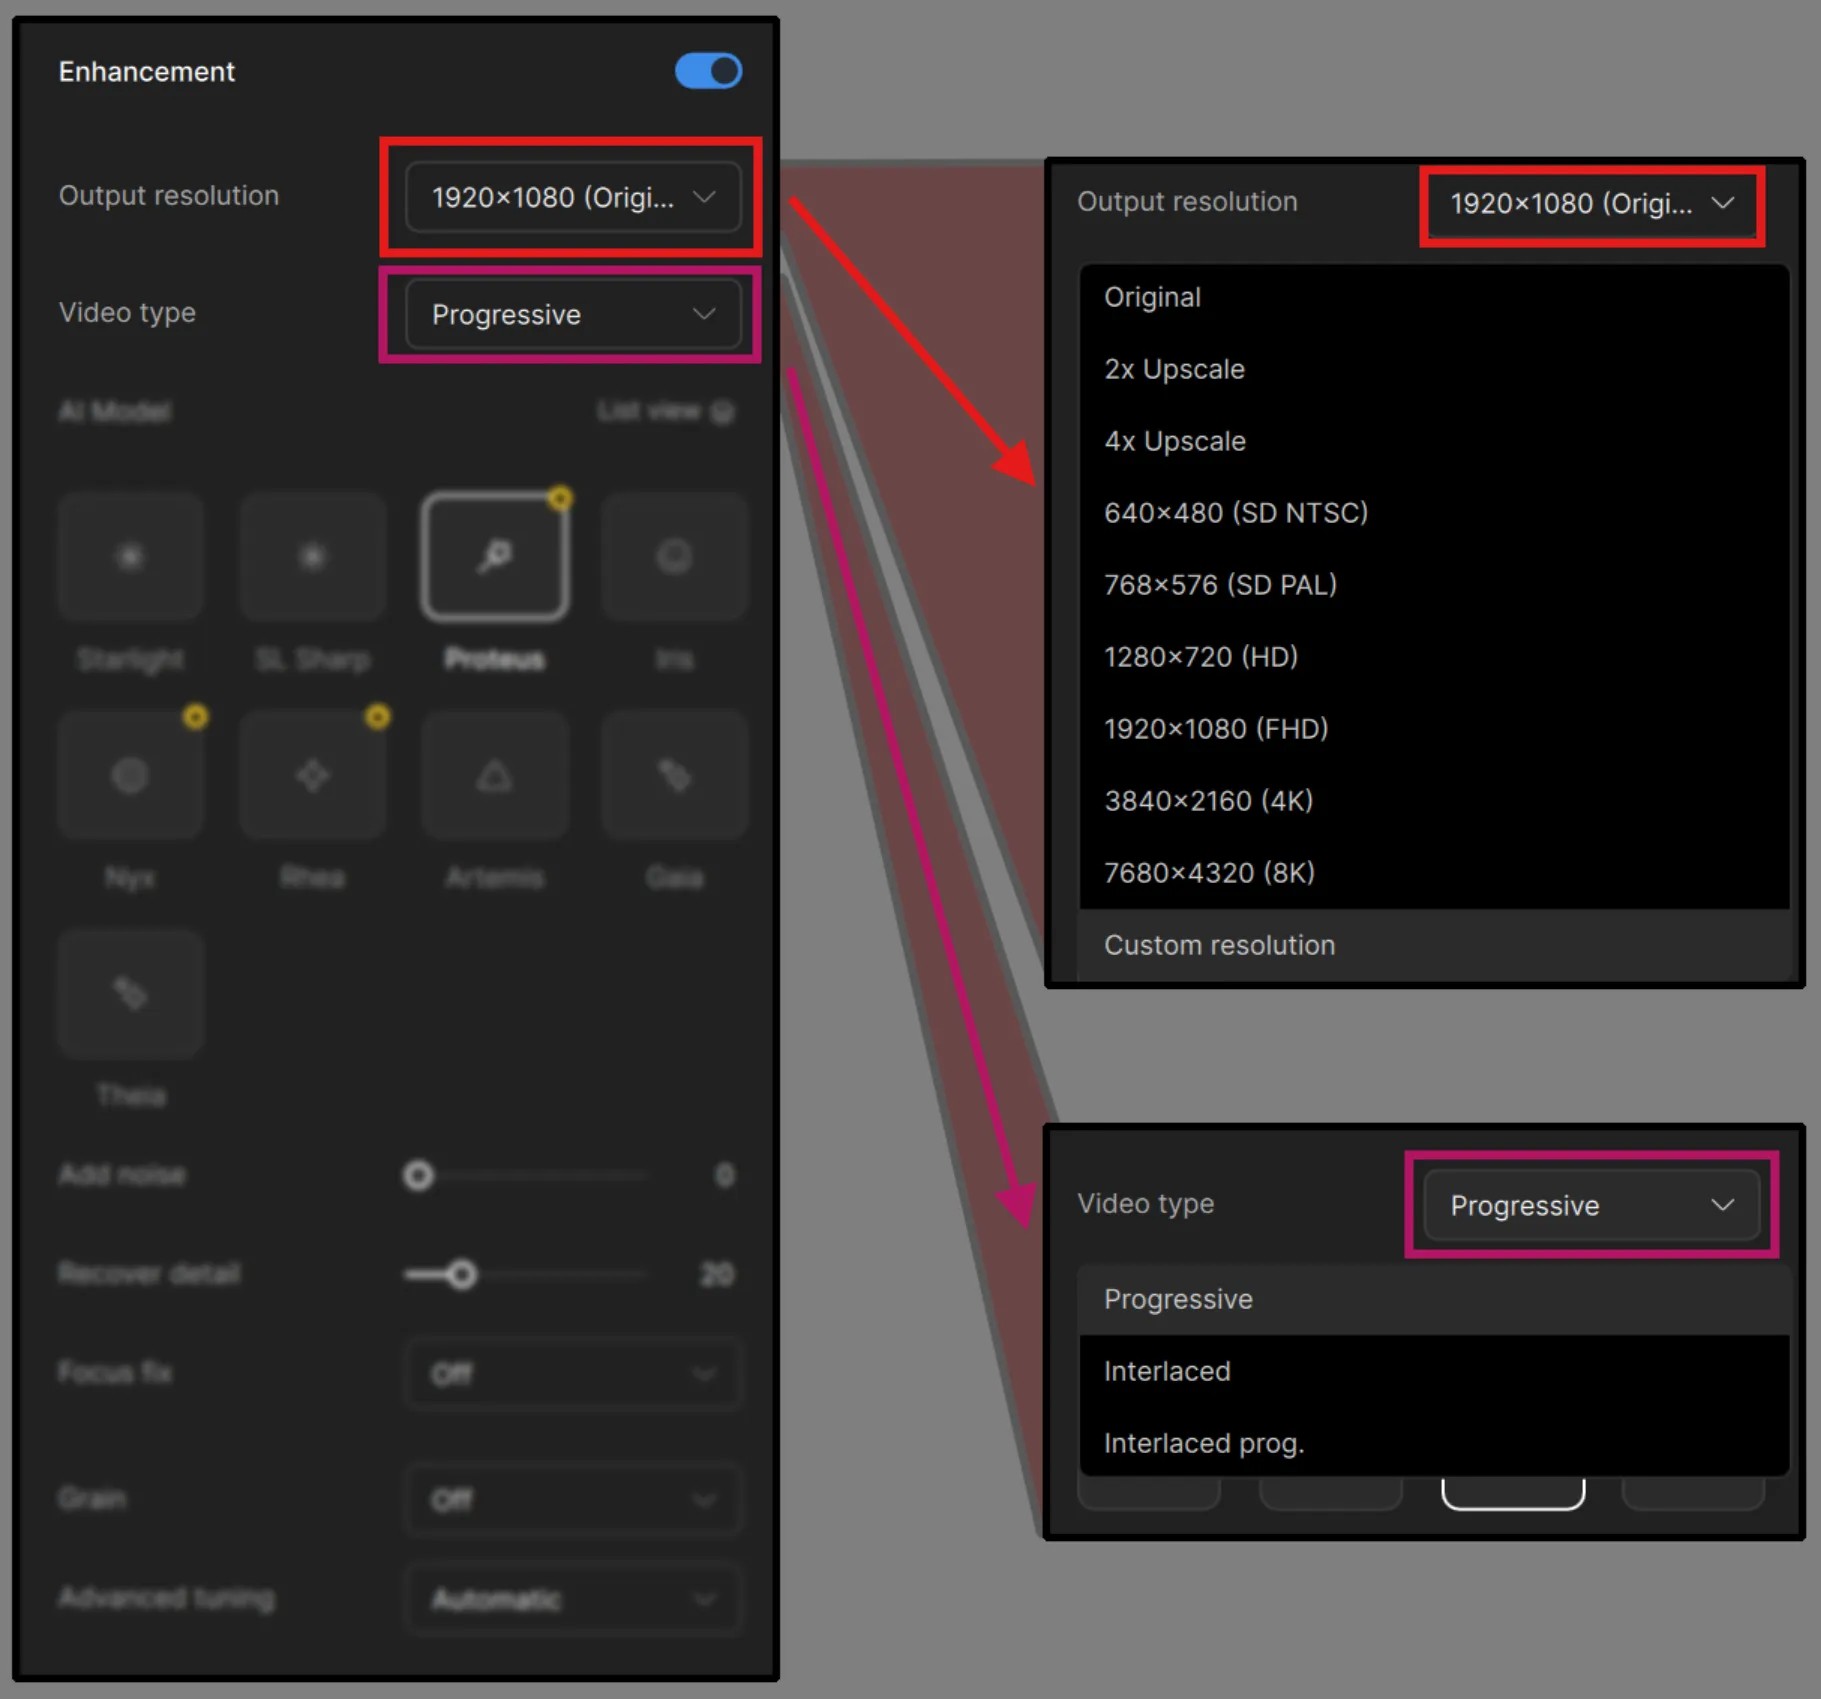
- Output Resolution: This drop-down menu allows one to decide the final output frame size in scale.
- Video Type: Here you will need to decide on the type of video you intend to use with Topaz Video. Each of these categories have a different group of AI Models. Though, for most consumer cameras starting as early to mid 2000’s, these have been progressive.
Learn more about Video Types here.
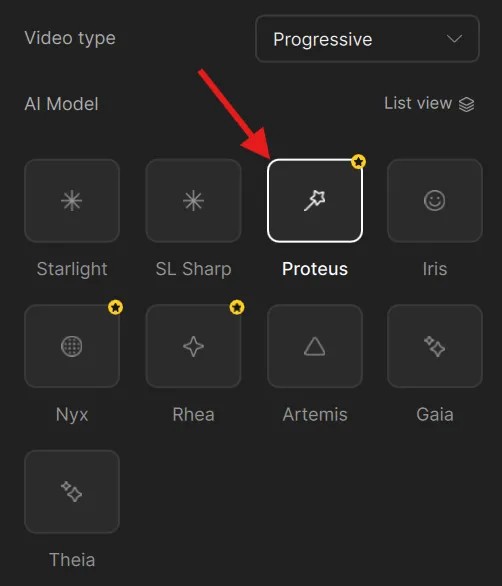
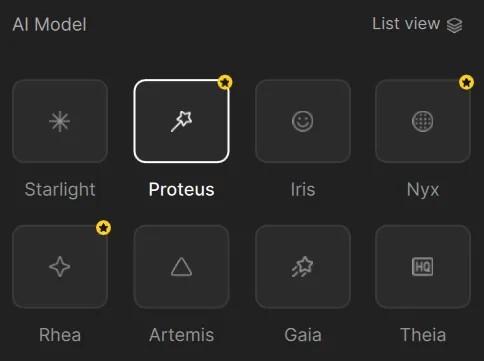
AI Model
When deciding on an AI Model to use, it is worth noting that a selected AI model is indicated by a white outline along the perimeter.
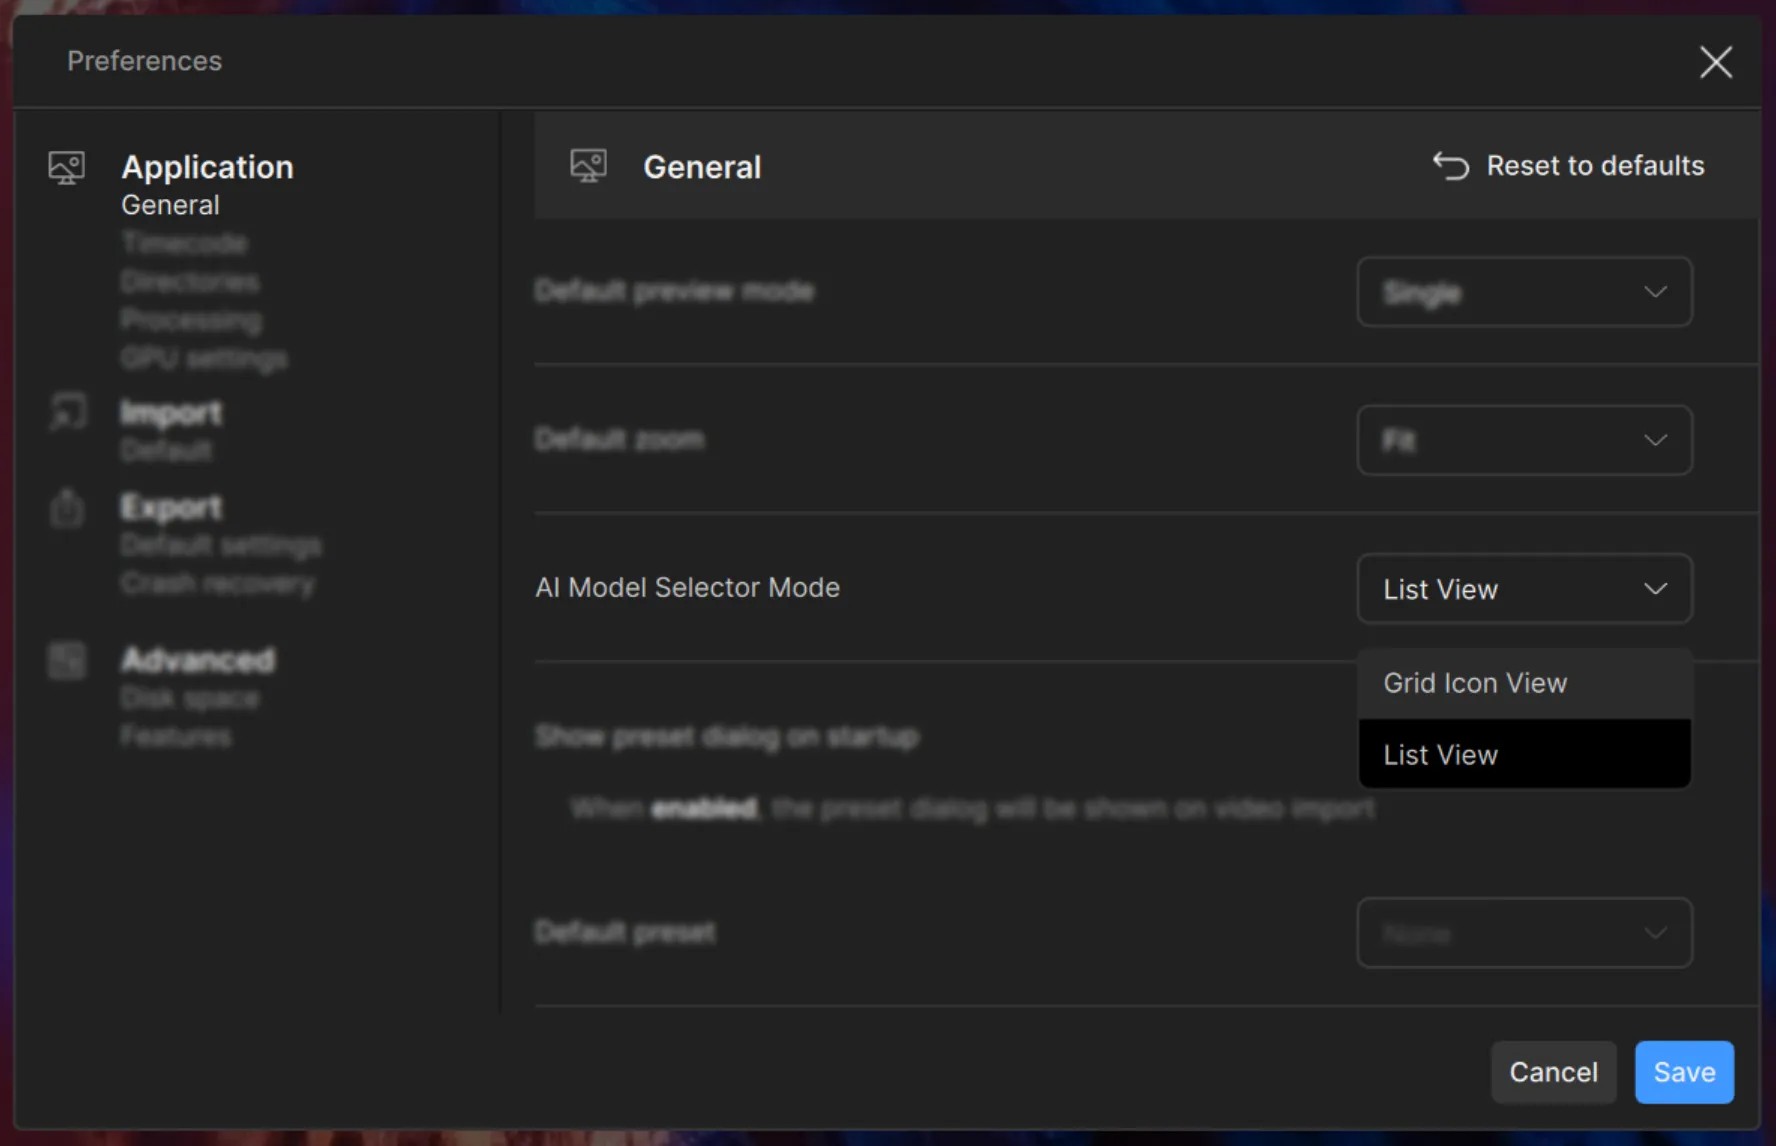
If you prefer a list view rather than the icons for the AI Model, you can click on the “List View” text to make the change. You can now select the AI Model from a drop down menu and see the list.
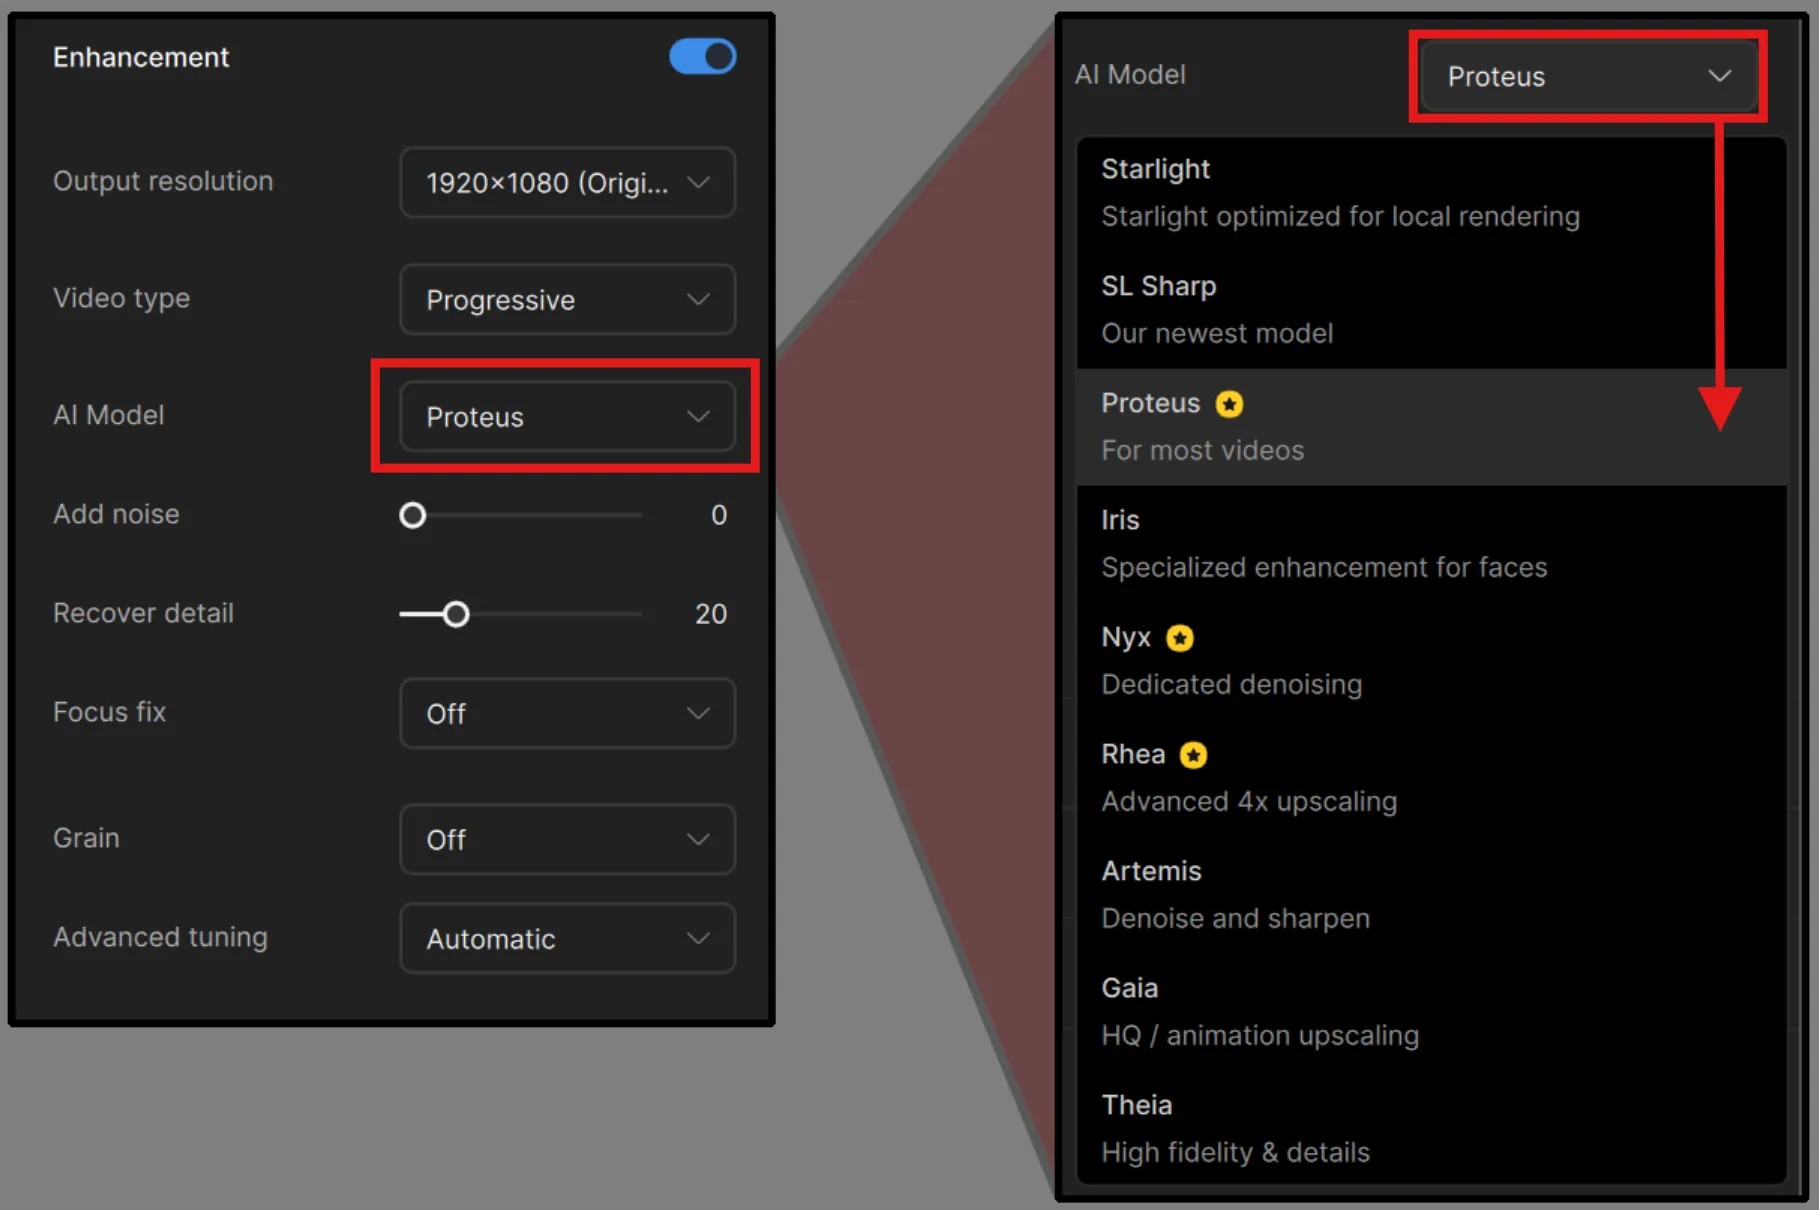
Please note, if you wish to return to using the icons, you will need to make this change within Preferences.
For your first video, I recommend starting with Proteus as this will give you a great idea on how the models work. Additionally, since this is one of the most commonly used AI Model, it’s a great place to start before using some of the other specialized AI Models.
Preview Your File
There are a few ways to preview your files.
- Frame Preview: Essentially, when you stop on any frame with an enhancement, the frame you are on will automatically load with an instant preview of said enhancement. Note, that this will not pre-render a range, just the single frame. The purpose for this is to get immediate feedback as you modify settings to find the results you are looking for.
- Live Render: It works by immediately doing a preview once an enhancement is applied and gets initiated by either the space-bar being pressed or the Play button. This is great for short videos with light enhancements to see an instant update with your video enhancement applied.
- Render Preview: If you have a long piece of footage, isolating render points plays a more pivotal role since caching the whole video can be a waste of local memory resources and take a significant amount of time.
Frame Preview
For the Quick Start, we will look into the Frame Preview.
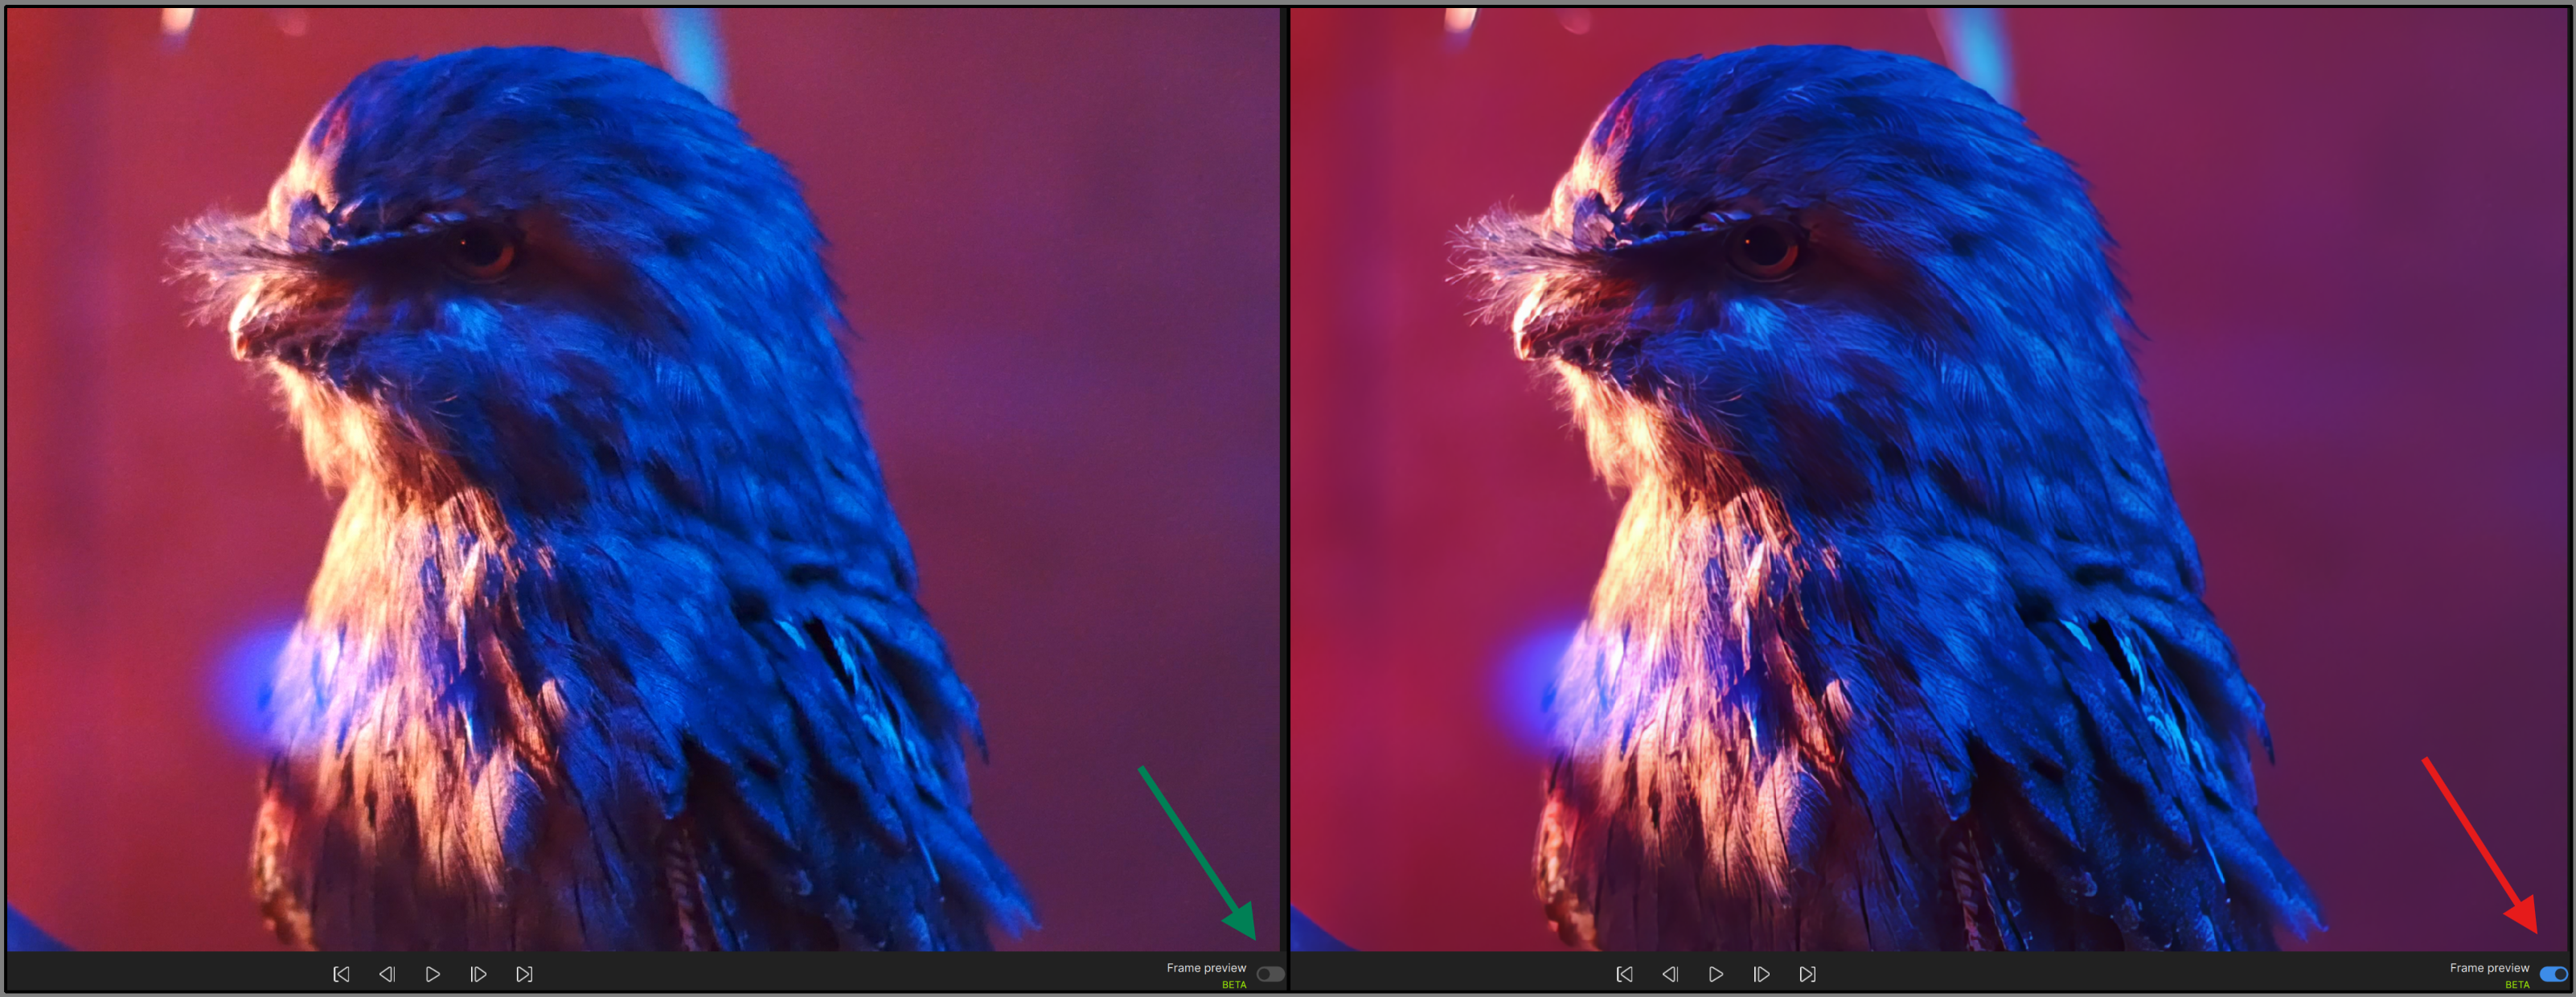
There are certain conditions where the Frame Preview option will not work. For now, Frame Preview should be used for core AI Model enhancements that exclude the starlight family models.
- To generate a preview, first select the desired resolution and video type.
- By default the Frame Preview will be disabled.
- Select an enhancement AI Model (excluding the Starlight ones) and enable by pressing the toggle.
- Immediately this will update the preview with the selected model.
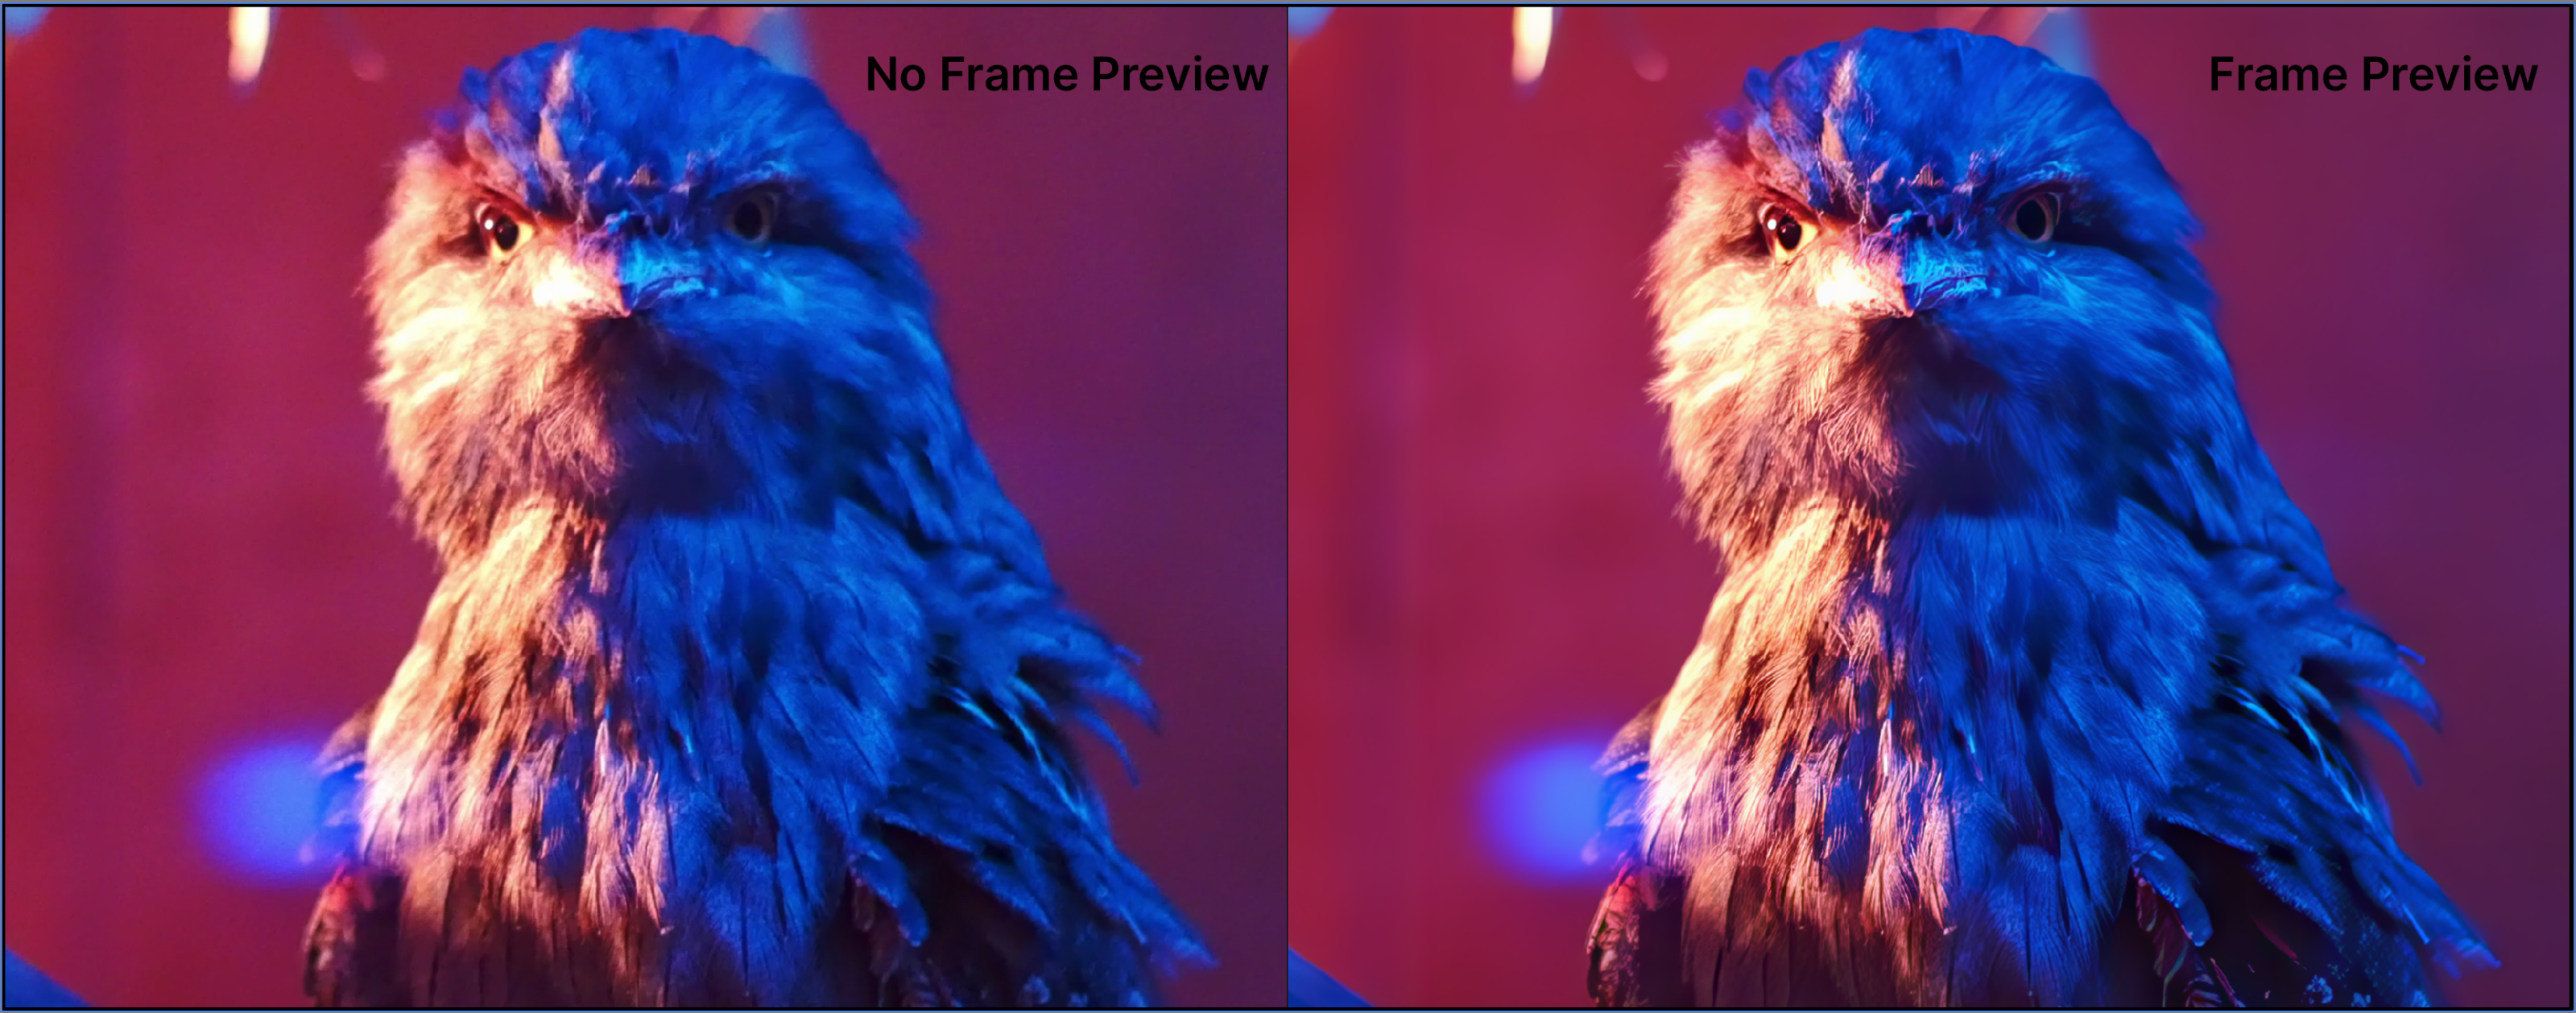
- Any modifications made or completely changing an AI Model, will automatically update the preview on the player.
Render Preview
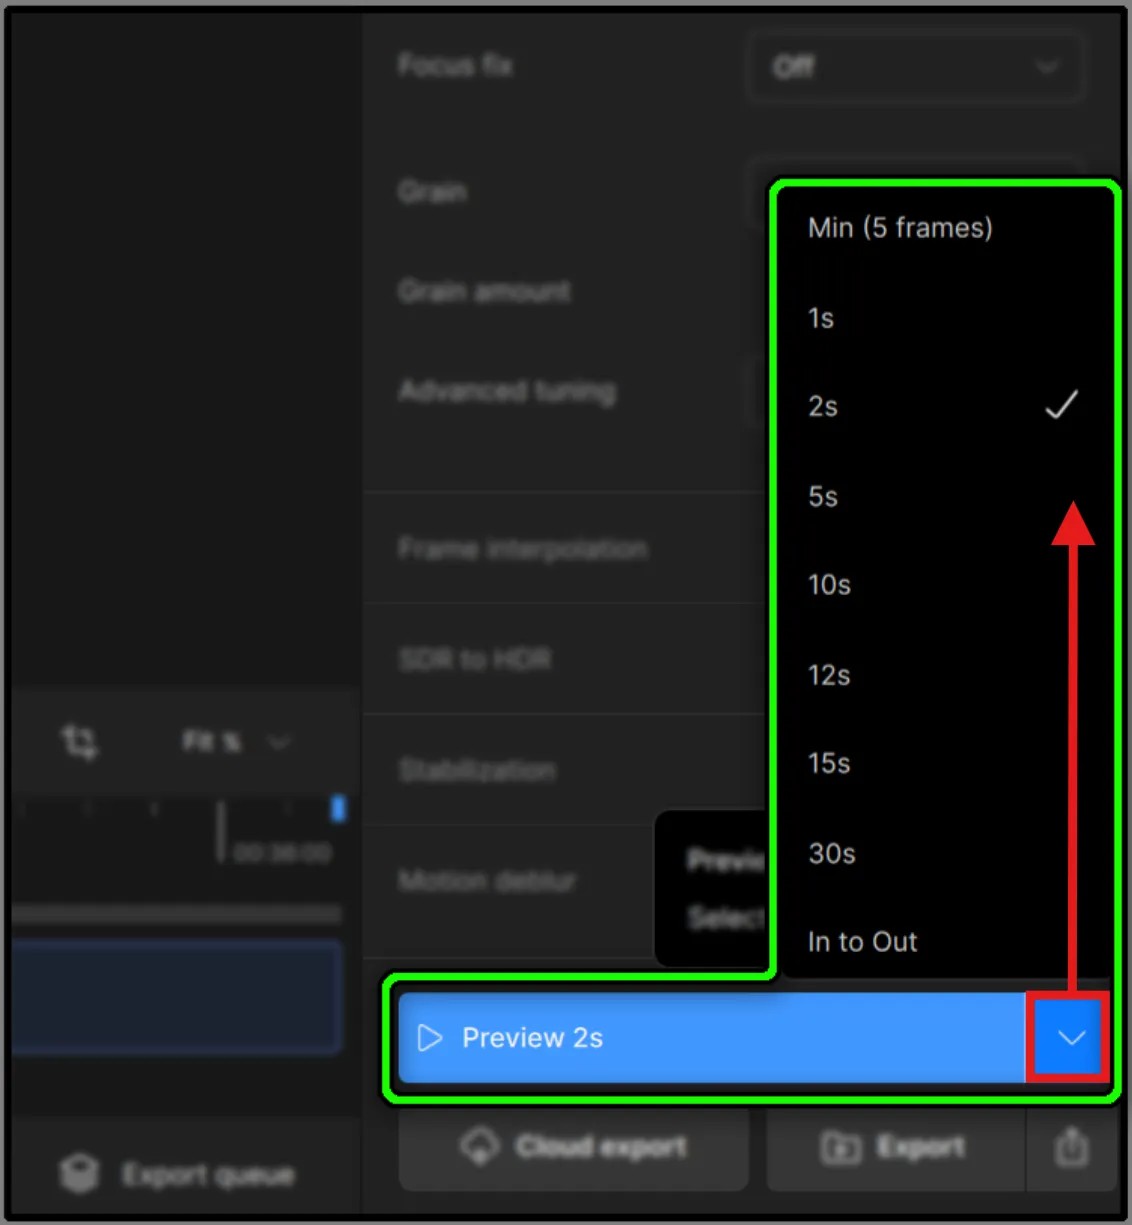
For the Render Preview button, there is a default of 2 seconds. Click the caret to select up to 30 seconds to preview. Otherwise Click on the main button (light blue section) to begin the preview.
- The render will begin wherever the video head marker is.
- You can always use In/Out points.
- When rendering, a progress bar and an ETA will appear for each file.
- A blue check mark indicates that the preview is complete.
- You can generate as many previews as you need by using tabs. Learn more about tabs from the User Interface page.
- Adjust the Player Modes and zoom to inspect the results.
Use the Playback controls to view and compare within the application. To view the Preview using your own default video player, double-click on the preview or use the triple dot menu to open an external player.
Please refer to the Import, Preview, and Export support page for more detailed information and tutorials with Live Render and Render Preview.
Export Your File
Codec Settings & Export Menus
- Codec Settings: will allow you to select the export Encoder, Container, and audio settings.
- Export Menus: allows you to process your videos out to its final output.
Codec Settings
Click on the Codec Settings tab from the upper screen right side of the Controls Sidebar.
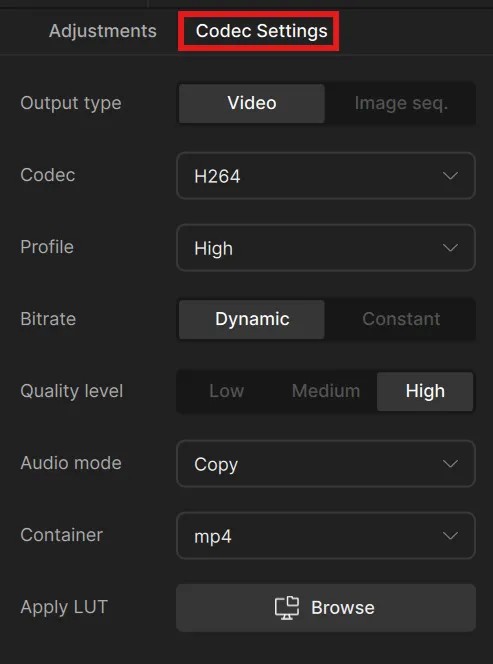
Here you can make any changes you would like to the output video or image sequence file type. Additionally there are some audio parameters and a few other adjustments pending on the Codec file type you’ve selected. Please note that H264 is set as the default. This should be good for most cases up to 4K outputs.
Learn more about Topaz Video's Encoders and Containers.
Export Menus
Once you have found the best settings for your file and you have inspected the preview, you are ready to Export.

By default, the exported file will be saved to the input file's location.
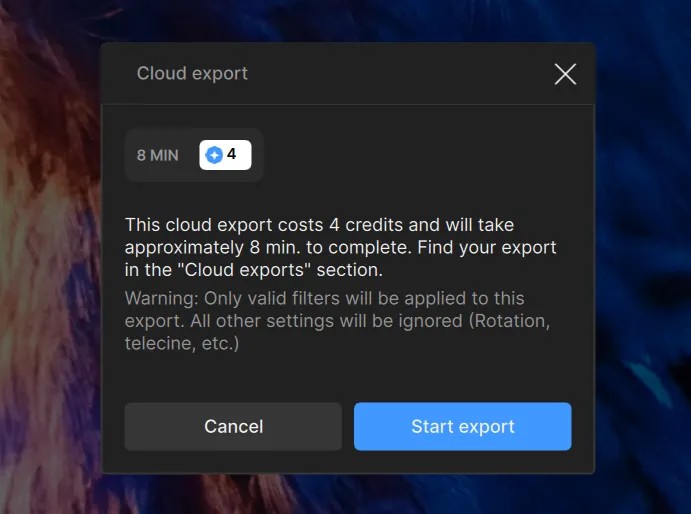
- Cloud Render: is an optional service where you can send files off to our servers to process for you. This is useful for those with a machine that may struggle with the requirements for the specified AI Model or as a time saver for content with a long duration.
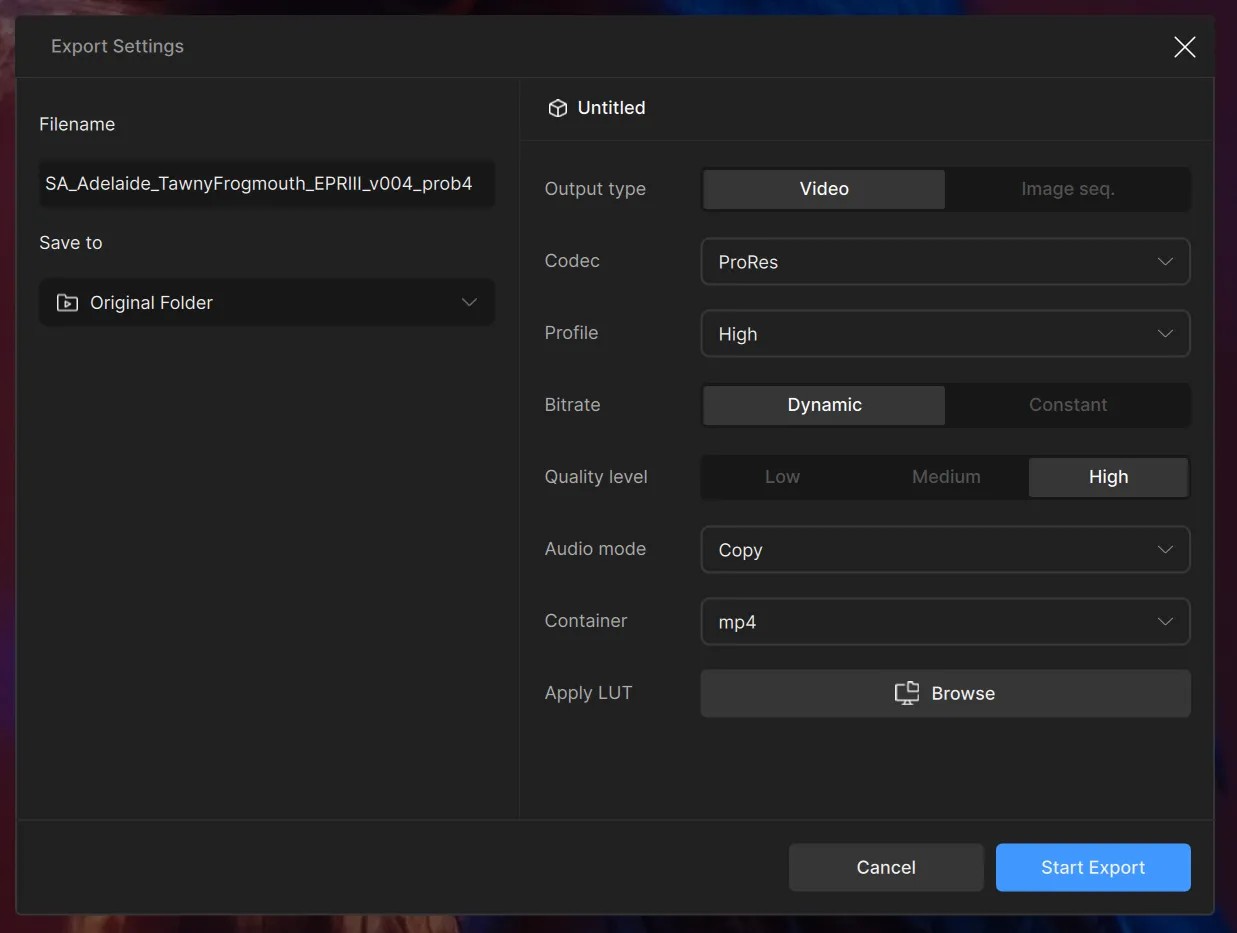
- Export As…: Allows customization to the save location, rename the video file and revisit any last minute codec changes. Please note that any Codec changes made here will be mirrored with the Codec Settings menu.
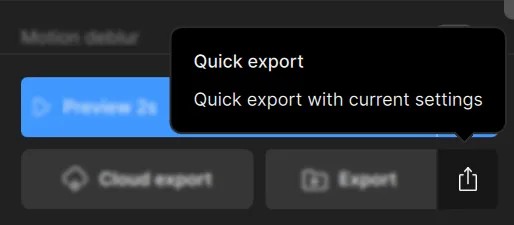
- Quick Export: Shown as an icon button on the lower SR side of the application, uses whatever settings are prepared from the Codec Settings, saves to the input file’s location, and keeps the original naming with an additional tag of the filter(s) used.
Using any of the export buttons will process from the current video.
Export Queue
Once you have selected the method you wish to export, all your exports is conveniently housed together in the Exports Queue. Click on the Exports Que to open this view.
In the Exports Queue view, there are a few main areas to note:
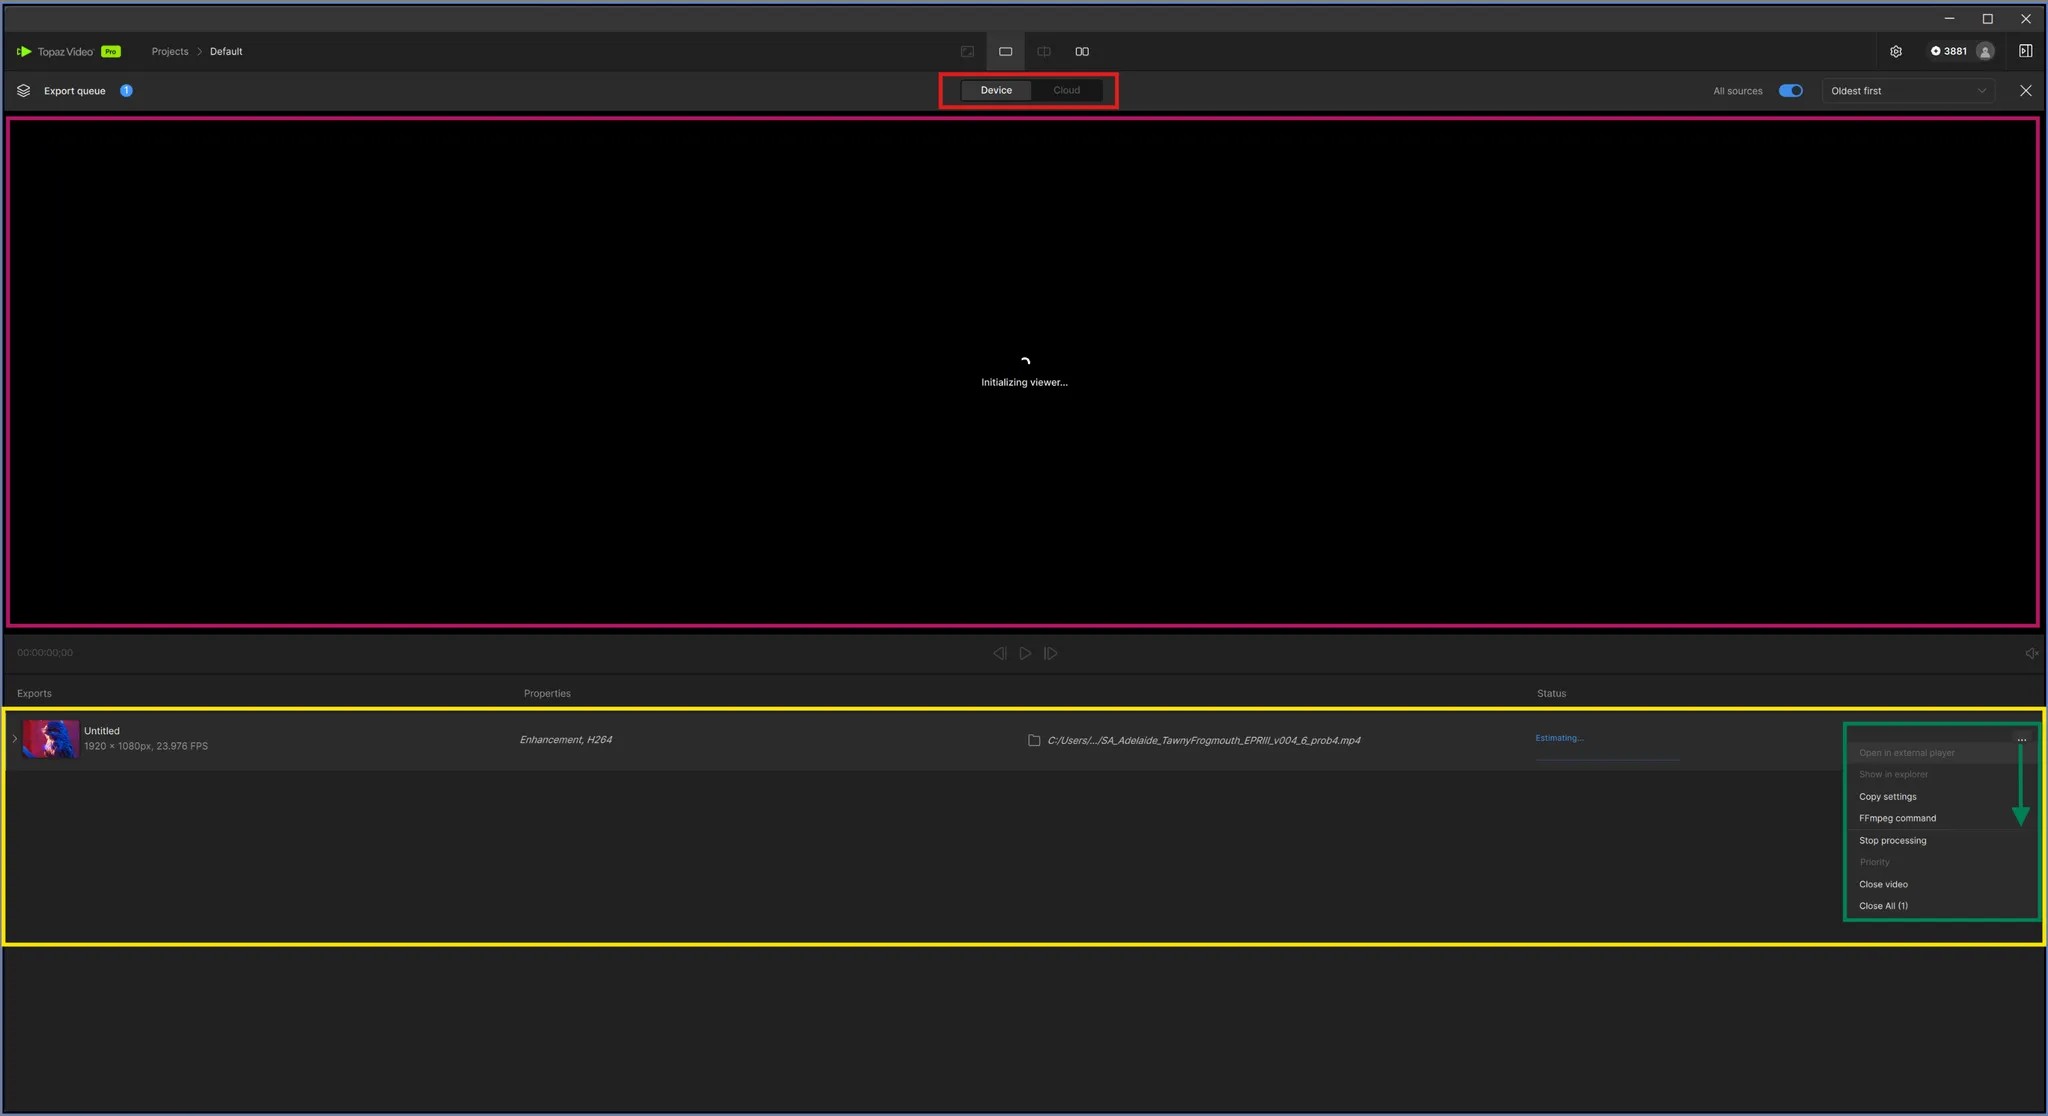
- Export type (red): Device (local) or Cloud
- Player (pink): Allows you to preview the render.
- Export Task (yellow): This is the individual export task. If there were multiple, they will be aligned in layers below this one.
- Additional Options “…” (green): This provides more things that can be done the processing/processed task.
What's Next?
Congratulations on enhancing your first video! Learn how to use Topaz Video filters, encoders, and more: