Generative Models
Gigapixel has generative AI models that produce outstanding results for unique enhancements on small images. If a ⚠️ Large image warning appears, you likely need to crop or resample the image into smaller pixel dimensions to avoid processing errors. You can find all the generative models at the bottom of the model list in the right panel:
System Requirements
Generative models have higher requirements for processing than the core models.
- Generative models other than Standard Max require 8GB of VRAM with a NVIDIA or AMD GPU. Standard Max only requires 6 GB of VRAM with a NVIDIA or AMD GPU.
- 24GB+ of system RAM is required for ARM-based systems.
- macOS 14 or newer is required for all generative models
- 16 GB of RAM or more is required for all generative models
Wonder
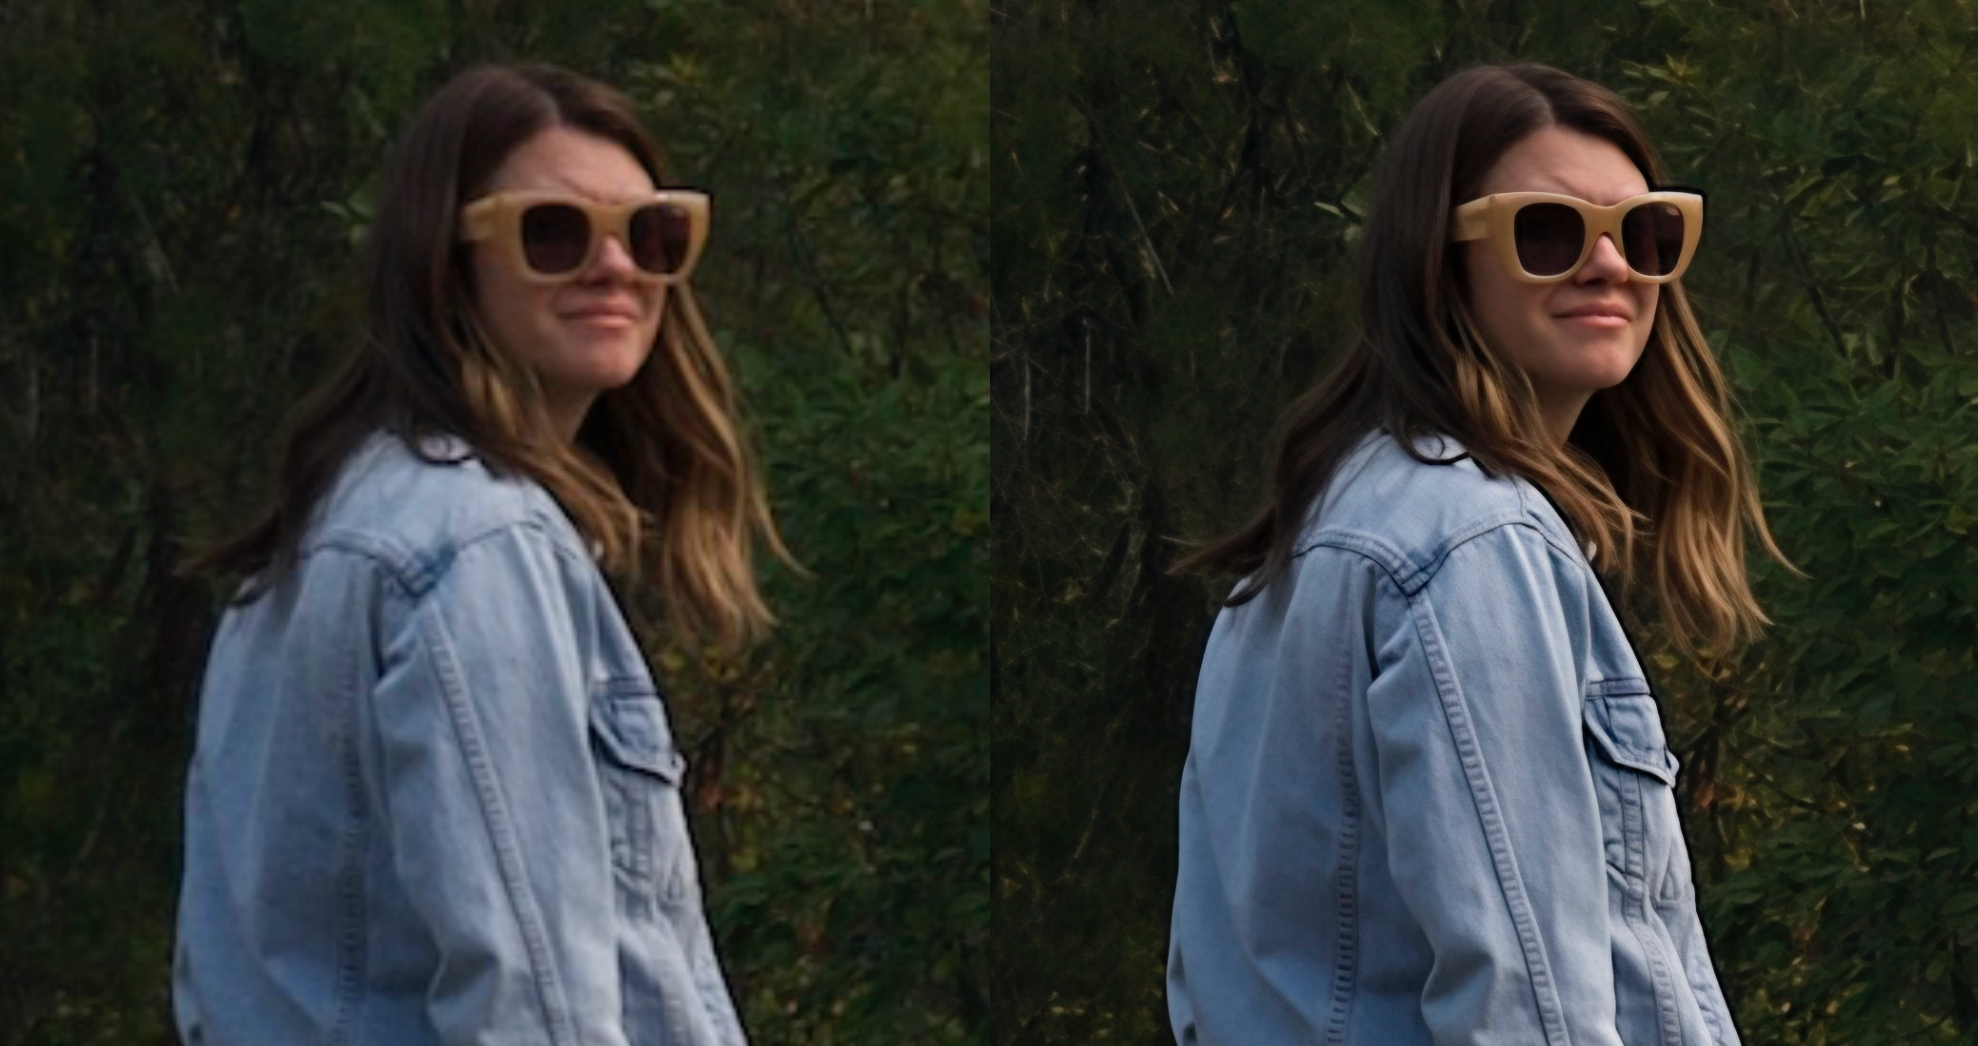
Wonder 3 is an updated generative upscaling model designed to deliver significantly higher quality results with more natural detail and improved realism across a wide range of image types. It supports both high-quality inputs and heavily degraded or compressed images, with selectable Low, Medium, and High enhancement levels for greater control across varying input conditions.
Compare results of Wonder 3 below:
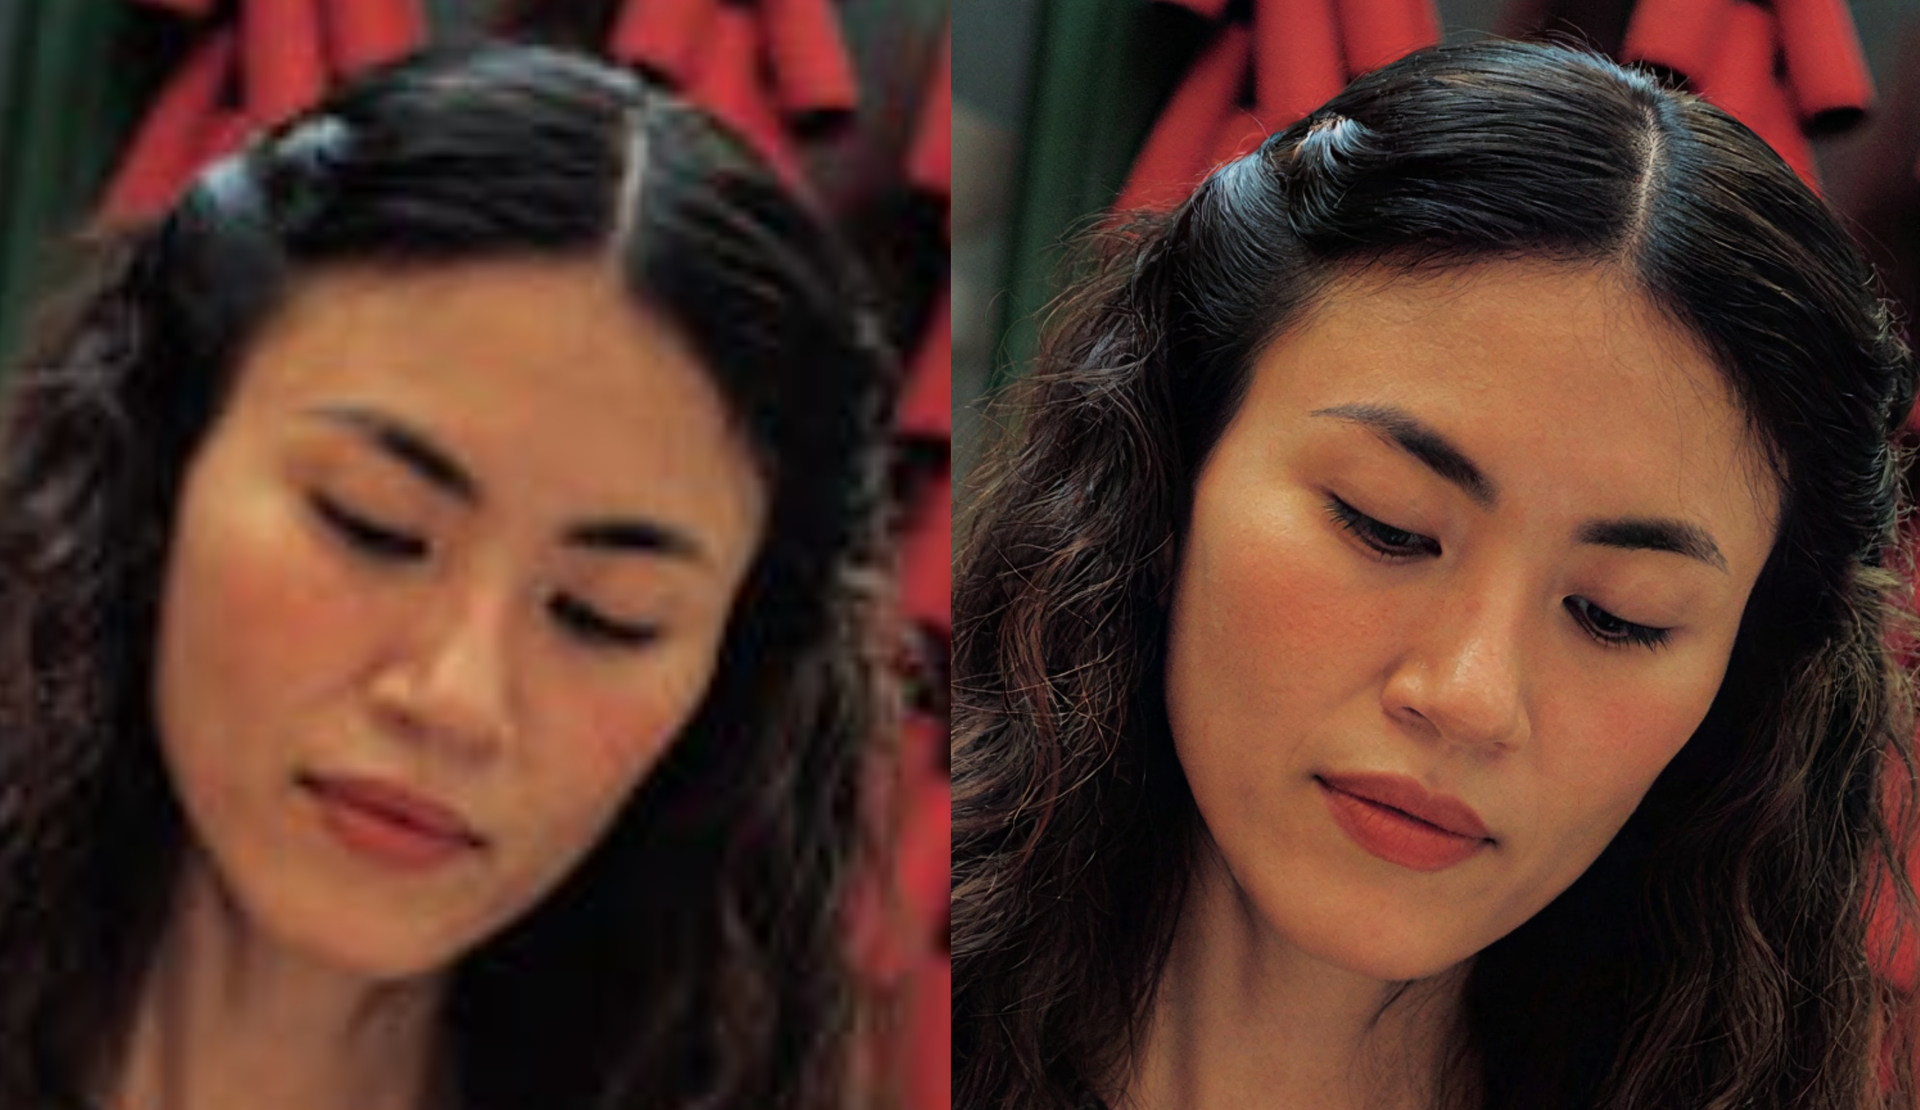
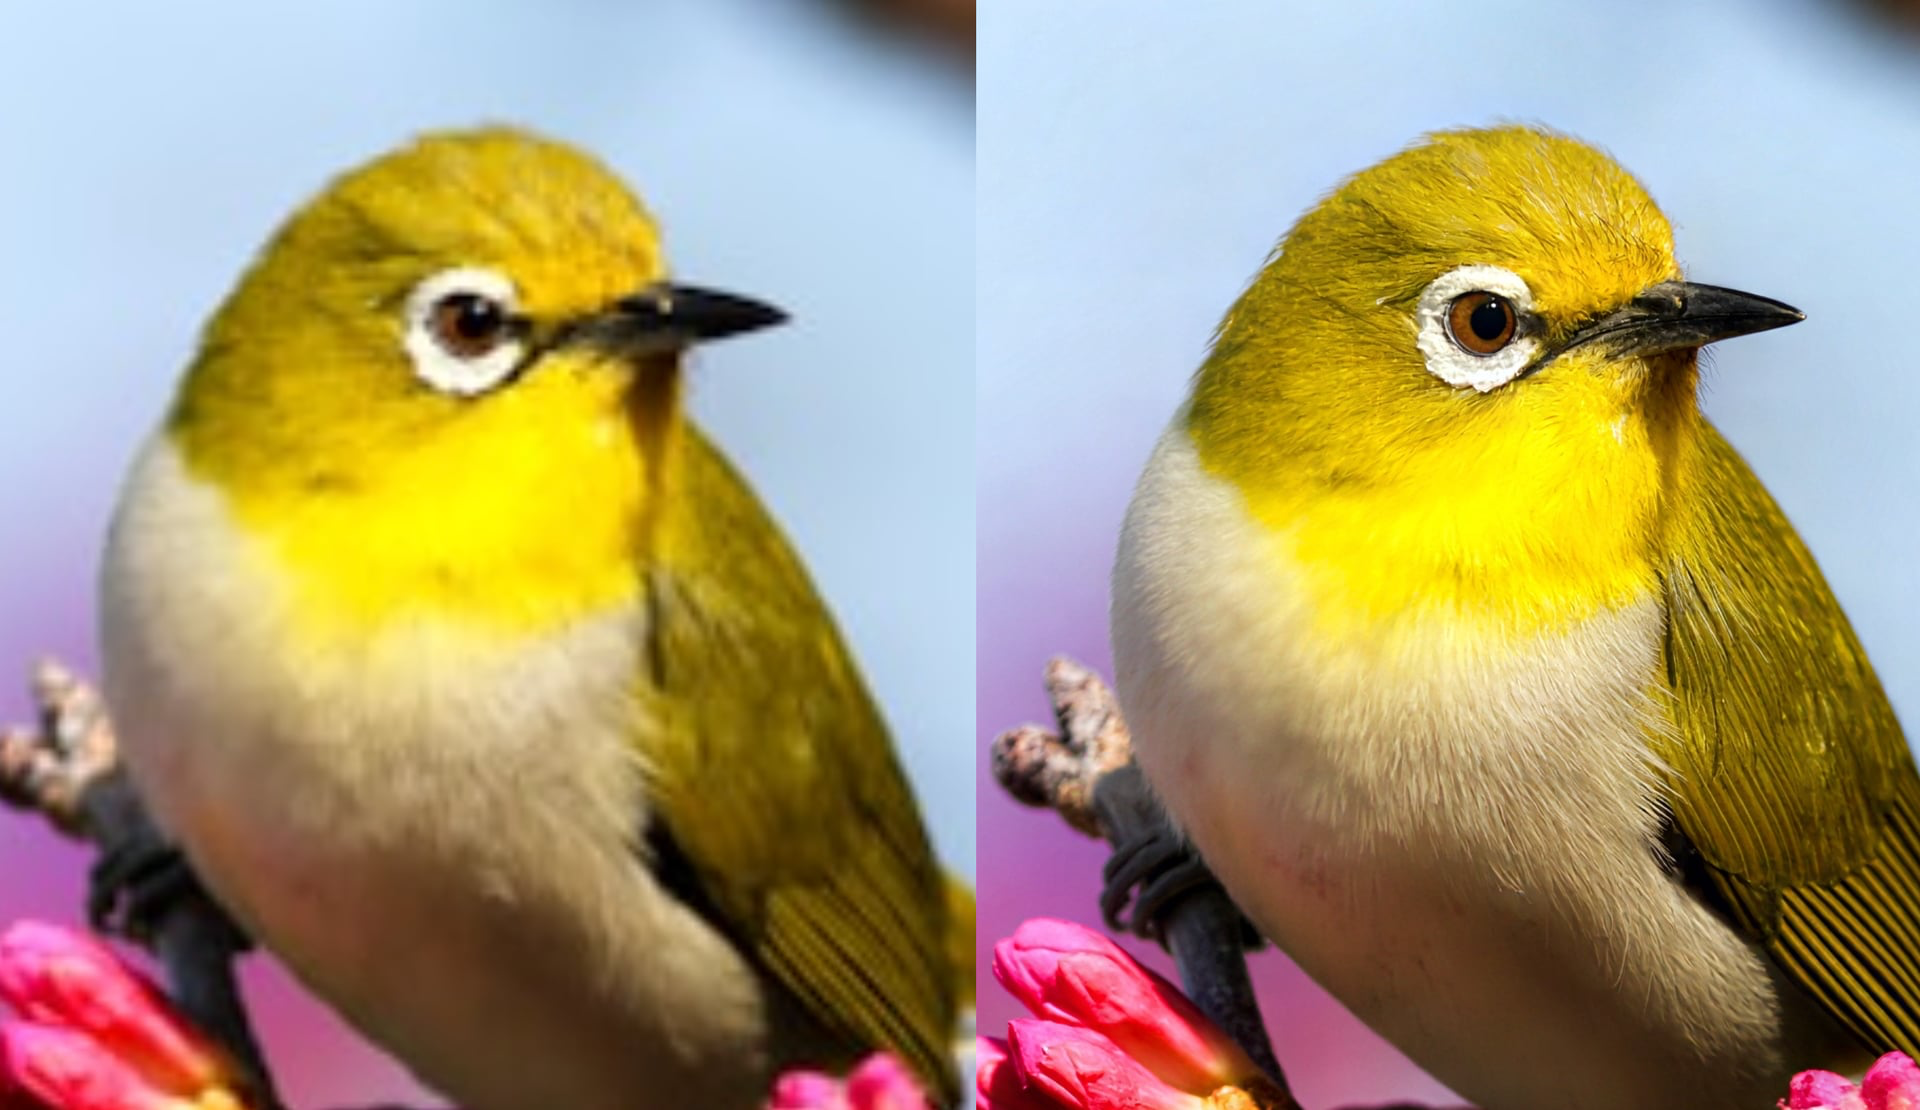
Wonder 3 performs across all resolution levels and is well suited for portraits, landscapes, wildlife, and complex textures such as fabrics, metallics, feathers, and skin. It also improves on Wonder 2 by resolving challenging edge cases and reducing the plasticky appearance and artifacts seen in earlier versions.
- Higher quality results with more natural detail and improved realism.
- Handles both high-quality inputs and heavily degraded images with consistent performance.
- Preserves text, logos, and fine details when source quality allows.
- Multi-level enhancement control for adjusting strength across a range of input conditions.
Wonder 2 is the second-generation Wonder model and the most advanced realism-focused image enhancement model in the family. It is designed to handle extremely challenging, low-resolution images and produce outputs that look clean, natural, and professional.
Wonder 2 restores sharper, more natural detail across the image, resolving plasticky or airbrushed artifacts to produce clean, realistic results. It recovers skin texture, facial features, hair, fabric, and environmental detail while minimizing artifacts and avoiding unnecessary changes to the source during upscaling.
- Second-generation generative enhancement for difficult or low-quality images
- Restores sharper, more natural detail with strong artifact prevention
- Preserves text, logos, and fine details when source quality allows
Use Wonder 3 if your image suffers from false resolution, noise & grain, or is low-light with artifacts.
Wonder 1 is a generative image enhancement model designed to repair and improve small to medium-sized low-resolution images in a single step. It intelligently reconstructs missing detail while prioritizing realism and avoiding unnecessary changes to objects, textures, or overall image structure.
Wonder excels at restoring soft, noisy, or compressed images, producing clean, realistic results with minimal artifacts. It is best used when images require strong cleanup and realism-focused enhancement rather than fine-grained manual control.
- One-click generative enhancement for low- and medium-quality images
- Delivers clean, realistic results without artifact buildup
- Designed for single-step image repair when realism matters more than manual control
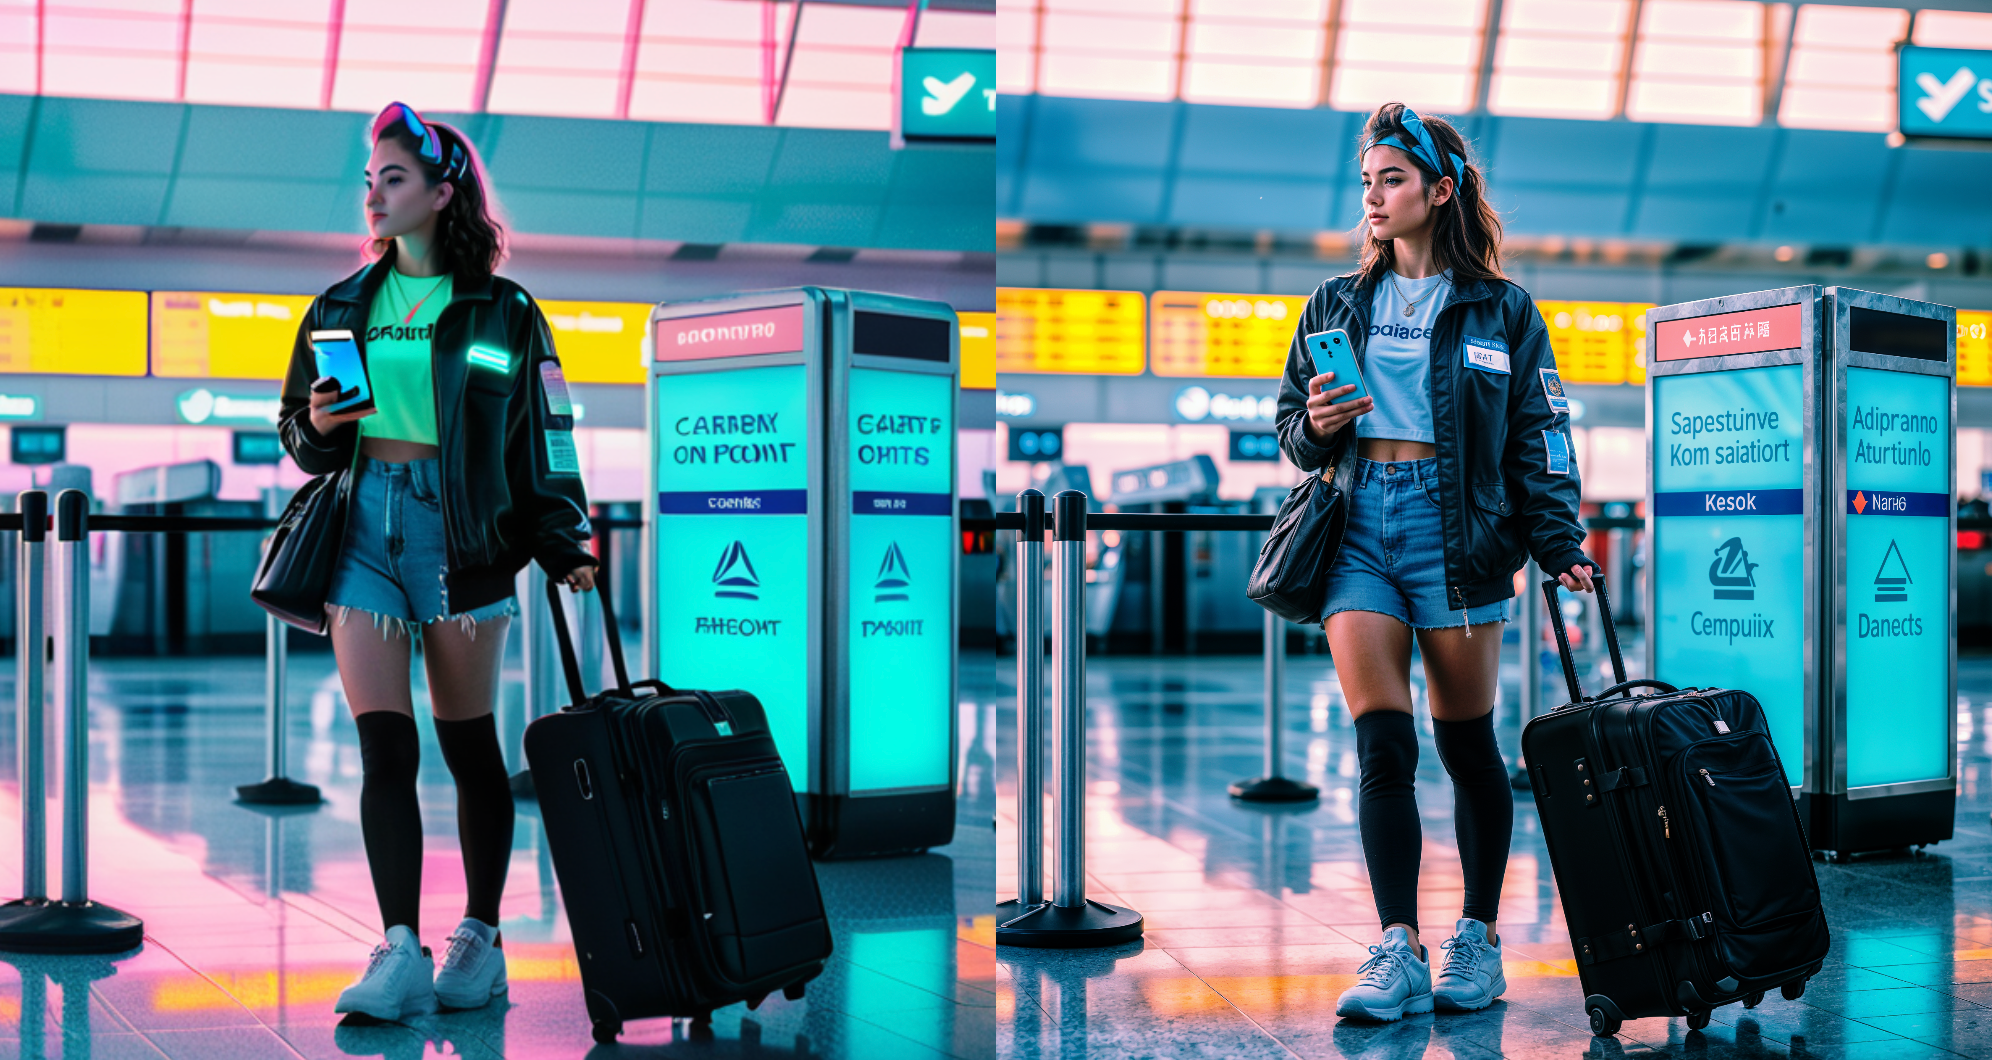
Standard Max
Standard Max is a generative model that delivers high-quality, natural results while remaining efficient enough to run on a wide range of devices. It achieves detail and realism comparable to generative upscaling models, without the heavy hardware requirements or long processing times typically associated with them.
- High-quality, true-to-input upscaling with natural detail
- Excellent recovery of detail from low-resolution images
- Faster than most image diffusion-based upscaling models
This large image was cropped for use with Standard Max.
Compare results with the core Standard model for best results.
Recover

Recover 3 is built for users who want soft, realistic enhancement rather than aggressive detail reconstruction. It shines especially with:
- Fur and feathers
- Natural textures that benefit from subtle recovery
Choose a strength mode (Low/Med/High) - the app defaults to the Medium option for balanced enhancement. The strength mode controls the intensity of the detail enhanced.
Optimized for speed, Recover 2 is faster than Recover 1. This model brings the best upscaling fidelity for old and low quality photos.
Pre-downscaling
An action for pre-downscaling will improve working with larger images that suffer from false resolution. These images tend to be low information dense—where pixel dimensions have increased without a meaningful addition of detail. Pre-downscaling addresses this by intelligently optimizing image input before enhancement.
How it works:
- Pre-downscaling resamples the image to concentrate image density
- The result is then upscaled using AI to generate natural results
- Choose between three levels of downscale intensity
When to use Pre-downscaling:
- When images exceed 1000px on both sides
- Ideal for old JPEGs, scanned photos, or poorly upscaled content
- Select None if you prefer to skip pre-downscaling
Try the core Low Resolution model which is more compatible across more systems.
Redefine
Redefine is a generative image model designed to add new detail and rebuild structure when original image information is missing or degraded. Redefine can generate photorealistic detail to restore clarity in AI artwork, low-resolution, or damaged images.
Redefine is also the only local, prompt-driven generative image model available, giving artists direct control over generation without relying on cloud processing. Users can guide results using image prompts, creativity controls, and texture settings, making Redefine especially valuable for CGI, VFX, and creative workflows that require generative flexibility while working entirely on local hardware. You can choose between 2 models for either realistic fidelity or creative distinction.
- Generative enhancement that adds new detail and structure; local and cloud
- Prompt-driven control for creative and VFX workflows without cloud dependency
- Powerful recovery of blurry, low-resolution, and heavily degraded images
If your artwork requires accuracy, use the core Art & CG model.
Redefine realistic
Choose between None or Subtle to set the level of adjustment that will be applied.
Selecting Subtle will enable the option for directing the adjustment using the Image description.
Redefine creative
Choose between Low, Medium, High, or Max to set the level of adjustment that will be applied.
Use the Image description to direct the changes that will be applied to the image.
Adjust the Texture slider to refine the results.
- Creativity - Low, Medium, High, Max
- Texture - adjust the level of detail that will be generated
- Image description - Utilize this if you want to be specific about the details you're looking for. The model responds to a descriptive statement versus a directive one. For example, use the phrase "girl with red hair and blue eyes" instead of "change the girl's hair to red and make her eyes blue"
Image Description
Check out the Community pages for tips on writing image descriptions from other users.
Image descriptions are unique to each individual image and cannot be batched.
Workflow
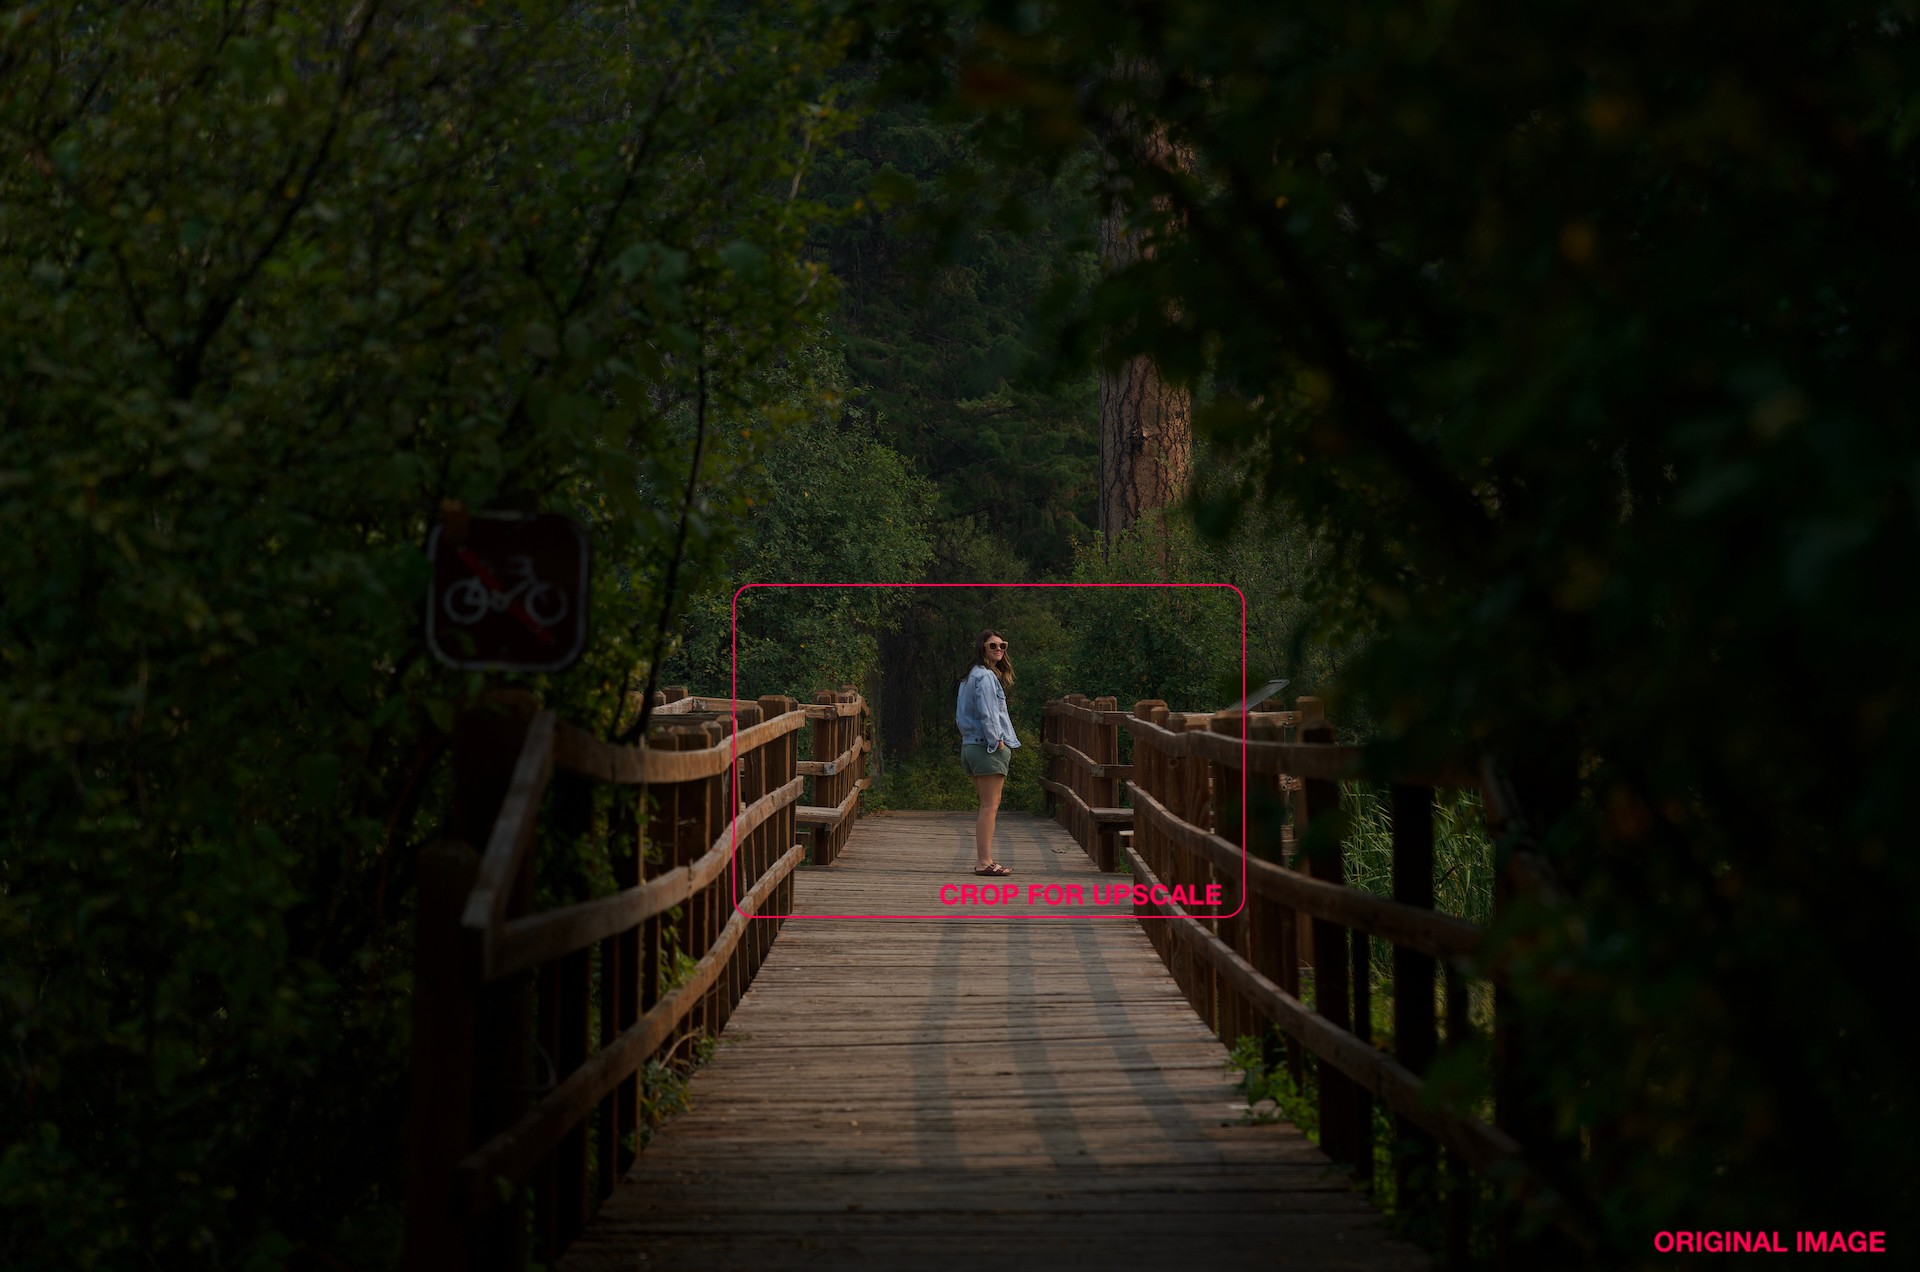
Since generative models are intended for small images, some users desire larger results than what their system or the cloud is able to process and export.
Here is the recommended multi-pass workflow for getting more resolution out of images used with generative models.
- Resize your source image to fit within generative model recommendations.
The⚠️ Large imagewarning can indicate when resampling is needed.
Using pre-downscaling with Recover V2 can also work. - Upscale with a generative model with a scale factor of 1-4x.
The scale factor is based on what your system is capable of rendering. - Export the result of that generative model, creating a new file.
You can render locally if your system is capable or use Cloud render. - Import that resulting file into Gigapixel selecting a core model for additional upscaling with a larger scale factor.
We recommend Auto mode for model and setting selection.